Step 1: After downloading and installing the Shoviv GroupWise Migration Suite, the application opens with the main interface, where you need to click on the Add GroupWise.
Step 2: Thereafter, clicking the button opens a new window where you need to select the method for connecting from: Default, Online, Caching Mailbox Path, Remote Mailbox Path, GroupWise Server Details, or Show Archive Items.
Step 3: Now the software will fetch the mailbox data from the GroupWise and provide for the further process of the procedure. From the preview, you can select the data that you want or not.
Step 4: Now, you need to select the migration method: EWS or Outlook MAPI. You can select any way to migrate to an Office 365 account.
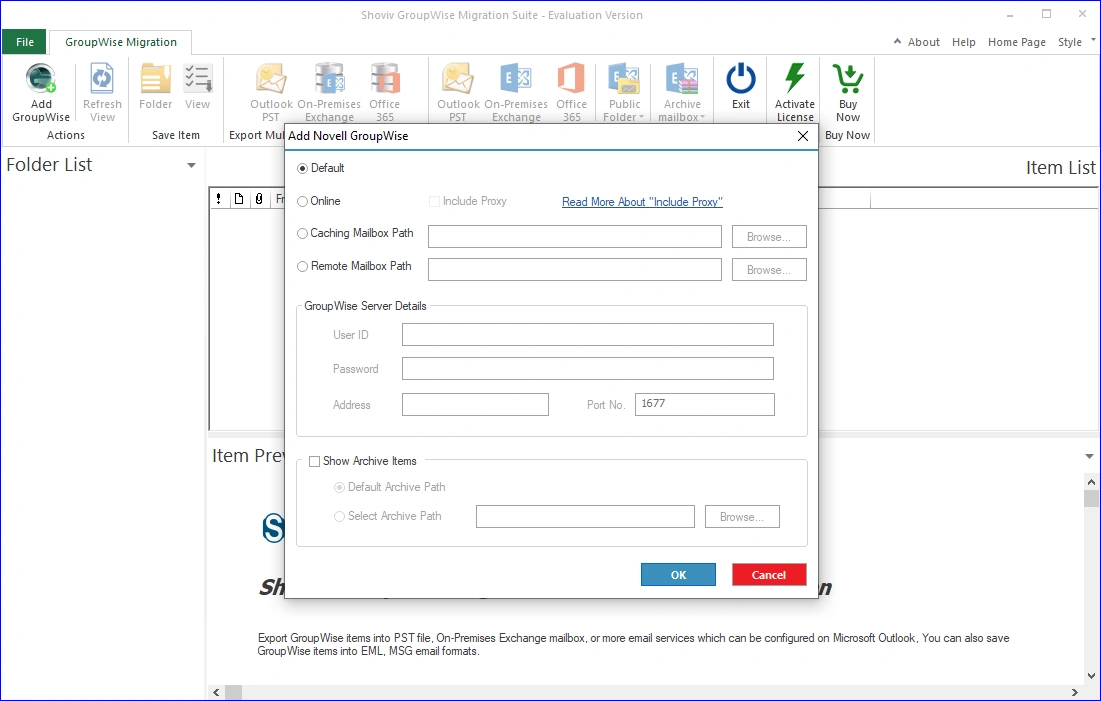
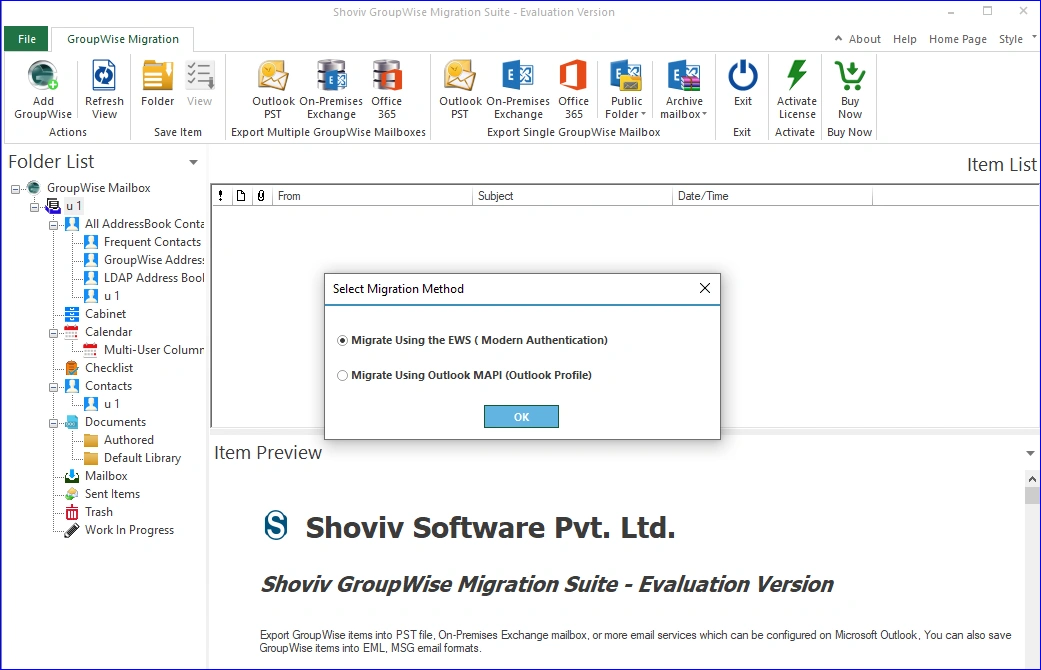
Mode 1: Using the EWS (Modern Authentication):
Step 5: For the users who want to migrate using the EWS ( Modern Authentication). Click on OK and follow the below given steps.
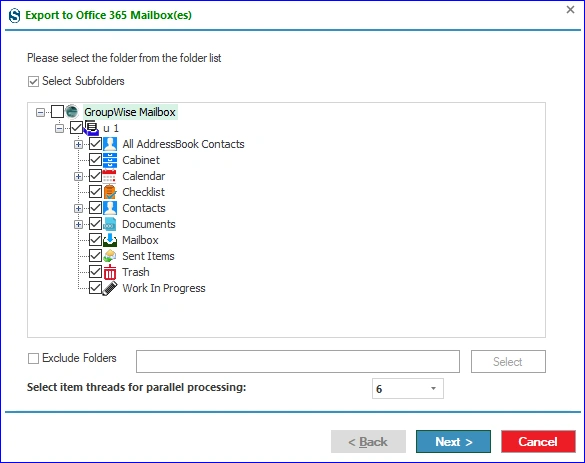
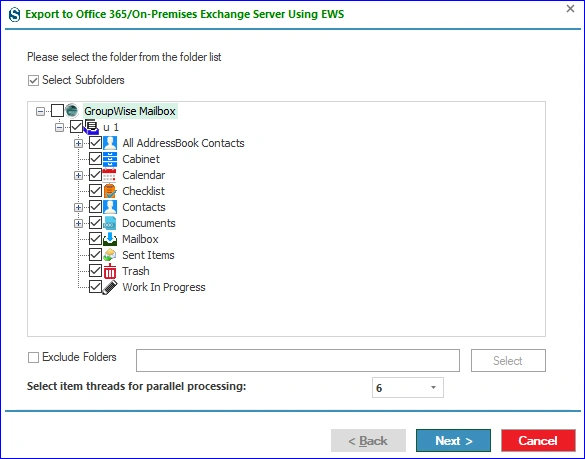
Step 6: New window opens, need to work with the subfolders selected from the folder list, and if you want to exclude any folders, you can also select them.
Step 7: Click on Next.
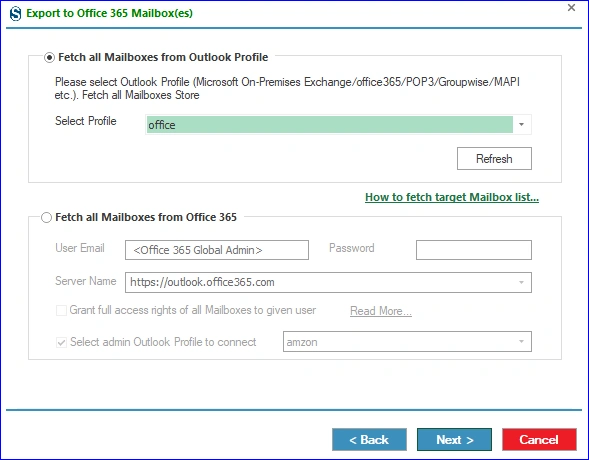
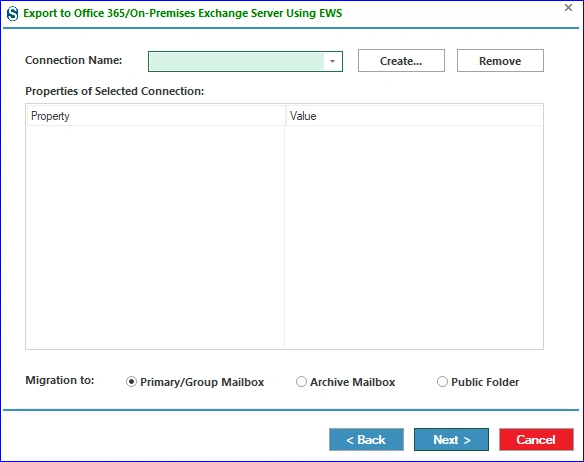
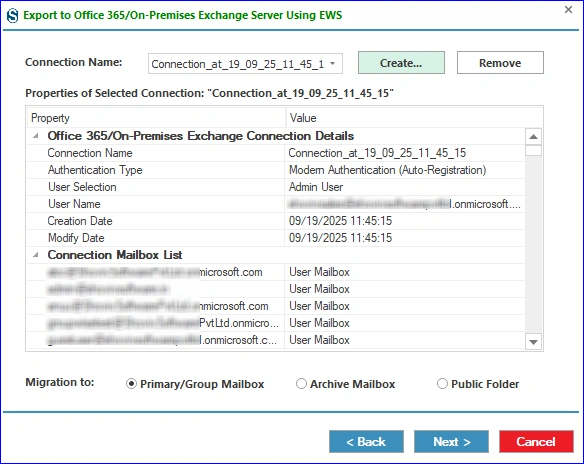
Step 8: Need to complete the connection. If you already have a connection, then select it from the dropdown menu. Moreover, select the mailbox type for the target.
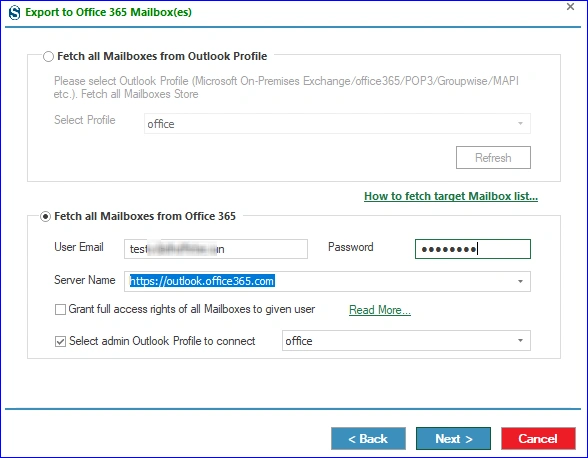
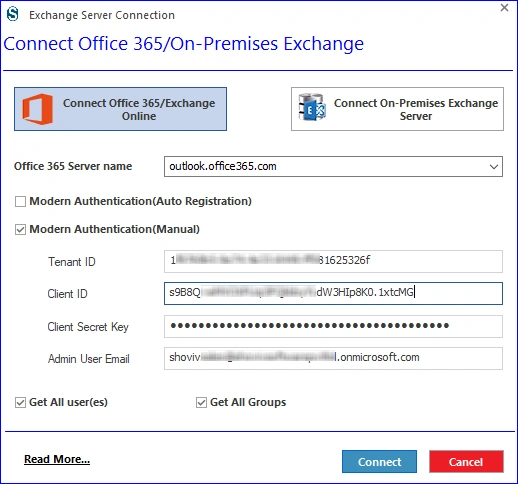
Step 9: In this window, you need to connect with the Office 365 account. This provides you with two options: Modern Authentication ( Auto Registration) and Modern Authentication ( Manual).
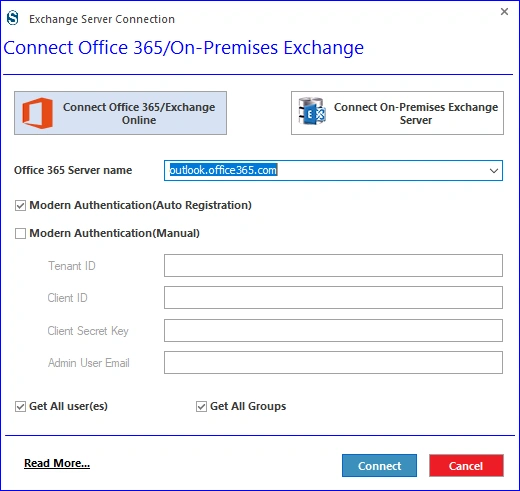
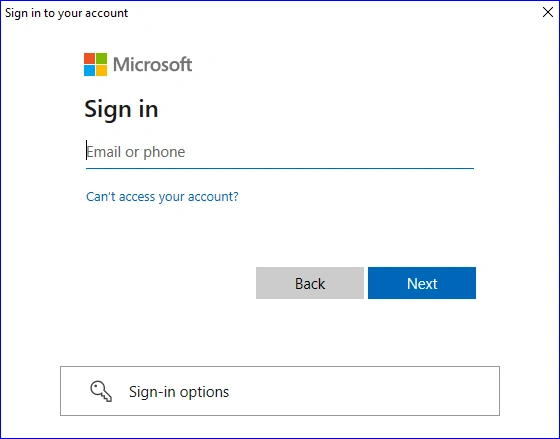
Step 10: If you choose the auto authentication, then you will be directly prompted to the Sign in page.
Step 11: For manual registration, you need to connect with the credentials that were present on the screen. Enter carefully. Learn more about these credentials here: https://www.shoviv.com/technical-guide/generate-client-id-and-client-secret-key-for-onedrive.html
Step 12: Click on Connect.
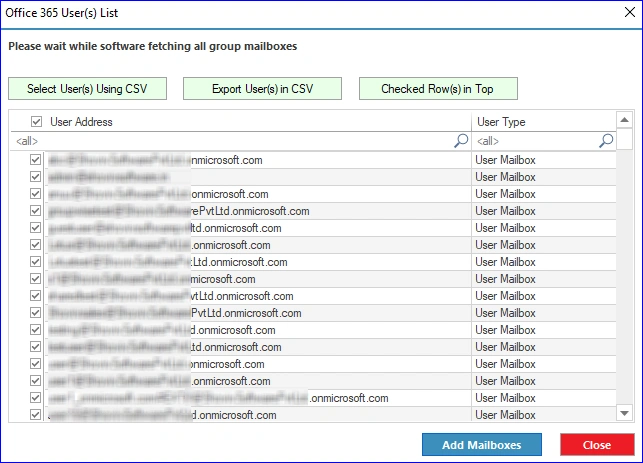
Step 13: Select the required users from the list and click on the Add Mailboxes.
Step 14: This window provides the connection report. If all is okay, then click on Next, and if you want to make changes, then click on Back.
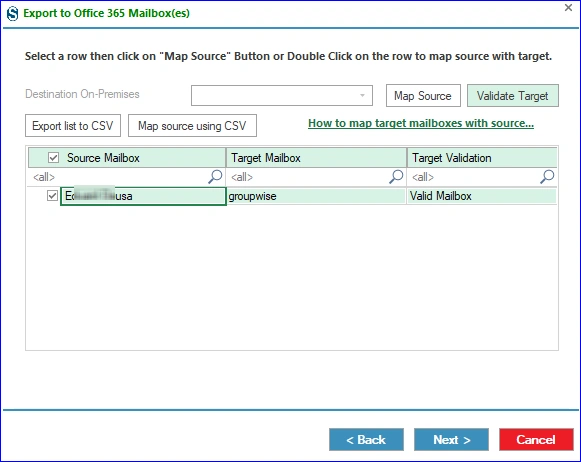
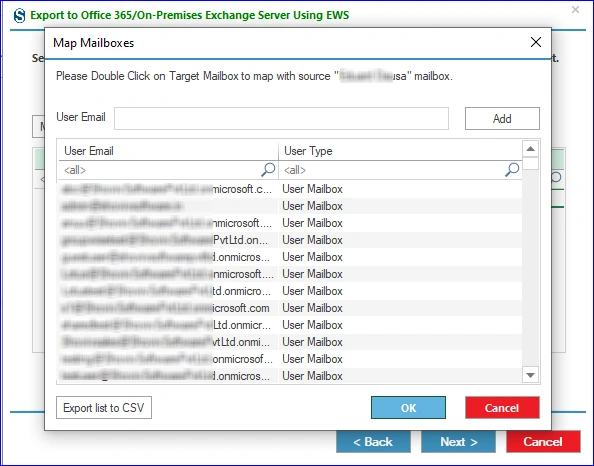
Step 15: Here, you can match the source and target mailboxes through the Map Source.
Step 16: Select the required Source Mailbox and then click on the Map Source. After that, a new window appears, from which you can select the Target Mailbox.
Step 17: Click on Next.
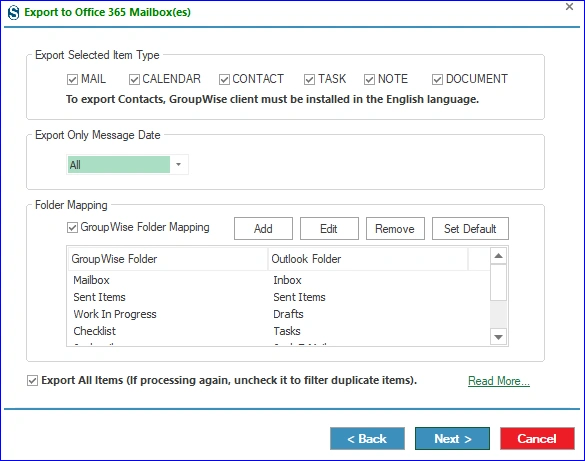
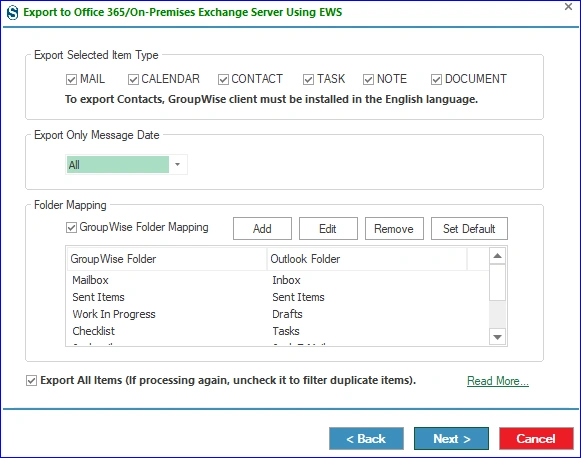
Step 18: This window provides the filter option, such as Export Selected Item Type, Only Message Date, and Folder Mapping. Click on Next.
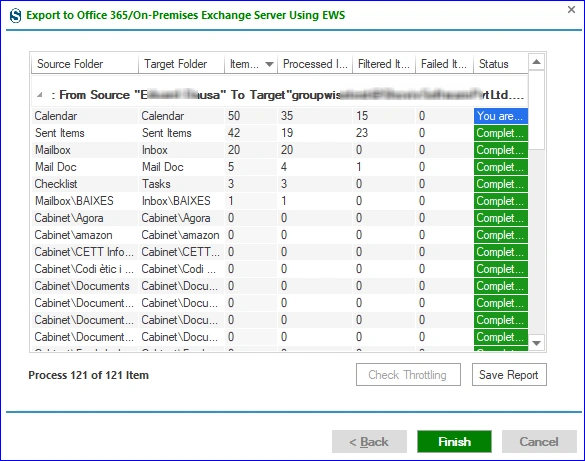
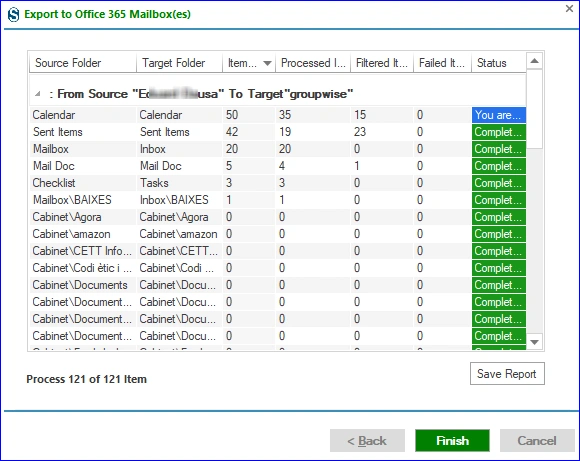
Step 19: Review the Process Report and click on Finish.
Mode 2: Migrate Using Outlook MAPI (Outlook Profile)
Step 8: After selecting the Migrate Using Outlook MAPI ( Outlook Profile) method to connect Office 365; click on OK.
Step 9: Now select the subfolders from the Subfolder list that are present on the screen, and here you can also exclude folders (by checking the “ Exclude Folders” box and selecting the folders) and threads for parallel processing.
Step 10: After that, click on Next.
Step 11: For the connection of the target, you need to choose Fetch all Mailboxes from Outlook Profile or Fetch all Mailboxes from Office 365 in this window, from which option you want to proceed further.
Step 12: If you choose the Fetch all Mailboxes from Outlook Profile select the profile you want with the help of the dropdown option. To know how to create an Outlook Profile, click here: https://www.shoviv.com/technical-guide/create-an-online-outlook-profile.html
Step 13: If you go with the Fetch all Mailboxes from Office 365, enter the asked credentials. In this window, you can also handle the Grant full access right of all Mailboxes to the given user and select the admin Outlook Profile to connect. Click on Next If Outlook profile is not created then create by following the given guide: https://www.shoviv.com/technical-guide/create-an-online-outlook-profile.html
Step 14: After that, users need to map the source with the target. You can do it with the help of the row that is given on the screen. Double-click that specific user, and the new list appears with the target list. Select one that is required. Must validate the target.
Step 15: Click on Next.
Step 16: In this page, users can handle the Export Selected Item Type (to exclude an item type; uncheck), Export Only Message Date, and Folder Mapping (to match a particular source folder with the target).
Step 17: The migration process will start as per the applied settings. Click on the Finish as the process completes. You can also save the migration report in HTML file format by clicking on the “Save Report” button.