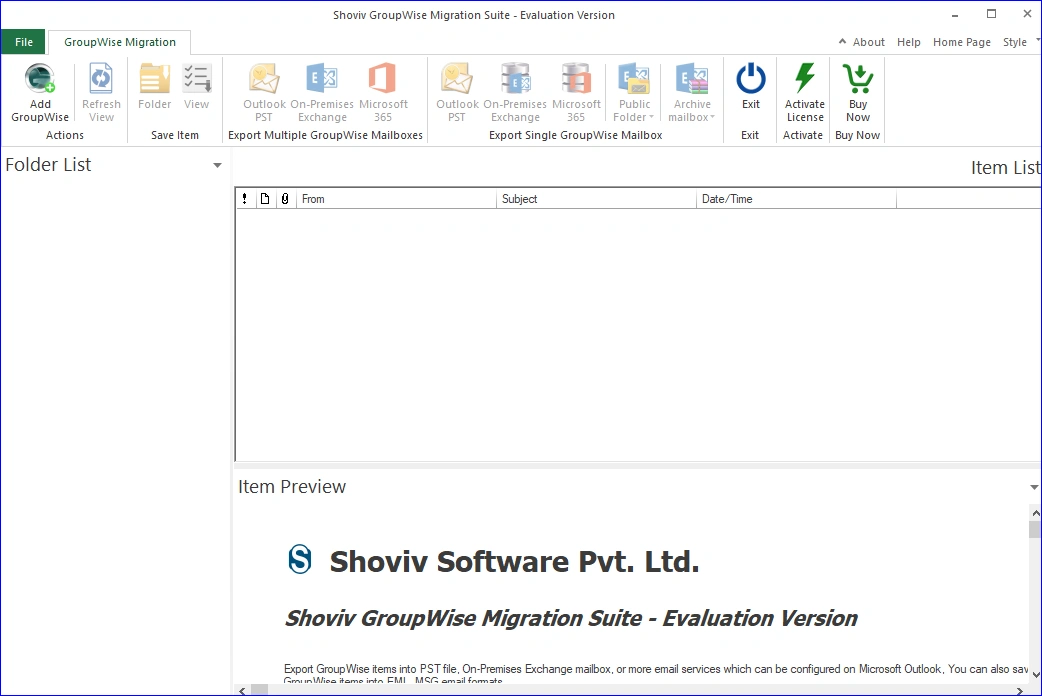
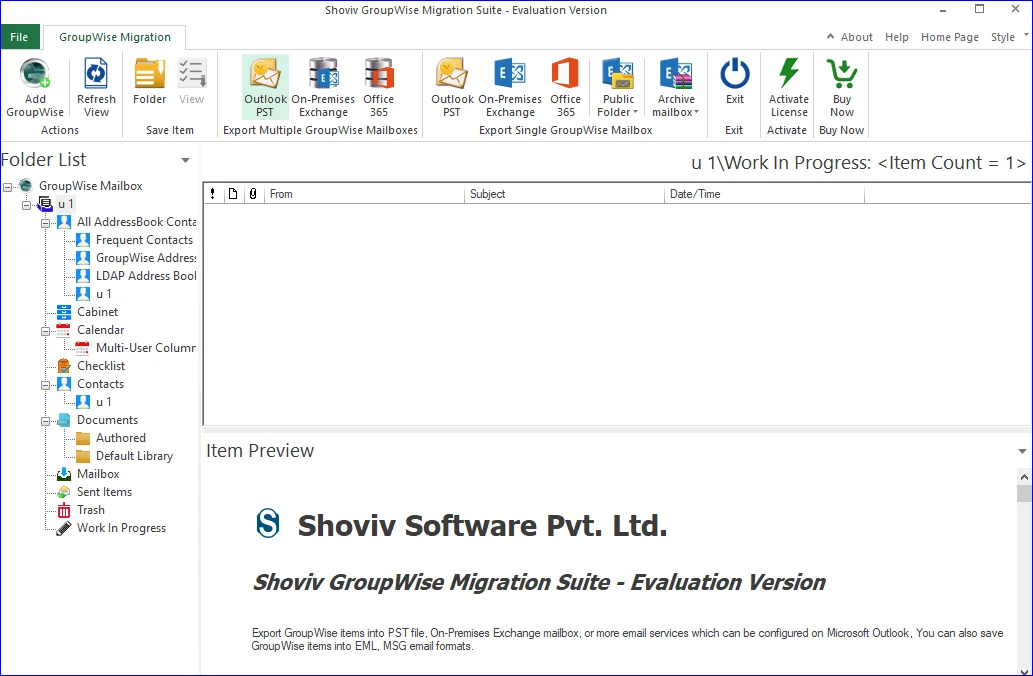
Step 1: Open the Shoviv GroupWise Migration Suite and click the Add GroupWise button.
Step 2: After that, the tool will provide you with several options to connect the source GroupWise mailbox. Add GroupWise mailbox using any of the options and enter the required details to proceed.
- Default: You can use this option to add the currently opened profile mailbox in GroupWise. Using this option, you can only add a single mailbox only.
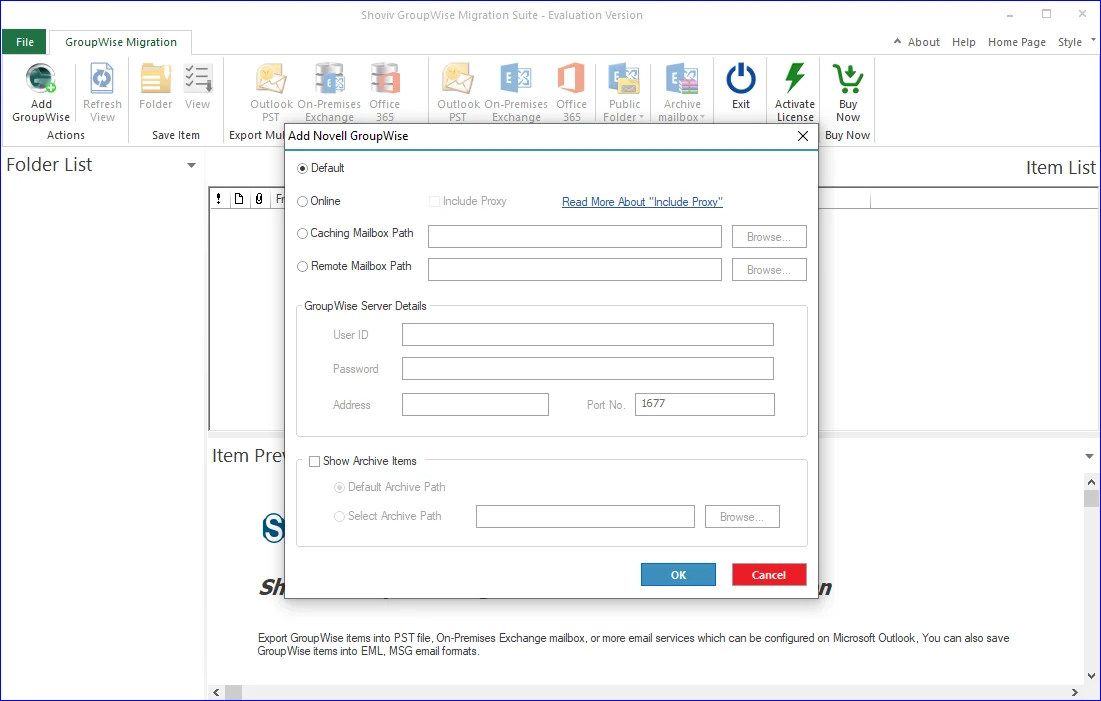
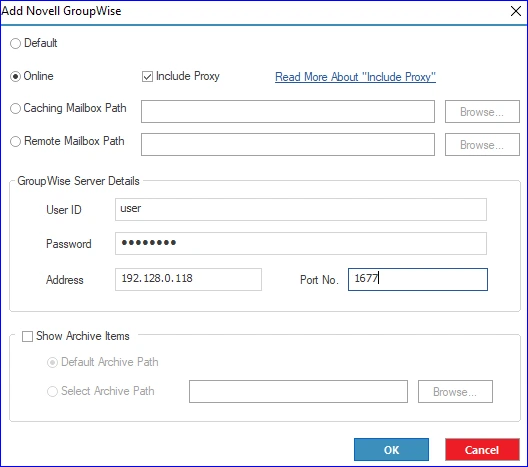
- Online: This option will help you add the desired GroupWise mailbox by filling out your User ID, Password, Server Address, and Port Number. Ensure that the user you are connecting with is online and connected to the GroupWise Server.
- Include Proxy: Check this option to connect multiple GroupWise mailboxes for conversion/migration. To understand how to grant proxy access, please click read more:
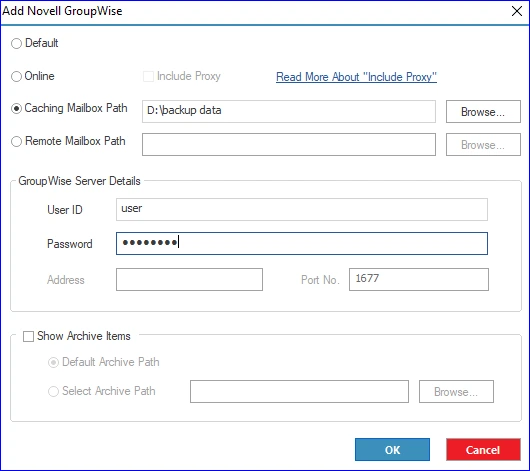
- Caching Mailbox Path: You can also add the source GroupWise mailbox even if the user is not online. You can browse the cached mailbox path and provide the username and password to add the cached mailbox.
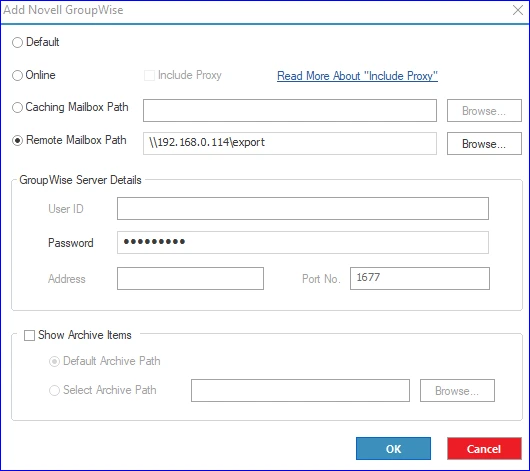
- Remote Mailbox Path: This option will help you add the mailbox if you have the remote data of any GroupWise mailbox on your local disk. Click Browse, locate the path, and type the user password.
- Now, click the OK button to confirm your action of adding the GroupWise mailbox.
Step 3: After that, select the Outlook PST option from the Export Multiple Mailboxes/Export Single Mailbox section according to your requirements.
Step 4: Now, you can tick/untick the folders and subfolders of the GroupWise mailbox.
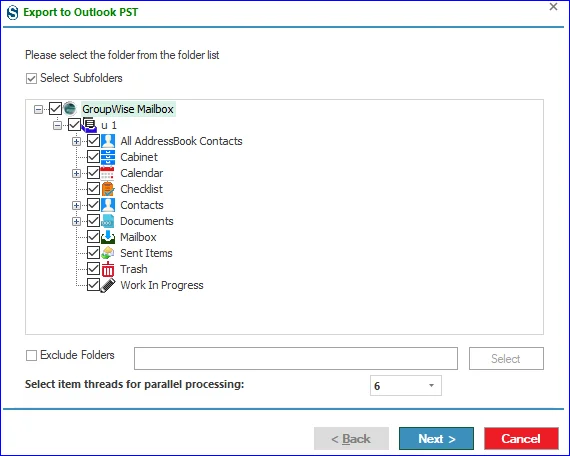
- You can also use the Exclude Folders option to remove unwanted folders by clicking the OK. After that, continue with the Next button.
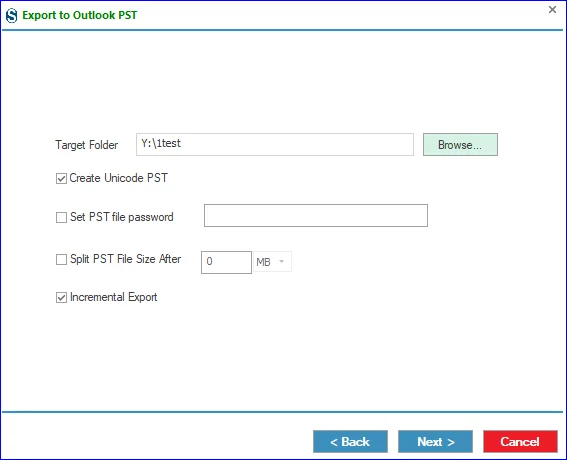
Step 5: Tap on the Browse button and select the target folder where you want to save the resultant PST. You can also use other options, like split PST file after size, incremental export, etc., according to your needs and tap the Next button.
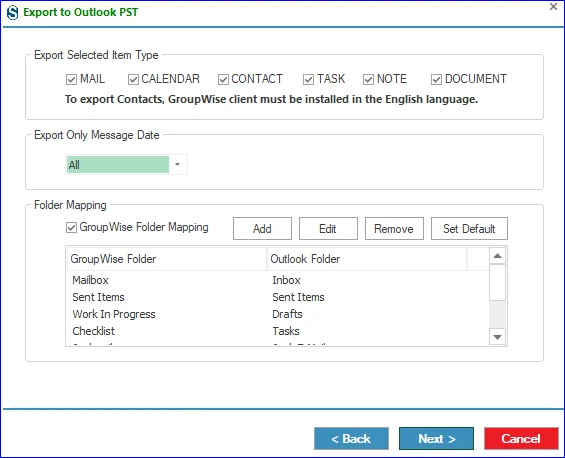
Step 6: You can now use Item Type and Message Date filters to add/remove the GroupWise mailbox data.
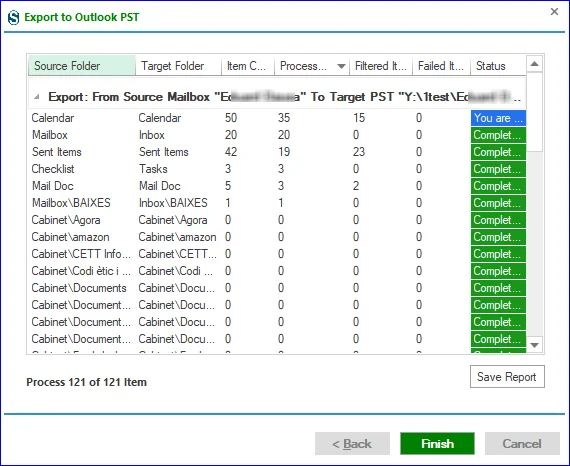
Step 7: The GroupWise mailbox conversion to PST will begin. Click Finish once the process gets completed and save the report if needed for future reference.