Step 1: Once you have installed and launched the Shoviv Groupwise Migration Suite, the dashboard will appear. To begin, choose Add GroupWise from the ribbon bar.
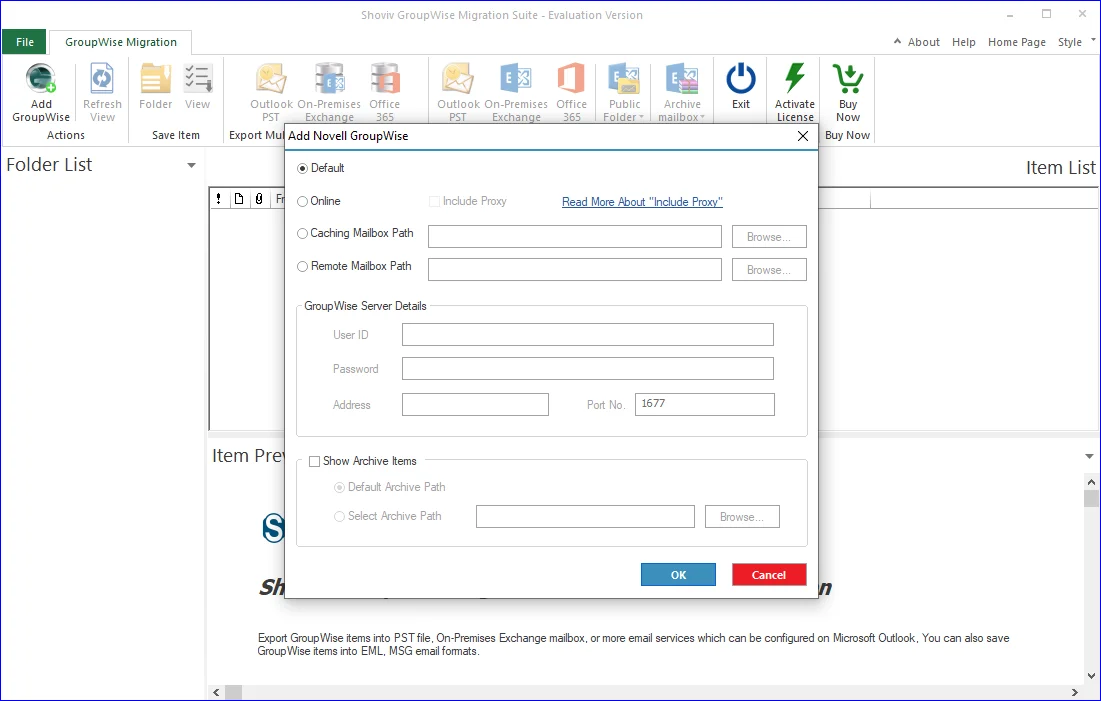
Step 2: This action will display a dialog box prompting you to select how you want to establish the connection. The software provides several options to connect, such as Default, Online, Caching Mailbox Path, and the Remote Mailbox Path.
Step 3: Select the connection method that best fits your need and confirm your choice by clicking OK
Step 4: The software will connect and show the GroupWise mailbox data.

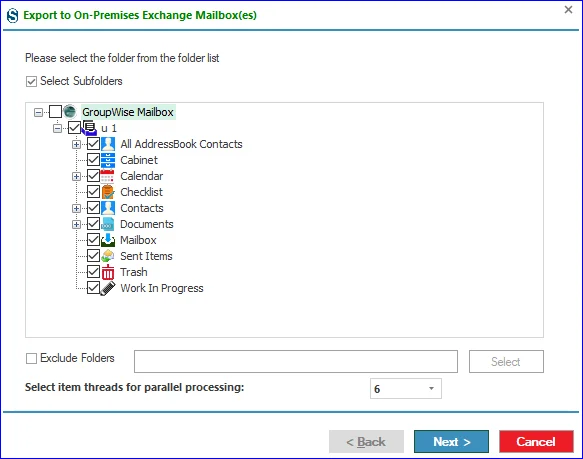
Step 5: When the new window appears, you will be presented with a folder list. From here, you can choose the subfolders you want to include in the process. If there are any folders you do not wish to work with, select them by checking the Exclude Folder checkbox.
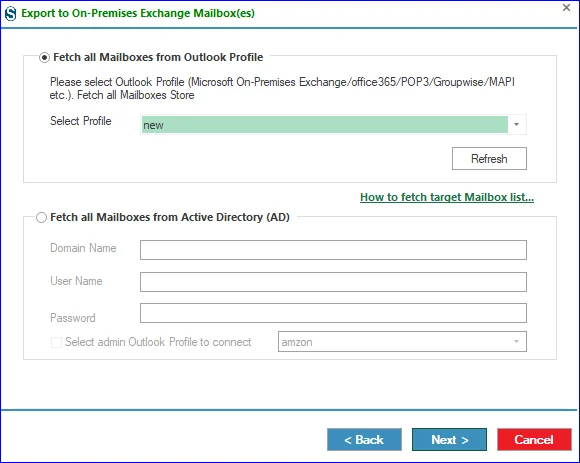
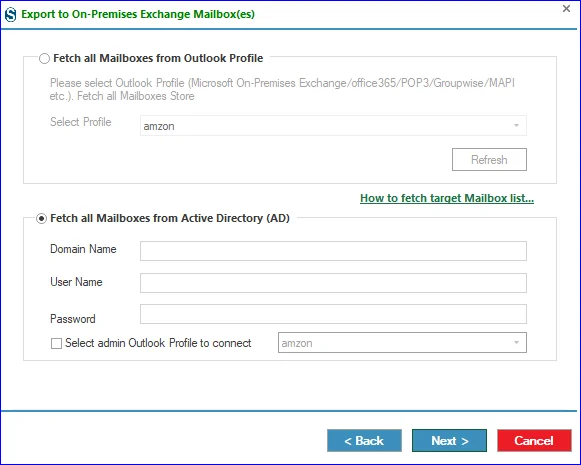
Step 6: To establish a connection with the target, you will be prompted to select how you want to fetch the mailboxes.
- The window provides two choices: Fetch all Mailboxes from Outlook Profile or Fetch all Mailboxes from Office 365.
- If you decide to go with the Outlook Profile option, use the dropdown list to pick the desired profile and continue from there. Click here to see how to create the Outlook Profile: https://www.shoviv.com/technical-guide/create-an-online-outlook-profile.html
- To fetch all Mailboxes from Active Directory (AD) need to enter all the credentials.
- Click on Next.
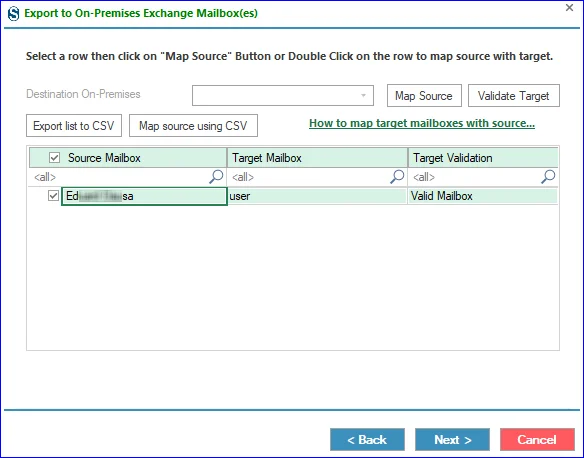
Step 7: The next step is mapping the source mailboxes. This can be done directly from the row displayed on the screen. Double-click the user you want to map, and a list of available target mailboxes will appear. Must validate the target.
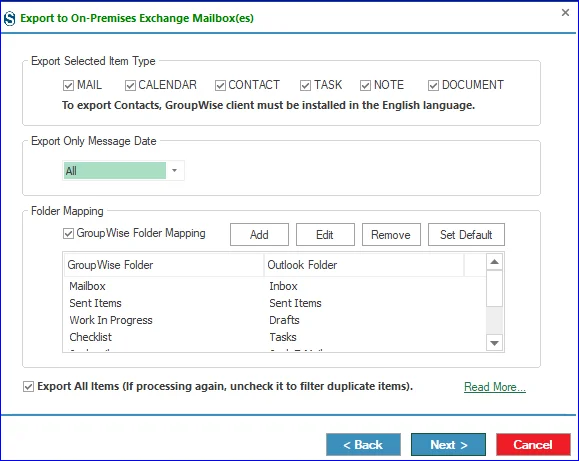
Step 8: On this page, users have the option to manage settings such as Export Selected Item Type (uncheck if you want to uncheck a particular item type), Export Only by Message Date and folder mapping.
Step 9: In the following window, you will see a summary of the project. Review the information carefully. If you need to make adjustments, click Back to return to the previous steps. If not, then click on Next. The migration process will start, and you will have the complete migration report. Click on Finish when all is done.


