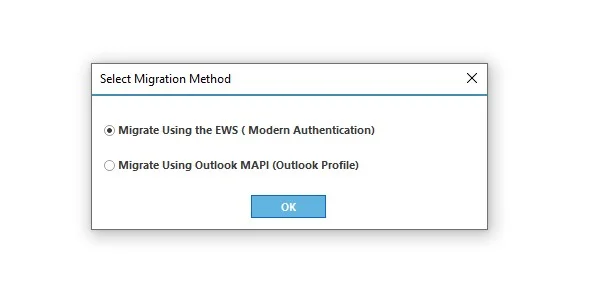
Mode 1: Using the EWS (Modern Authentication)
Step 1: Select the Migrate Using the EWS (Modern Authentication) option.
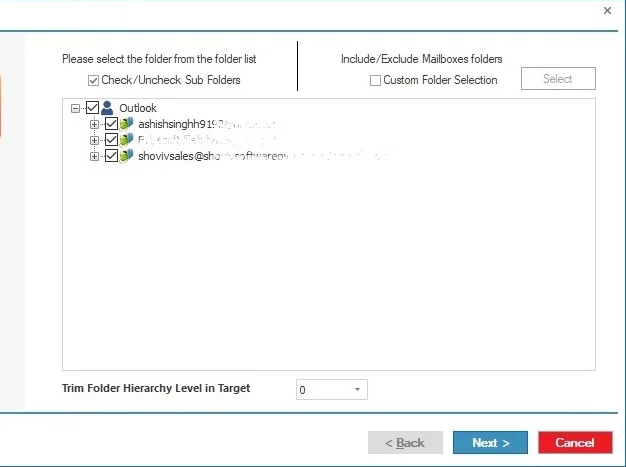
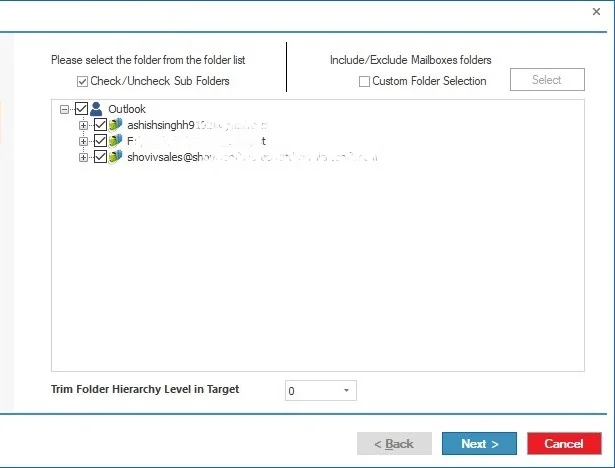
Step 2: Here, you can exclude the folders if there is any requirement. Moreover, you can decide the number of items that will migrate simultaneously. Click Next.
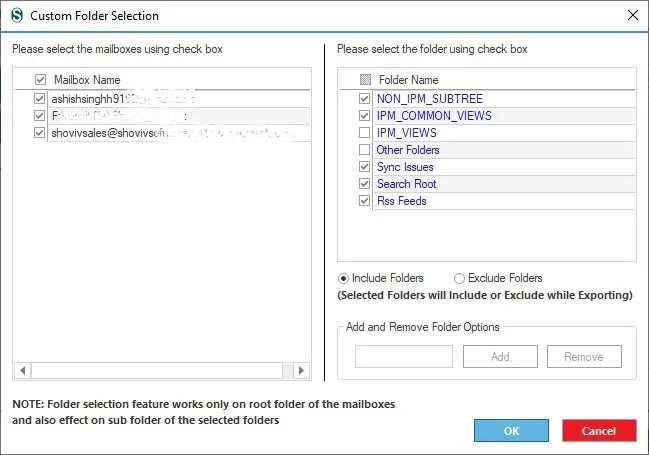
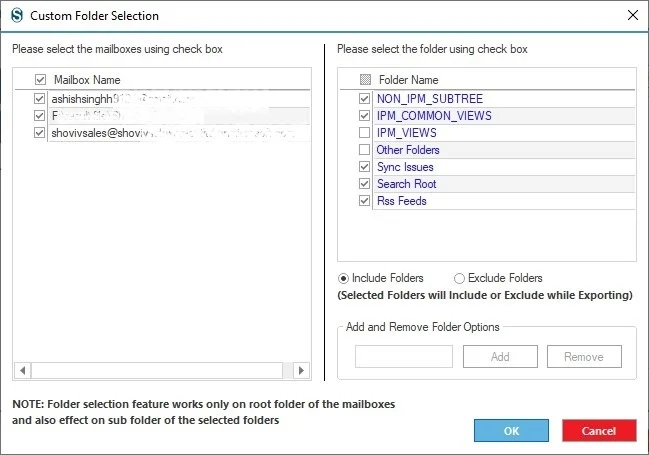
Custom Folder Selection: Enables you to choose specific folders for processing, ensuring only required data is included in the job.
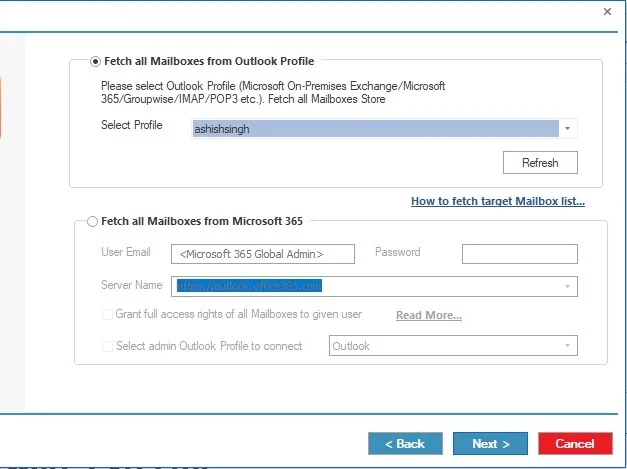
Step 3: A default connect wizard will open; moreover, you can choose whether you want to migrate to the Primary/ Archive Mailbox or the Public Folder.
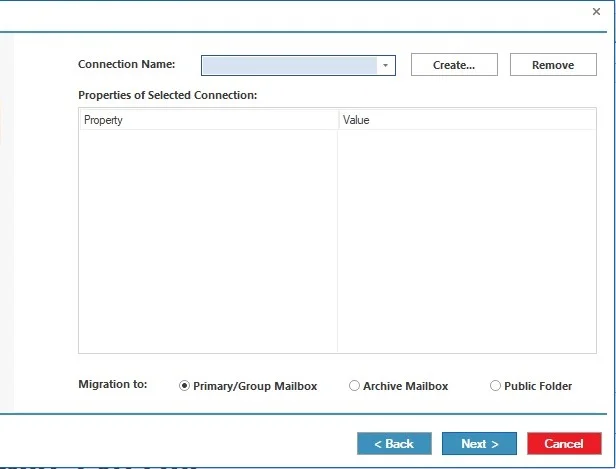
- Primary/Group Mailbox: Processes the main user mailbox or Microsoft 365 group mailbox containing emails, contacts, calendars, and other core data.
- Archive Mailbox: Handles the archive mailbox separately to migrate or manage older and automatically archived emails.
Public Folder: Allows processing of shared public folders that store organizational data accessible by multiple users.
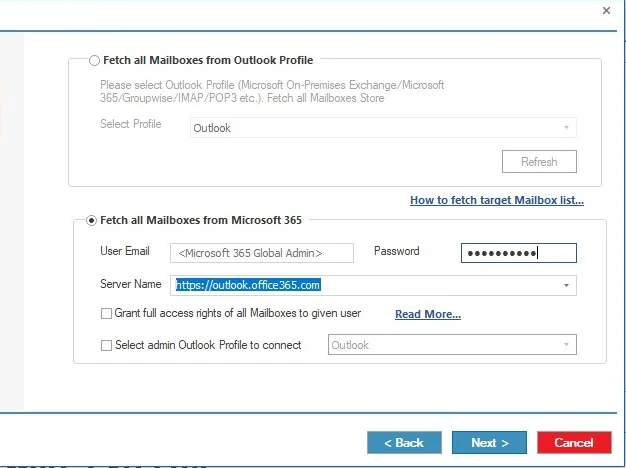
Step 4: Select Office 365/Exchange Online as the target. Again, here are two ways to connect: Auto Registration and Manual.
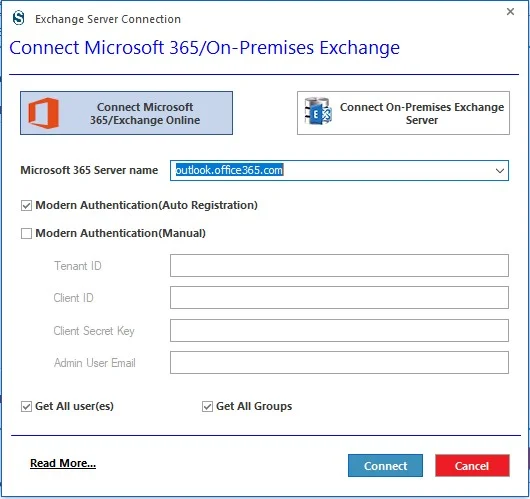
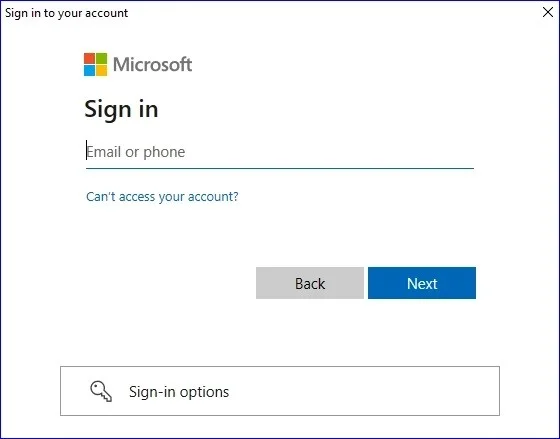
Step 5: When you select the Auto Registration, the software will prompt you to the Microsoft sign-up page. Enter the credentials to connect.
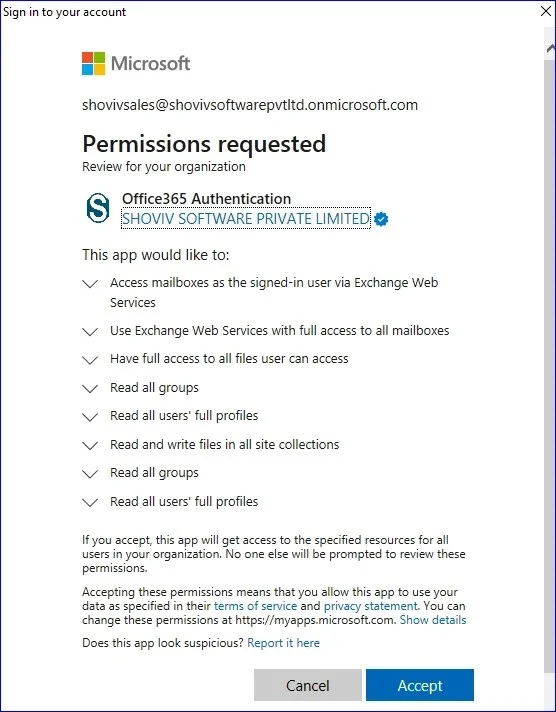
Step 6: Accept the permissions requested and move ahead.
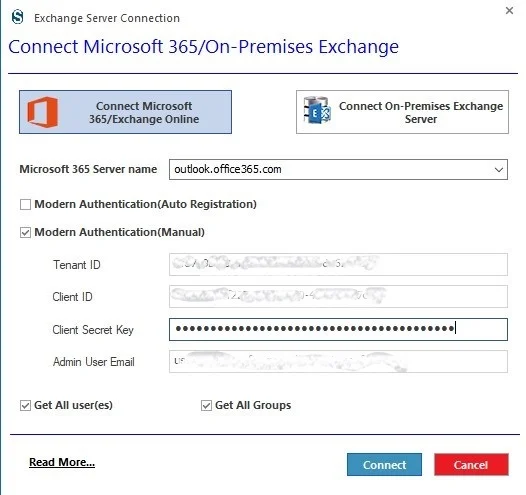
Step 7: If you choose Modern Authentication (Manual), then you have to enter the Tenant ID, Client ID, Client Secret Key and Admin User Email. Click here https://www.shoviv.com/technical-guide/connect-exchange-server.html to learn about these credentials
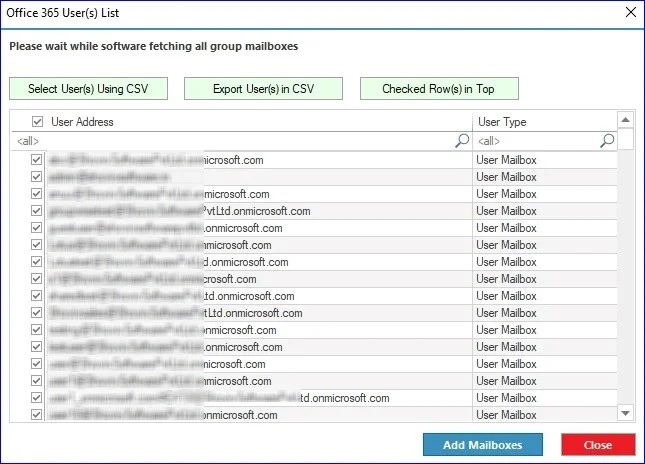
Step 8: Now the software will connect and show the users. You can also add users through the CSV file. Check the users required and click on the Add Mailboxes.
Step 9: You will get connection details and the target mailbox type for the migration. Click Next.
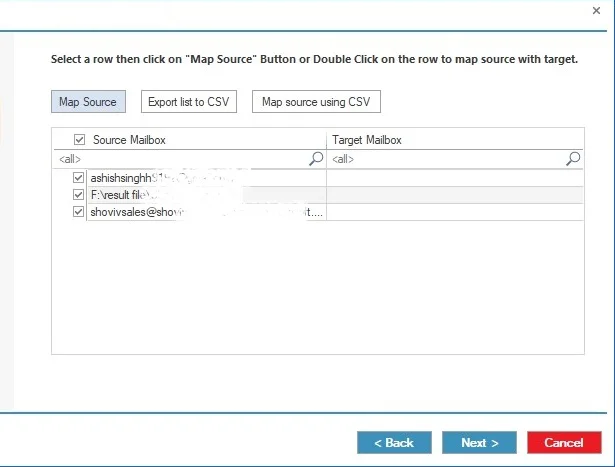
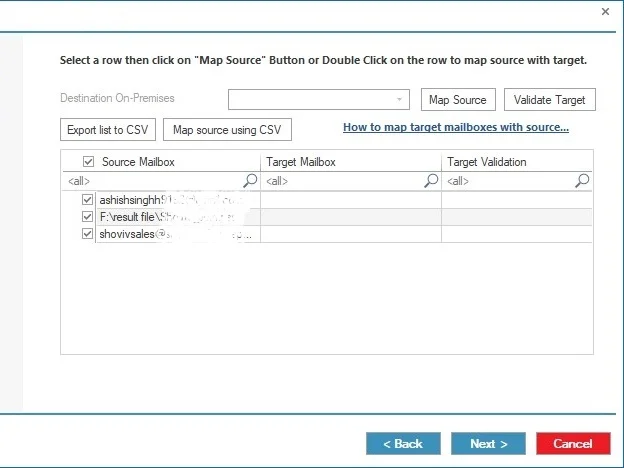
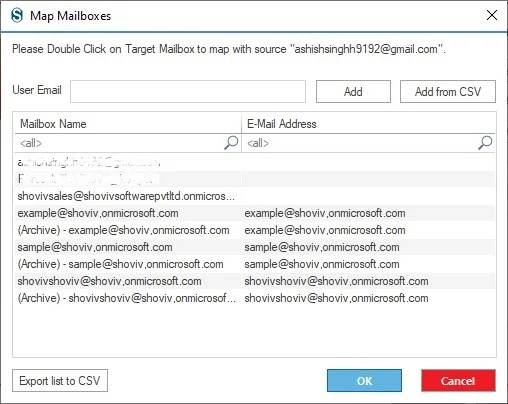
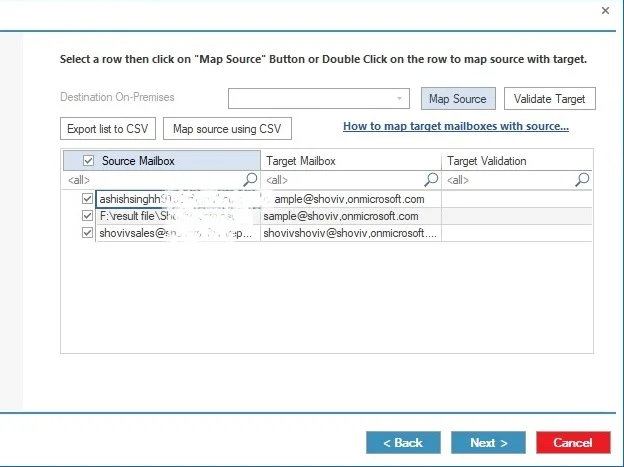
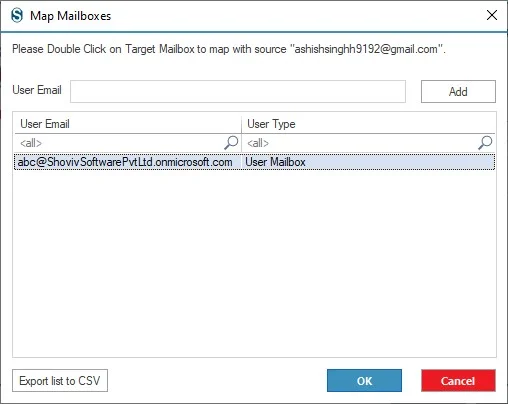
Step 10: Select and double-tap the target mailbox to map with the source. Click OK.
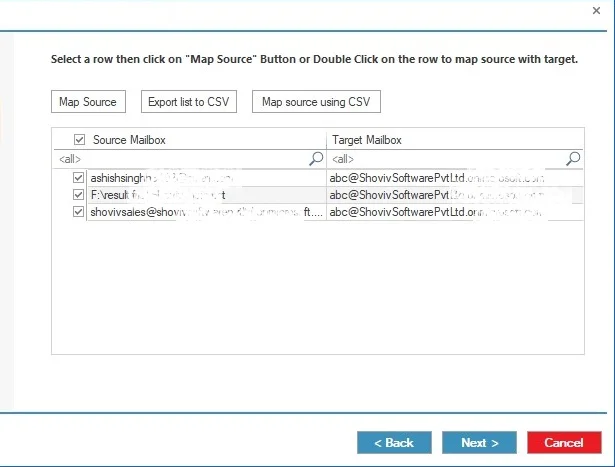
Step 11: Map and validate the target. Click on Next.
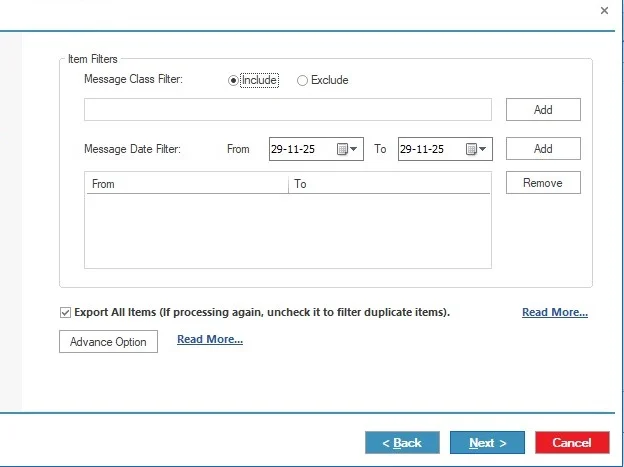
After that, a filter page will have appeared with two options.
Step 12: Thereafter, you can use the Message Class and Message Date filters to include/exclude the mailbox items.
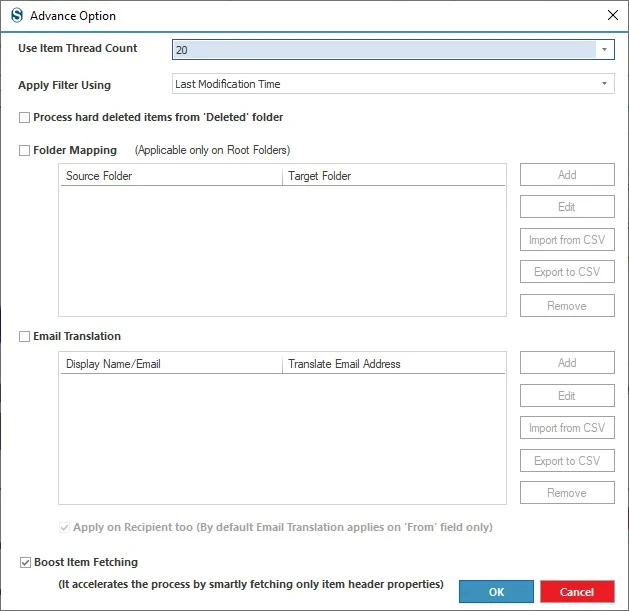
Select the Advanced Option to make other changes, like managing item thread count, folder mapping and email translation. After setting up these options, click the Next button.
https://www.shoviv.com/technical-guide/migation-advance-option.html
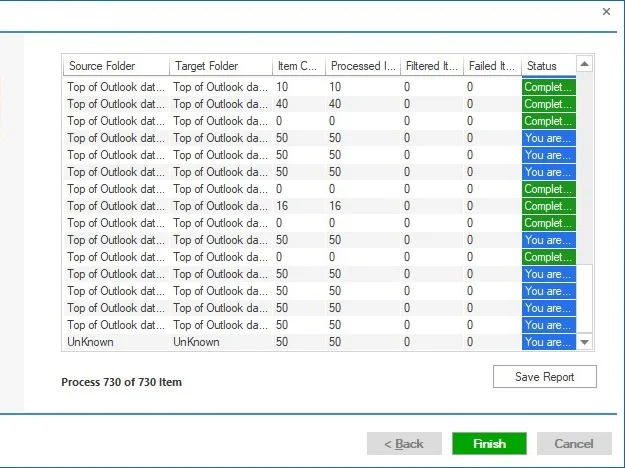
Now the process will start and status will be shown. The Status wizard will show Source Folder, Target Folder, Item Count, Filtered Items, Process Item, and Status in this report.
You can stop the process using the 'Stop' button, else wait for the process completion.
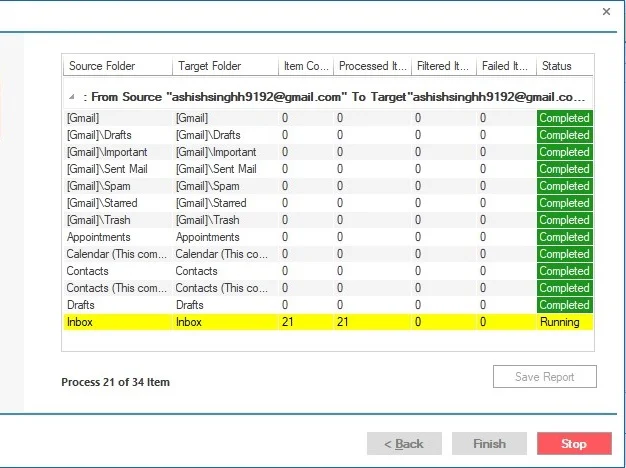
Once the process gets completed successfully. click on the 'OK' button.
You can save the report using the 'Save Report' button and at last click on the 'Finish' button to finish the process.