Mode 1: Using the EWS (Modern Authentication):
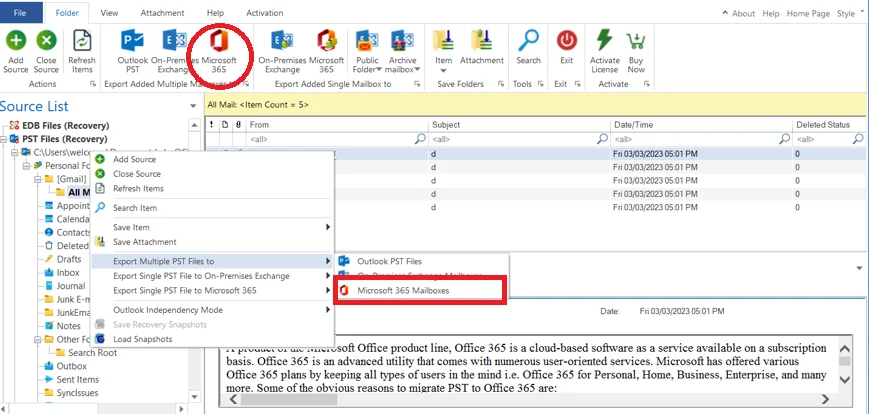
Step 1: Click On Migrate Using the EWS ( Modern Authentication) option.
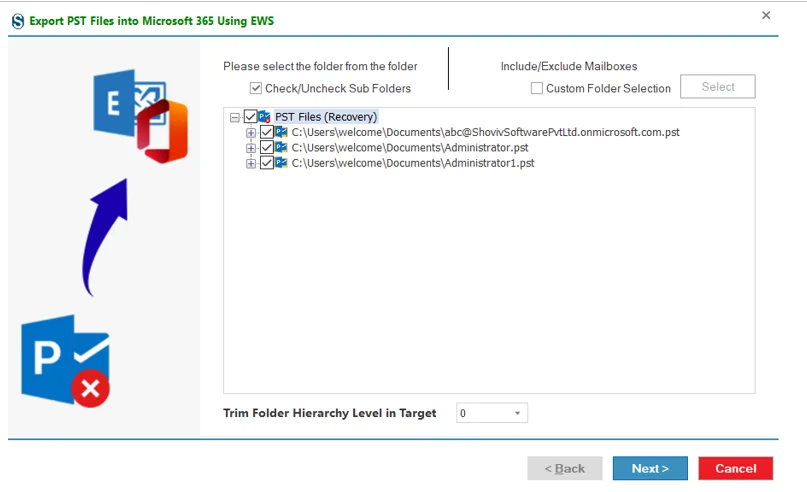
Step 2: Here, you can exclude any folders you don’t want to migrate. You can also set how many items should be migrated at the same time. Once done, click Next.
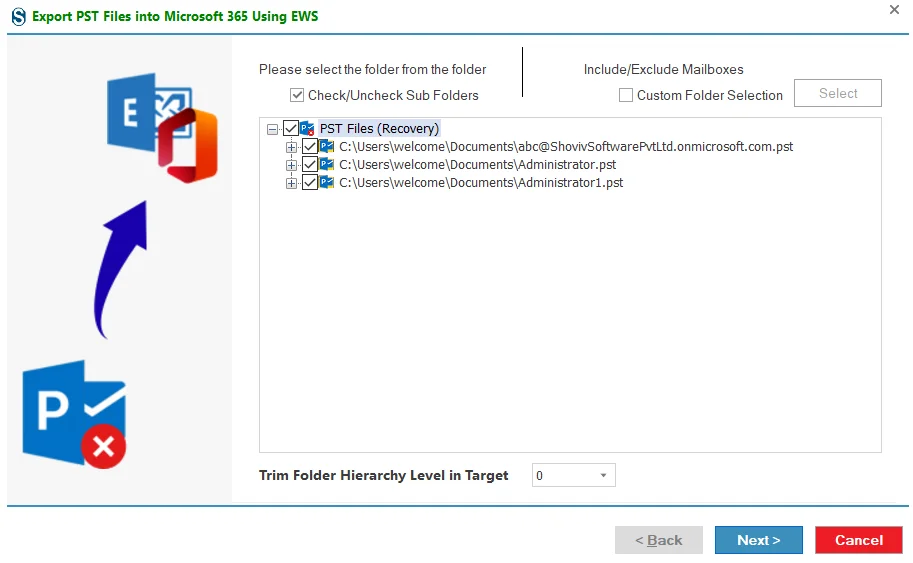
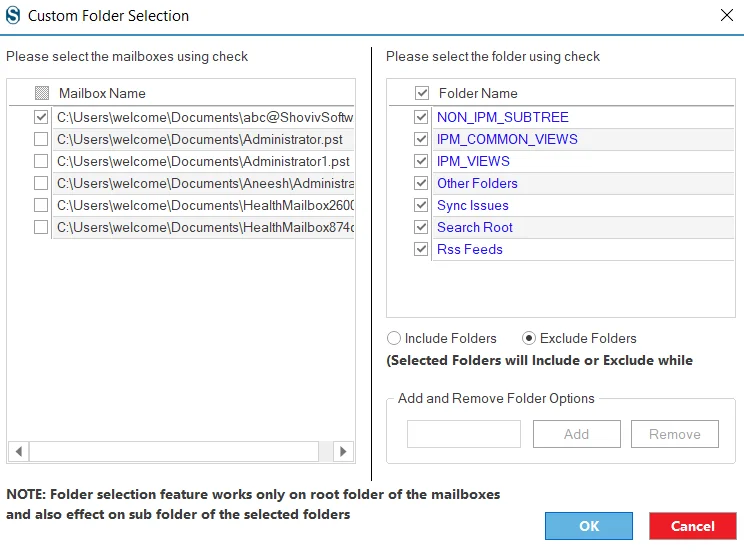
Include/exclude Mailboxes: Go to custom folder selection option and select the mailboxes you want to include or exclude.
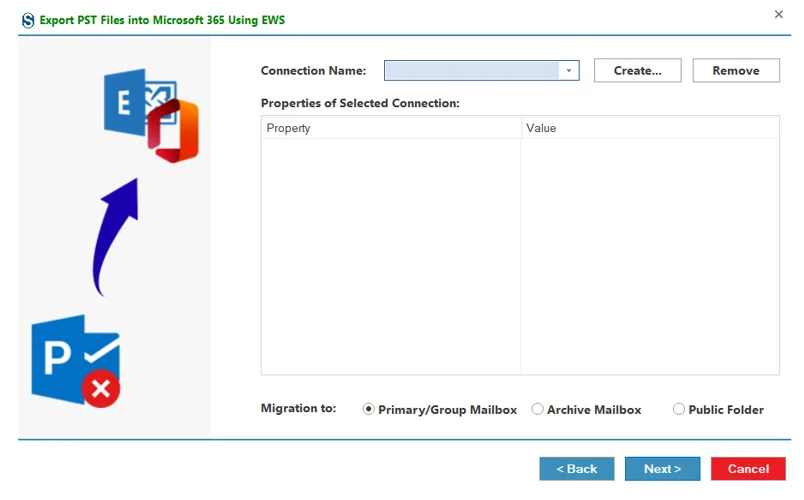
Step 3: A default connect wizard will open; In this , you can choose whether you want to migrate to the Primary/ Archive Mailbox or the Public Folder.
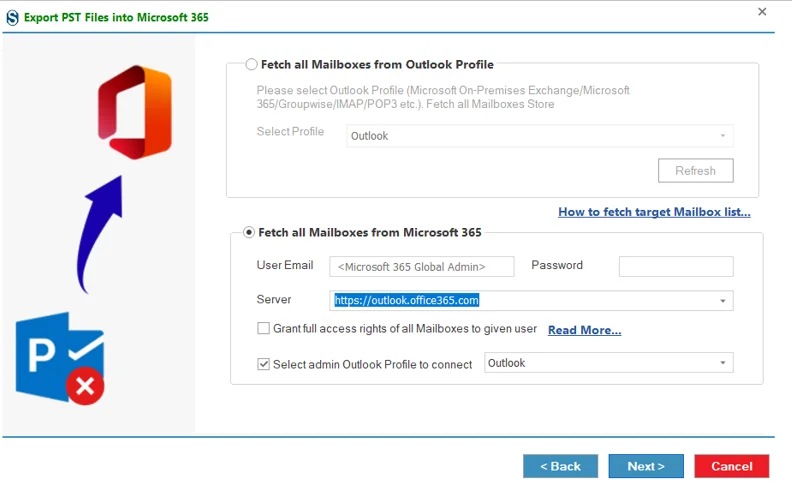
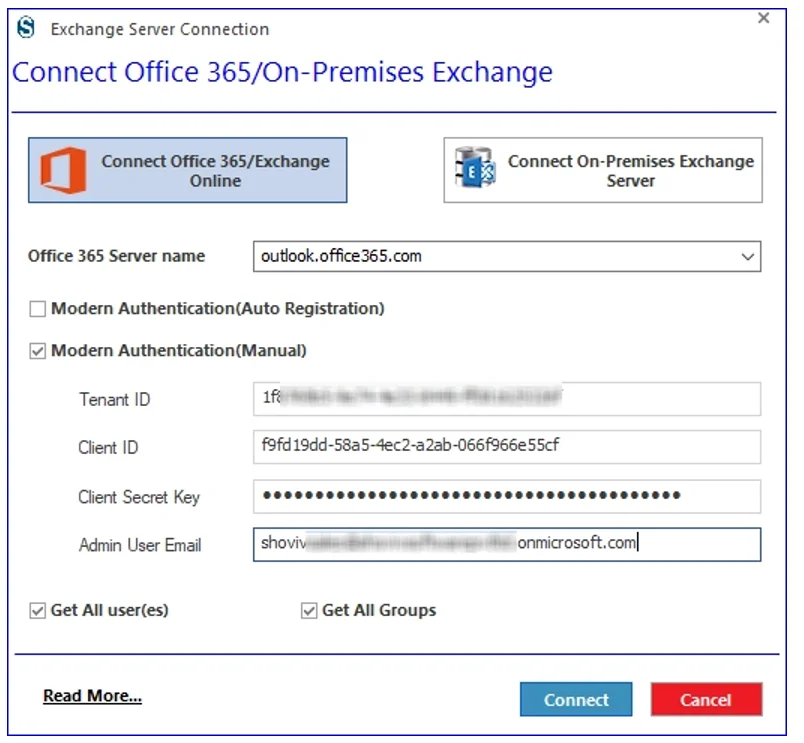
Step 4: Select Microsoft 365/Exchange Online as the target. Again, here are two ways to connect: Auto Registration and Manual.

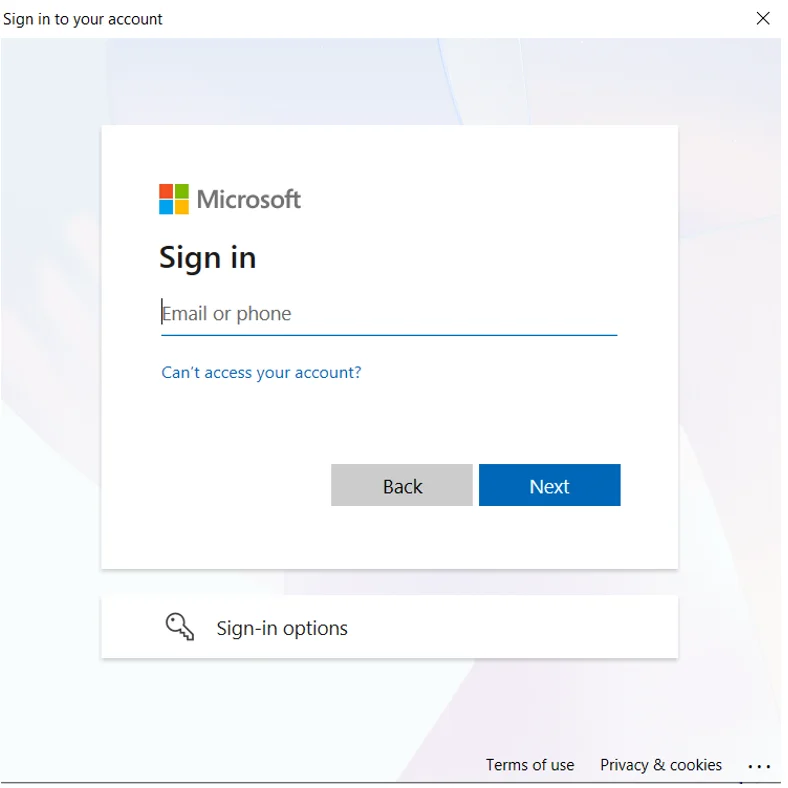
Step 5: When you select the Auto Registration, the software will prompt you to the Microsoft sign-up page. Enter the credentials to connect.
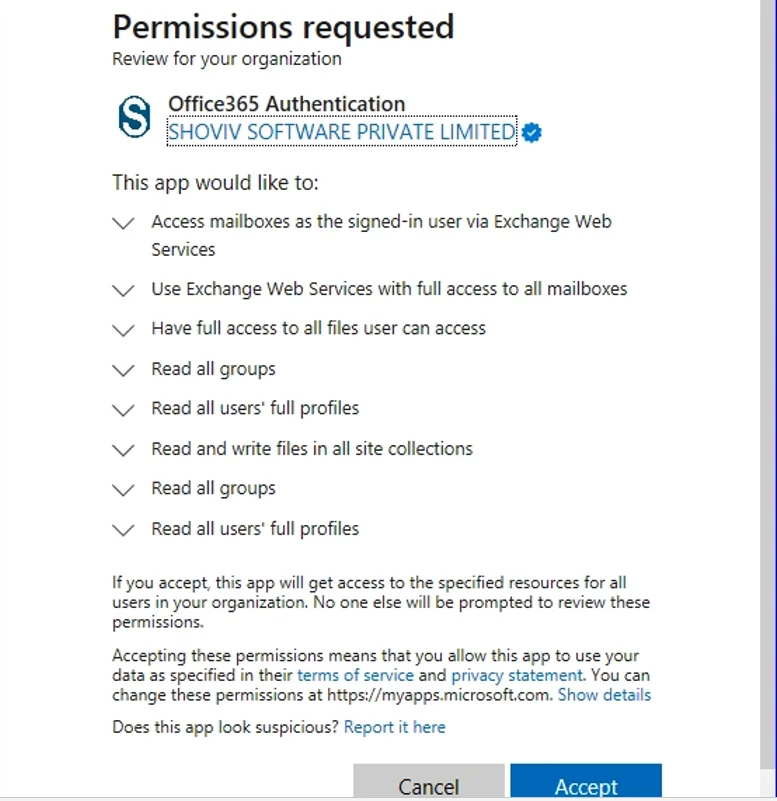
Step 6: Accept the permissions requested and move ahead.
Step 7: If you choose Modern Authentication (Manual), then you have to enter the Tenant ID, Client ID, Client Secret Key and Admin User Email. Click here to learn about these credentials: https://www.shoviv.com/technical-guide/generate-client-id-and-client-secret-key-for-onedrive.html
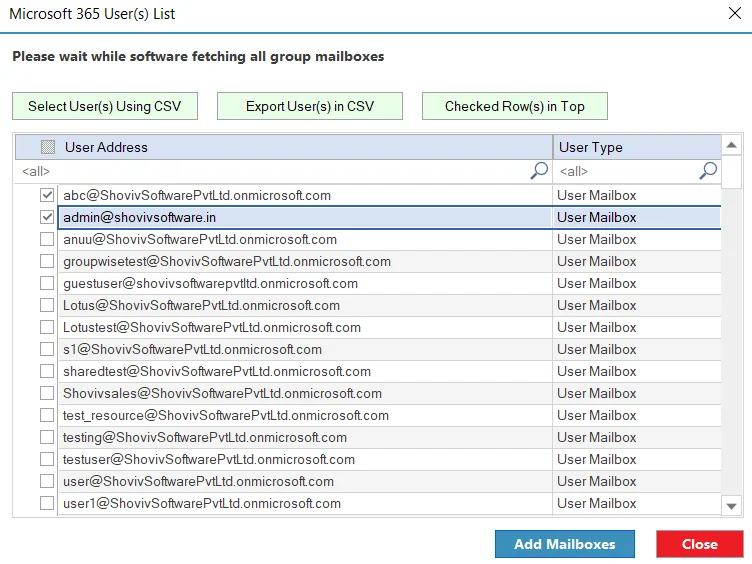
Step 8: The software will connect and display the users. You can also add users using a CSV file. Select the users you want and click Add Mailboxes.
Connection confirmation click next.
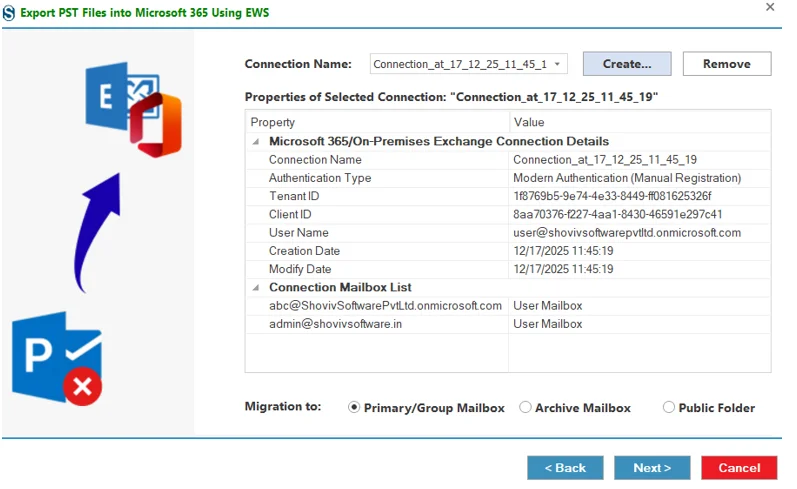
Step 9: You will get connection details and the target mailbox type for the migration. Click Next.
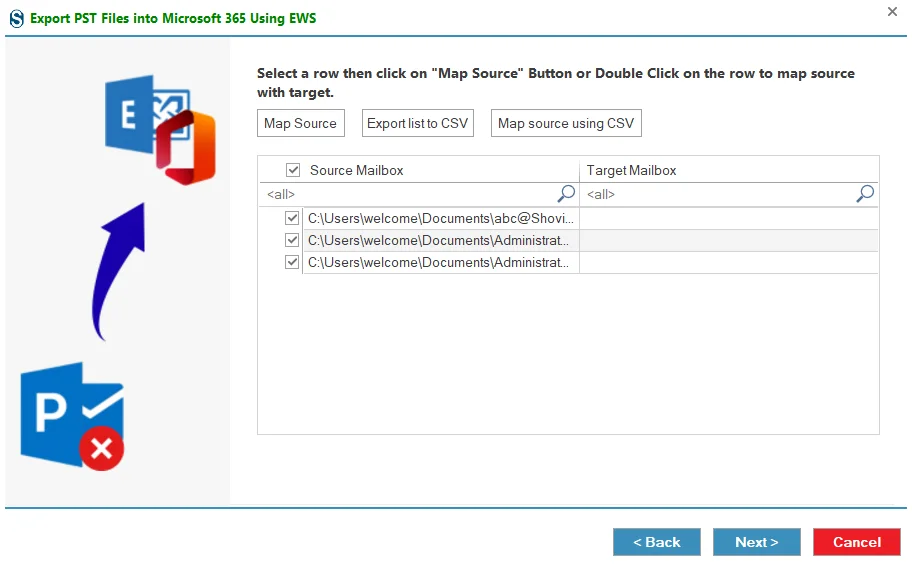
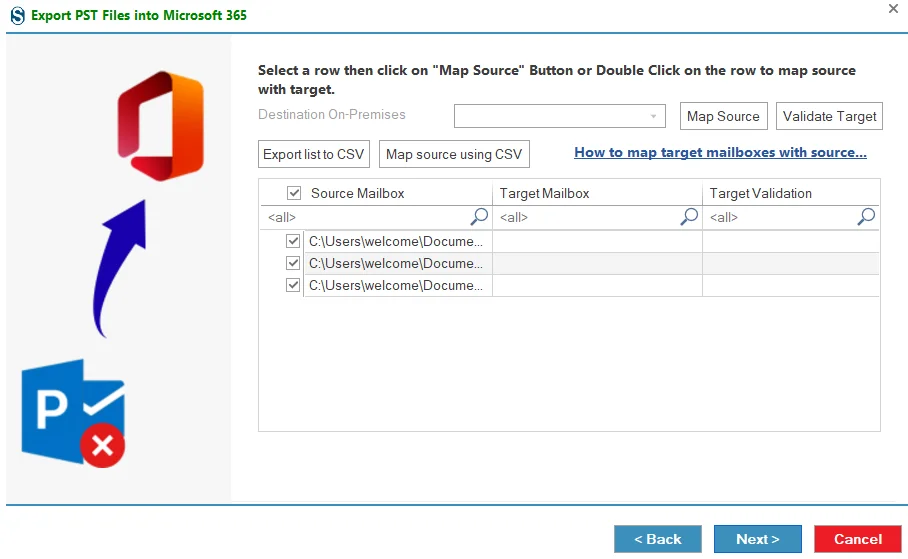
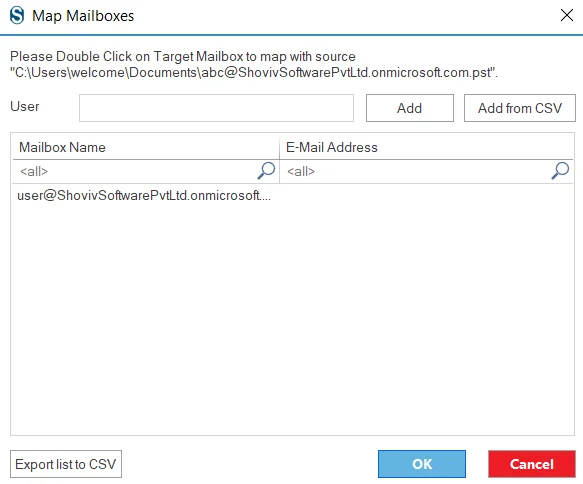
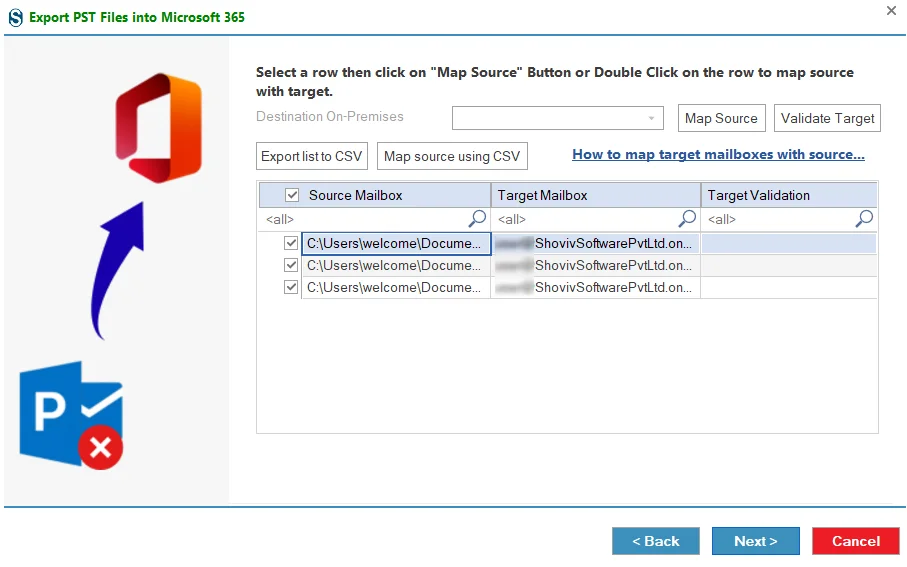
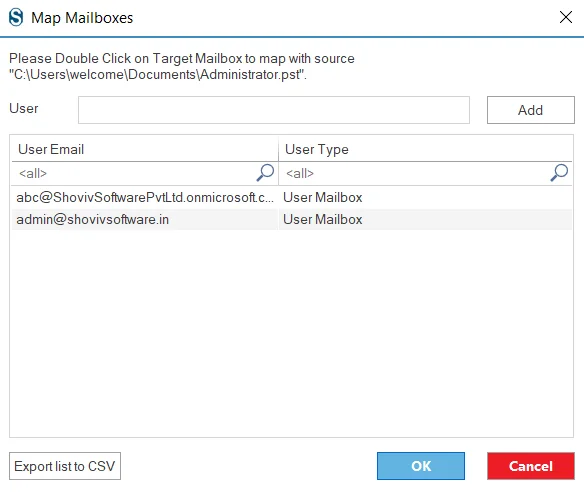
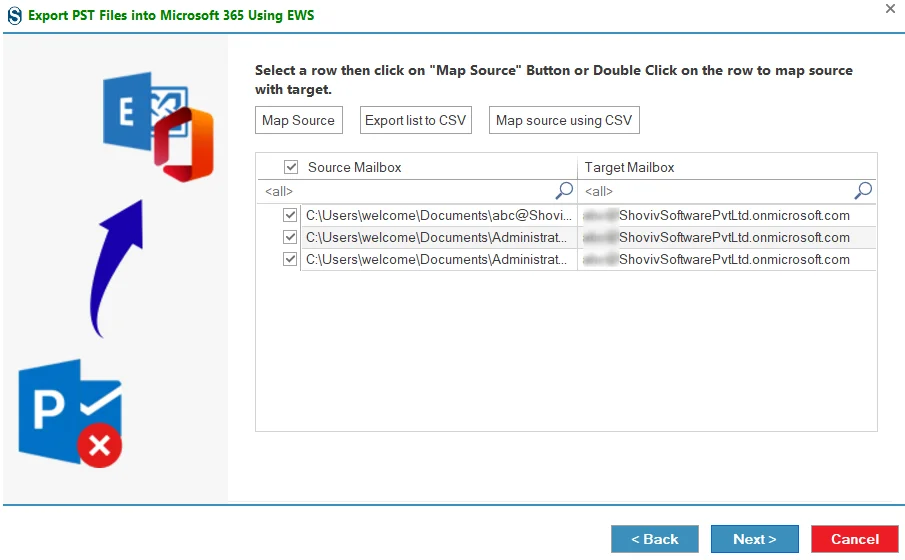
Step 10: Next, map the source mailboxes to the target. Review and check the source mailboxes listed for mapping..
After Mapping ,click on next.
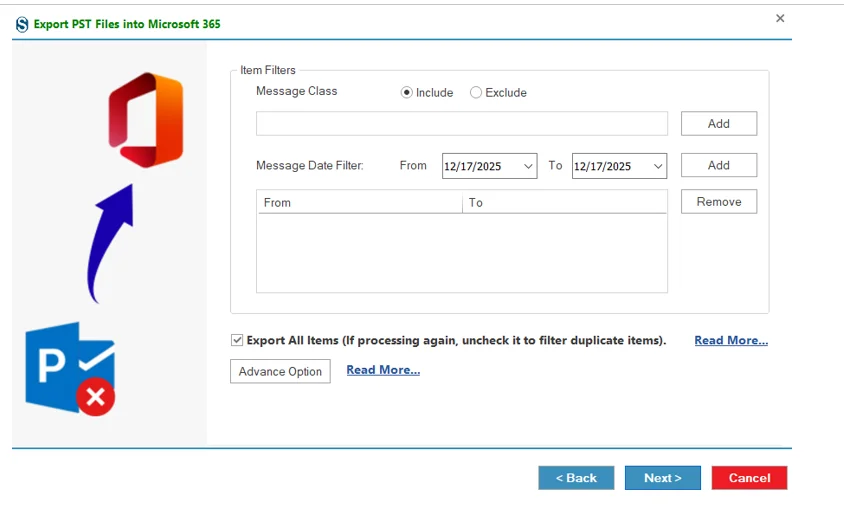
Step 11: After that, the filter page appears with two options.
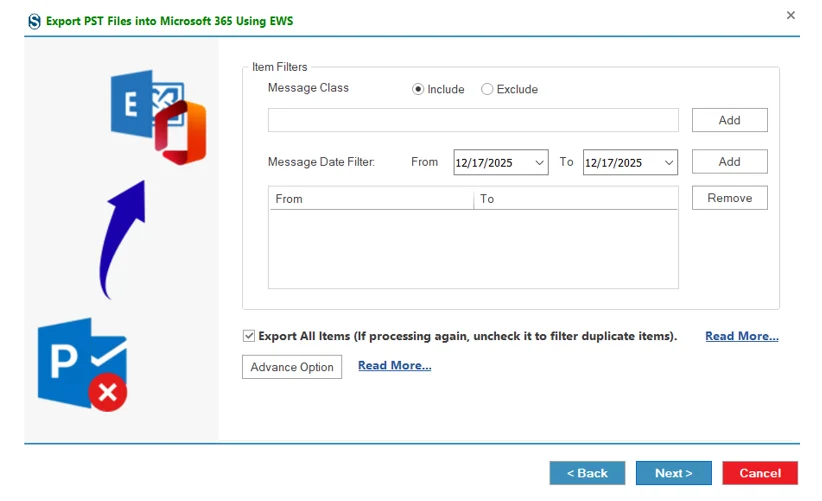
11.1: Message Class Filter:
This option lets you include or exclude specific message classes.
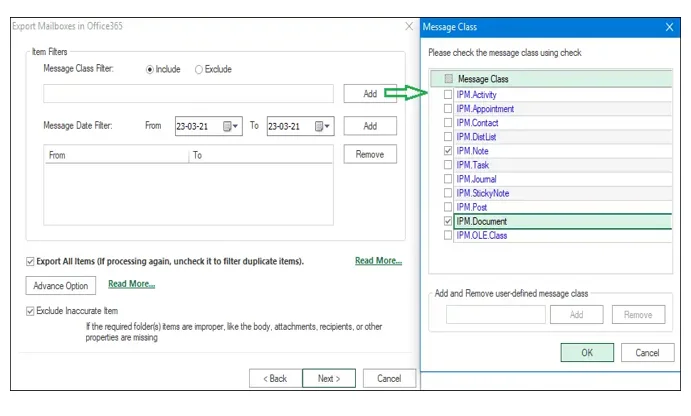
- Click the Add button to open the Message Class dialog box.
- The dialog will display default message classes.
- Select the required message classes by checking the boxes and click OK.
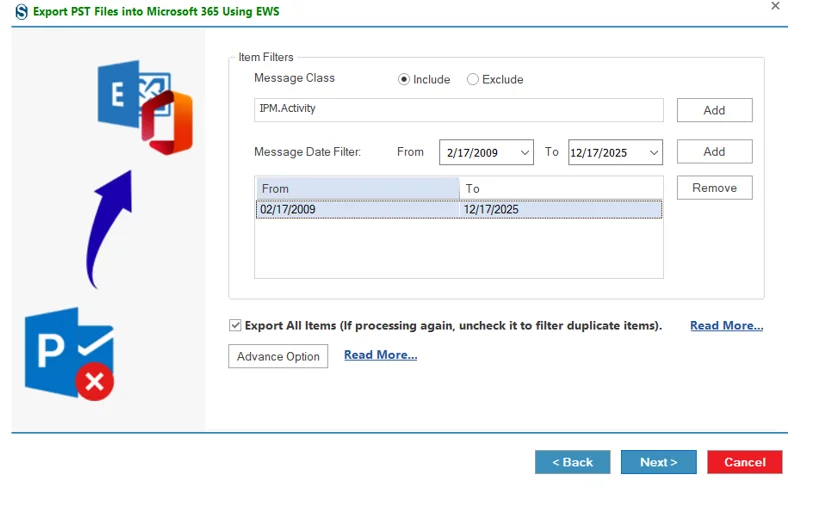
- 11.2: Message Date Filter: This option allows you to process the message according to the date range.
Read more to prevent duplicate items: https://www.shoviv.com/technical-guide/exchange-server-exclude-duplicate-item.html
11.3: For more advanced conversion options, click the Advanced Scan button.
Advance option: https://www.shoviv.com/technical-guide/migation-advance-option.html
1. Use Item Thread Count:
Select the item thread count from the dropdown menu.
2. Apply Filter Using:
You can filter items based on different criteria:
- Last modification time.
- Message creation time.
- Message delivery time.
- Client submit time.
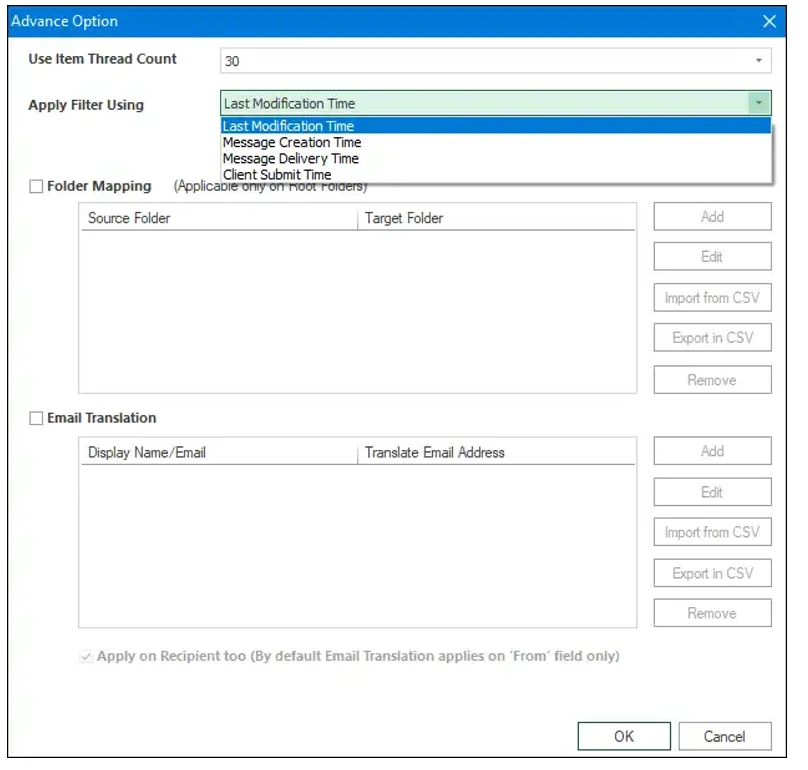
3. Folder Mapping: The folder mapping option allows the users to migrate items from one folder to another particular folder.

- Add:- Using this button, one can add the source and the target folder name for mapping.
- Edit:- With this button, we can edit or change the source folder or target folder name.
- Remove:- This button is provided to remove the added source folder and the target folder.
- Export in CSV:- Use this button to export the Folder mapping list into a CSV file for later use.
- Import from CSV:- With this button, map multiple sources with target mailboxes using a CSV file. Create a CSV file containing the source name in one column and the respective target in another column, then upload it using the Import from CSV option.
4. Email Translation: Users can change the email address according to the destination server's email addresses. i.e. user@sourcedomain.com to user1@destinationdomain.com. The email translation feature is a highlighted feature of this software.

- Add:- With this button, we can add the source and the target folder name for mapping.
- Edit:- Using this button, we can edit or change the source folder or target folder name.
- Remove:- By this button, we can remove the source folder and the target folder.
- Export in CSV:- With this option, you can export the Folder mapping list into a CSV file to use later.
- Import from CSV:- With this button, map the source with target mailboxes using a CSV file. Create a CSV file containing the source name in one column and the respective target in another column, then upload it using the Import from CSV option.
Apply on Recipient Too: Enables email translation for recipients as well. By default, translation only applies to the From field.
After following all the required step using "Advance Scan", Click the 'Next' button.
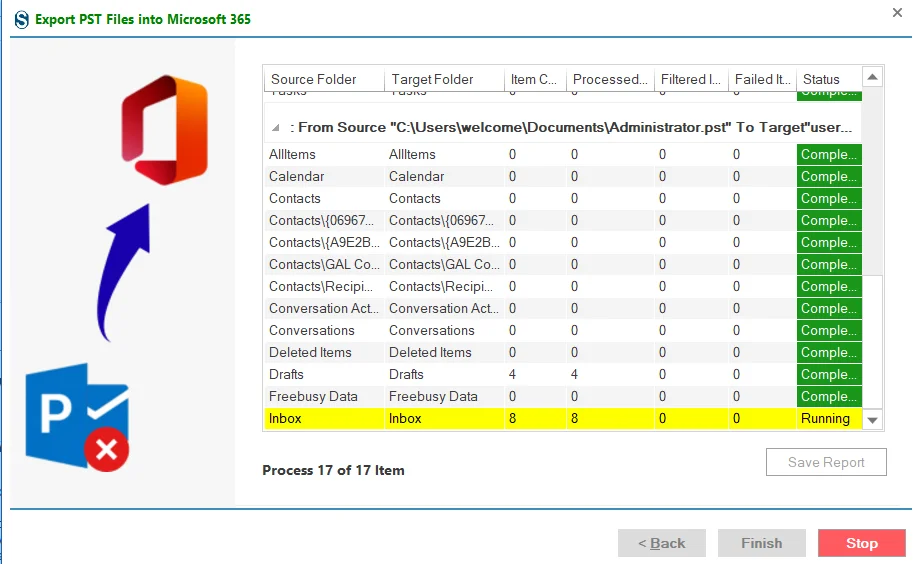
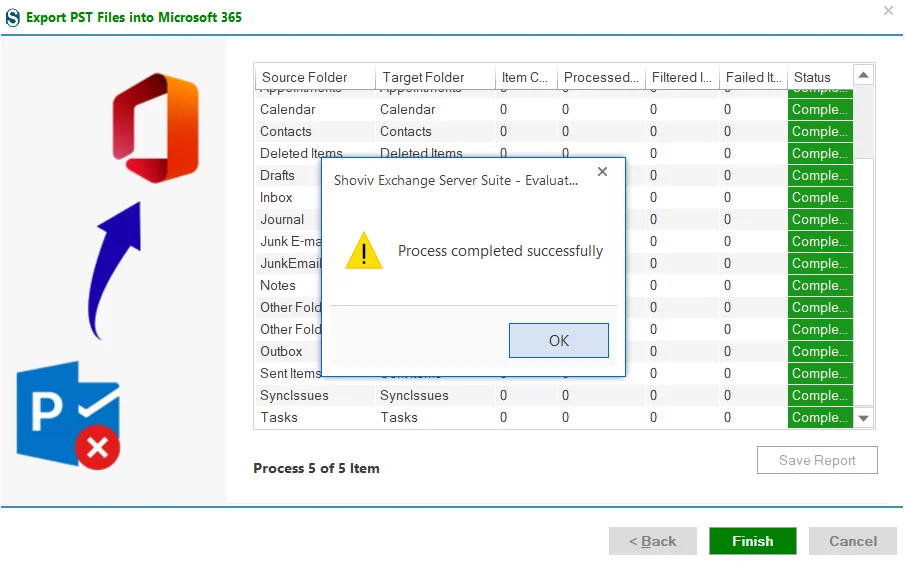
Step 12:Now the process will start and status will be shown. The Status wizard will show Source Folder, Target Folder, Item Count, Filtered Items, Process Item, and Status in this report.
- You can stop the process using the 'Stop' button, else wait for the process completion.
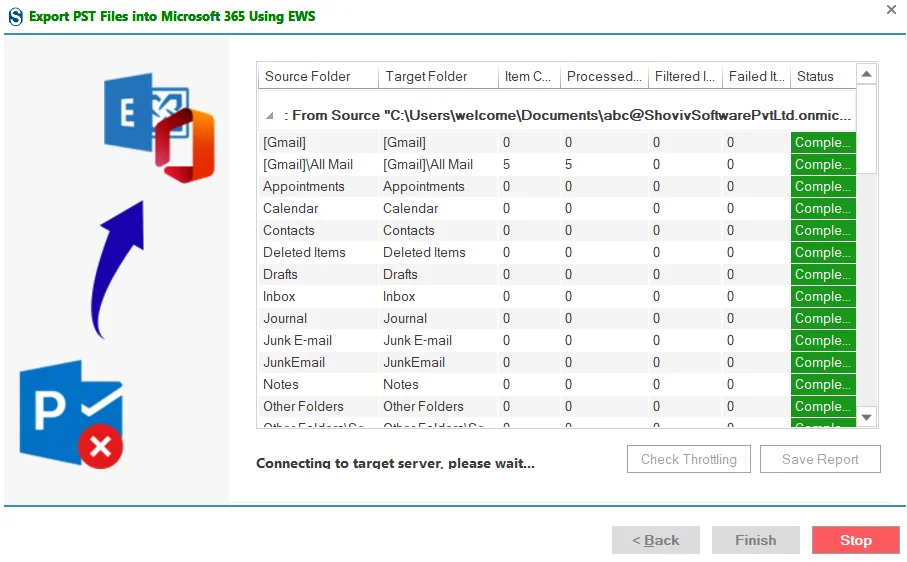
- Once the process gets completed successfully. click on the 'OK' button.
- You can save the report using the 'Save Report' button and at last click on the 'Finish' button to finish the process.