After selecting the EDB File option in the application, the Add EDB File (Recovery Mode) window opens. This window provides options to locate and add the required EDB database.
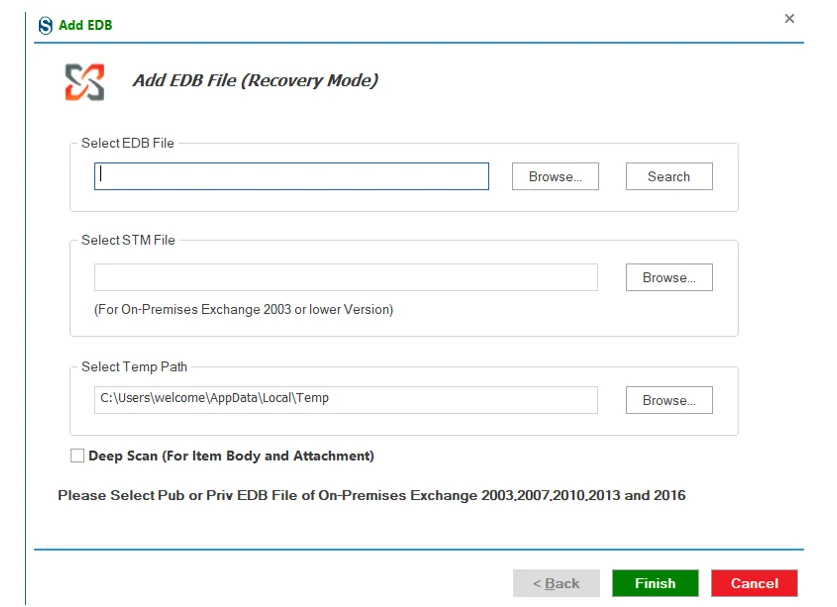
1: Select the EDB File:
In the Select EDB File section
- Click Browse to manually locate the required .edb file on your system.
OR
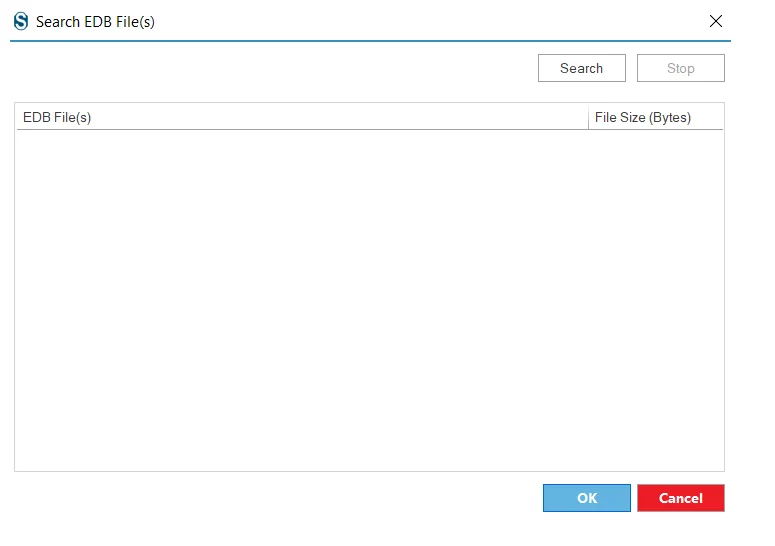
- Click on search, a dialog box will appear again click on search.
- Now select the target folder, to find the required EDB file..
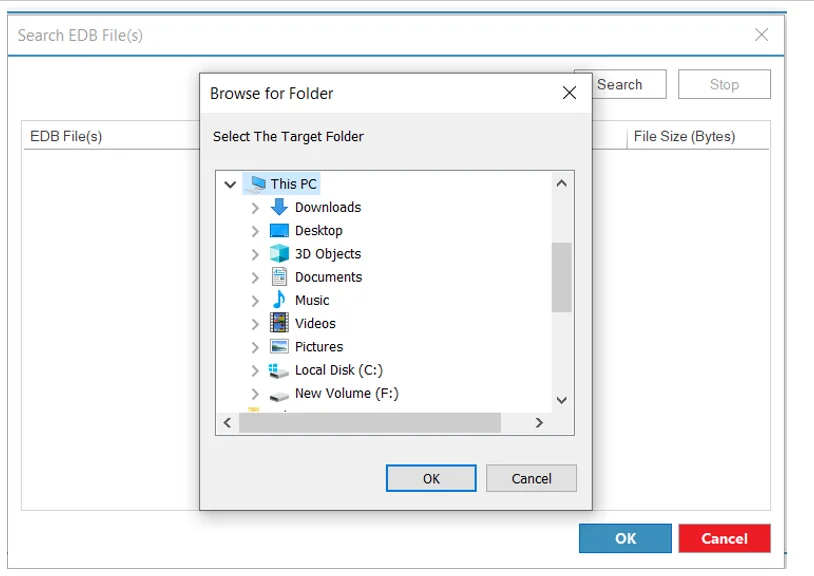
After selecting, click Ok.
New dialog box will appear, select the EDB files that are required.
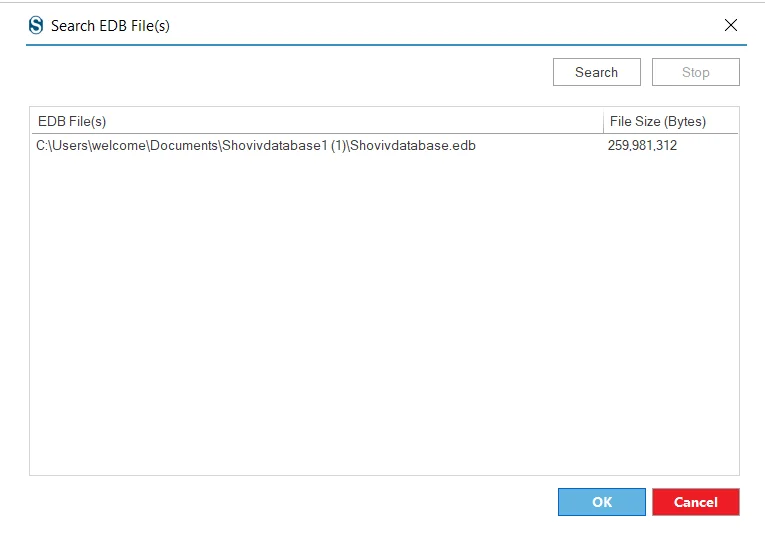
Click OK.
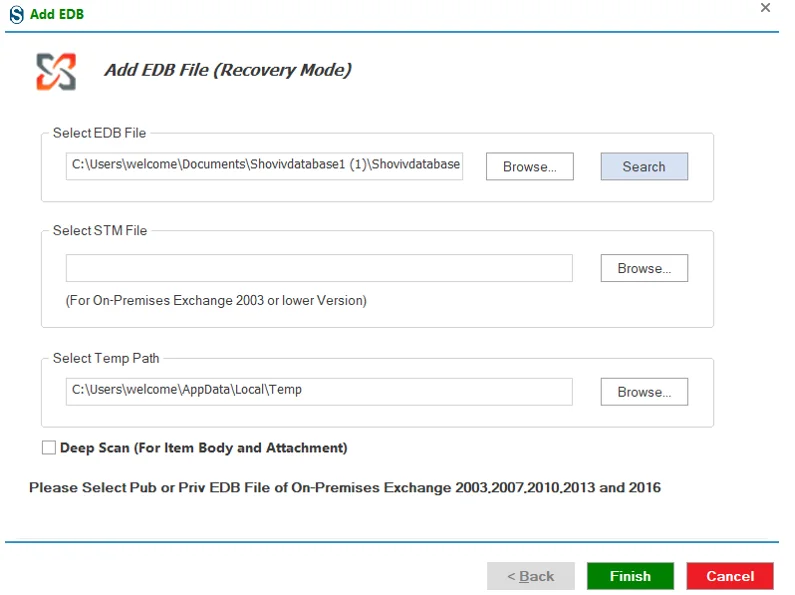
2: Select STM File
In the Select STM File section:
- Click Browse to choose the corresponding .stm file.
- This step is only required for On-Premises Exchange 2003 or earlier versions.
- If you are using a newer Exchange version, this step can be skipped.
3: Select Temporary Path
In the Select Temp Path section:
- A default temporary folder path is already provided.
- Click Browse if you want to change the location.
- This path is used to store temporary files during the recovery process.
Deep Scan (For Item Body and Attachment)
Check the Deep Scan option if:
- You want a more through scan
- You need detailed recovery of email bodies and attachments
- Click Finish to start loading and scanning the selected EDB file.
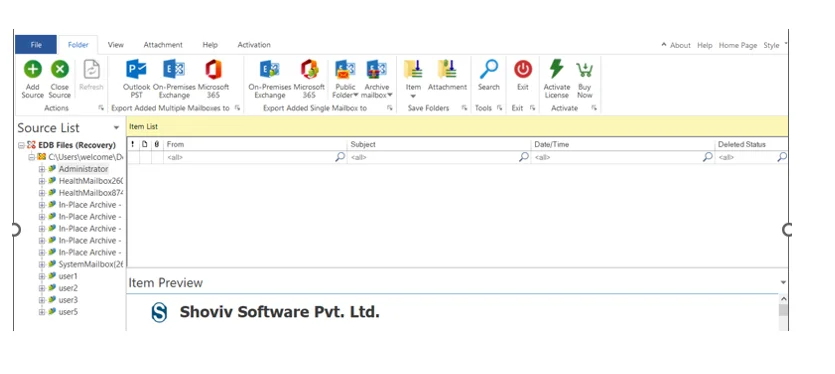
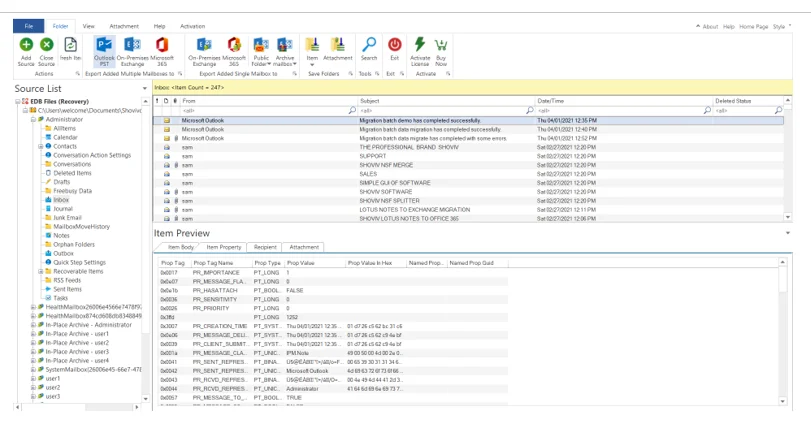
Preview Mailbox Data:
Select a mailbox or item from the list to view its data. The application then shows a live item preview with multiple viewing options for detailed review.
The preview pane includes the following tabs:
- Item Body: Displays the main content of the selected item.
- Item Properties: Shows detailed metadata and properties of the item.
- Recipients: Lists all recipients associated with the selected item.
- Attachments: Displays all attachments linked to the item.