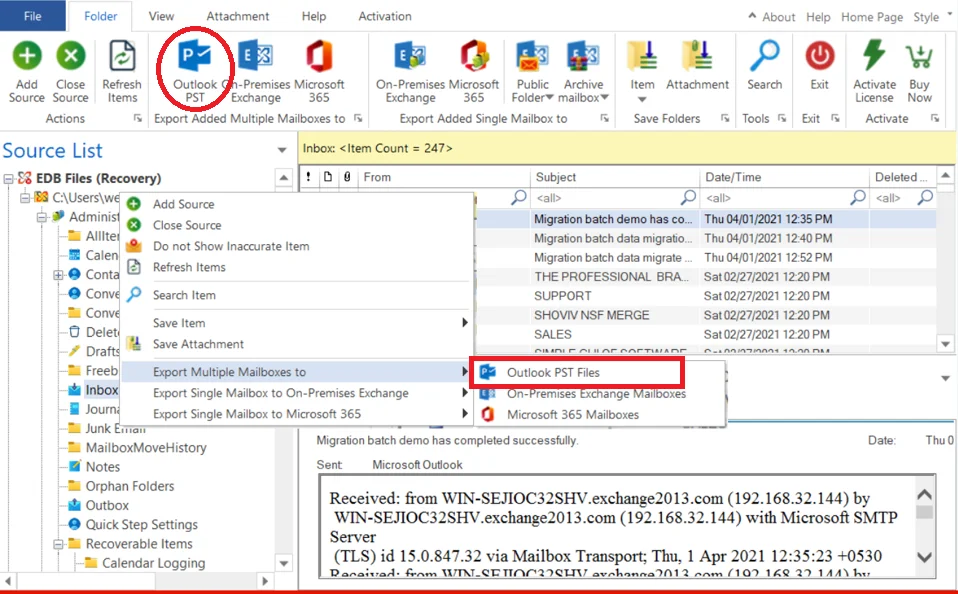
Note: Once you have added the EDB, you have to select Outlook PST as the target.
The first way is to choose the Outlook PST(Multiple Mailboxes) option from the ribbon bar, and the second way is to right-click on the file folder and select the same option (Outlook PST).
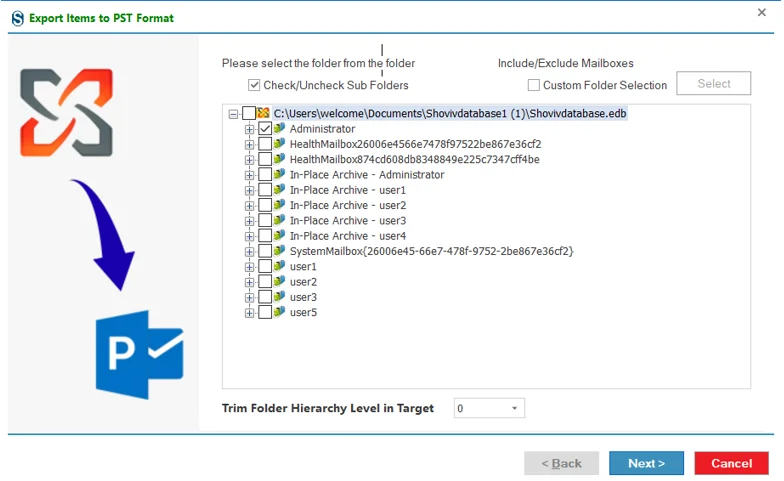
Step 1: Now, a wizard will pop up in which you will find the option Check/Uncheck Subfolders.
- Check/Uncheck sub-folder: Checking this option automatically checks all the sub-folders of the checked folder and vice versa. You can Check/Uncheck sub-folders.
- Include/Exclude Folders: Include/exclude folders consist of three options in which you can opt to export the added source.
- Include Folders: Only selected Folders will be exported.
- Exclude Folders: Selected Folders Will not be exported.
- Add and Remove Folders: In the Add & Remove a folder, we can add folders manually.
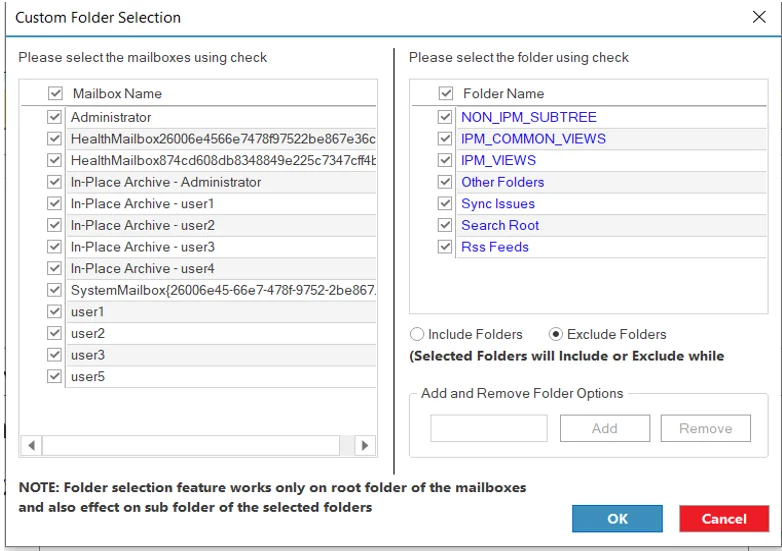
Once you’re done with Include/Exclude option click the OK button and then click the 'Next' button.
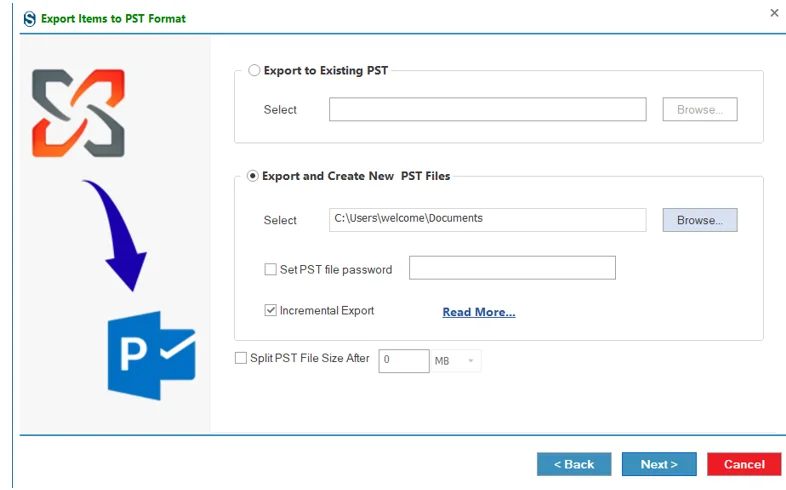
Step 2: Than, there will appear two ways to export PST file.
- Export on Existing PST: This option is available for simply a single mailbox.
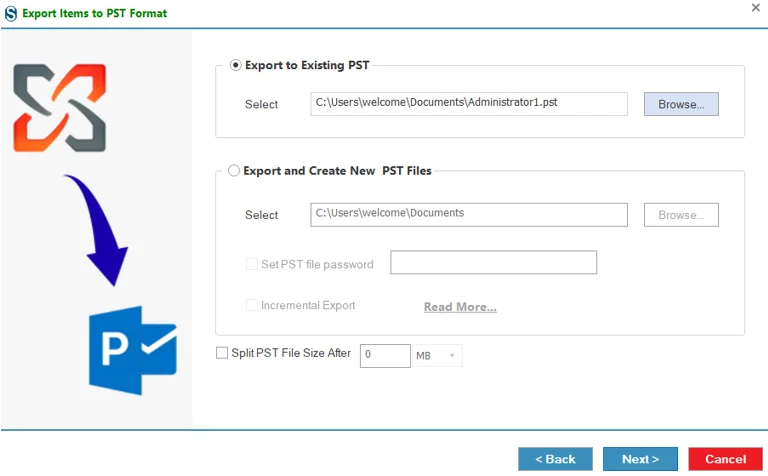
- Export and Create New PST Files: If you want to export item in PST by creating new PST file then select this option.
- Select Folder: Select the target folder anywhere in the disk whither you want to save items of selected folders in Outlook PST.
- Set PST file Password: If you want to create a password-protected PST then select this check box and enter a password for the PST.
- Incremental Export: The software also includes an incremental export feature that helps prevent duplicate data in the destination. After users complete the initial backup successfully, they can use the incremental backup option to capture only the changes made since the previous backup. This approach saves time and ensures that duplicate items are not created in the target.
Read more for Incremental Export: https://www.shoviv.com/technical-guide/incremental-export-backup.html
- Split PST file size After: Using this feature you can create more than one PST file according to size (100 MB to 51200 MB or 1 GB to 50 GB). then select this option and enter the PST file size in GB or MB accordingly.
After that click on Next button.
Step 3: After click on Next button, a filter page will have appeared with two options.
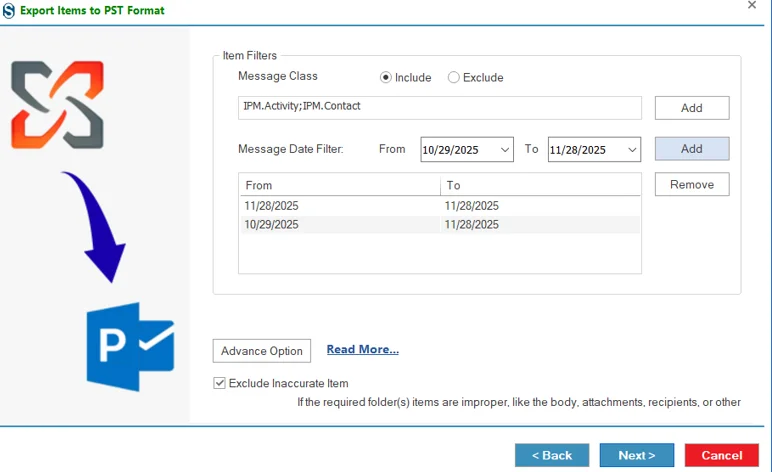
- Message Class Filter: The message class process option allows to add message class using the Add button. In this option, you can include or exclude the message class.
After click on add button a message class dialog box will pop-up. The message class dialog box will show some default messages inside the dialog box. Check the required message class using the checkbox and click the OK button.
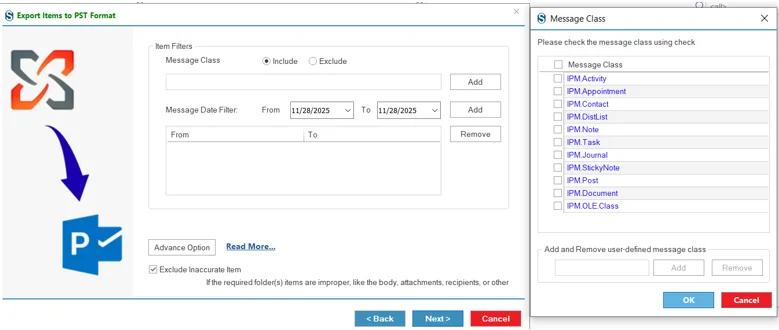
The default message cannot be removed from the list. You can only remove the added message class from the list.
- Message Date Filter: This option allows you to process the message according to the date range.
Use item Thread Count: Select Item Thread count form given drop-down.
Apply Filter using: There are various criteria that the user can use:
- Last modification time.
- Filter by message creation time.
- Filter by message delivery time.
- Filter by client submit time.
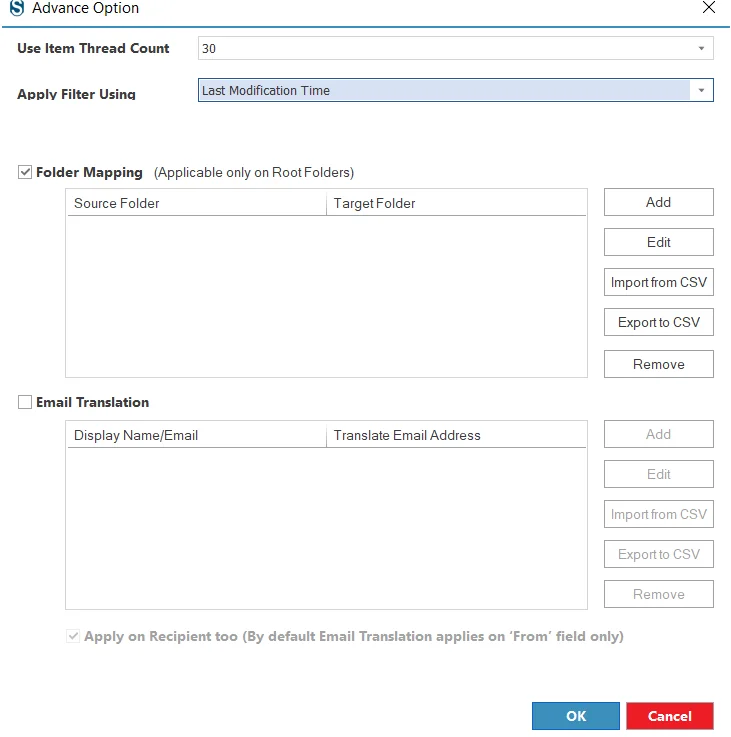
Folder Mapping: The folder mapping option allows the users to migrate items from one folder to another particular folder.
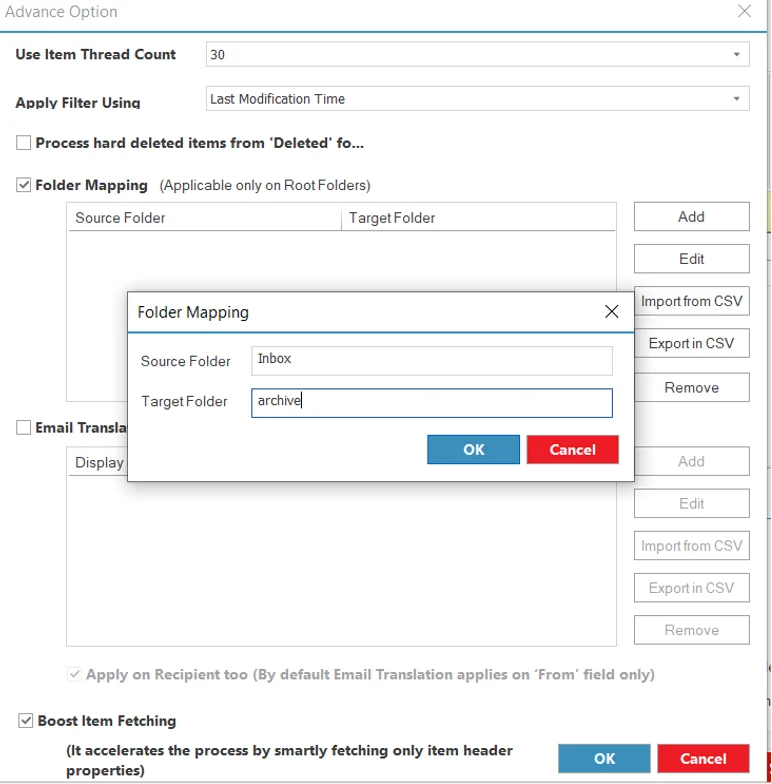
Email Translation: Users can change the email address according to the destination server's email addresses. I.e. userC@sourcedomain.com to userD@destinationdomain.com. The email translation feature is a highlighted feature of this software.
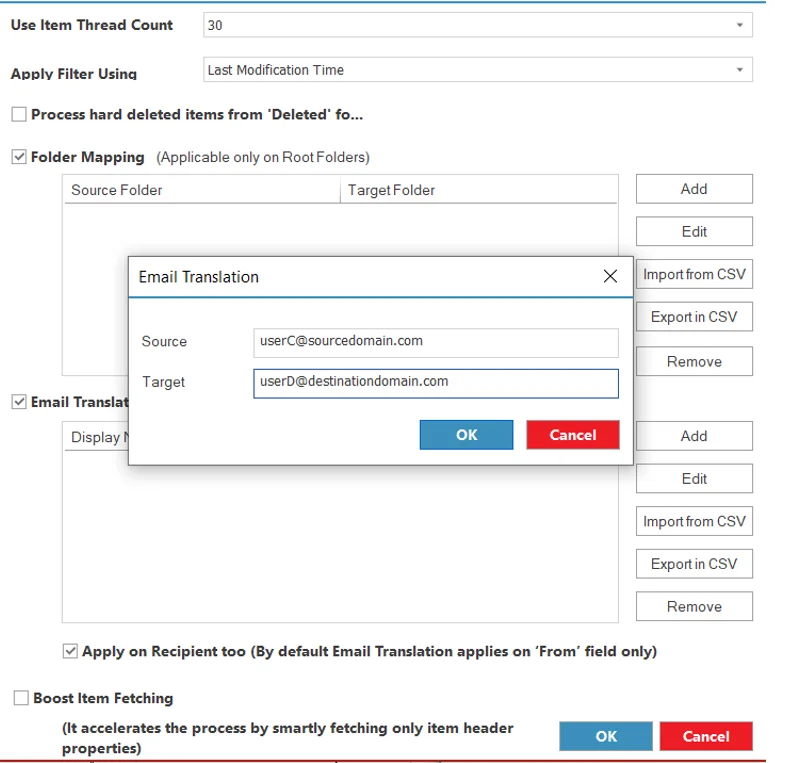
- Add: With this button, you can add the source and the target folder name for email translation.
- Edit: Using this button, you can edit or change the source folder or target folder name.
- Remove: Using this button, you can remove the source folder and the target folder.
- Import from CSV: With this button, you can map the source with target mailboxes using a CSV file. Create a CSV file containing the source name in one column and the respective target in another column, then upload it using the Import from CSV option (Demo CSV File).
Export in CSV: With this option, you can export the folder mapping list to a CSV file for later use.
After following all the required step using "Advance Scan", Click the Next button.
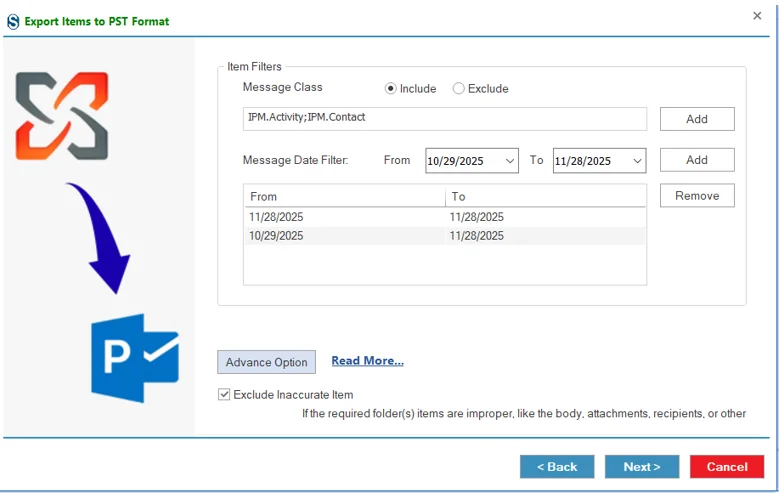
Step 4: Now the process will start and status will be shown. The Status wizard will show Source Folder, Target Folder, Item Count, Filtered Items, Copied Items, and Process Item in this report.
- You can stop the process using the 'Stop' button, else wait for the process completion.
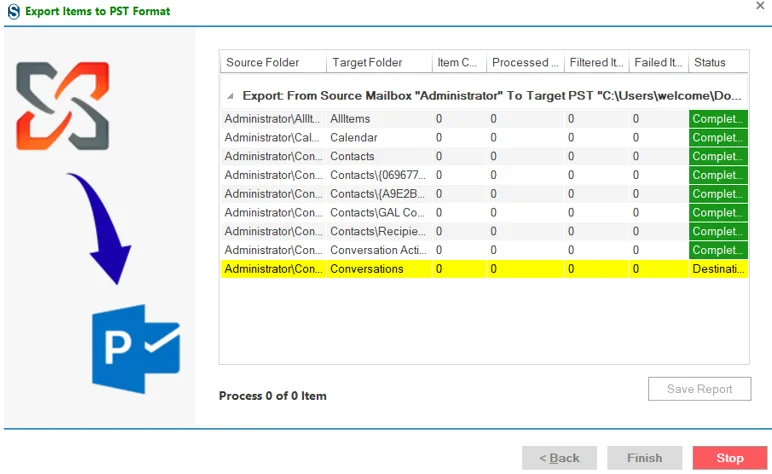
Once the process gets completed successfully. click on the 'OK' button.
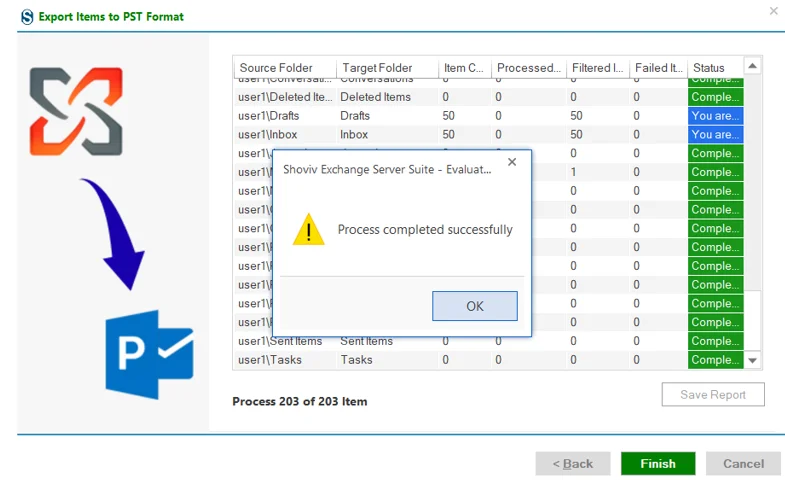
- You can save the report using the 'Save Report' button and at last click on the 'Finish' button to finish the process.