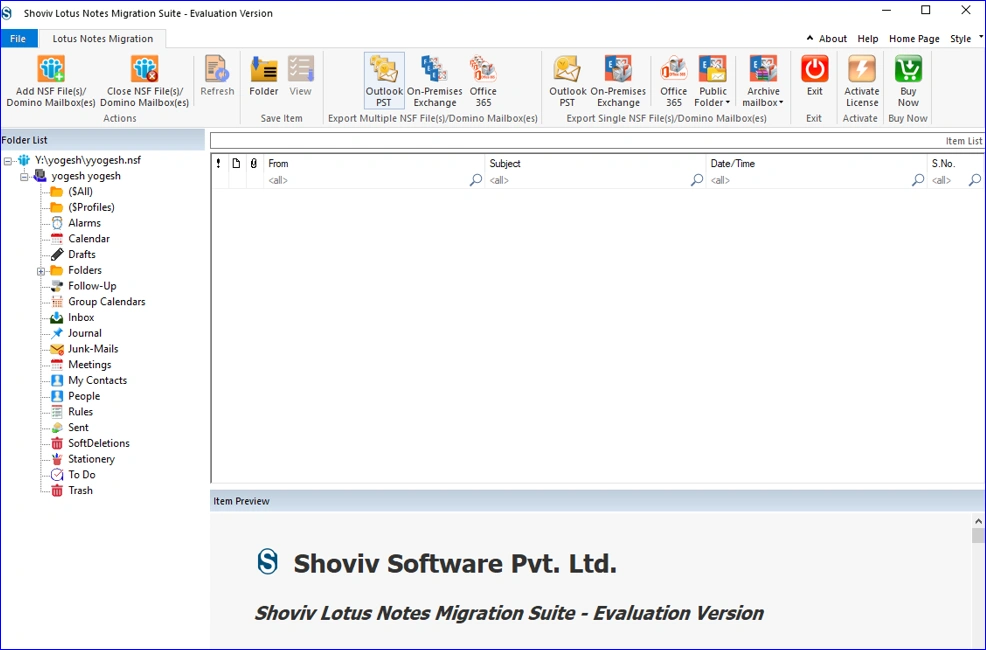
Step 1: Open the Shoviv Lotus Notes Migration Suite/ Aka Shoviv Lotus Notes (NSF) to Outlook (PST) Converter and tap the Add NSF File(s) button.
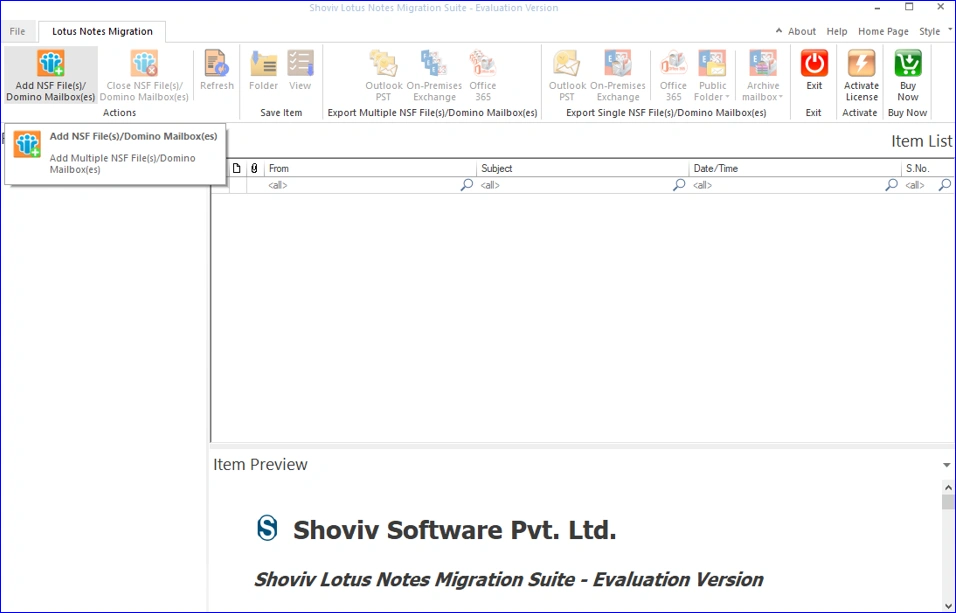
Step 2: There are multiple options to add the Lotus Notes NSF files; you can choose any of them to proceed:
- Add Local NSF File(s): You can tap this option to add the NSF File(s) from the local disk.
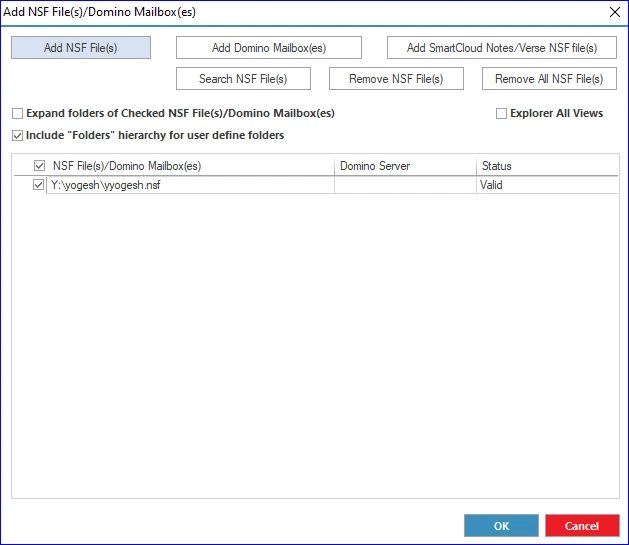
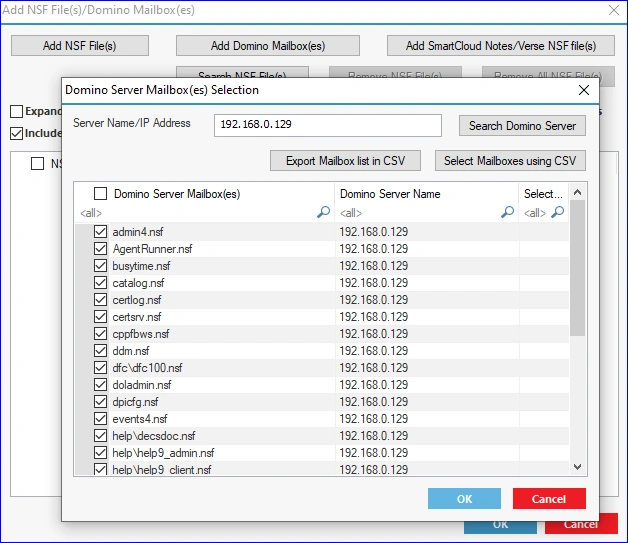
- Add Domino Mailbox(es): You can use this option to add the NSF File(s) directly from the Domino Server. To do this, you must fill in the server name/IP address.
- Add SmartCloud Notes/Verse NSF File(s): If you want to add the SmartCloud Notes NSF File(s), click this option and enter your Server Name/IP Address.
- Search Local NSF File(s): Go with this option to search and select the NSF File(s) from the local folder.
- After adding the NSF Files, tap the OK button.
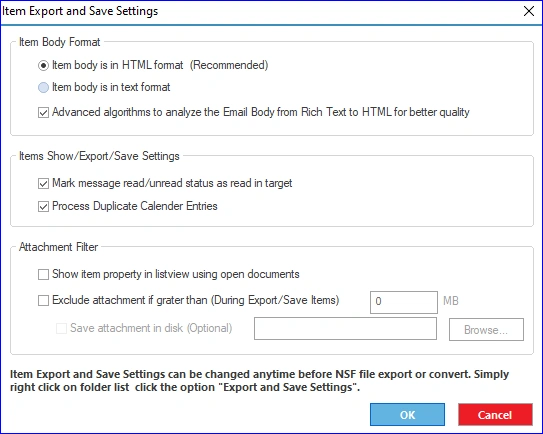
Step 3: Set up the Item Export and Save Settings if needed. You can also right-click on the folder list and select the Export and Save Settings option if you want to make changes later.
Step 4: Afterwards, you have to click the Outlook PST option from the primary menu (ribbon bar) to export NSF to PST.
- Choose the Outlook PST option according to your source NSF File(s): Multiple NSF Files or a Single NSF File.
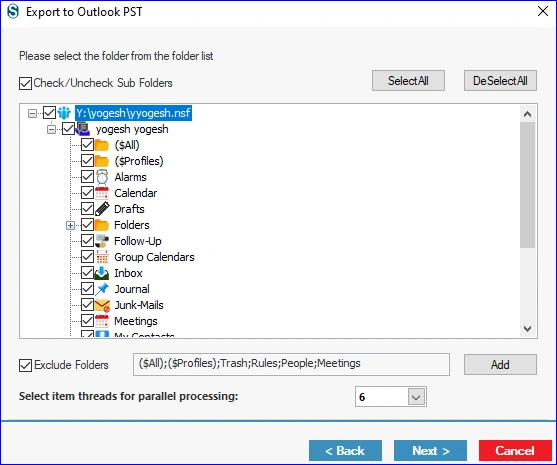
Step 5: Now, you can check/uncheck the subfolders and folders from the list as per your needs.
- You can also use the Exclude Folder option to remove specific folders from the process by clicking the Next button.
Step 6: After that, you need to select the target location and make other changes according to your demands.
- Target: Please select the target folder using the Browse button where you want to save the resultant PST file.
- Create Unicode PST: Keep this option checked if you wish to export the resultant file as an Unicode PST in the target.
- Split PST File Size After: You can set a size to split the resultant PST file to avoid large PST file issues.
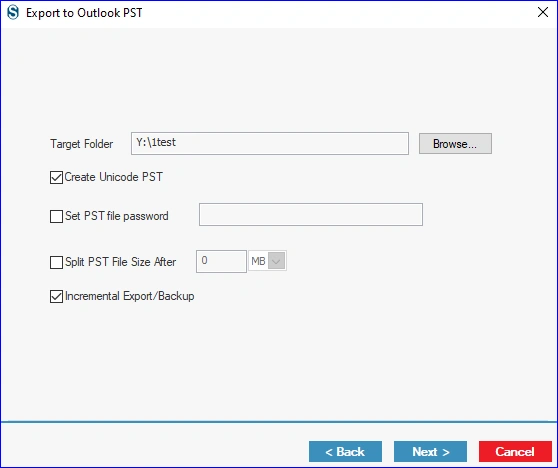
- You can also set a password for the output PST and tick the Incremental Export option to skip items that have already been exported. Then, continue with the Next button.
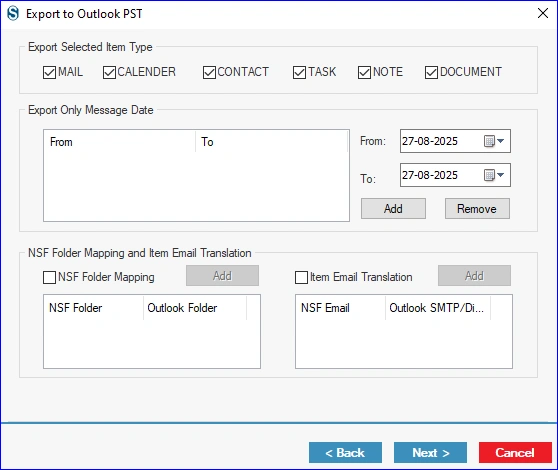
Step 7: Following that, you can use the Item Type and Message Date filter criteria to add/omit NSF File items.
- You can also use the Folder Mapping and Email Translation option if needed, and click the Next button.
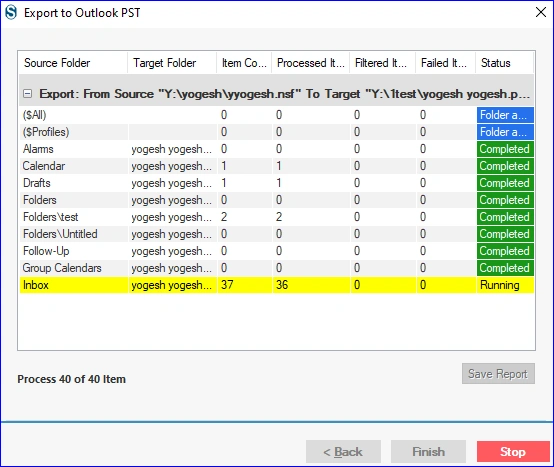
Step 8: In the aftermath, the tool will start exporting NSF file items to PST format. After the conversion completion, click the Finish button and save the report using the Save Report button if required.