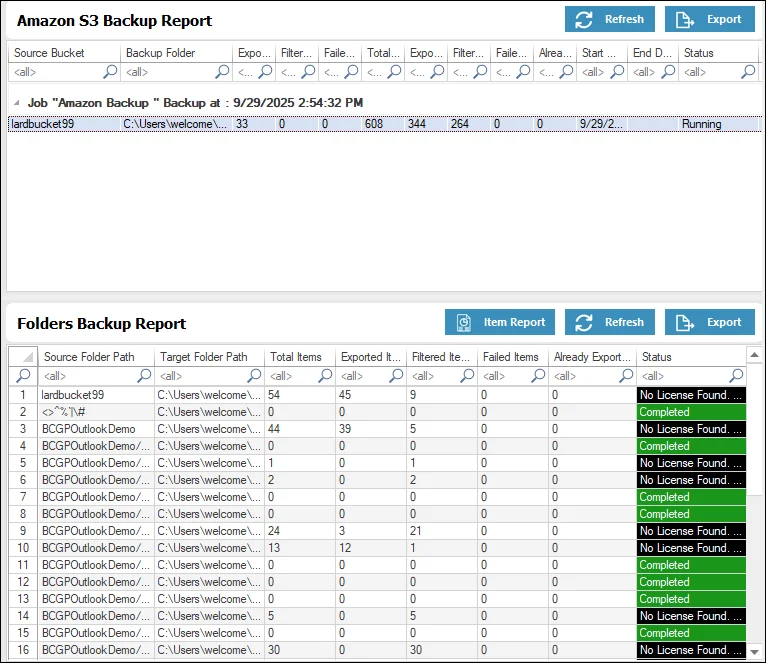
Step 1: After downloading and installing Shoviv Cloud Drive Migrator, from the dashboard, go to the Create Drive Backup Job.
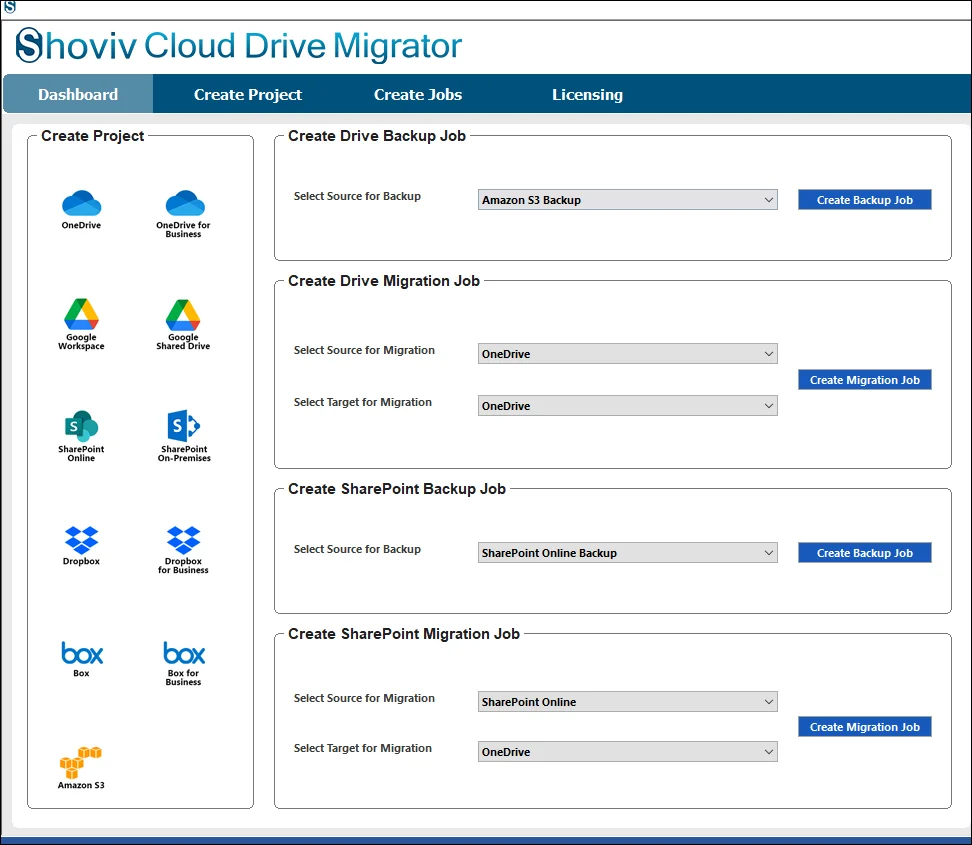
Step 2: Select Amazon S3 as the Source for Backup from the dropdown menu. Click on the Create Backup Job.
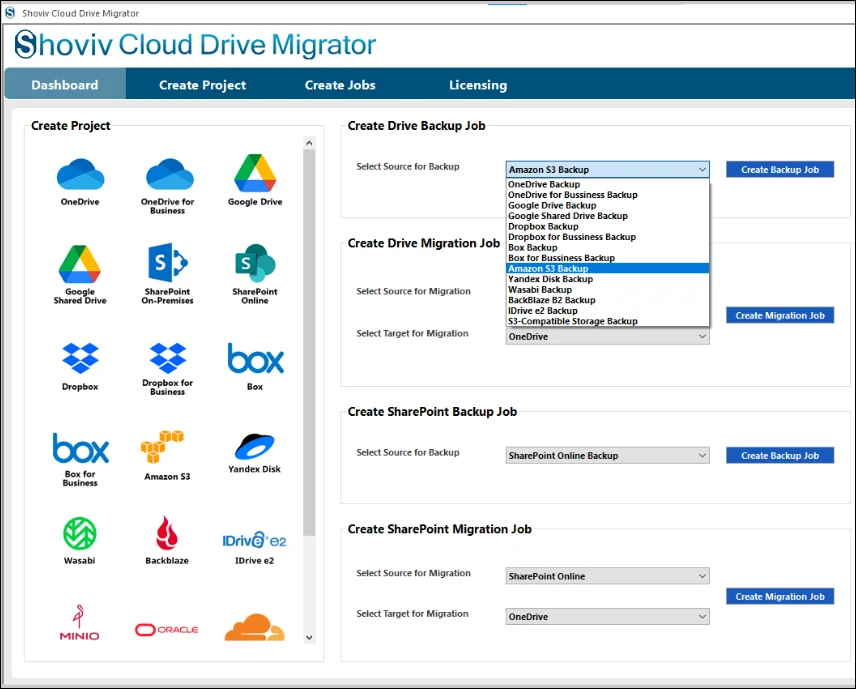
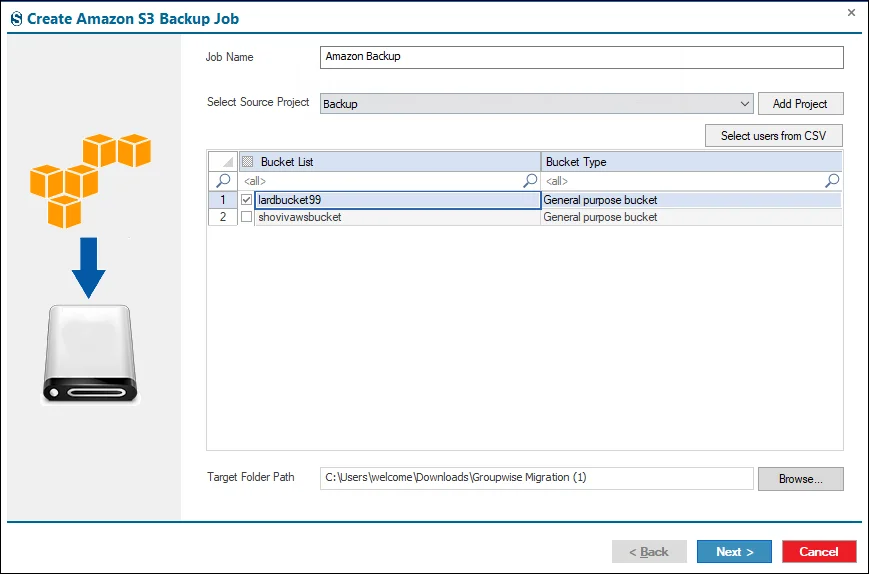
Step 3: Enter the Job Name with a specific way to distinguish it from the other created jobs.
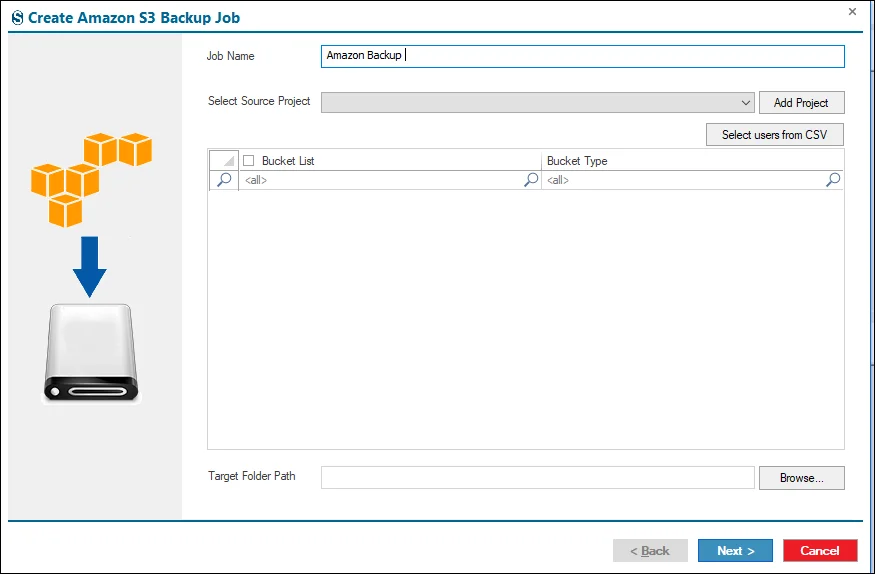
Step 4: Connect with the Source Project click on the Add Project and enter all the credentials which are asked for.
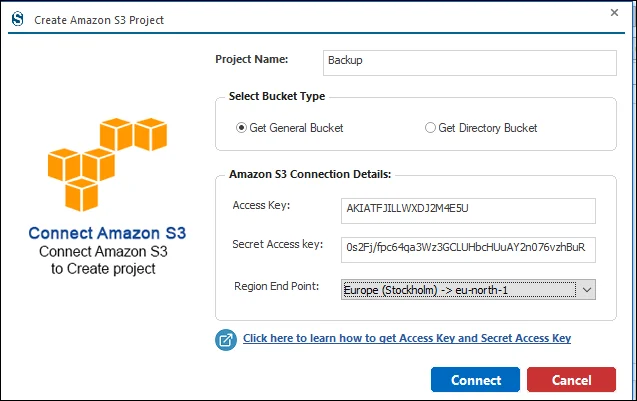
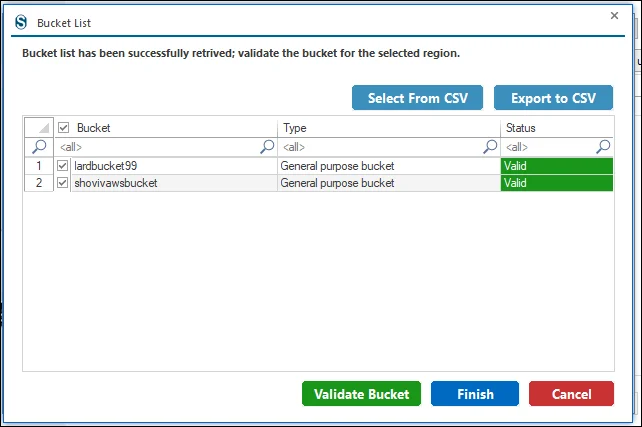
Step 5: Choose the bucket list and types of the bucket after valid, then click on the Finish.
- If you have the larger list of buckets then you can select them with the help of the CSV.
Step 6: If the Source Project exists then you can add it with the help of the dropdown menu and in case you have the larger set of the buckets then you can add them by clicking on the Select Buckets From CSV button.
Step 7: For the backup Target, click on the Browse and choose where you need.
Step 8: The Filter Wizard opens, with the various filter options user buckets items.Under the File/ Folders Filters you can find the different options such as Folder Filter, File Extension Filter, Date Filter, File Size Filter these options are explained in the detail manner in the below section.
- Folder Filter:- The folder filter allows you to exclude specific folders from the user bucket. You can add the multiple folders to be skipped. If you want to backup only the selected folder, switch the option form Exclude to Include.
- File Extension Filter:- This option allows users to filter files by their extension. You can choose which extension of file to be included or excluded from the process of migration.
- Date Filter:- This option lets you filter data based on the selected date range. After choosing the range of the date, click on the Add Button to apply it.
- File Size Filters:- This option enables filtering based on a selected range of size. After defining the range, click on the dropdown option to choose between Greater than and lesser than option.
- File Version Migration:- Controls how many files are migrated. This option performs the operation from the latest to oldest version.
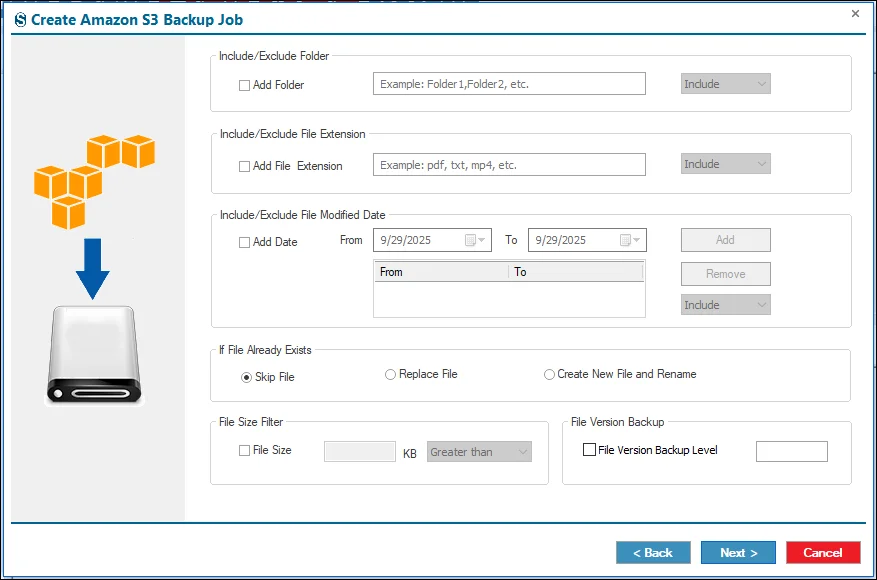
If File Already Exists:-Defines behavior when the destination already has the file.
-
Skip File :- Use this option to prevent duplicate files from being migrated.
-
Replace File :- This option replaces an existing file with a newer version during the migration process.
-
Create New File and Rename :- This option migrates the file by creating a new copy in the target folder with a new name each time (for example, Test (1), Test (2), etc.).
Step 9: You can handle all your settings here. But if you don’t want to make any changes, press Next to move forward.
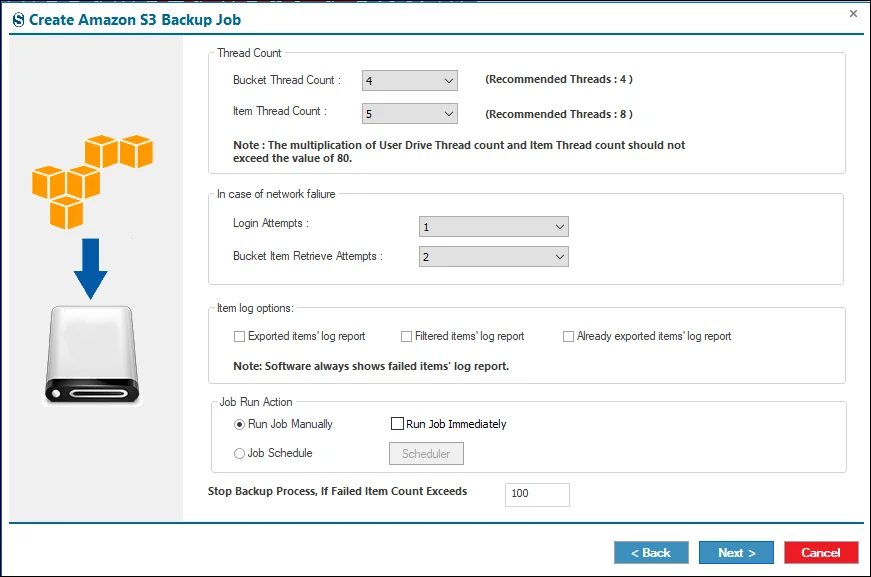
- Bucket Thread Count:- This setting defines how many buckets can be processed simultaneously during the backup. For example, if there are five buckets in a job and the thread count is set to five, the software will backup all buckets at the same time.
- Item Thread Count:- This option specifies the number of threads the software can run for each individual user. For instance, if the thread count is set to ten, the software will process ten items concurrently for each user.
- Login Attempts:- During migration, network interruptions may cause user login attempts to fail. This option allows you to set the maximum number of retry attempts before the migration job is marked as failed.
- Bucket Item Retrieve Attempts:- This setting allows you to define how many retry attempts the software should make to retrieve a bucket item before the migration job fails.
Item Log Report
- Exported items, log report:- When this option is enabled, the software generates a log report containing details of all items that have been successfully migrated. This report is useful for verification and auditing purposes.
- Filtered items’ log report:- This option creates a log report for items that were skipped due to applied filters, such as date range, file size, folder selection, or file extension filters. It helps users understand which items were excluded and why.
- Already exported items’ log report:-By clicking this option, you will open the folder within the job report where you can find the log report of the items that have already been exported.
- Note:- The software always generates a Failed Items’ Log Report by default. This report contains details of items that could not be migrated due to errors or issues, regardless of the selected log options.
- Bad Items Count: This option determines the maximum number of failed items allowed before the software stops migrating a specific user. For example, if the bad item count is set to 100, the migration for that user will stop once 100 items fail. If you do not want these settings then you can ignore it with the help of the Next button.
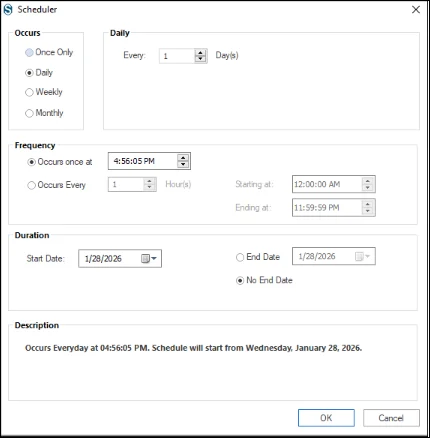
Step 10: The Scheduler is a key component of the backup job setup. It allows users to automate migration tasks by defining when the job should run. This is especially useful for periodic or recurring migrations. By setting a start time, the migration job will automatically begin at the scheduled time without any manual intervention.
- Run Job Manually – Select this option if you want to start the Amzon S3 bucket backup manually at any time from the dashboard.
- Run Job Immediately – Enable this option to run the backup job automatically as soon as the job creation process is completed.
- Job Schedule – This option allows you to schedule the backup job to run at a specific time. You can configure it to run on selected days or at defined intervals.
- Daily:- Runs the backup every day at a specified time.
- Weekly:-Runs the backup on a weekly basis. You can choose a single day or multiple days within the week and set a specific time.
- Monthly:- Runs the backup on a monthly basis. You can select specific months and define the date(s) and time for the backup.
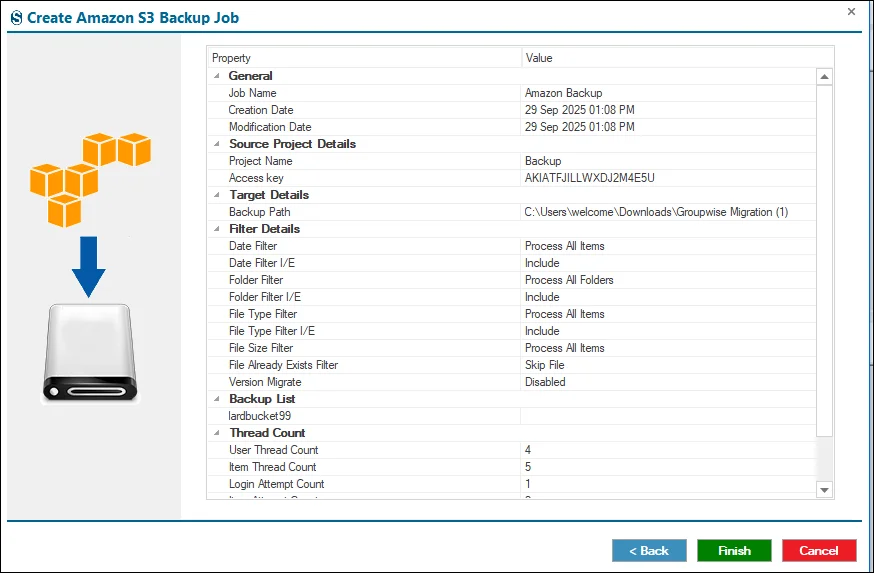
Step 11: Review the Job. If all is accurate, then click on Next; if not, then click on Back and edit the details.
Step 12: The job runs according to the option you have chosen under the Job Run Action section. In case if you select the manual option then you need to tap on the Start Job button to run the job.