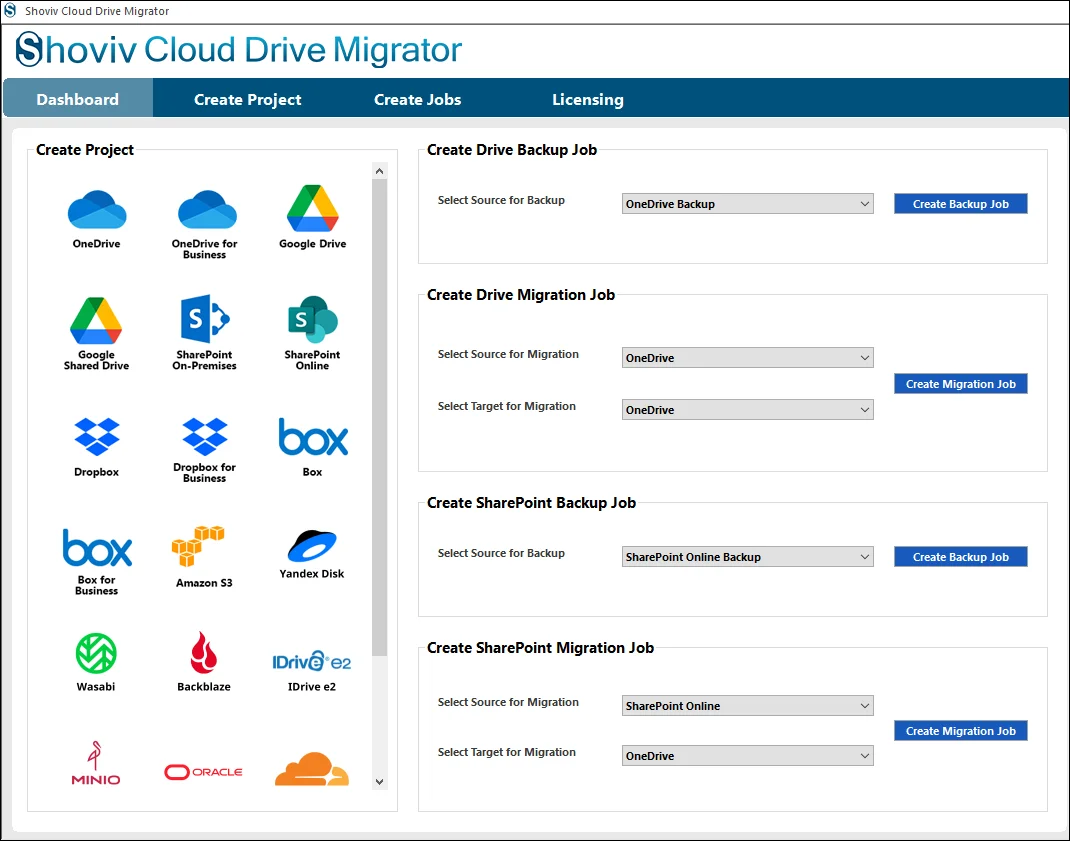
Step 1: Once you have finished downloading and installing Shoviv Cloud Drive Migrator, the application opens with the main interface, from where you need to go to the Create Drive Backup Job.
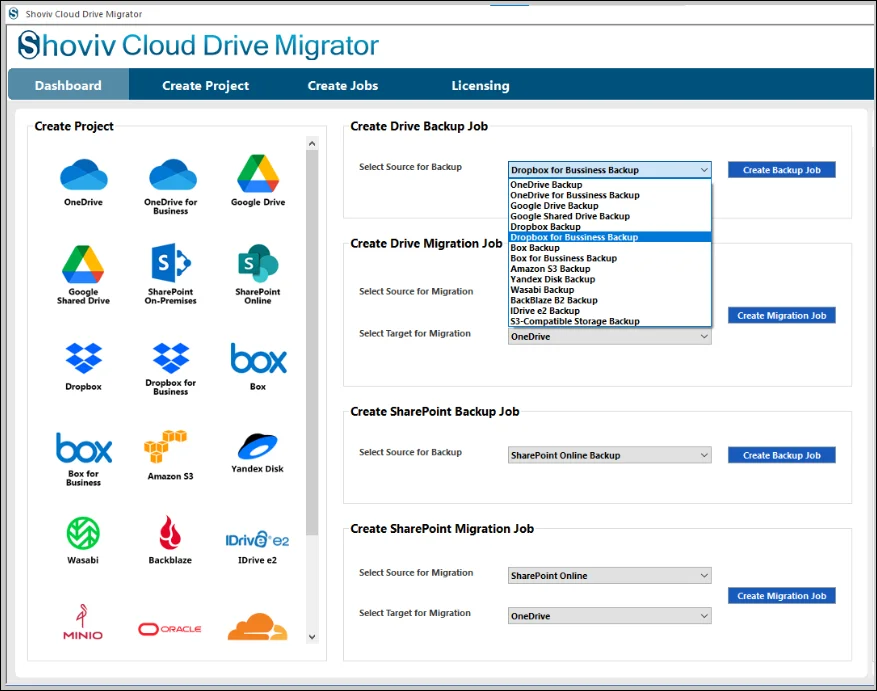
Step 2: In this section you need to select Dropbox (Personal or Business) as the Source destination.
- Click on the Create Backup Job button to complete the first step of the backup process.
Step 3: Give the name of the job in the field of the Job Name section in such a way that it cannot overlap with the other created project. If this happens, you will receive a notification about it.
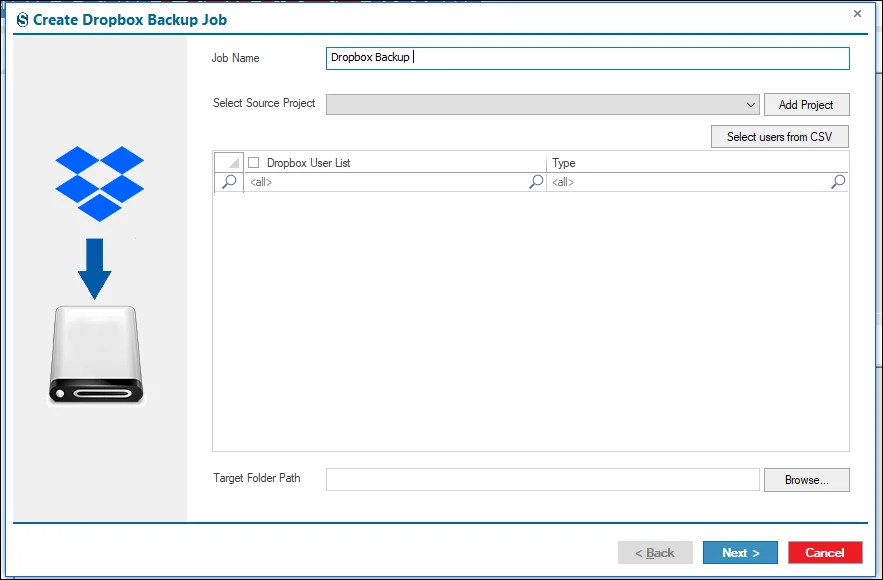
Step 4: Connect with the Source Project.
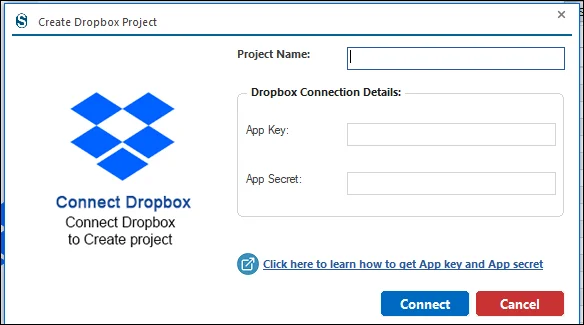
- Click on the Add Project.
- Enter the name of the Project in the Project Name section.
- Personal Dropbox Account: Enter the credentials that are asked for.
- Click on the Connect button.
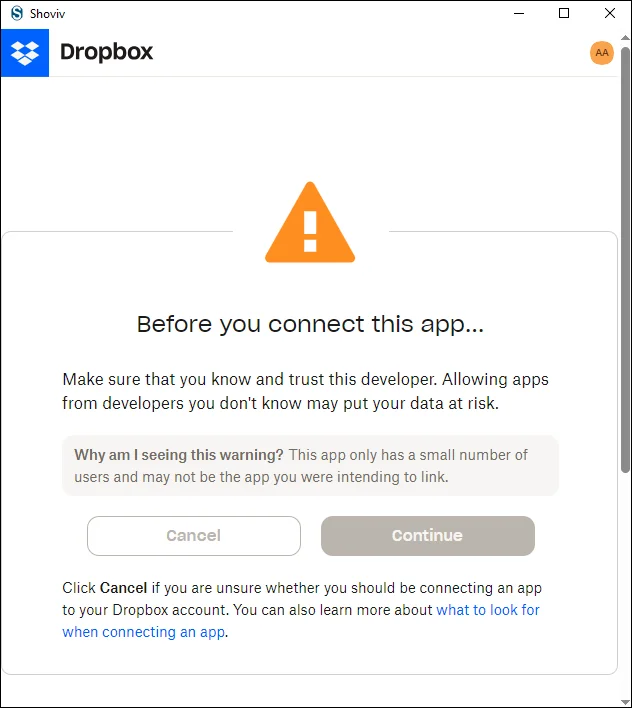
- Another page opens: enter your email Id and password, then click on Continue.
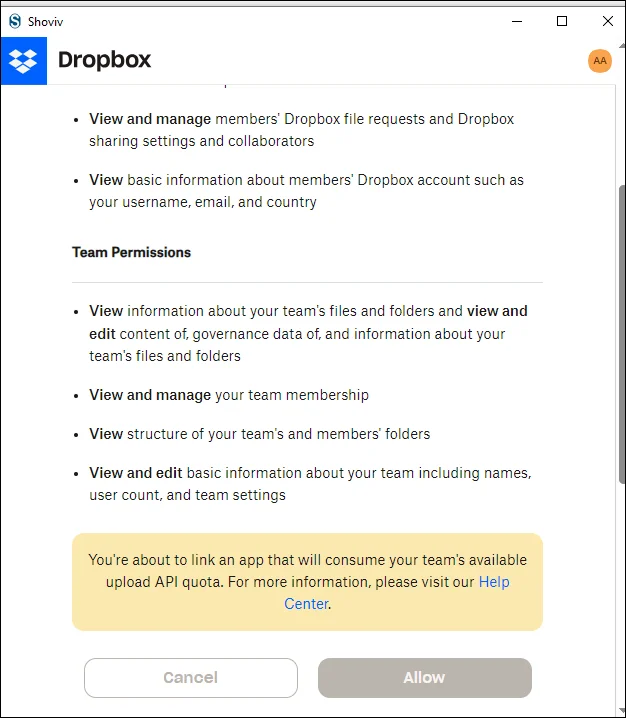
- Click on the Allow button to proceed.
- For details on these credentials, refer to the Shoviv Technical Guide.
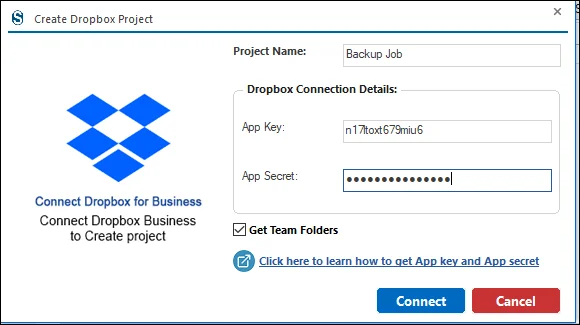
Step 5: Business Dropbox Account: Enter credentials accordingly.
- Optional: Backup team folders by clicking on the Get Team Folders option. Uncheck if not needed.
- Click on the Connect button.
- Refer to Shoviv Technical Guide for better understanding.
Step 6: Enter your email Id and password on the next page and click Continue.
Step 7: Click on Allow to proceed on the following page.
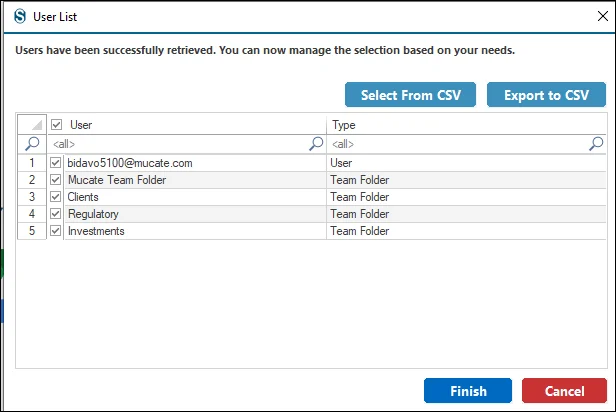
Step 8: Select the source users from the list. For a larger set of users, click Select Users From CSV. You can save them using Export to CSV.
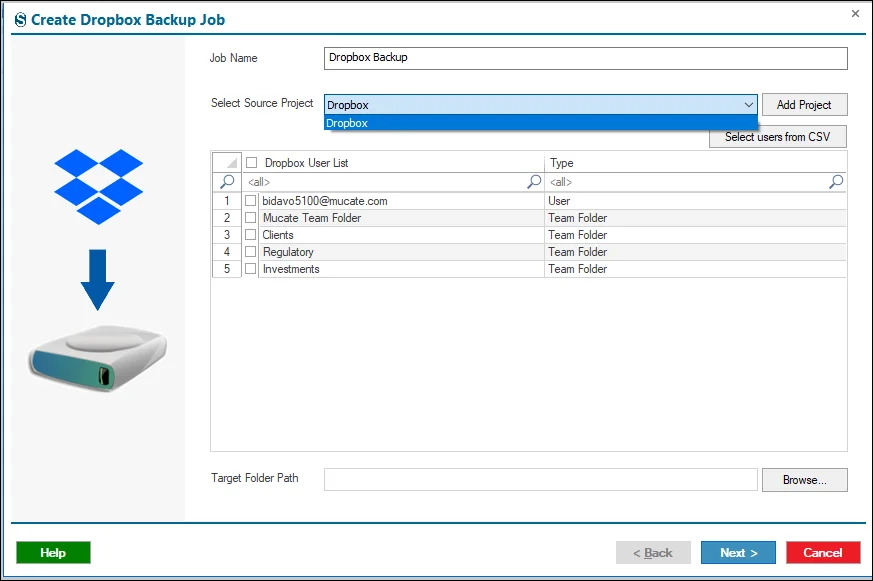
Step 9: If the Source Project exists in your system, select it from the dropdown menu.
- For a larger set of users, click Select Users From CSV.
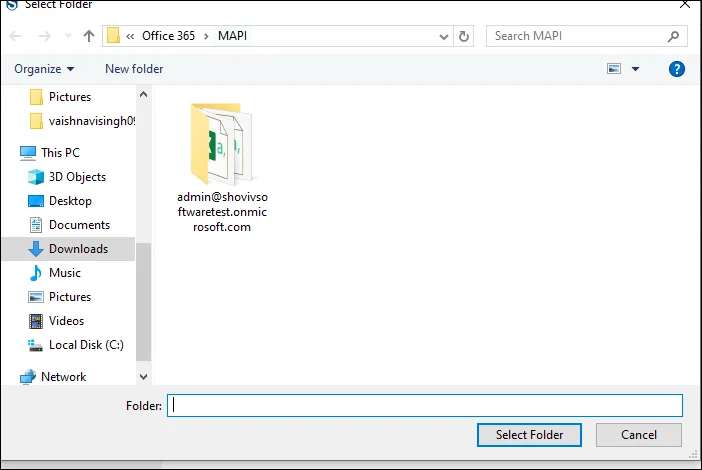
Step 10: Set the Target Folder Path by clicking on Browse.
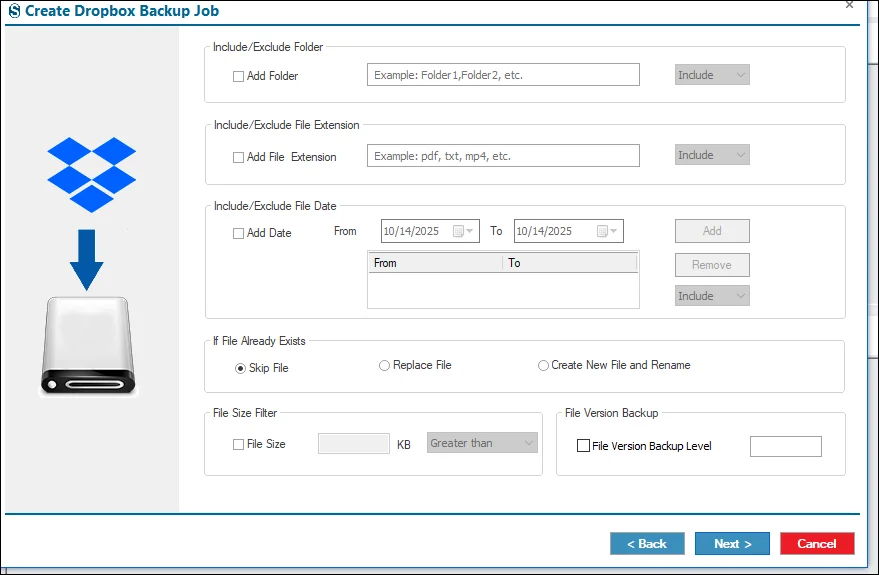
Step 11: Apply the filter options as needed. You can ignore them by clicking Next if not required.
- Date Filter: Backup only files created or modified within a selected date range.
- Folder Filter: Include or exclude specific folders.
- File Size Filter: Set minimum or maximum file size limits.
- File Extension Filter: Include or exclude files based on extensions.
- File Version Backup Level: When this option is enabled, it allows you to back up versioned files. The backup process runs sequentially, starting from the most recent version and proceeding to the oldest version.
Step 12: Configure backup performance and error handling options.
- User Thread Count: Number of users backed up simultaneously.
- Item Thread Count: Number of files/items transferred simultaneously.
- User Login Attempts: Retry count if login fails.
- User Drive Item Retrieve Attempts: Retry attempts if files cannot be retrieved.
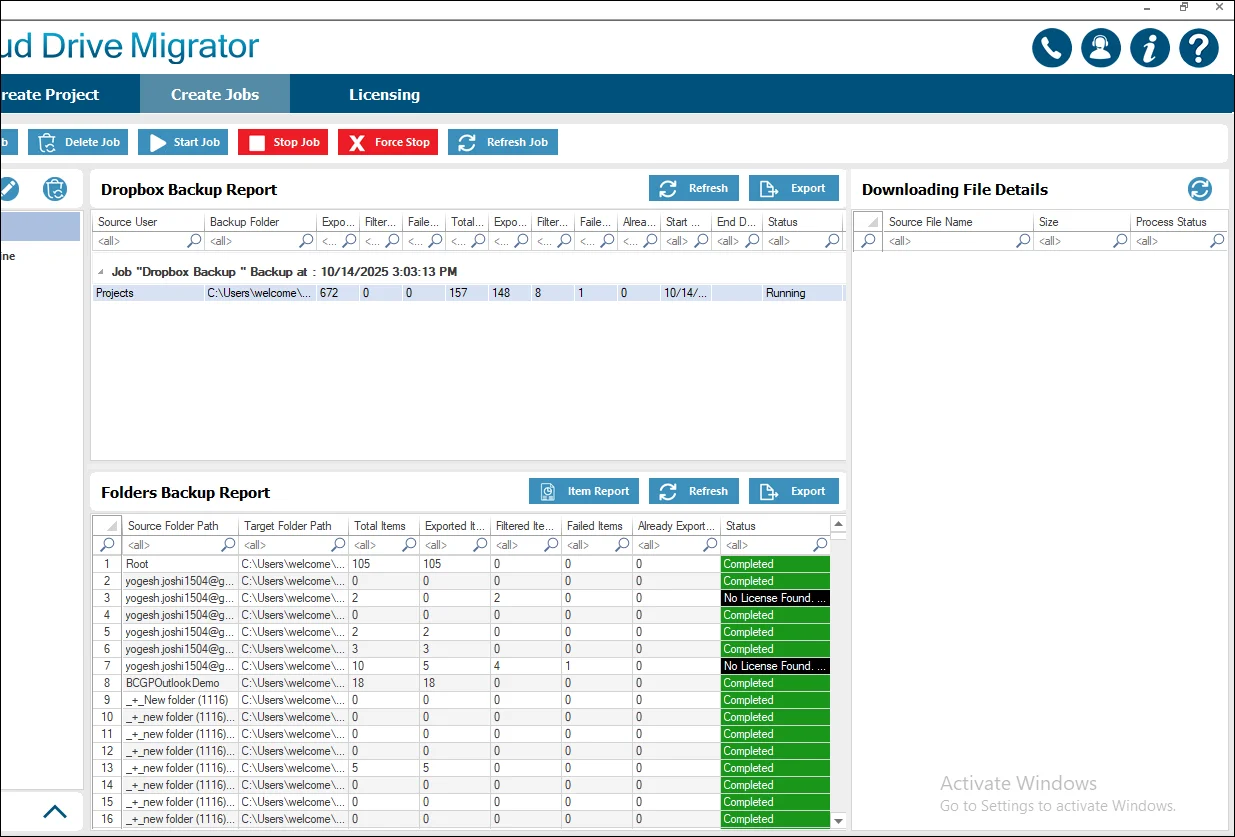
- Exported items’ log report: When this option is enabled, the software creates a log report that lists all items successfully backed up.
- Filtered item’s log report: When selected, this option generates a log report of items that were skipped based on applied filters, such as date range, file size, selected folders, or file extension criteria. It allows users to review which items were excluded and the reasons for their exclusion.
- Already exported items’ log report: By enabling this option, you can access the job report folder containing the log report of items that have already been backed up.
- Note: The software automatically generates a Failed Items Log Report by default. This report contains details of items that could not be backed up due to errors or other issues, regardless of the selected log report options.
- Bad Items Count: Max errors allowed before stopping the backup process.
- Ignore these settings if not needed by clicking Next.

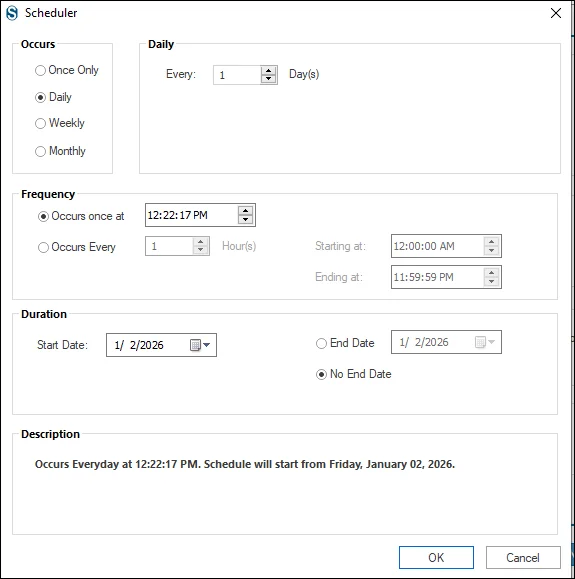
Step 13: Scheduler features allow automation of the backup process. Manual start is still available.
- Immediately: Backup starts as soon as the job is created.
- Set Date & Time: Specify when the backup should start.
- Run Daily: Backup runs every day at the scheduled time.
- Run Weekly: Backup runs once a week based on your schedule.
- Run Monthly: Backup runs once a month at the defined time.
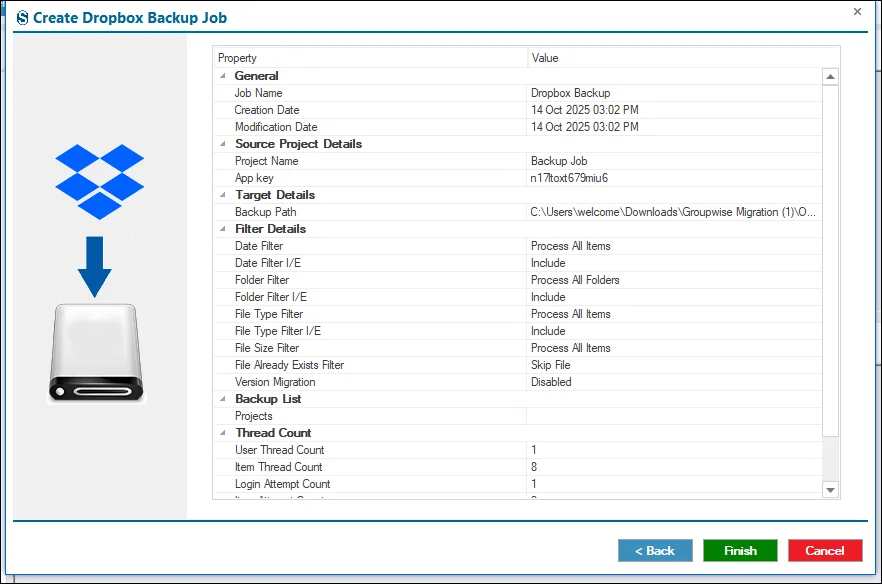
Step 14: Review all backup job details to ensure accuracy.
- Click Back to make changes if needed, or click Finish to complete the backup process.
Step 15: The job runs according to the options selected. For manual runs, click on the Start Job button in the ribbon bar.