Step 1: Install and run the Shoviv Migrator.
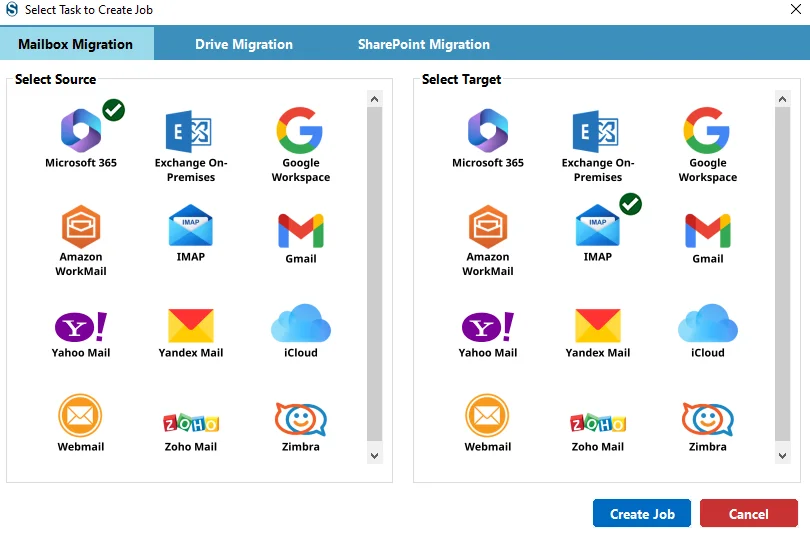
Step 2: From the Job Manager window, select Microsoft 365 under the Select Source, and similarly pick IMAP as the Select Target, and then click on Create Job.
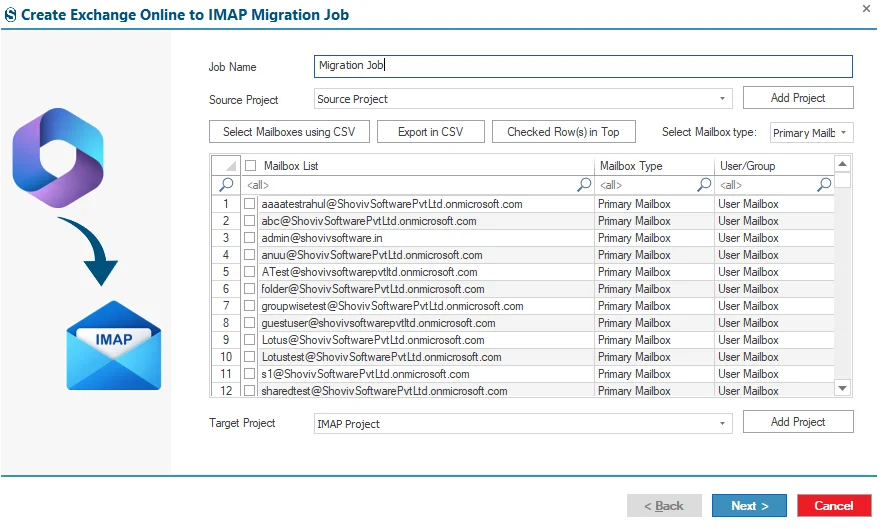
Step 3: Enter the Job Name.
- Select the Source Project which appears in the combo box, and then pick the required mailbox which is populated in the screen.
- In case you want to select the specific mailbox for the migration, then you can do it with the Select Mailboxes using CSV.
- Pick the required Source Mailbox to be involved in the migration process: Primary Mailbox, Archive Mailbox, and Public Folder.
- Select the Target Project from the dropdown menu if you already have the Target Project present in the software.
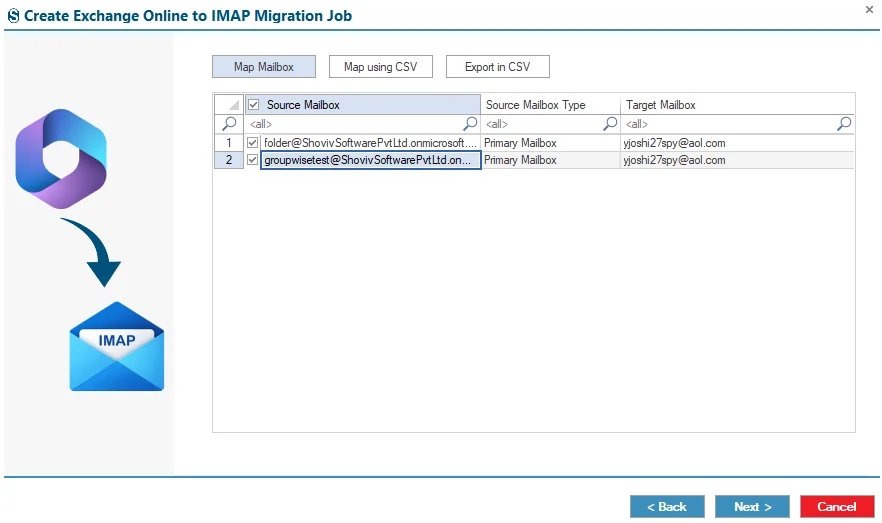
Step 4: Map the Source and Target Mailboxes to each other for accurate migration.
- There are two methods for the Mapping: Manual Mapping and Mapping with CSV.
- Manual Mapping
- Select the Source Mailbox from the displayed list on the screen.
- Next, click on the Map Mailbox.
- Now, pick the required target mailbox for that specific Source Mailbox.
- Click ok after picking the target mailbox.
- Now, after completing the mapping task, click Next to proceed to the next steps.
- Click on the Map Using CSV. If you have a larger list of mappings with this option, you can select the mailbox for the mapping.
- Select the Target Mailbox option by clicking on the Migrate in dropdown menu and then select the Primary Mailbox, Archive Mailbox, and Public Folder.
Step 5: This page allows you to fine-tune your migration process with the user-centric filters, such as Date range, Folder, Emails, Contacts, and Calendars.
- Include/ Exclude Date: Select the date range emails for the specific outcome.
- Include/ Exclude Folder: Pick the specific folders for the migration process.
- Click on the Next button.

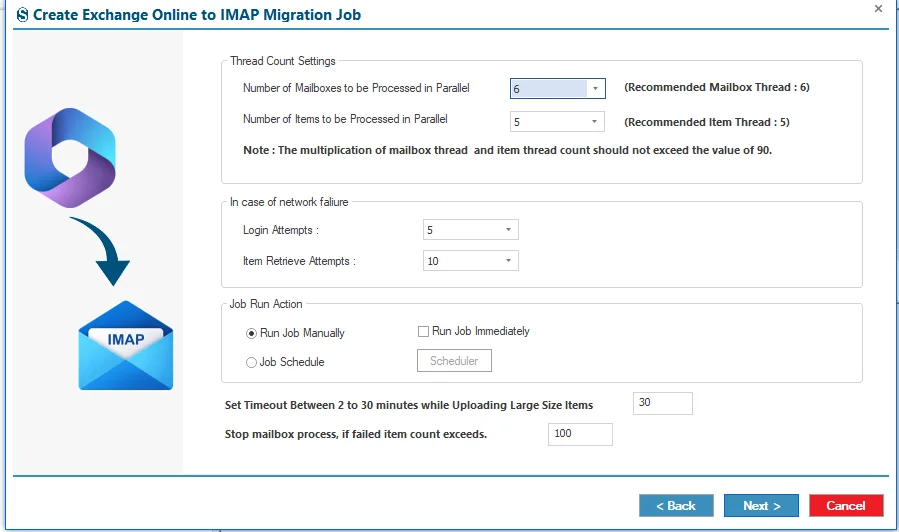
Step 6: You can set the advanced settings for the refinement of the migration process.
- Number of Mailboxes to be Processed in Parallel: Define how many mailboxes should be migrated at the same time.
- Number of Items to be Processed in Parallel: Specify how many mailboxes' items, such as emails or contacts, should be processed at the same time within each mailbox.
- Login Retry Attempt: Set the number of retry attempts if the mailbox login fails because of connectivity or network problems.
- Items Retrieval Attempts: Choose how many times the system should retry fetching mailbox items if retrieval fails during migration.
- Run Manually: Configure the migration and start it later by clicking the Start Job button from the ribbon menu.
- Run Immediately: Start the migration automatically once the setup is complete.
- Scheduler: Schedule the migration for a particular date and time.
- Timeout for Large Item Size: Set a time limit, between 2 and 30 mins, for uploading large mailbox items.
- Bad Item Count: The migration process will stop automatically if the number of failed items exceeds the defined limit.
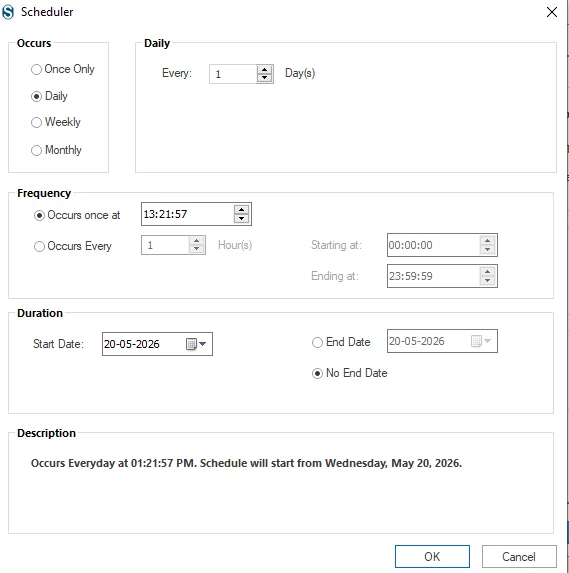
Step 7: Occurs: Choose how often the migration job should run, such as one-time, daily, weekly, or monthly, according to business needs.
- Daily: Configure how many times the job runs each day for continuous or incremental synchronization.
- Occurs Once At: Set a specific time for the migration process to start and manage server workload efficiently.
- Start Date: Select the date from which the scheduled migration will begin.
- End Date / No End Date: Decide whether the schedule should stop on a particular date or continue indefinitely.
- Description: Add notes or details about the scheduled migration setup for easy identification and review.
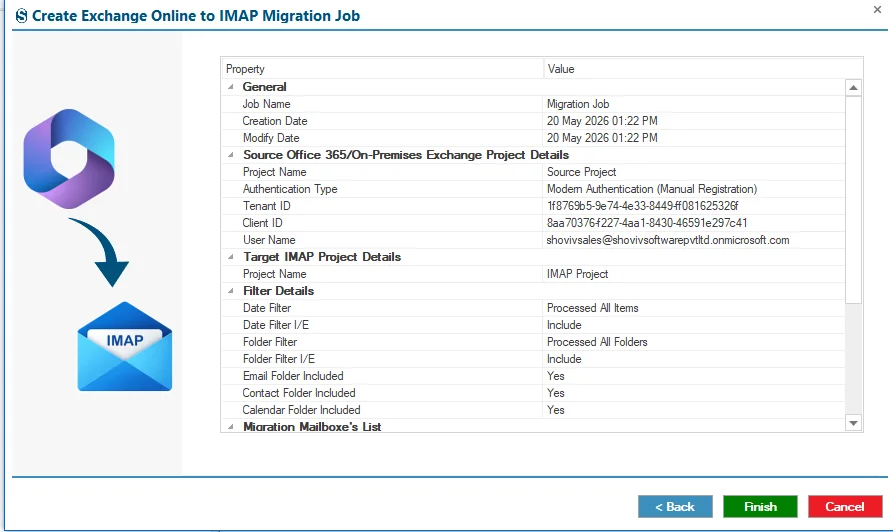
Step 8: Review all migration settings carefully. If any changes are needed, use the Back button; otherwise, click Finish to proceed.
Step 9: The migration will run according to the selected filters and configuration settings. If you selected the manual option, you must click the Start Job button to begin the process.


