Step 1: Install and launch the Shoviv Migrator.
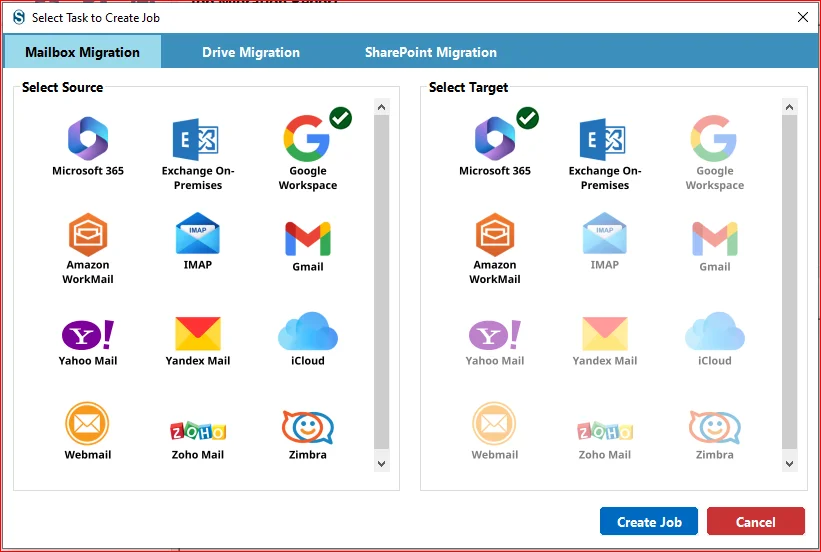
Step 2: Open the Job Manager section and click Create Job from the ribbon bar.
- Select Mailbox Migration as the migration category.
- Under Select Source, choose Google Workspace.
- Under Select Target, choose Google Workspace.
- Click Create Job to proceed.
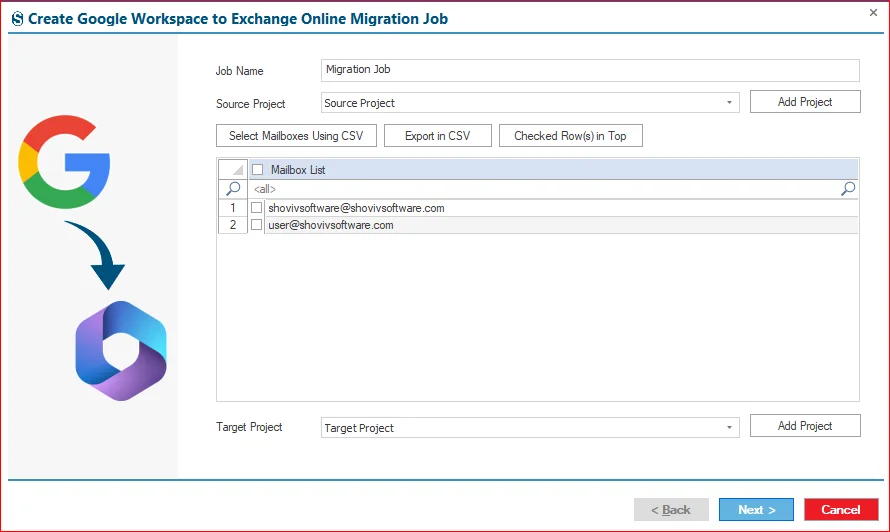
Step 3: Enter an appropriate Job Name.
- Click Add Project to configure the Source Project.
- Create the Source Project by following the Google Workspace connection instructions: https://www.shoviv.com/how-it-works/shoviv-migrator/google-workspace-to-imap.html
- If needed, use Select Mailboxes from CSV to import selected mailboxes.
- Click Add Project to connect with the Target Project.
- Complete the Target Connection setup using the provided connection guide: https://www.shoviv.com/how-it-works/shoviv-migrator/google-workspace-to-imap.html
- Choose the Target Project from the dropdown menu and click Next to continue.
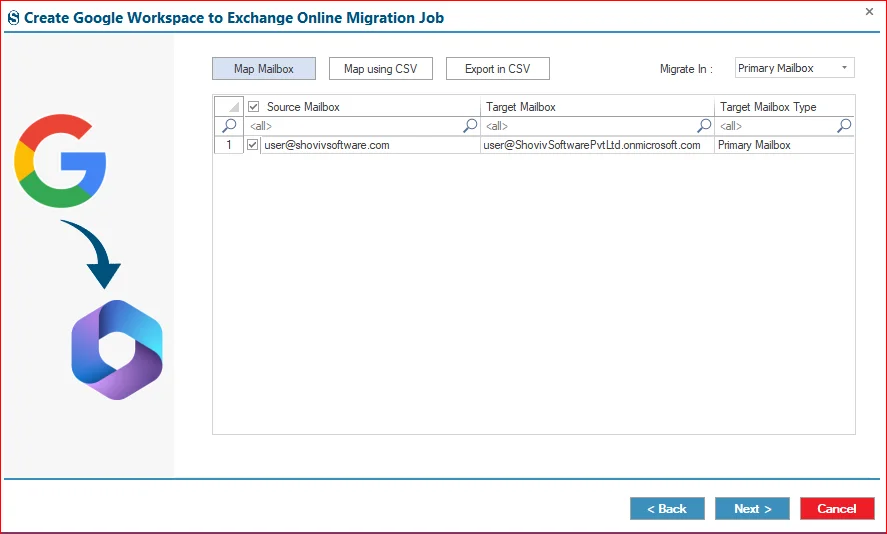
Step 4: Use the mailbox mapping options to associate source mailboxes with destination mailboxes:
- Map Mailbox: Manually map source and target mailboxes.
- Map using CSV: Import mailbox mapping details through a CSV file.
- Export in CSV: Export the existing mailbox mapping list.
- Select the migration destination:
- Primary Mailbox
- Archive Mailbox
- Public Folder
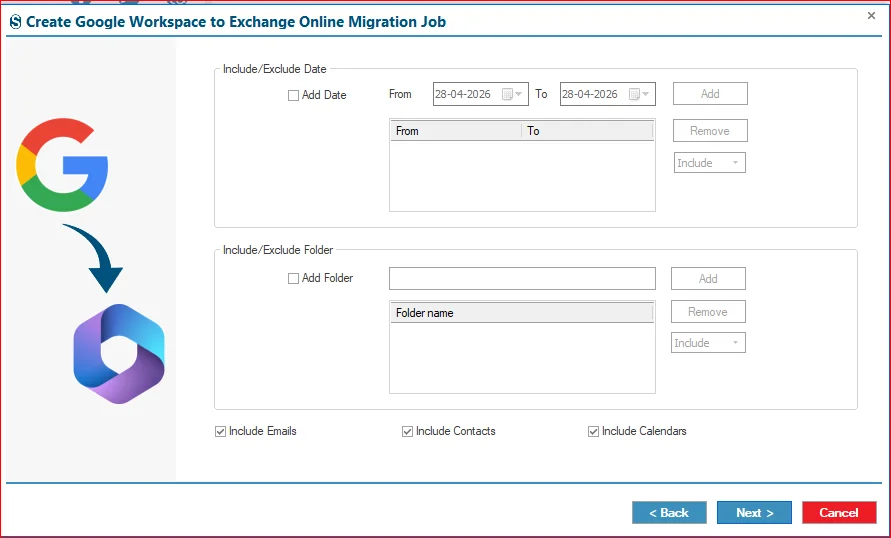
Step 5: Configure migration filters and selective migration settings:
- Include/Exclude Date: Migrate data within a specific date range or skip selected dates.
- Include/Exclude Folder: Include required folders or exclude unnecessary folders.
- Click Next to continue.
Step 6: Configure advanced migration settings:
- Number of Mailboxes to be Processed in Parallel: The number of mailboxes processed at the same time.
- Number of Items to be Processed in Parallel: Number of items processed per mailbox at the same time.
- Login Attempts: Specifies the retry attempts if the mailbox login fails due to network interruptions.
- Login Reterive Attempts: Determines the number of retries when the item retrieval fails.
- Job Execution Options.
- Run Manually.
- Run immediately after setup.
- Scheduler for later.
- Set a timeout (2-30 minutes) for large item uploads.
- Stop mailbox processing if failed items exceed a defined limit by the users.

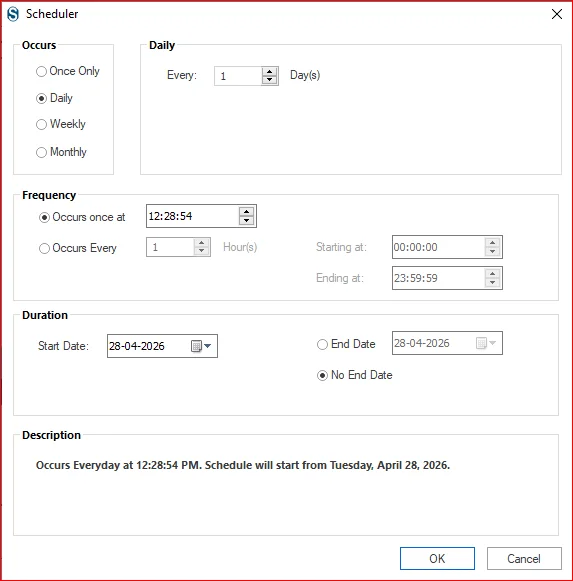
Step 7: Define when and how often the migration runs:
- Occurs: Once, Daily, Weekly, or Monthly.
- Daily Interval: Set frequency for daily runs
- Occurs Once At: Run multiple times within a time window
- Start Date: When the schedule begins
- End Date / No End Date: Define schedule duration
- Description: Displays a summary of the schedule
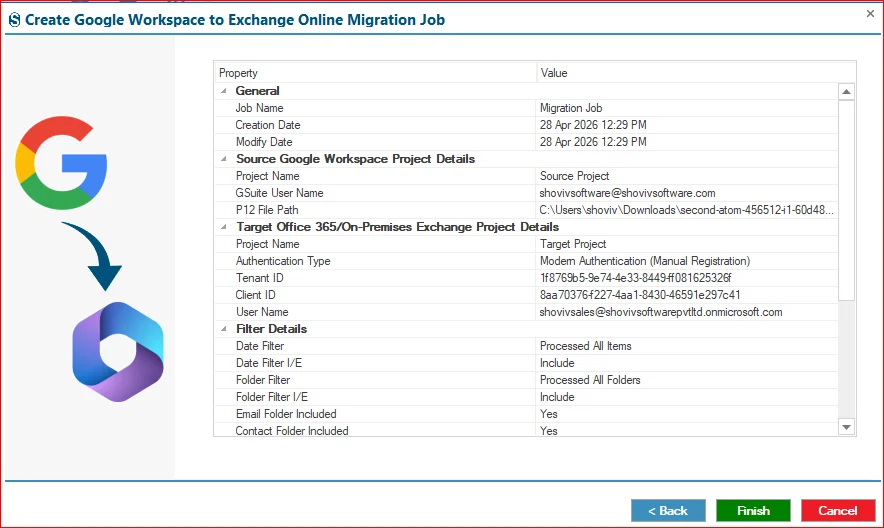
Step 8: Check all the configured settings. If you need to make changes, click Back. Otherwise, click Finish to finalize the setup.
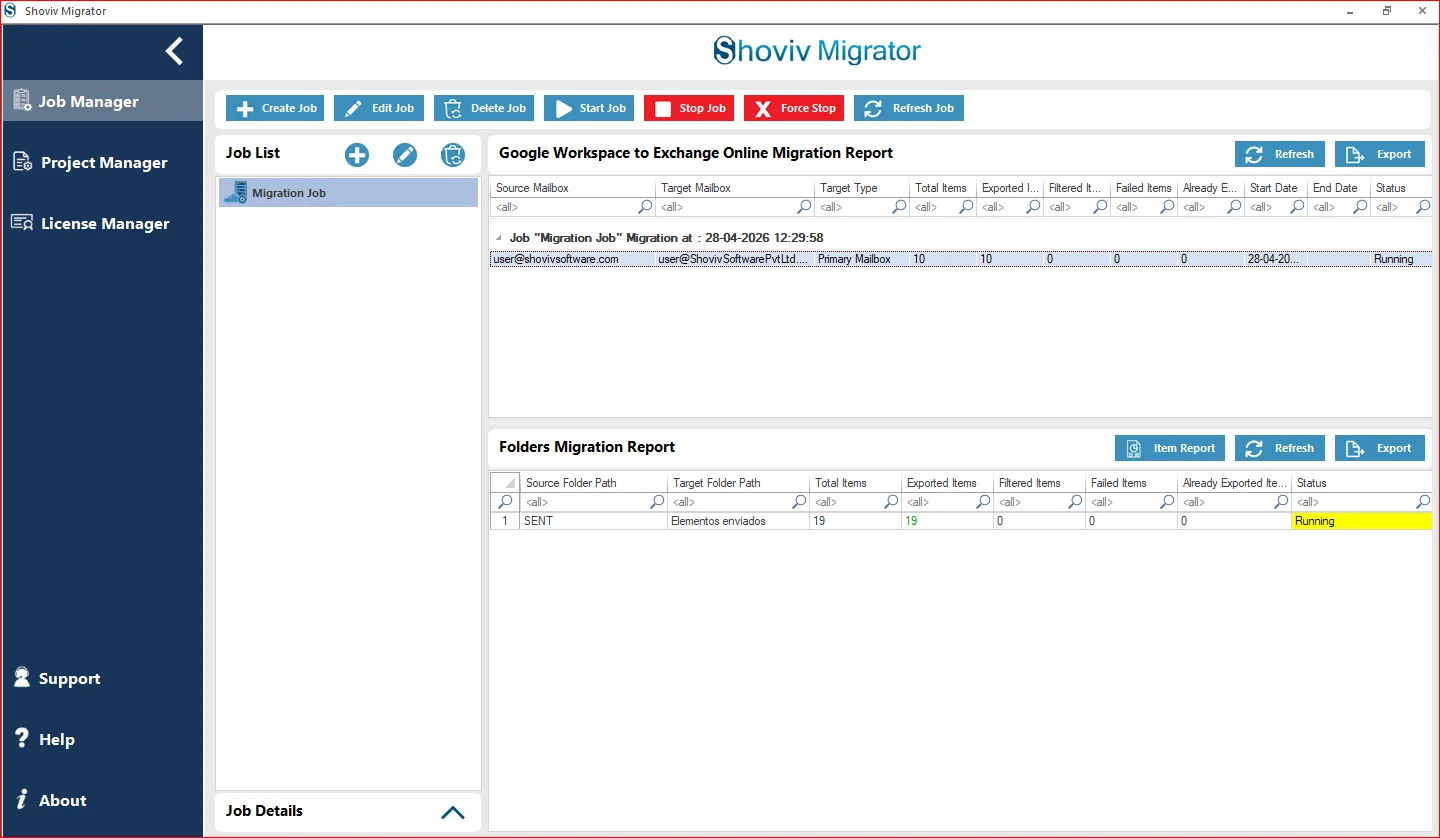
Step 9: The migration will run based on the selected job creation. If you chooseRun Job Manually, click onStart Job to begin the process.