“If you’re searching for an efficient way to migrate Rogers email to Gmail, this guide provides the complete solution. Here, we will cover both manual and automated approaches to help you migrate Rogers emails without data loss. Whether you’re switching platforms for better features, security, or convenience, this step-by-step guide will help you accomplish the Roger to Gmail migration easily and efficiently.”
Rogers Communications offers email services to its subscribers along with internet, wireless, TV, and other communication solutions. However, many users prefer switching to Gmail—Google’s highly popular platform known for its reliability, advanced search capabilities, superior security, and seamless integration with other Google applications. Due to storage limits, downtime issues, and restricted accessibility in Rogers, users often choose Gmail for a better email experience.
Before beginning the migration, it’s important to understand why many users switch and choose Gmail over Rogers Mail.
Reasons to Migrate Rogers Email to Gmail :
Users commonly transfer from Rogers to Gmail because Gmail offers:
- Better Integration & Productivity – Syncs with Google Drive, Meet, Calendar, Docs, and other Google apps.
- Superior Spam filtering – Keeps your mailbox cleaner and more organised.
- Strong security – Two-factor authentication, TLS, and advanced anti-phishing protection.
- Higher Reliability – Google’s infrastructure ensures minimal downtime and stable performance.
- Better accessibility – Works smoothly on any device or browser through the Gmail app or web interface.
- Fast Performance – Faster loading, searching, and processing compared to Rogers email.
- More storage – 15 GB free cloud space shared across Google services.
- Multiple Add-ons– Gmail supports multiple add-ons and extensions to boost performance.
Now that you know why many users switch from Rogers to Gmail, let’s explore the available methods for Rogers Email to Gmail Migration in the next section.
Manual Methods to Transfer Rogers Email to Gmail
Method 1: Import Rogers Email to Gmail
It is the simplest manual method using Gmail’s built-in Import mail and contacts feature. Here are the steps:
- Log in to your Gmail account.
- Click Settings (gear icon) > See all settings.
- Go to the Accounts and Import
- Clicks Imports mail and contacts.
- Enter your Rogers email address, then click Continue.
- Allow the permission request and click Agree.
- Press Start Import to begin transferring your Rogers mailbox.
Done! Your Rogers email account is now successfully added to Gmail.
Drawbacks of this Method:
- Very slow for large mailboxes and may take 2-3 days to complete the import.
- Risk of losing metadata such as labels and read/unread status, with no guarantee of preserving folder structure.
- Not ideal for frequent migrations or business/corporate-level transfers.
Now we move ahead to the professional solution to perform this migration.
Method 2: Migrate Rogers Email to Gmail Using IMAP Access
This method involves manually linking your Rogers account with Gmail using IMAP. Here are the steps:
Step 1. Enable IMAP in Rogers Email
- Log in to your Rogers webmail.
- Open Settings.
- Locate IMAP/POP settings.
- Enable IMAP.
Step 2. Add Rogers Email to Gmail
- Go to Gmail and click Settings > See all settings.
- Open the Accounts and Imports
- Under Check mail from other accounts, click Add a mail account.
- Enter your Rogers email address.
- Select IMAP and proceed.
Step 3. Enter Server Settings
Use these Rogers IMAP settings:
- IMAP Server: mail.yahoo.com
- Port: 993
- SSL: Yes
- Username: Your full Rogers email address
- Password: Your account password (or app password if required).
Step 4. Fetch Emails
- Gmail will now begin fetching your Rogers emails.
- It may take time, depending on the mailbox size.
Step 5. Move Emails to Gmail Folders
You can organize your emails by:
- Creating Gmail folders matching your Rogers structure.
- Dragging/dropping emails to respective folders.
Step 6. Verify Data
- Ensure all important emails and attachments are properly imported.
Step 7. Set Up Email Forwarding
- Enable auto-forwarding in Rogers Webmail if you want all future incoming mail to land in Gmail.
Setup complete! Your Rogers email is now connected to Gmail.
Drawbacks of this Method:
- Requires manual, time-consuming folder organisation with no selective migration option.
- Needs technical understanding of server settings and configuration.
- High chance of mistakes that can cause incomplete or failed migration.
These are the manual methods to migrate Rogers email to Gmail. However, these approaches demand both technical skill and considerable time. It also carries a significant risk of data loss. To ensure a smooth and secure migration without interruptions, proceed to the next section.
Migrate Rogers Email to Gmail Professionally
The Shoviv IMAP to IMAP Migration Tool provides the most reliable and efficient way to migrate your emails from Rogers Mail to a Gmail account. It enables direct IMAP-to-IMAP transfer with complete folder hierarchy, zero data loss, and advanced filtering options. This tool is ideal for migrating large mailbox data, multiple user accounts, or selective folders without downtime or technical complexity.
Advanced Features of Shoviv IMAP to IMAP Migration Tool
- Supports migration between all IMAP email services (Gmail, Yahoo, Zoho, iCloud, etc.).
- Fast and time-saving migration engine.
- Allows adding and migrating multiple mailboxes simultaneously.
- Preserves folder structure and email integrity.
- Includes an incremental export feature to prevent duplicates and resume incomplete jobs.
- Offers advanced filters (Date Range and Folders).
- Enables folder selection and custom migration jobs.
- User-friendly GUI suitable for beginners and non-technical users.
Migrate Rogers Emails to Gmail: A Step-by-Step Guide
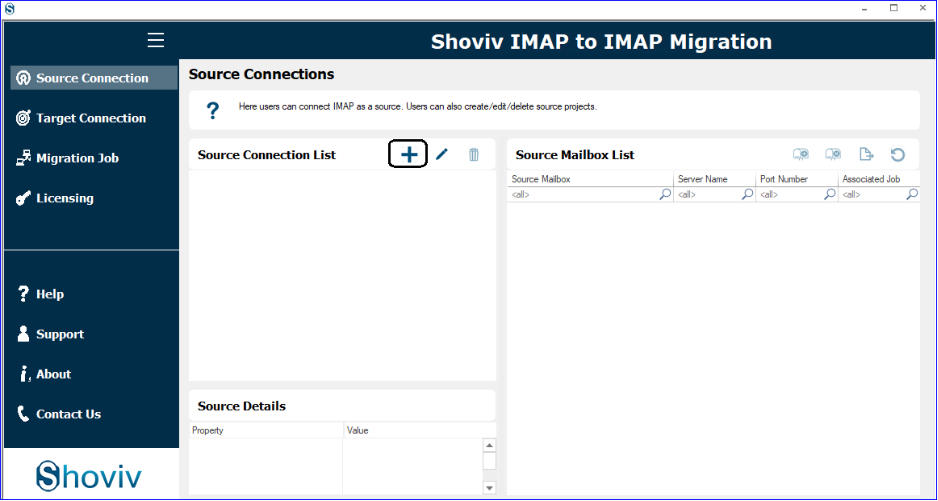
- Install and launch the Shoviv IMAP to IMAP Migration Tool.
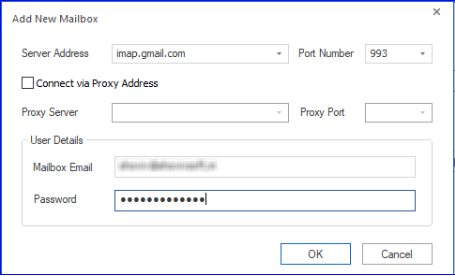
- Create a Source Connection using adding Rogers IMAP details (server, port, email, password).
- Add a Target Connection using your Gmail IMAP credentials.
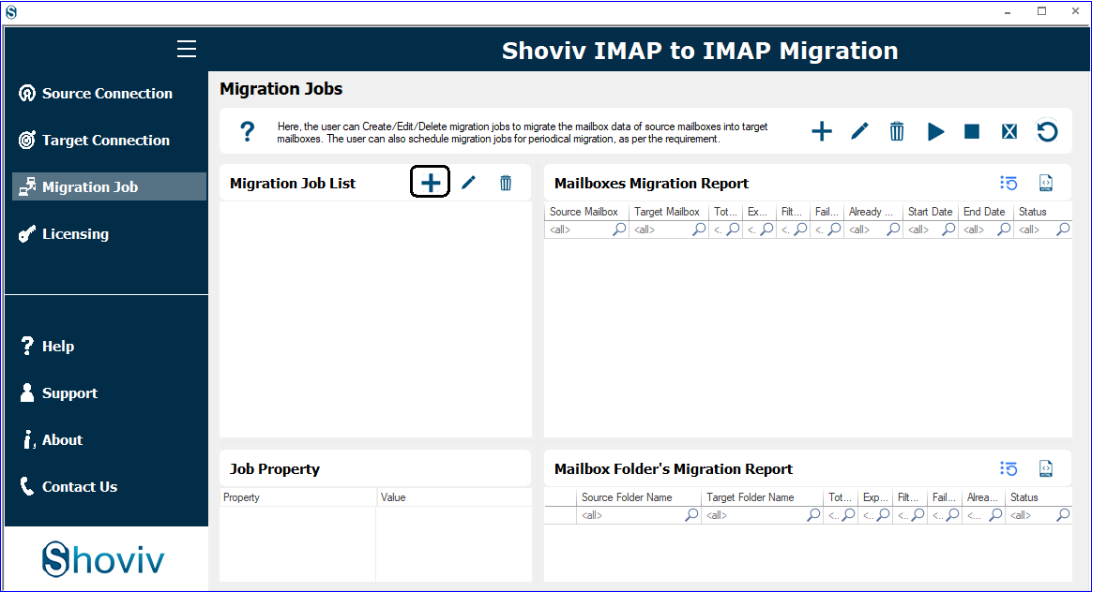
- Go to Migration Job and create a new job.
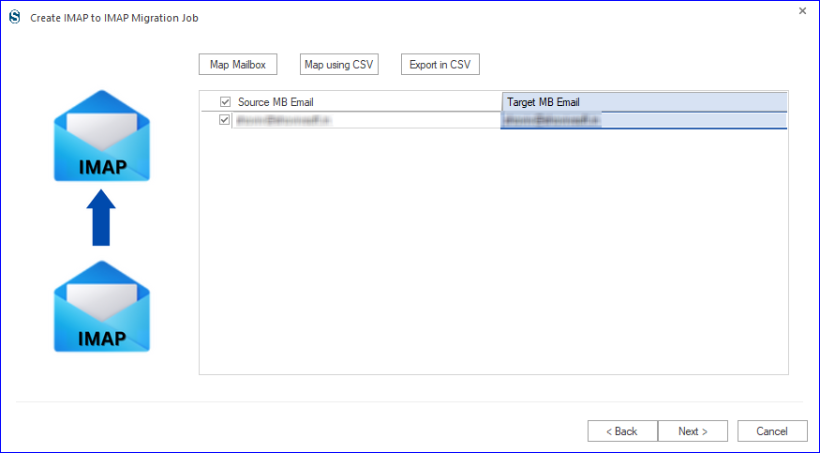
- Select and map the Rogers source mailbox to the Gmail target mailbox.
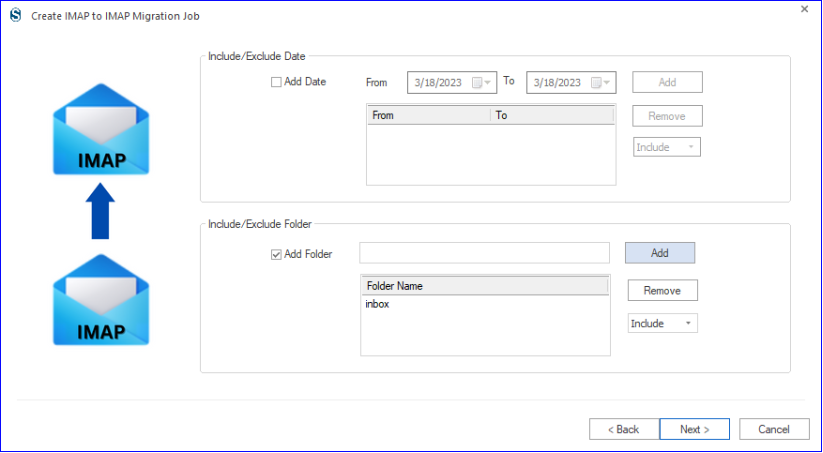
- Apply optional filters like date range or specific folders.
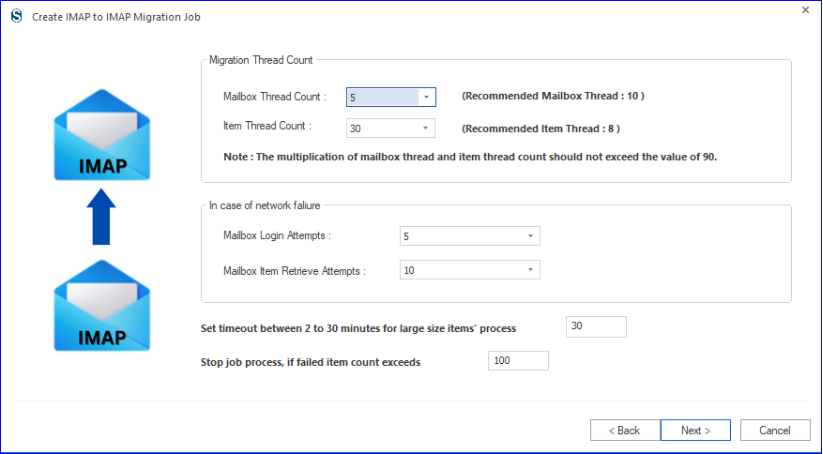
- Adjust advanced settings (thread count, login attempts, etc.).
- Run or schedule the job, review the summary, and start the migration.
Conclusion
This guide explained how to migrate Rogers email to Gmail using both manual and automated solutions. While manual methods are free, they are time-consuming, technically challenging, and prone to errors—especially for large mailboxes. For a secure and complete Rogers emails to Gmail migration professional method is best for email transfer.
You can also try its free demo to migrate 50 items from each Rogers folder and verify the tool’s performance before purchasing.
Frequently Asked Questions:-
Yes, the Shoviv tool supports batch migration of various Rogers accounts to Gmail.
Yes, the tool allows selecting specific folders before migration.
Shoviv provides 24*7 free technical assistance to users. You can ping us through live chat or write to us at support@shoviv.com.
Yes, you can check. A free demo version of this utility is also available to download. It allows processing the first fifty items per folder.