Go through the Below Shared Steps to Create a Client ID and Secret key for Personal Google Drive:
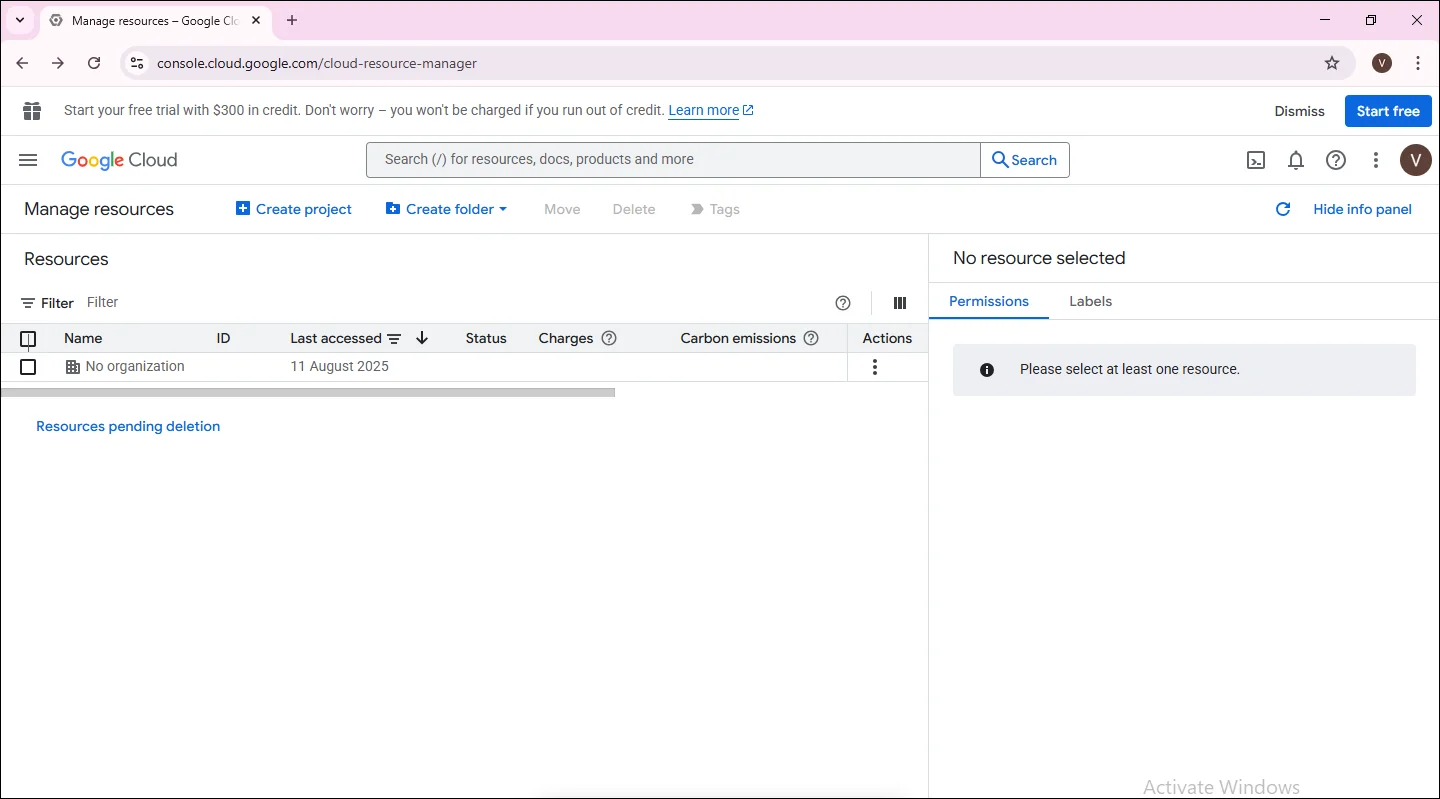
1. To initiate the process of creating credentials, first sign in to Google Cloud Resource Manager then click the Create Project button.
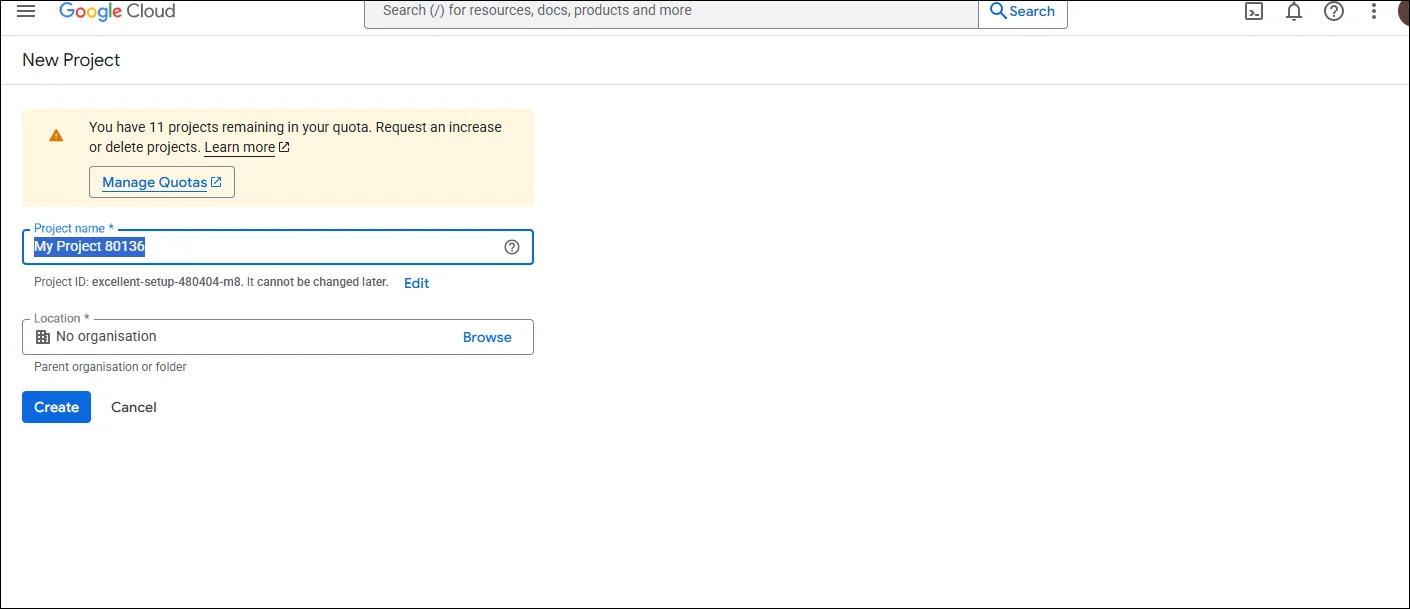
2. After clicking on the button, the new page opens where you need to enter the name of the project under the Project Name section. After that, you need to select the location in the other section with the help of the Browse.
3. Click on the Create button to complete the project creation process.
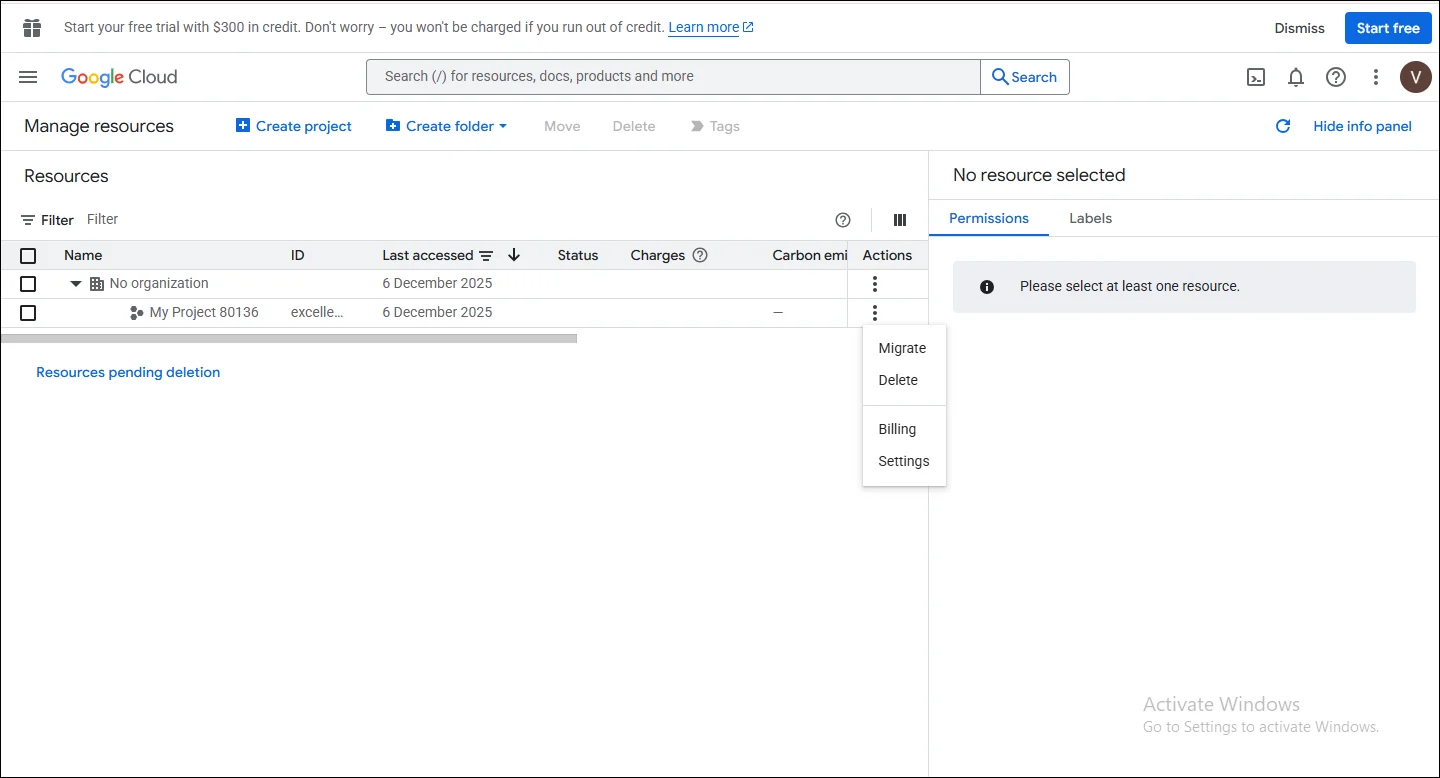
4. After creating your project, click the three dots next to it and select Settings.
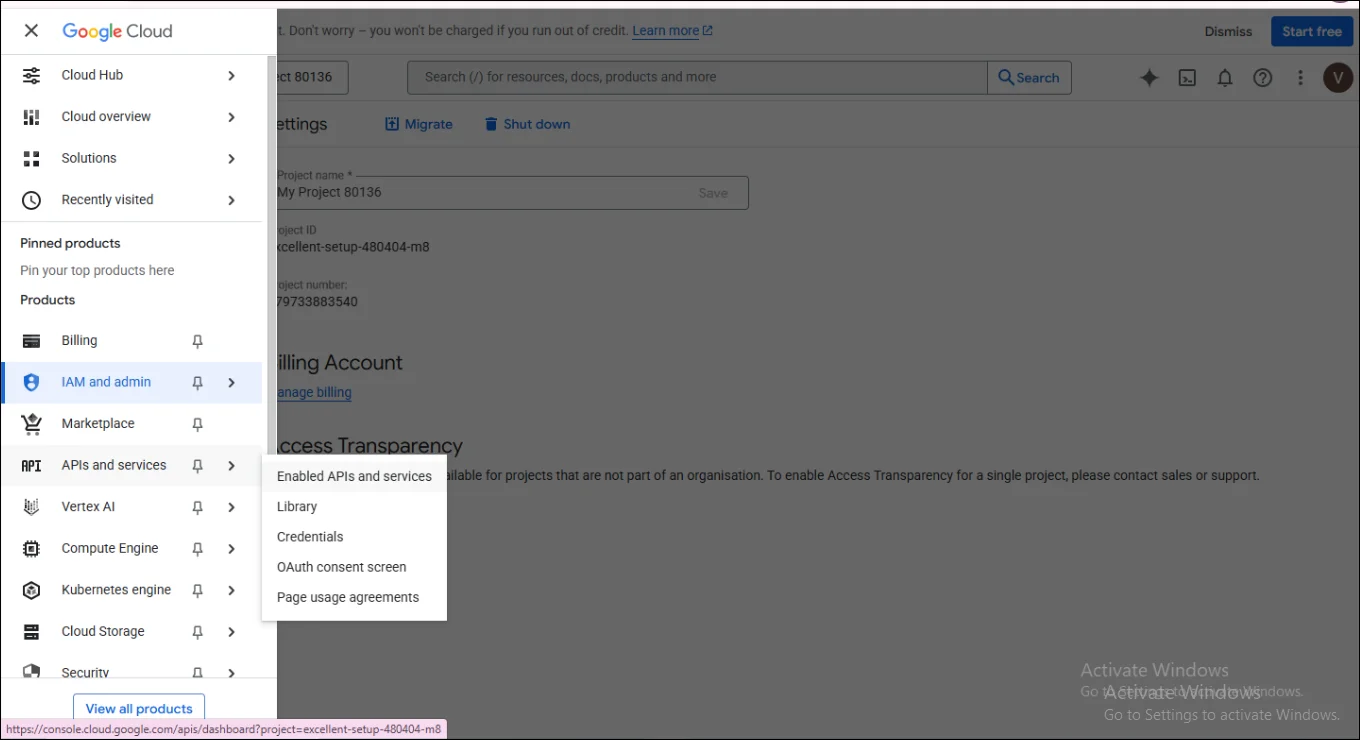
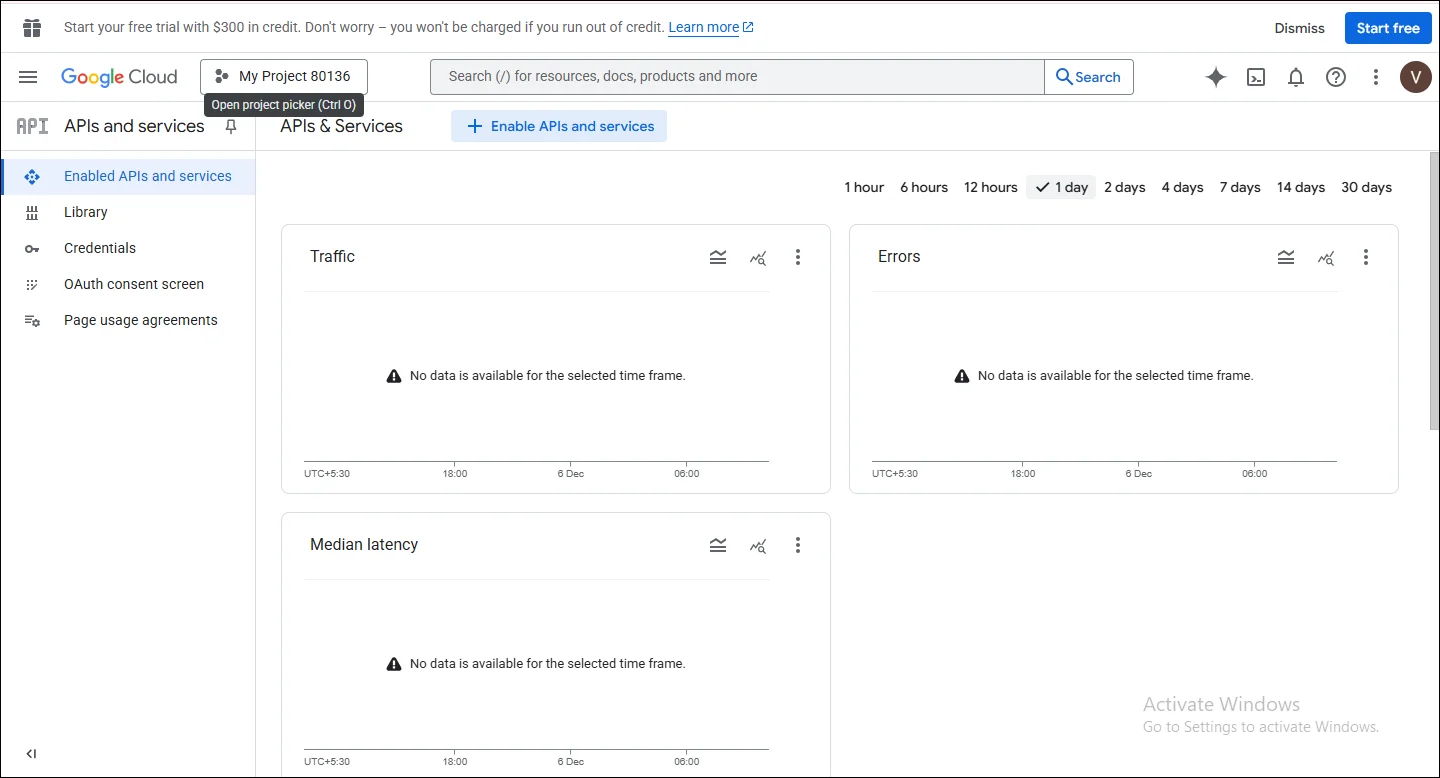
5. At this point, you need to click on the menu option, hit the APIs and Services option, where the other section is open, and from that, you need to select the Enable APIs and Services.
6. Once the new page opens, click on Enable APIs and Services..
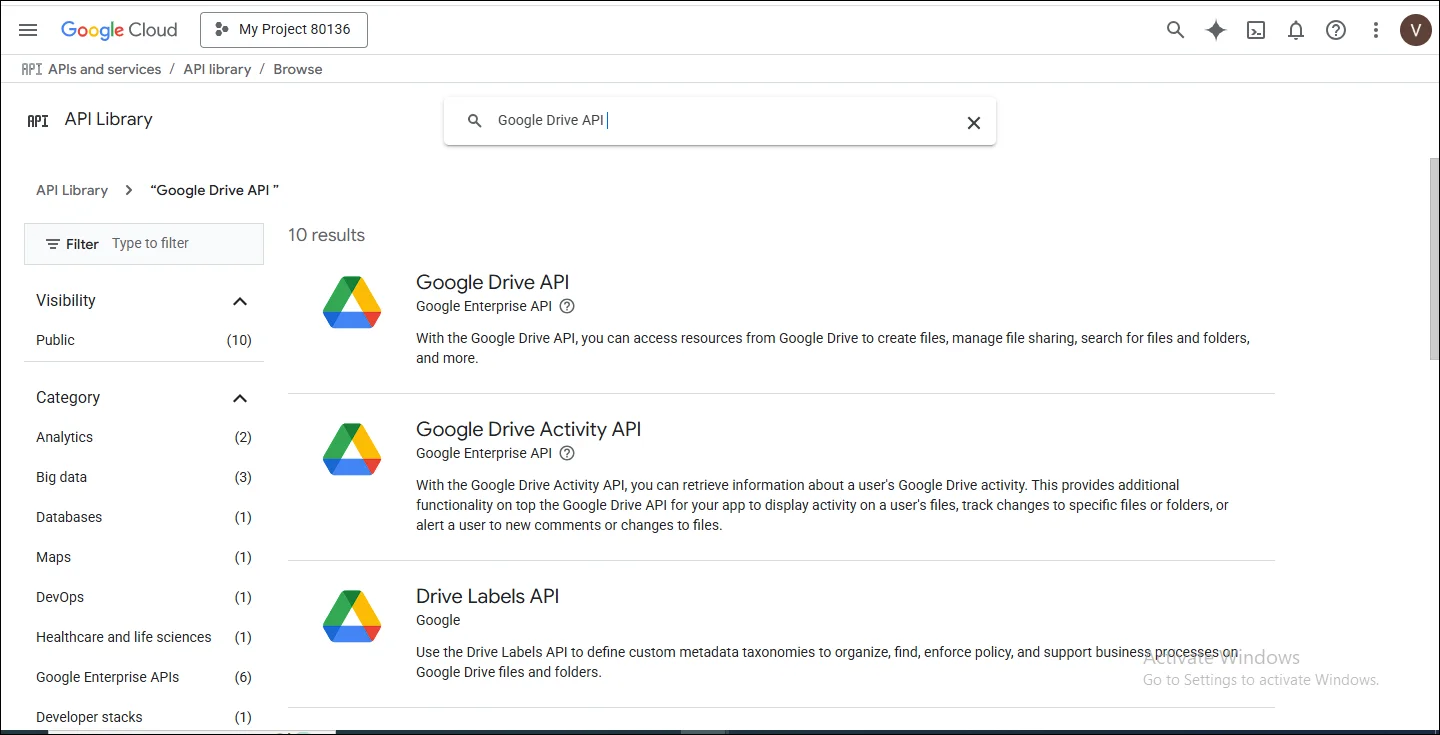
7. Here, type Google Drive API into the search bar.
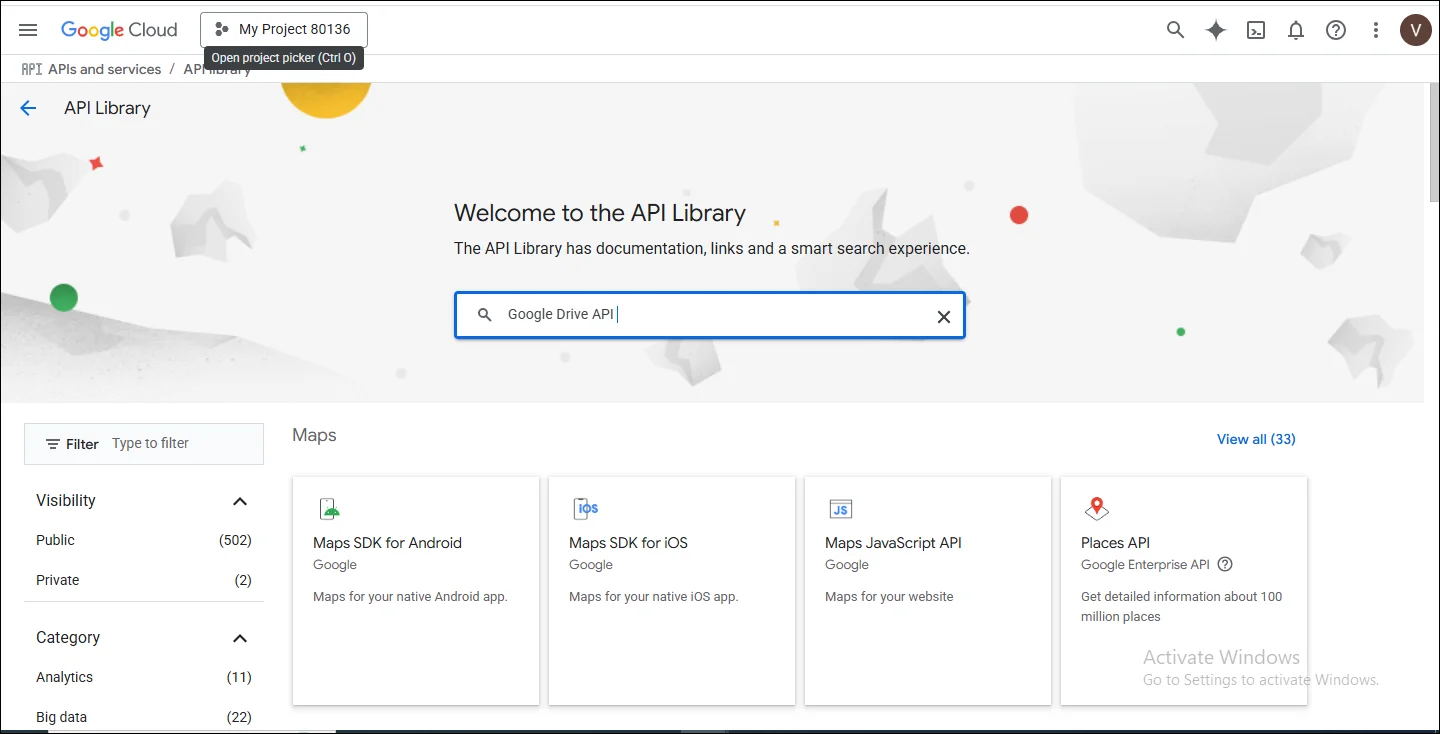
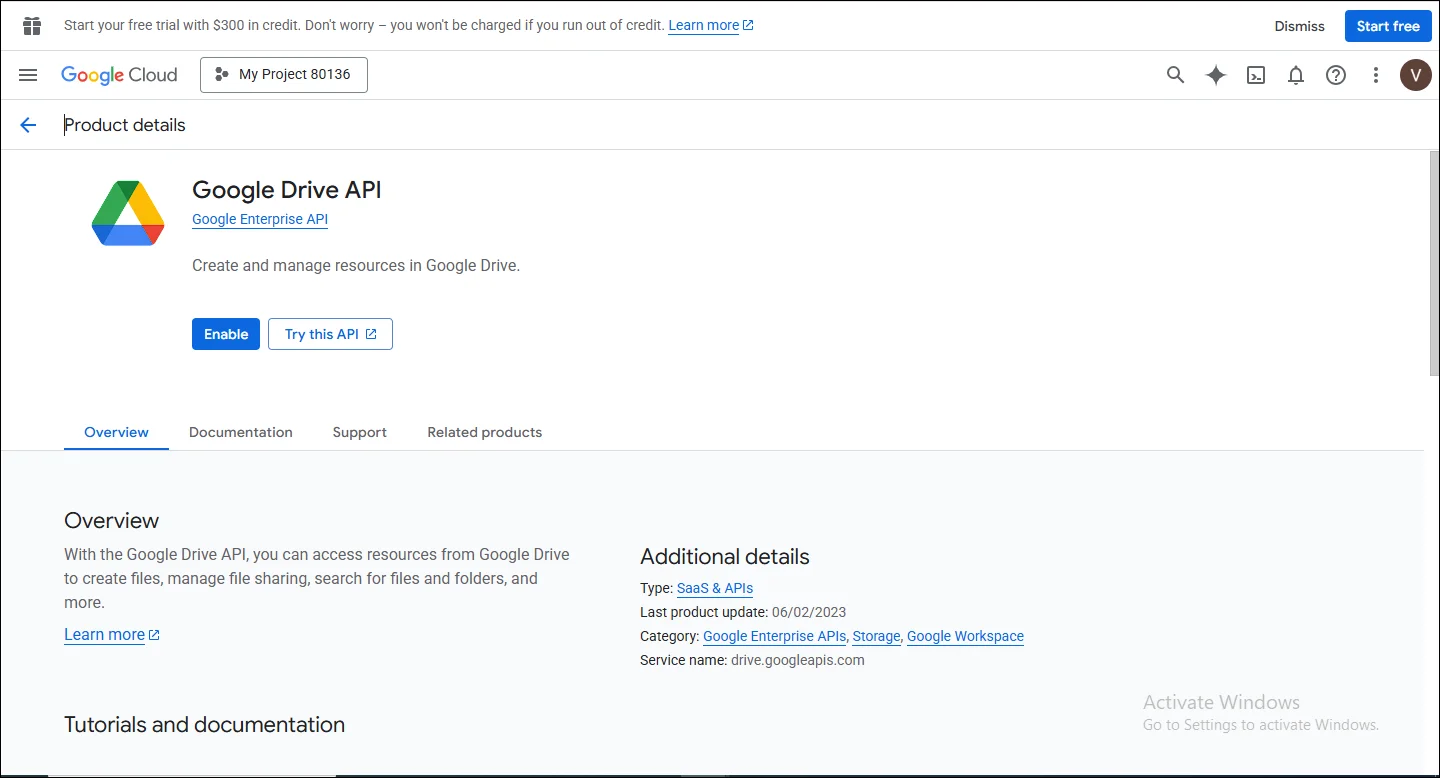
8. Select the Google Drive API.
9. On this page, click the Enable button.
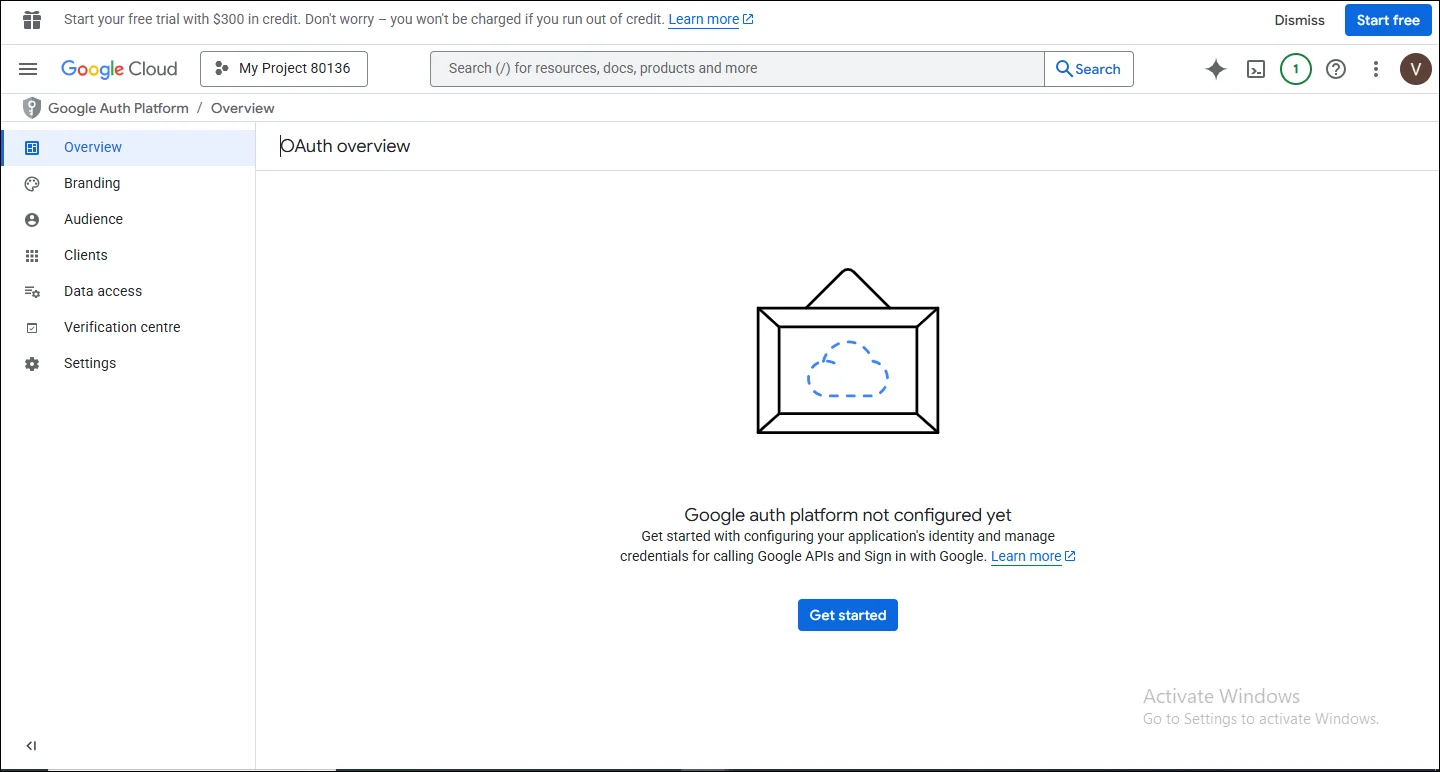
10. Once the enabling process is complete, you will see various options. From these, select the OAuth Consent screen.

11. When you reach the OAuth Overview page, press the Get Started button.
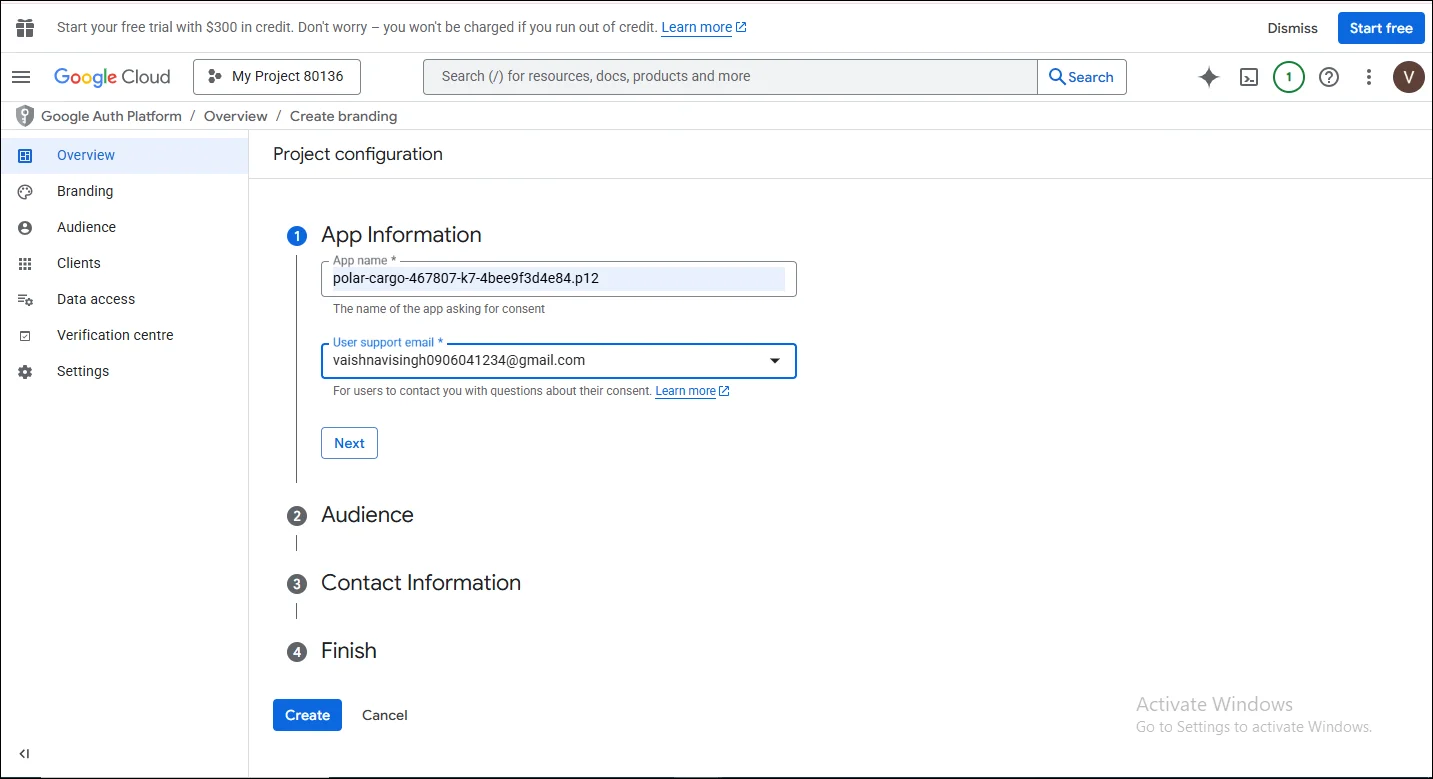
12. Provide App Information such as the app name and user support email, then click Next.
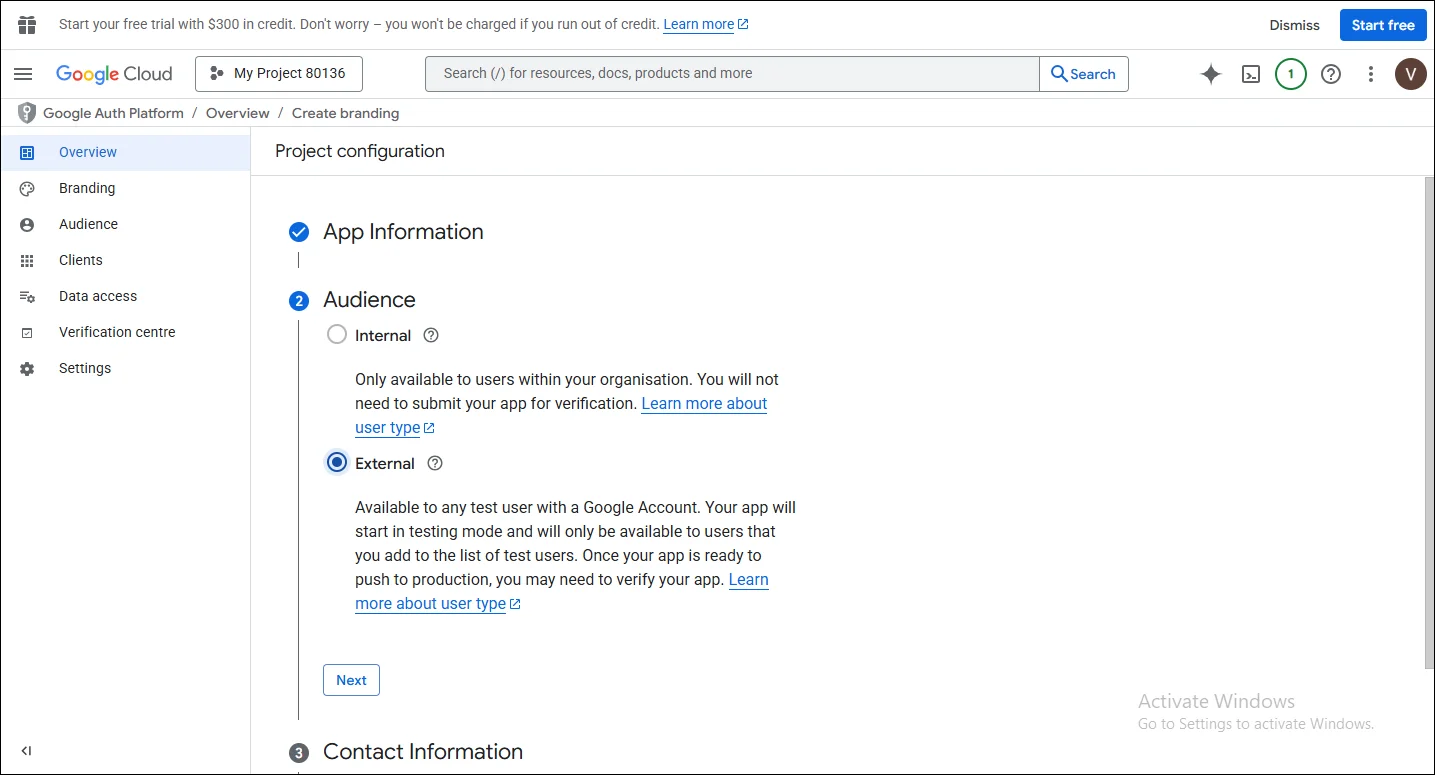
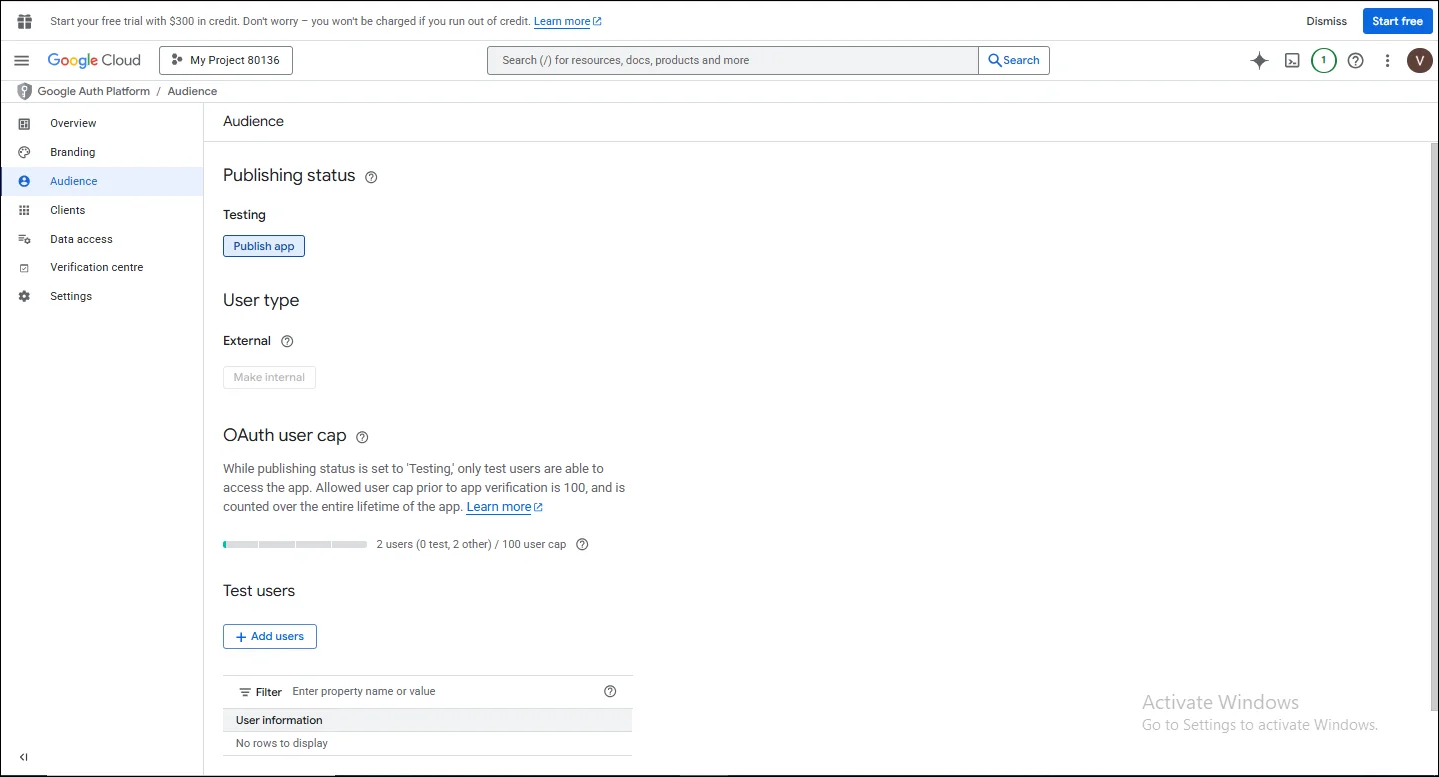
13. Next, under the Audience section, select either Internal or External.
14. Then click Next.
15. Then click Next.
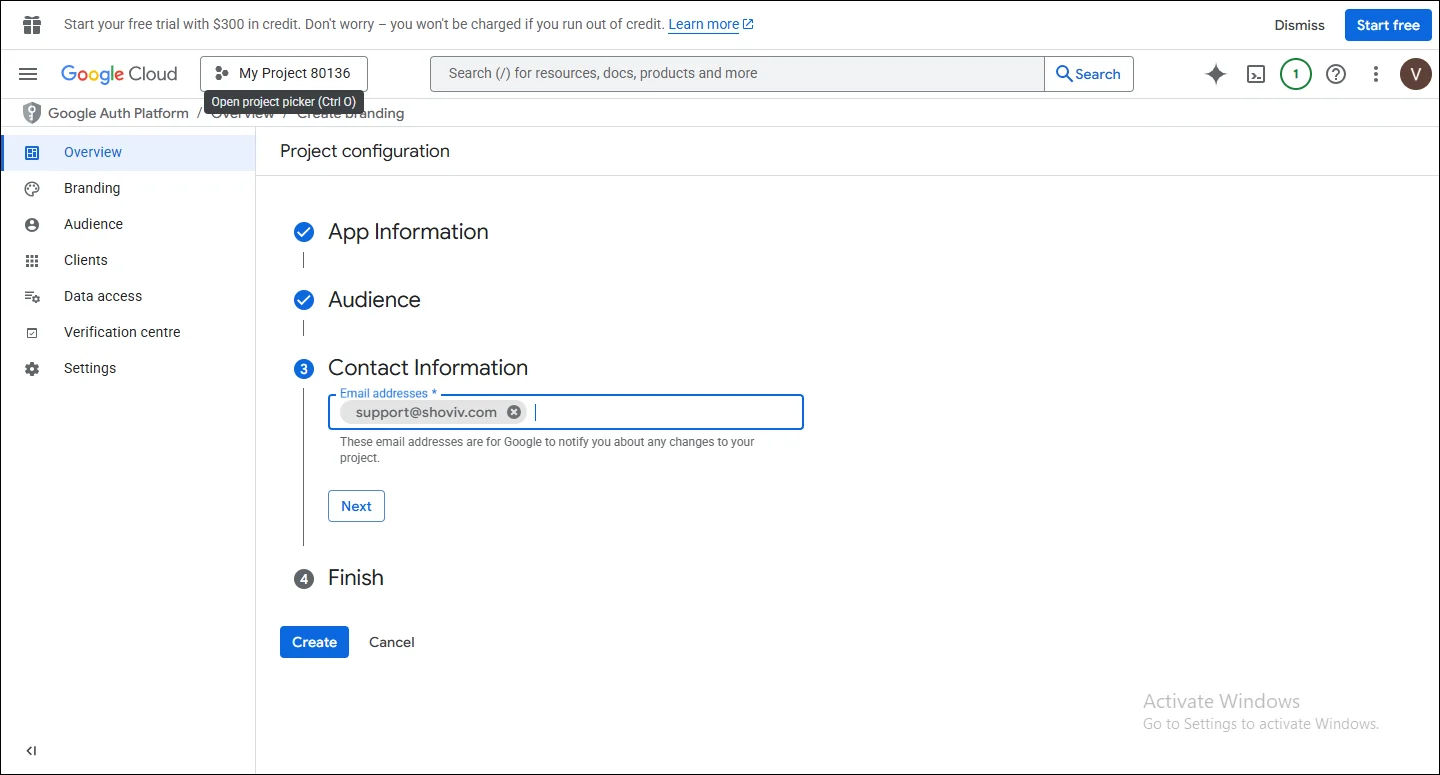
16. Afterward, add the contact information and proceed by clicking Next.
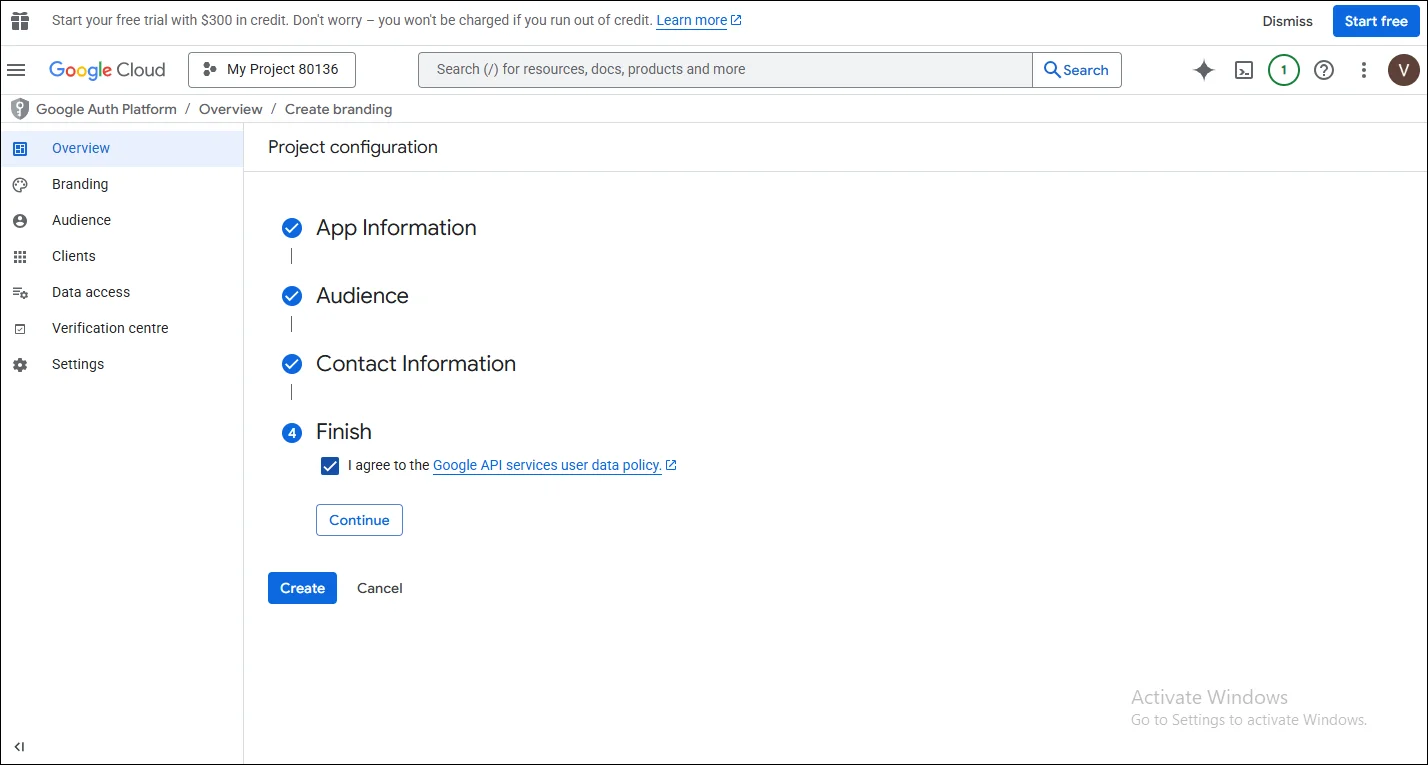
17. Under the Finish section, check that I agree to the Google API Services User Data Policy after reading it carefully.
18. Click on the Create button to complete this process.
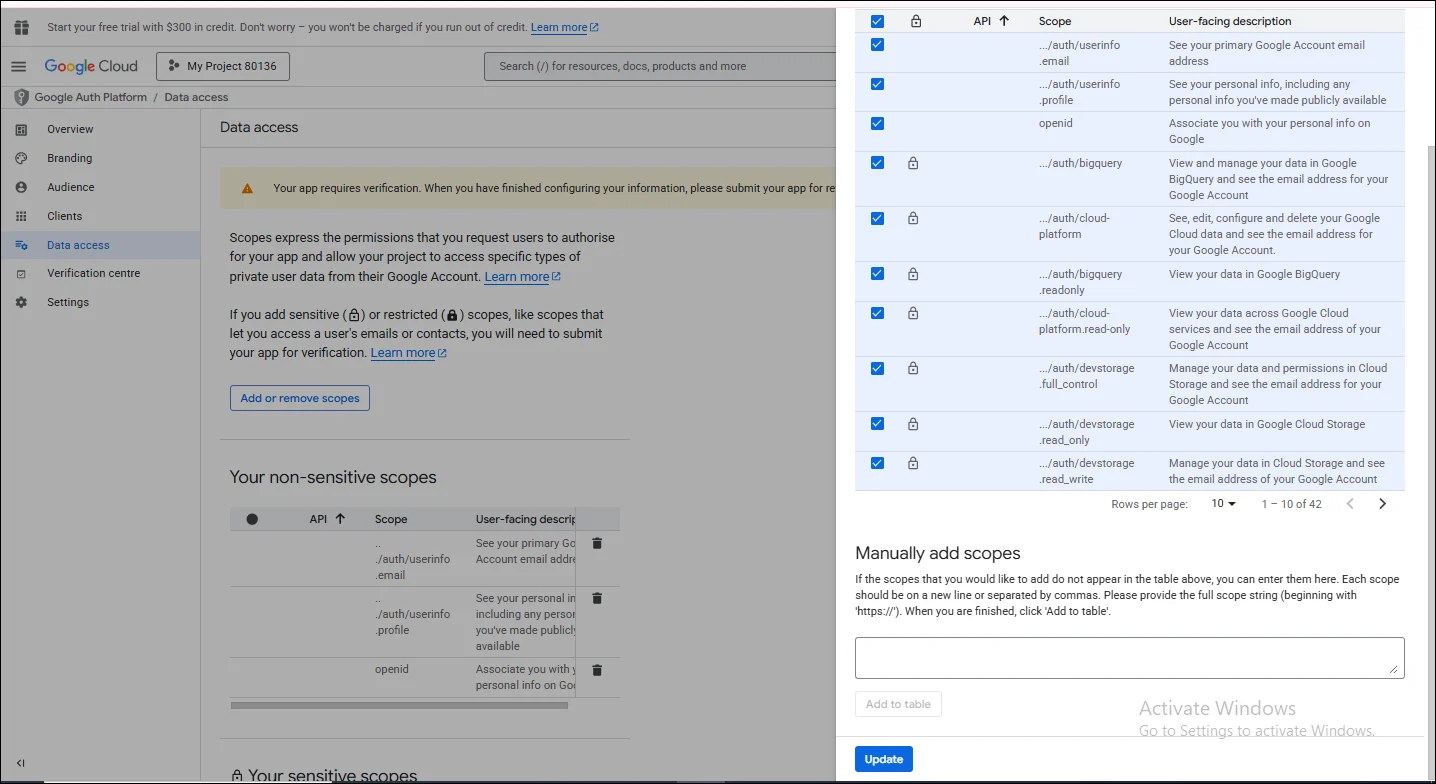
19. Now that the overview process is done, adjust your scopes as needed. You can also manage them manually through the Data Access.
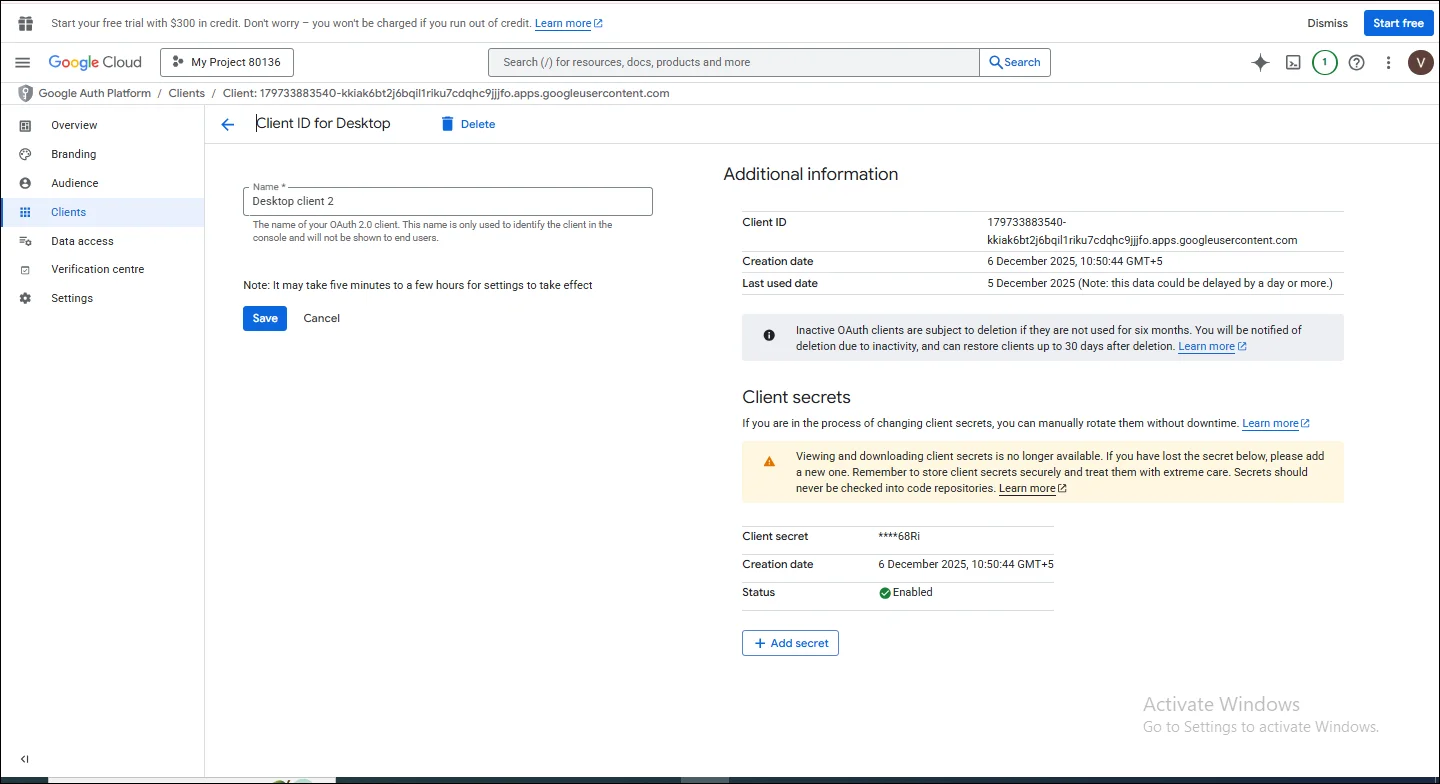
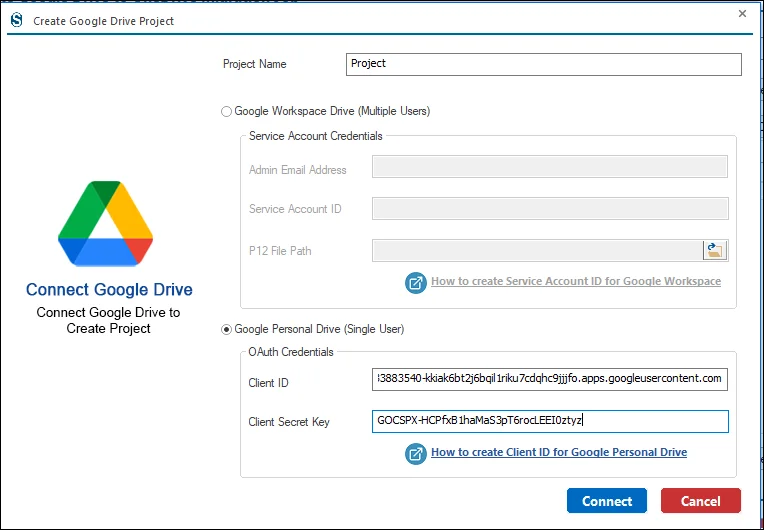
20. Under the Client ID for Desktop, enter a name and then click Save.
21. At this step, input your Client Secret.
22. After finishing the credentials setup, enter the details in your Google Personal Account. Click on the Connect button.
23. A new page will open, showing a notification that Google has not verified this app.
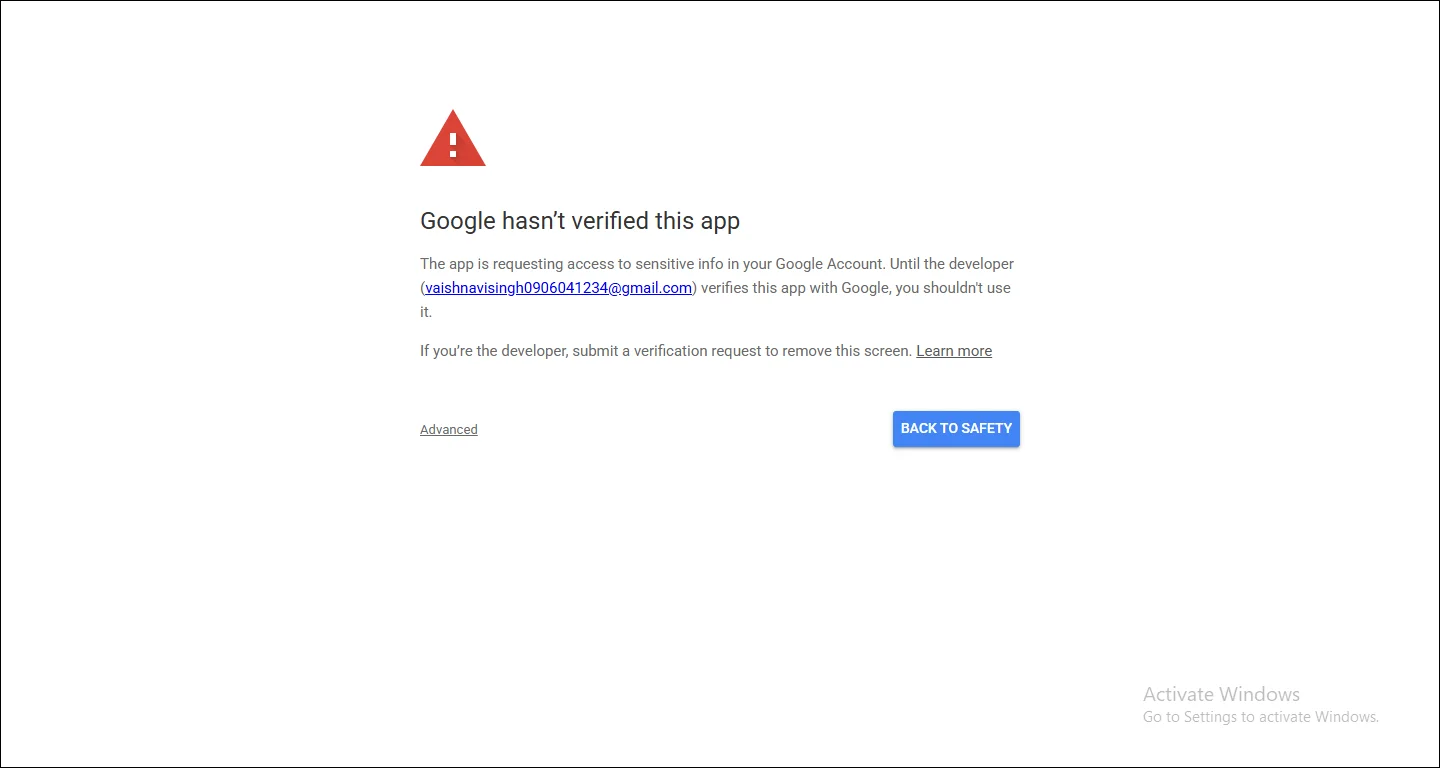
24. Next, click on Advanced, then select App Name.
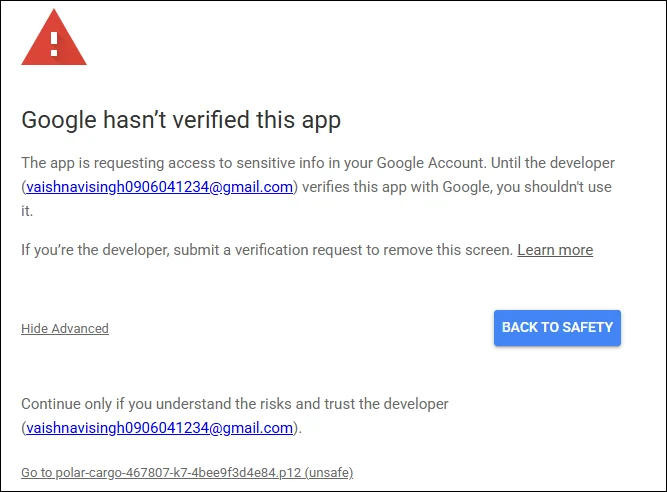
25. Read the information carefully, then press Continue.
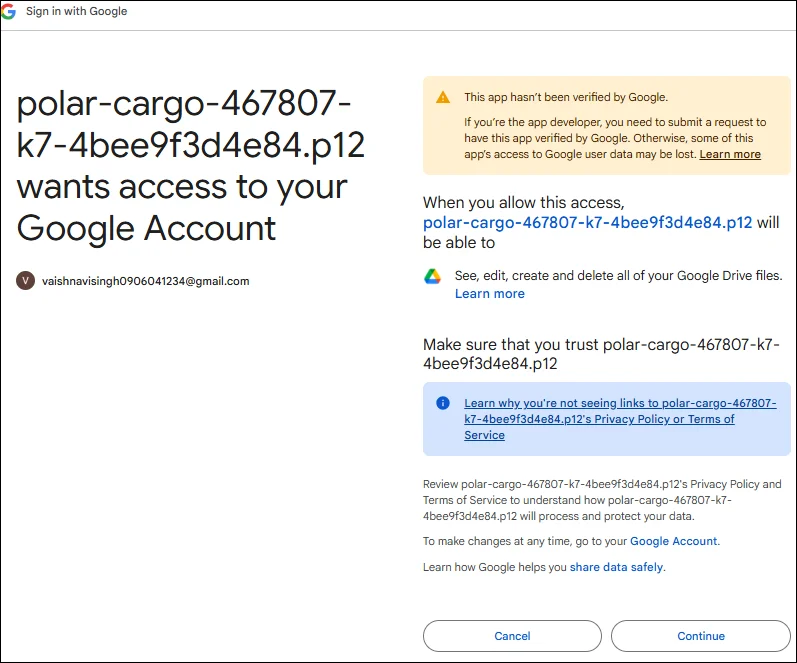
26. In this window you will receive code. You may now close this window: