To connect Office 365 account of your organization using the Modern Authentication, you need to create an Azure Active Directory application, as described in the below section.
To register a new Azure AD application, do the following:
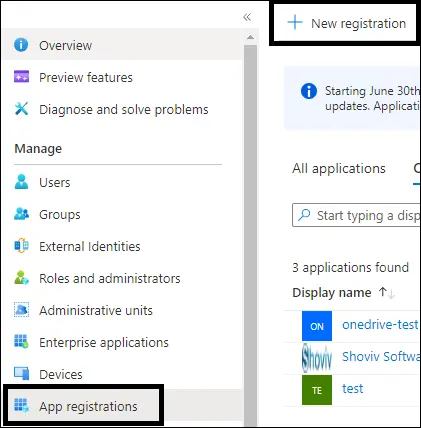
1 .Sign into the Microsoft 365 Admin Center (with your Global Administrator, Application Administrator, or Cloud Application Administrator account) and go to the Azure Active Directory admin center.
.webp)
2. Under the App registrations section, click on New registration:
3. In the Name field, enter the application name. And select - Accounts in this organizational directory-only option.
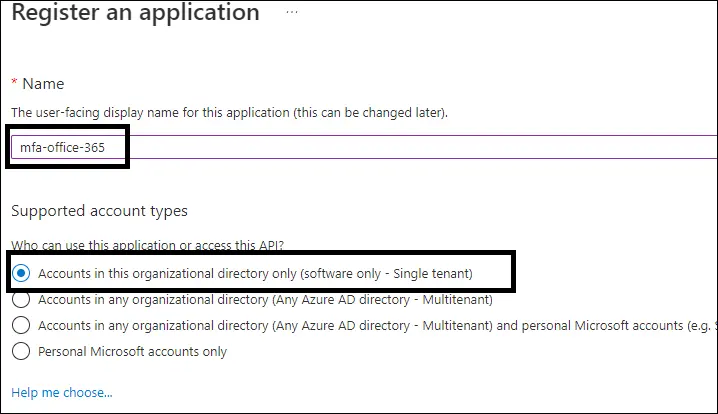
4Click the Register button. Note - Application redirect URI is optional; you can leave it blank on this step.

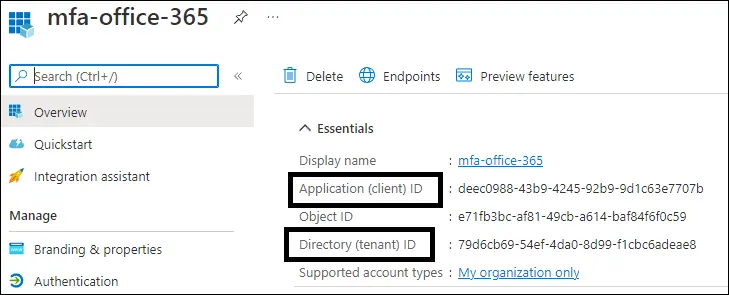
5. Your application ID and Tenant ID are now available in the Overview section. Copy it to a safe location.
 Step 2: Grant Required Permissions
Next, you need to grant your new application the required API permissions.
Azure AD applications can be assigned Delegated or Application permissions:
- Delegated permissions require a signed-in user present who consents to the permissions every time an API call is sent.
- Application permissions are consented by an administrator once granted.
Do the following: Add permissions
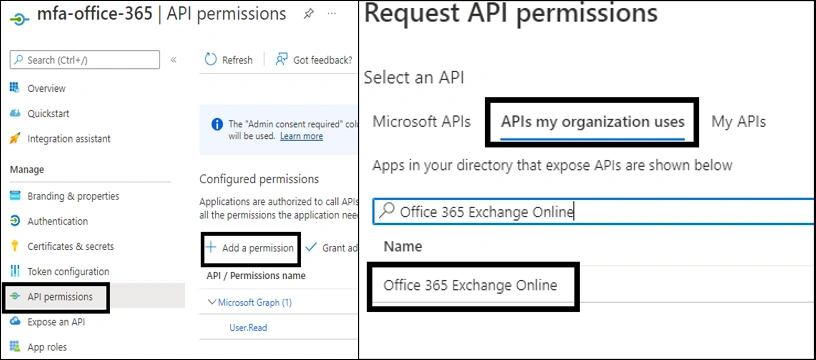
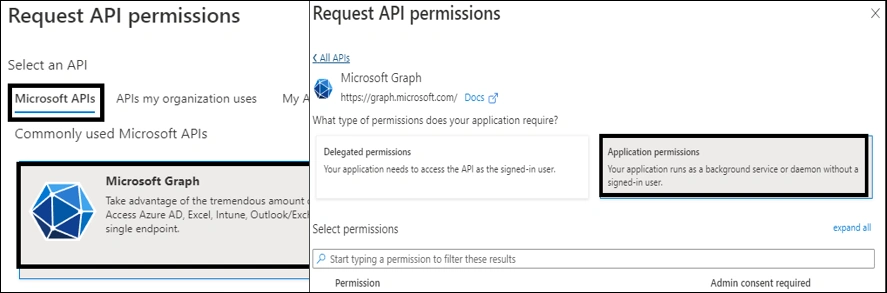
1. In API Permissions, click Add permission. At the top of the Request API permissions pane, click the 'APIs my organization uses' tab and search Office 365 Exchange Online, and click on office 365 (exchange online)
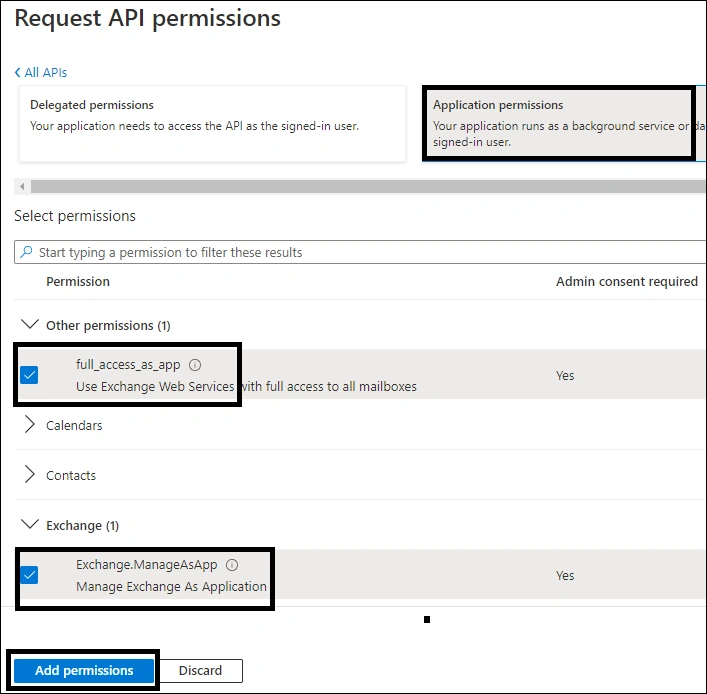
2. Proceed with adding the permissions for this app: select Application permissions and then select full_access_as_app. And Exchange.ManageAsApp. Click Add permissions.
3. And then after click on Microsoft API-Microsoft Graph- Application Permissions. And add these permission
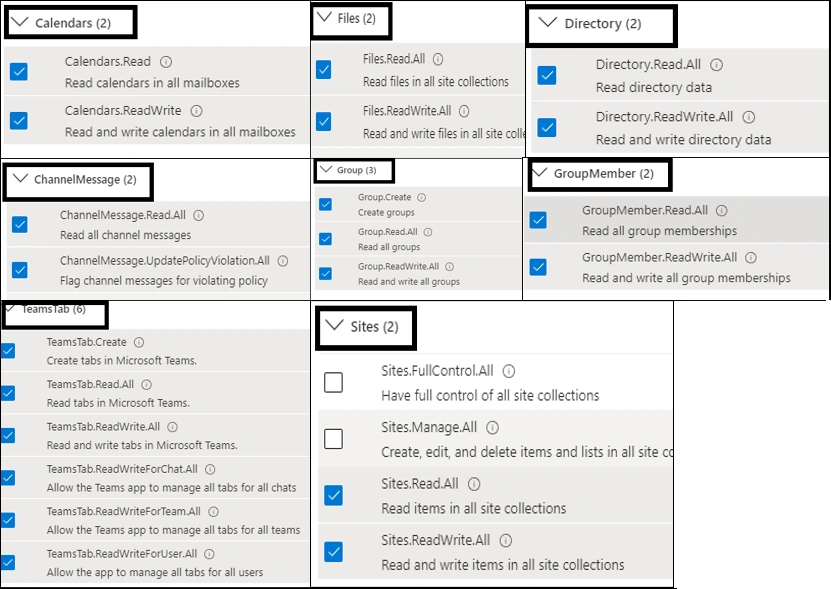
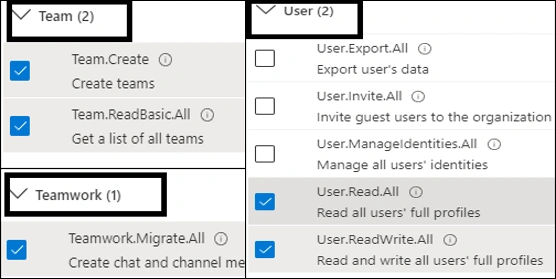
4. 1>Calendar.read , calendar read.write 2> Channel message.read.All , ChannelMessage.UpdatePolicyViolation.All 3>DirectoryRead.All , DirectoryReadWriteAll 4> Files ReadAll , Files ReadWriteAll 5> Group Create, GroupRead.WriteAll 6>GroupMemberReadAll , GroupMemberRead.WriteAll 7>SitesReadAll , SitesReadWriteAll 8>TeamsTab.Create , TeamTab.ReadAll ,TeamsTab.ReadWriteForChatAll, TeamsTab.ReadWriteForTeamAll, TeamsTab.ReadWriteForUser.All, 9>Team.Create , TeamReadBasic.All 10>Teamwork.Migrate.All 11>UserRead.All , UserReadWrite.All
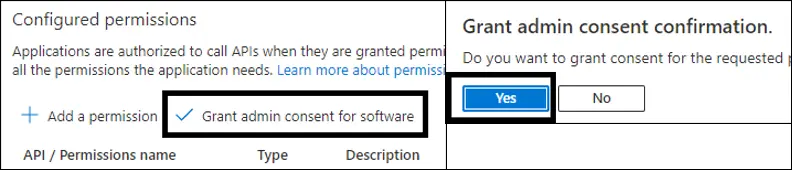
After API Permissions, click on Grant admin consent for . and click Yes.
 Step 3: Configure Client secrets
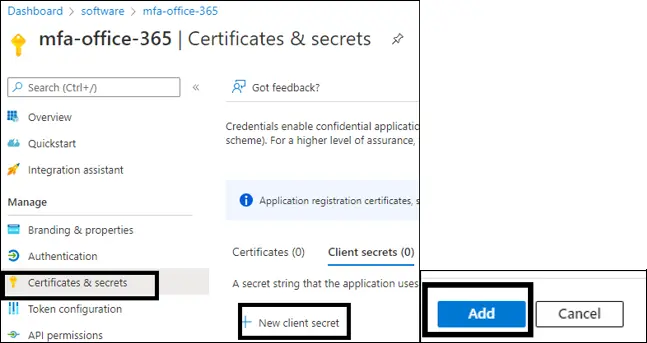
1. In the app settings, click Certificates & secrets and click New Client Secret.
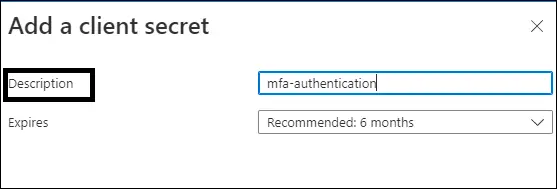
2. Enter the Description and select the expire period and click on add button.
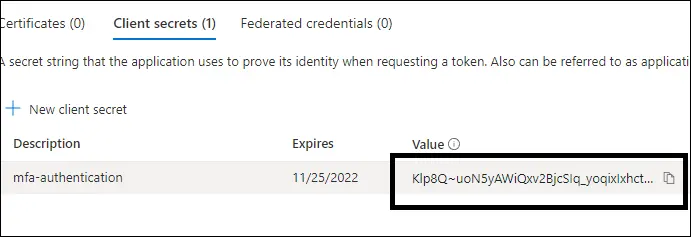
3. Copy the Client Secret value to a safe location.
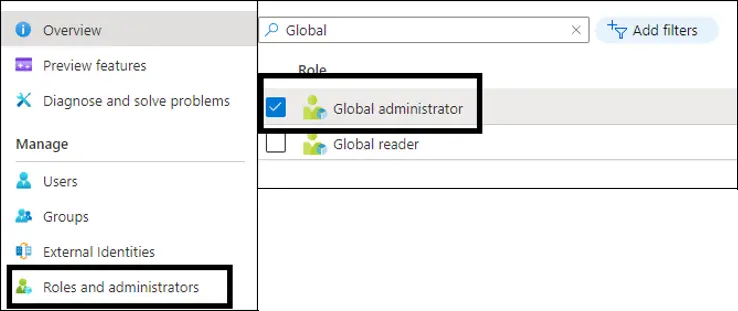
Step 4: Assign Role and Administrator
1. Go to Active Directory Dashboard and Select Role and Administrators. Search for 'Global administrator' and double-click on it.
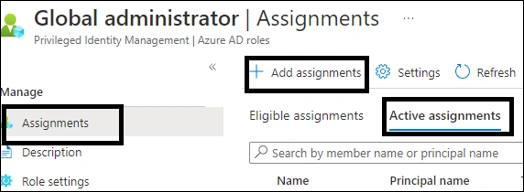
2. Under assignments category, click 'add assignments.
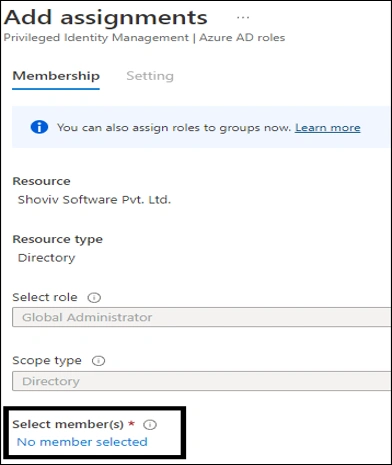
3. As no members has been assigned here, so click 'No Members selected.'
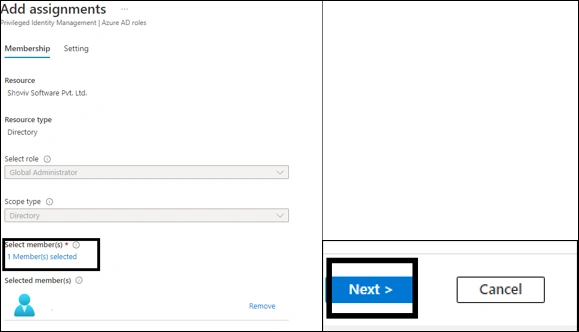
4. Type the name of the app that you have added in the Azure Active Directory. Choose it, then click Select.
5. A new member has been added. Click Next.
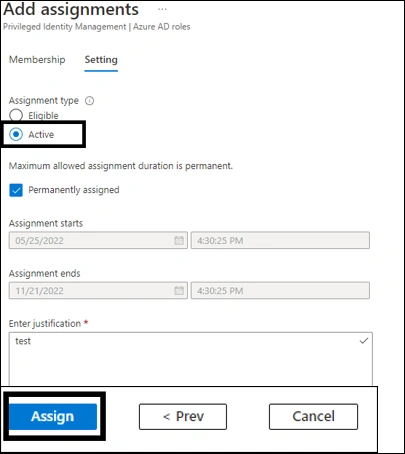
6. In Assignment Type, choose Active. Set the Assignment duration and provide a justification for assignment. Finally, click Assign.
What should you do in case you have 100+ mailboxes for the migration?
In such cases, you need to export the list of your Office 365/Exchange Server mailboxes into a CSV file format. Later on, import the CSV file into the software.