Here we have described the complete step-by-step process to generate and assign the Shoviv Office 365 Backup and Restore license to backup Office 365 Mailboxes.
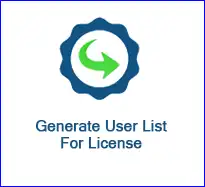
Generating Mailbox List for License
To assign the license to any Office user for the backup process, follow the below-given steps.
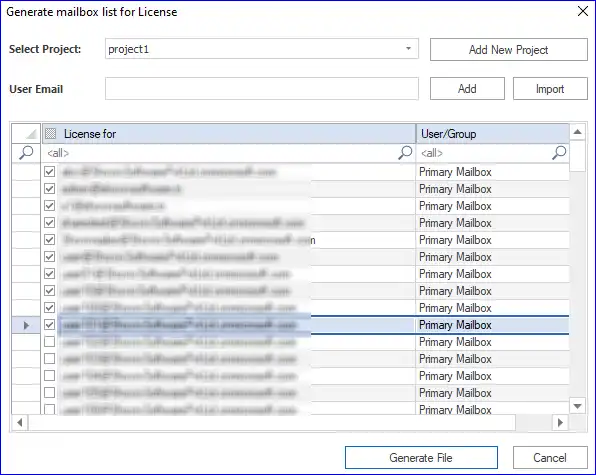
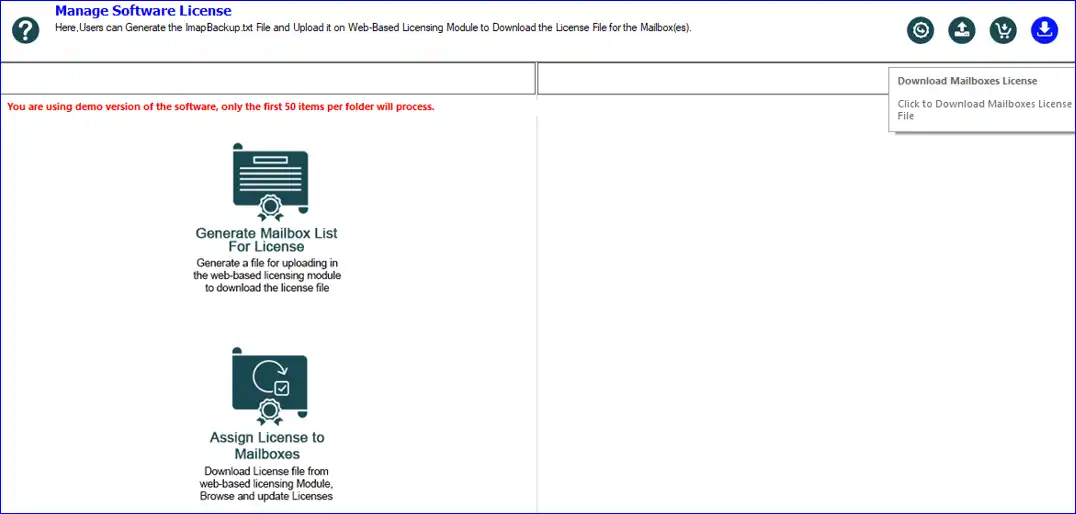
Step 1: - Go to the Licensing tab and click on Generate Mailbox List for License option.

Step 2: - Now, add the mailboxes for which you want to generate the license and click on Generate File button.
Automatic Activation
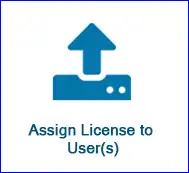
Step 3: - Click on the Assign License to Users option.
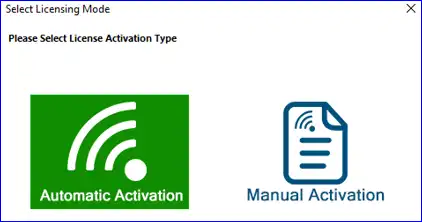
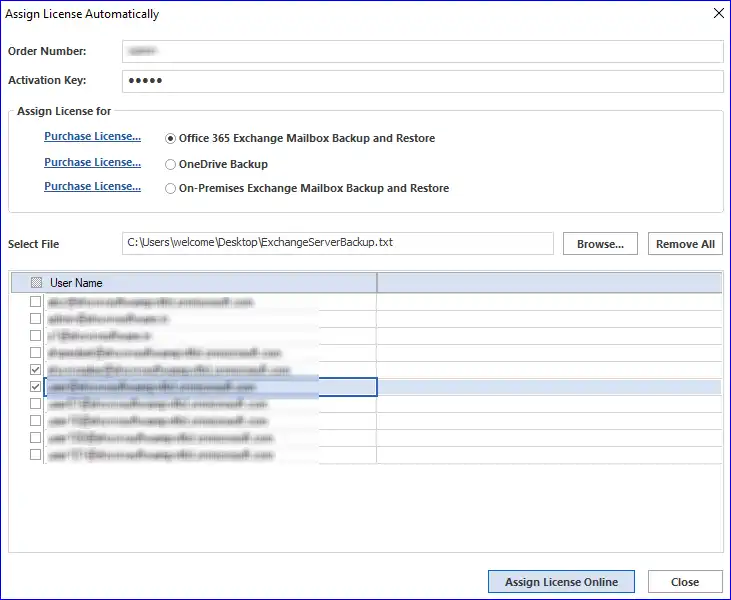
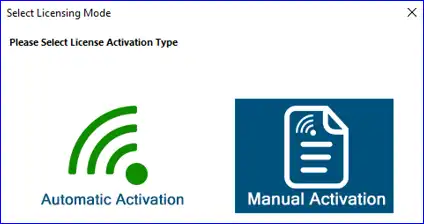
Step 4: - After that, you will be asked to select either Automatic or Manual Activation. Here, we are selecting Automatic activation.
Step 5: - After clicking on the Automatic Activation option, a new window will open. You need to enter the order number and activation key. Click on the browse button to select the already generated license file, which is in .txt format. Once done, kindly click on the Assign License Online button, and then you will see a successful message. Afterwards, you need to close the window.
Manual Activation
Step 1: - Go to the Licensing tab and click on Generate Mailbox List for License option.
Step 2: - Now add the mailboxes for which you want to generate the license and click on Generate File button.

Step 3: - Click on the Download option to generate the licensing file on the system. After that, you need to upload the .txt (License File) on the web-based licensing module.
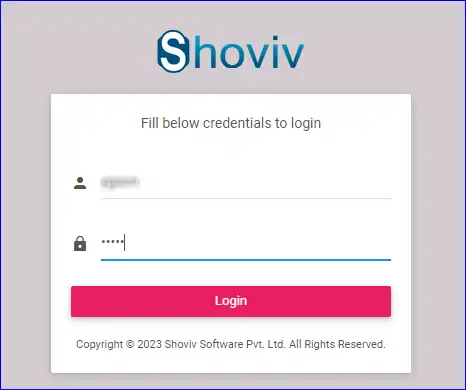
Step 4: - Log in to the web licensing module by providing the Order number and Activation Key. Click Here https://www.shovivsoft.com/user-license/login.php to open the web licensing page.
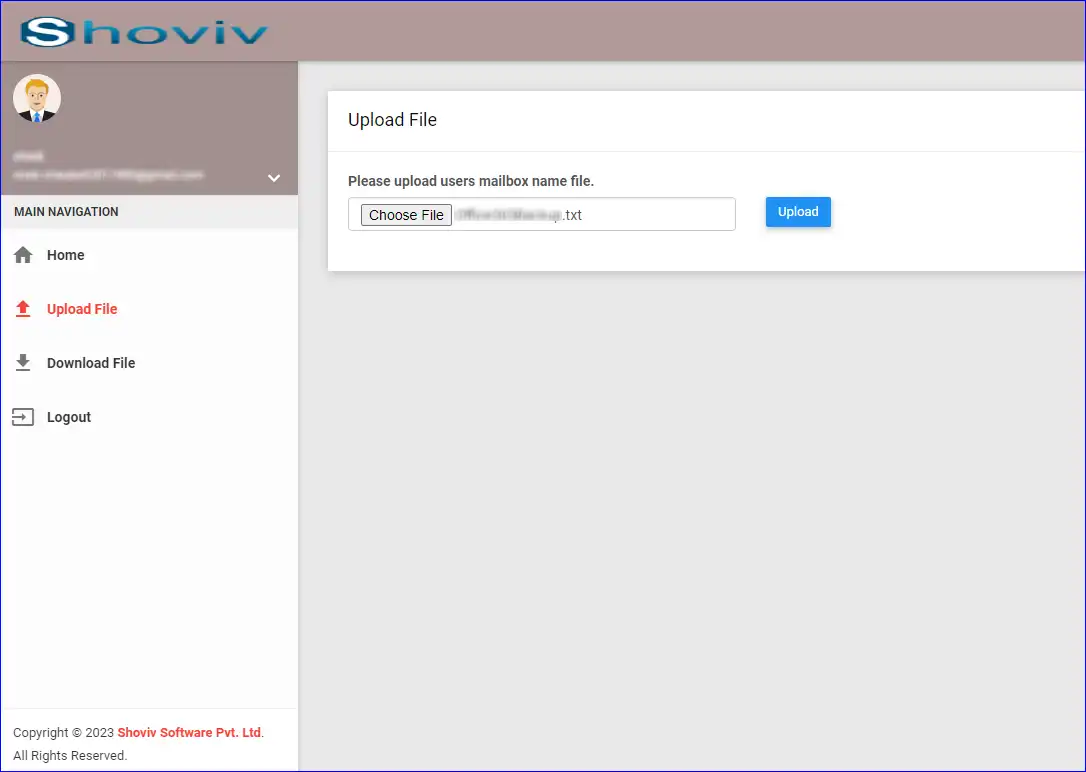
Step 5: - Then, go to the Upload File tab from the left pane, click on Choose File option and upload the generated .txt file.
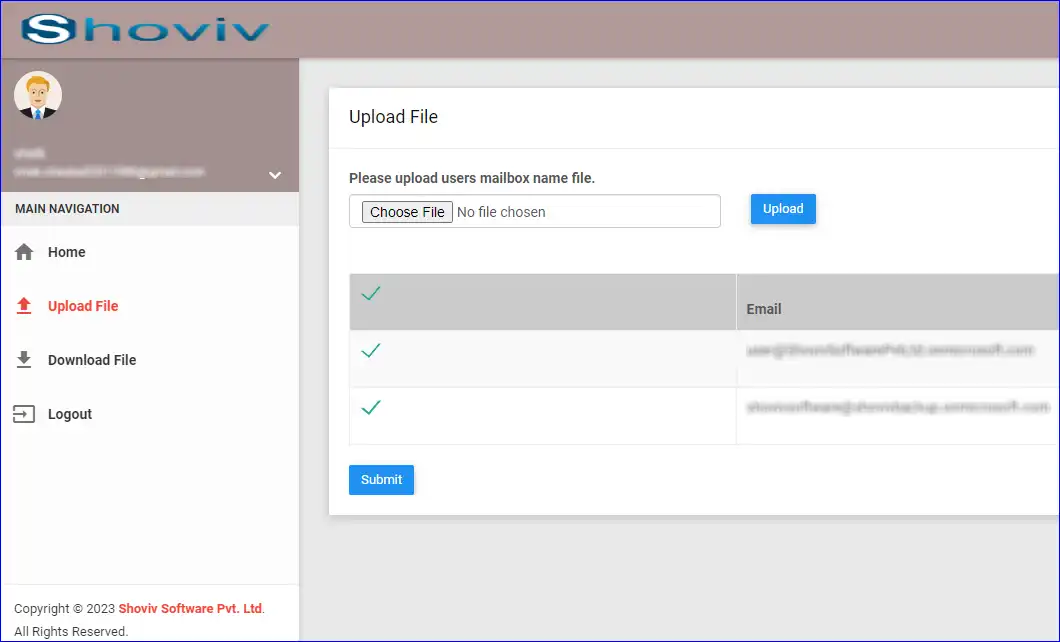
Step 6: - After uploading the file successfully, select the required mailbox and click on Submit button.
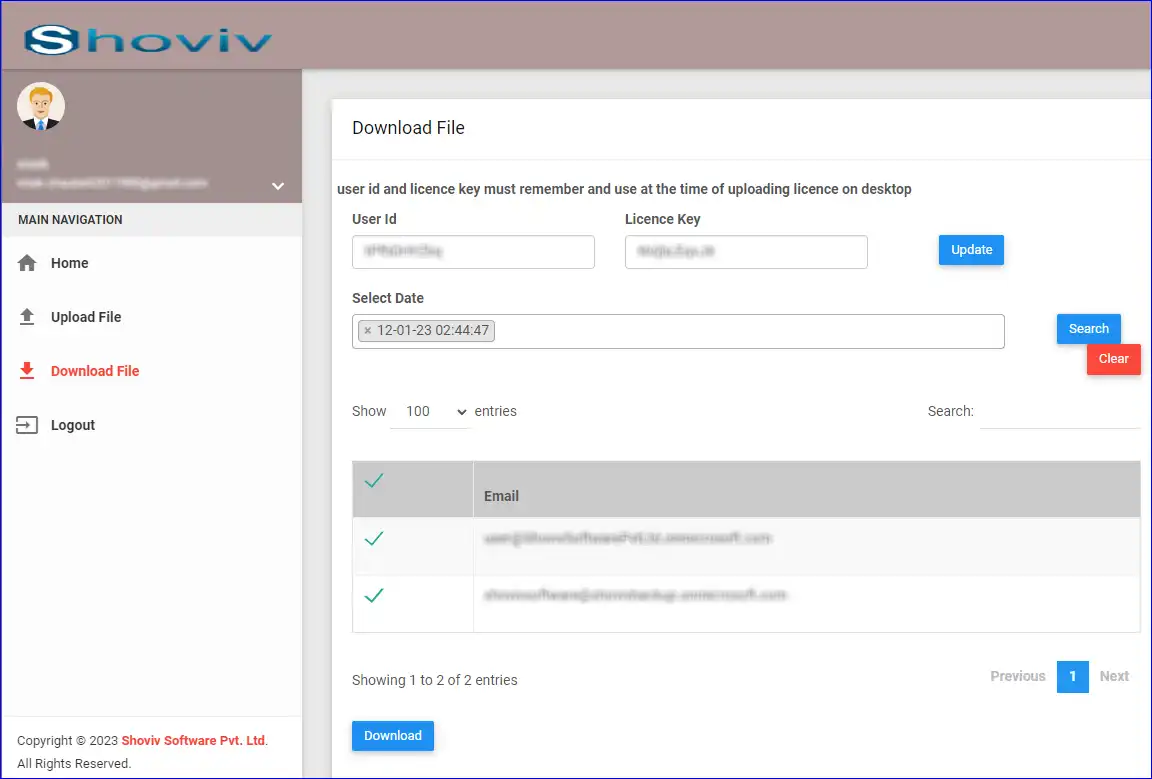
Step 7: - Now go to the Download file tab from the left pane. Here, you will get an auto-generated user Id and license key copy them in Notepad. (You can change your User id and License key according to your convenience).
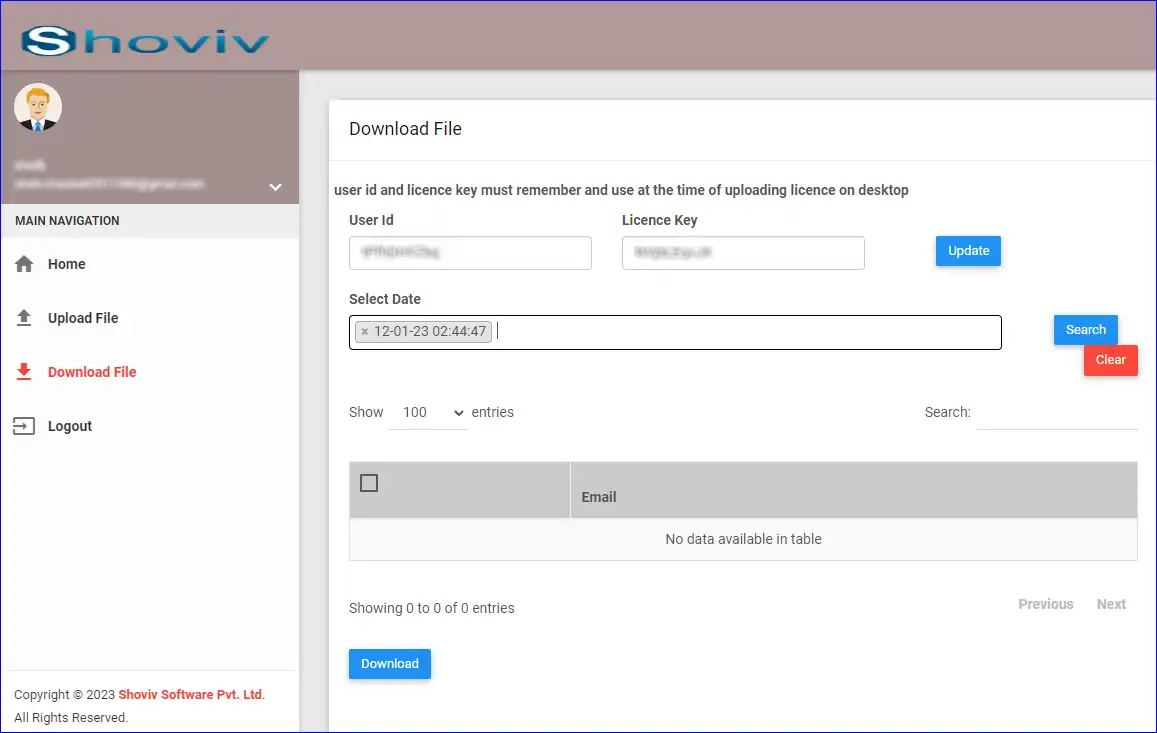
Step 8: - Then, select the single or multiple dates on which you uploaded the generated .txt files and click on the Search button. After that, the mailboxes for which the license is assigned will list up. Select the mailboxes and click on the Download button.
Step 9: - Now go to the Licensing window of the software and click on the Assign License to User option.

Step 10: - After that, you will be asked to select either Automatic or Manual Activation. Here, we are selecting Manual activation.
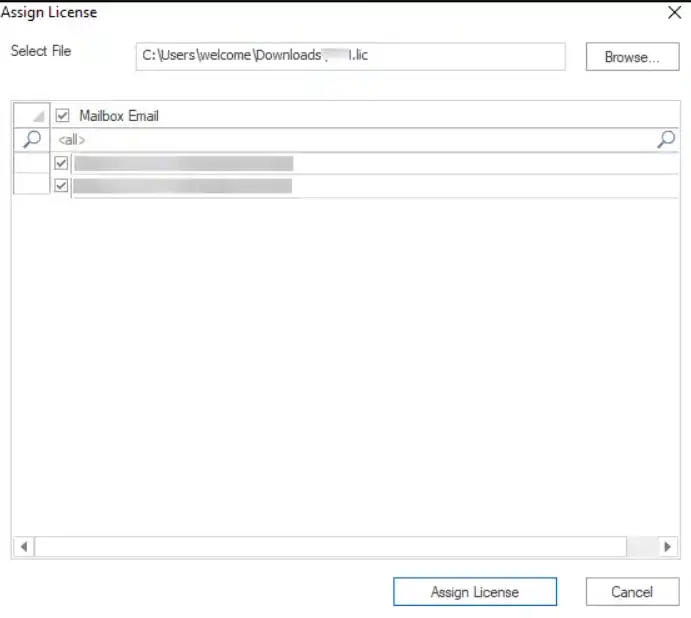
Step 11: - Now the assigned license window will appear. Here, provide the User ID & License key (copied from web portal), then browse the Downloaded license file (.lic).
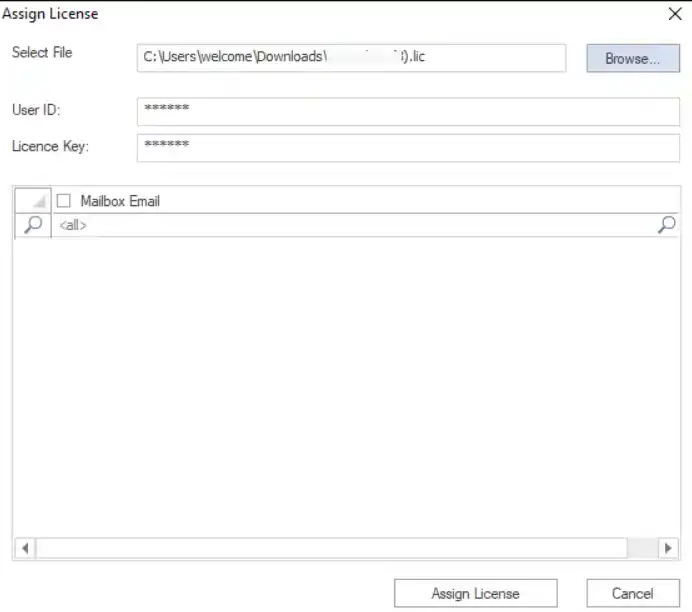
Step 12: - As you browse the license key, the Mailboxes for which the license is assigned will list up. Select the Mailboxes and click on the Assign License button.