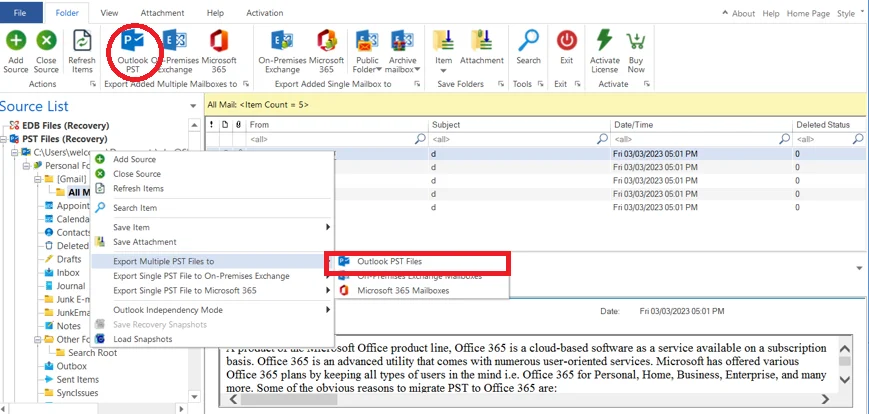
Note: Once you have added the PST file, you have to select Outlook PST as the target.
The first way is to choose the Outlook PST option from the ribbon bar, and the second way is to right-click on the file folder and select the same option.
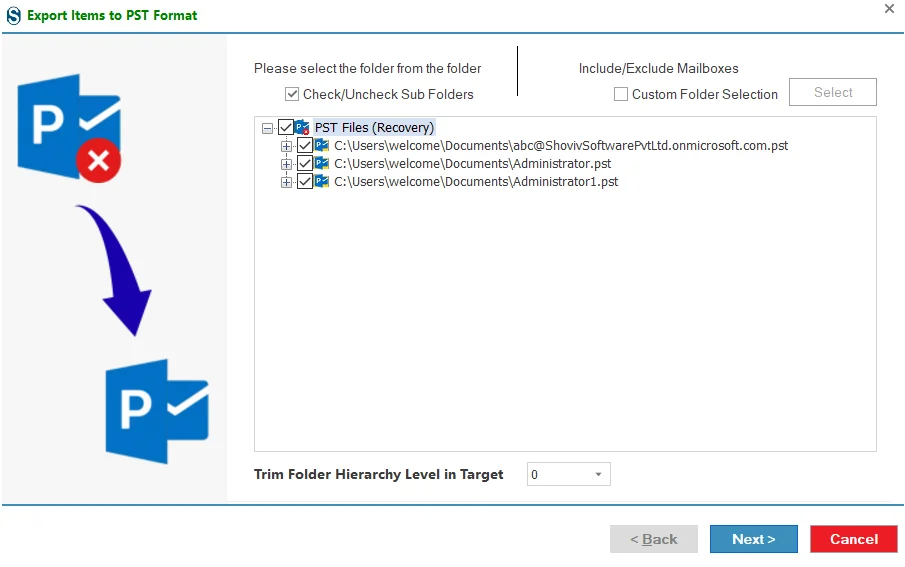
Step 1: Check /Uncheck Subfolders: When you select this option, all subfolders under a selected folder will be automatically selected or deselected. You can choose which subfolders to include, then click Next to continue.
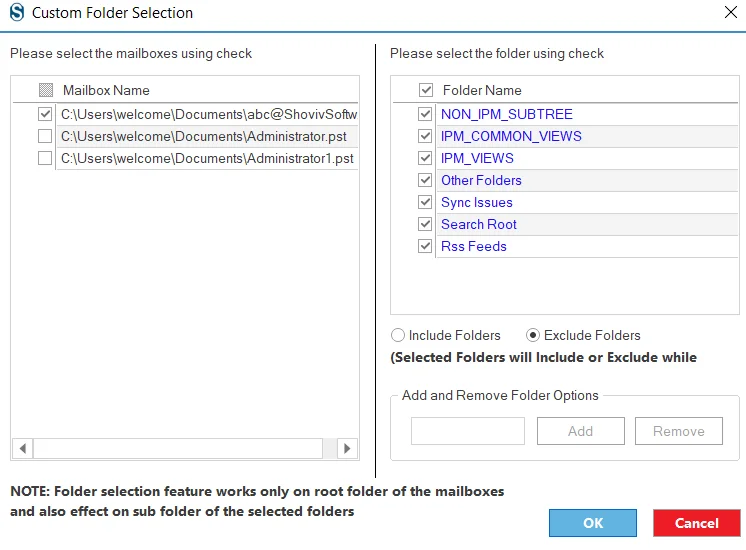
Include/Exclude Mailboxes: Go on to this option and choose option to choose or remove the mailboxes.
Step 2: After clicking Next you’ll see two options to export items into a PST file:
1. Export to Existing PST: If you want to add items to an existing PST file, select the Export on Existing PST option. Then, click Browse to choose the PST file from your computer.
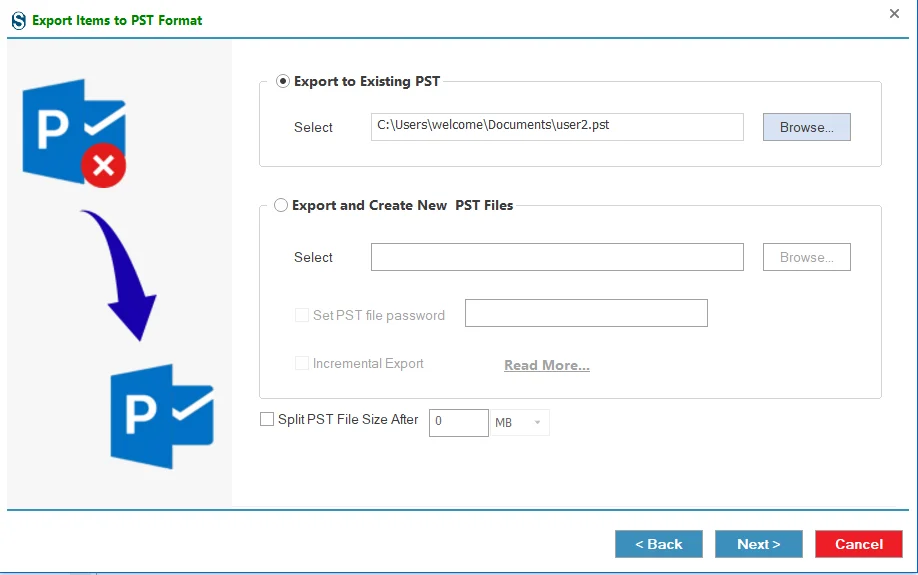
2. If you want to export items by creating a new PST file, select the Export and Create New PST File option. Then follow these steps.
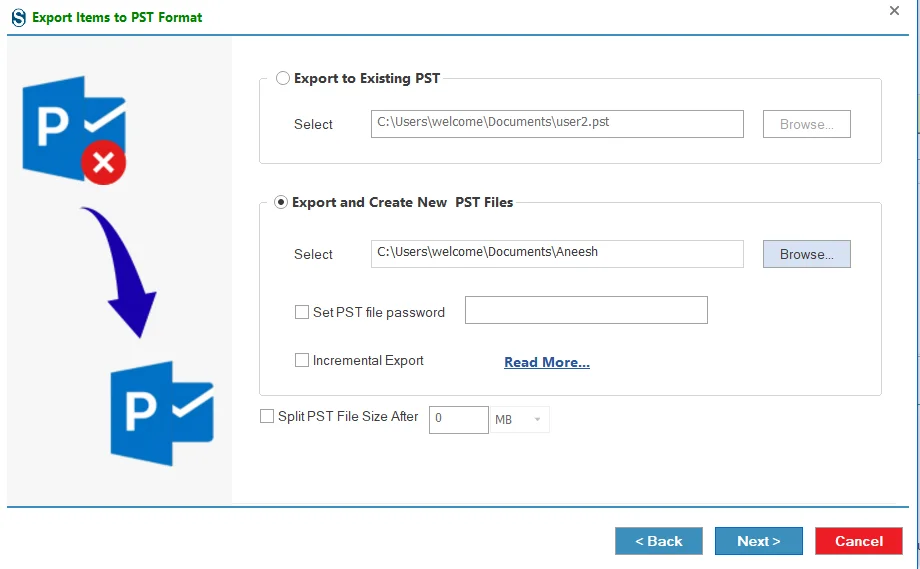
- Select Folder: Choose the location on your computer where you want to save the new PST file.
- Set PST File Password (Optional): If you want the PST file to be password-protected, check the Password box and enter your desired password.
- Incremental Export: The software also includes an incremental export feature that helps prevent duplicate data in the destination. After users complete the initial backup successfully, they can use the incremental backup option to capture only the changes made since the previous backup. This approach saves time and ensures that duplicate items are not created in the target.
- Split PST File After (Optional): You can split the PST file into smaller parts based on size (from 100 MB to 50 GB). Select this option and enter the preferred file size.
After setting all options, click Next to continue.
Step 3: After clicking Next, the filter page appears with two options:
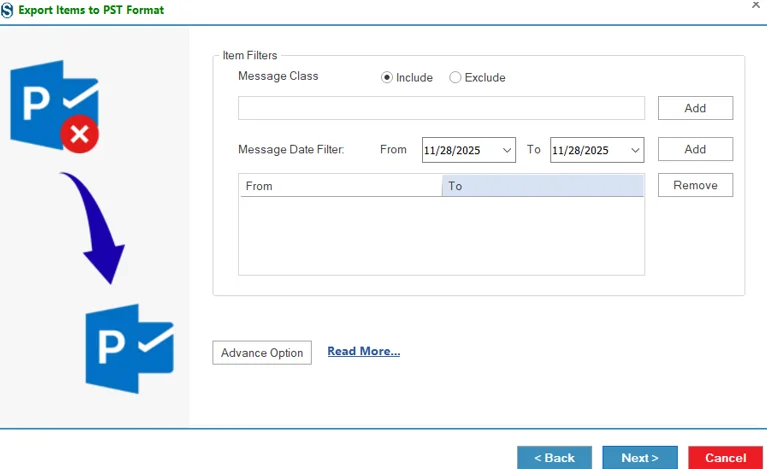
3.1 Message Class Filter: This option lets you include or exclude specific message classes.
- Click the Add button to open the Message Class dialog box.
- The dialog will show some default message classes.
- Select the message classes you want by checking the boxes, then click OK.
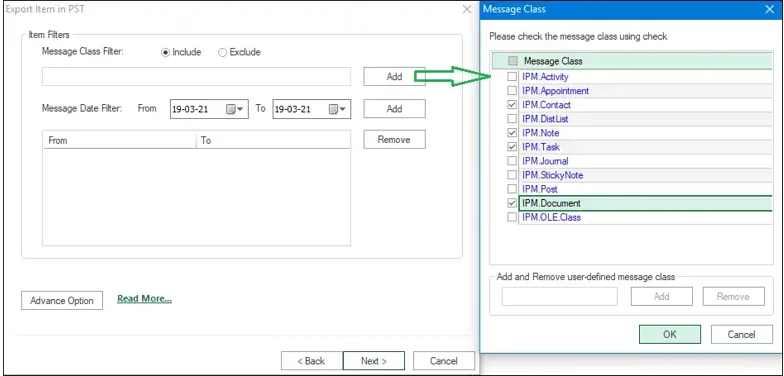
The default message cannot be removed from the list. You can only remove the added message class from the list.
3.2 Message Date Filter: This option allows you to process the message according to the date range.
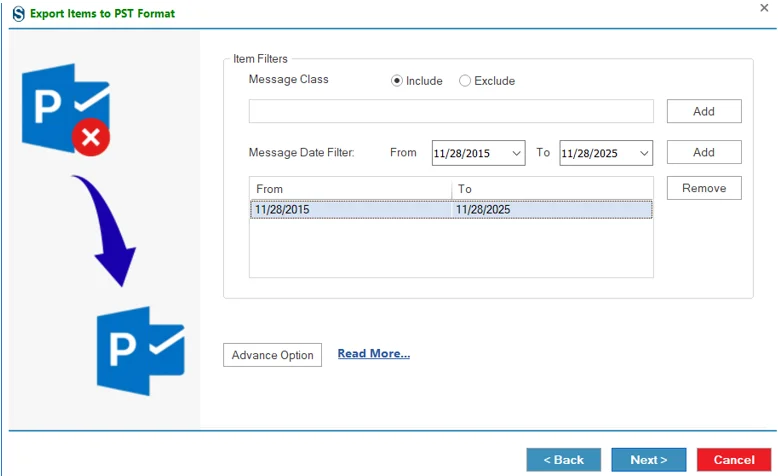
3.3 For more advanced conversion options, click the Advanced Scan button.
Use Item Thread Count: Select the thread count from the dropdown menu.
Apply Filter Using: You can filter items based on different criteria:
- Last modification time
- Message creation time
- Message delivery time
- Client submit time
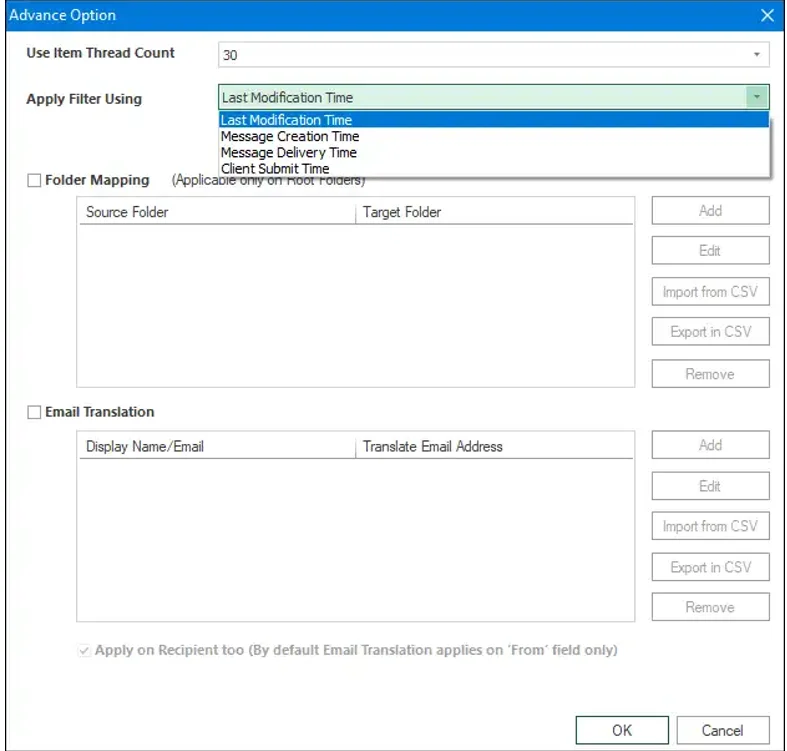
Folder Mapping: The folder mapping option allows the users to migrate items from one folder to another particular folder.
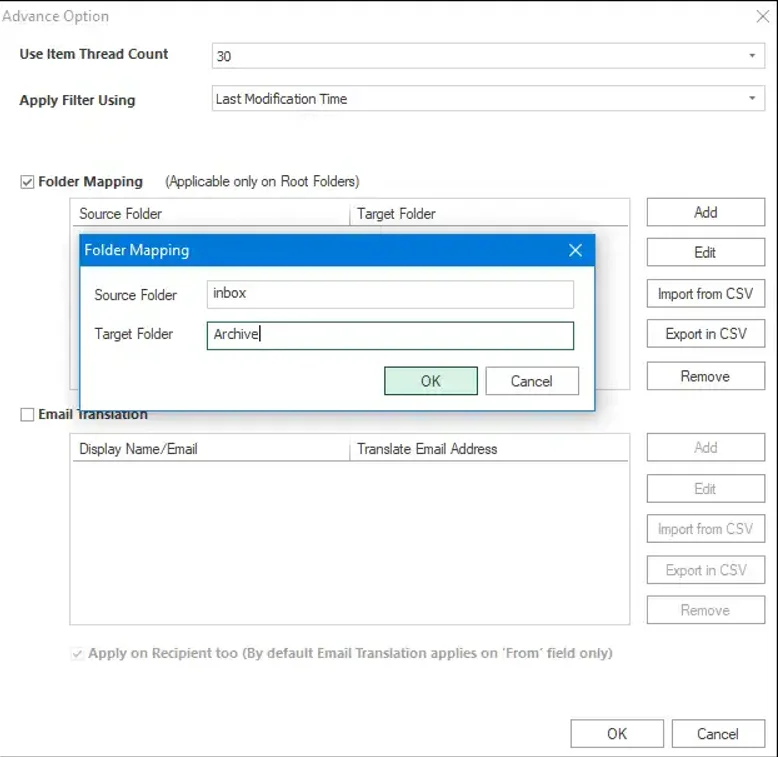
- Add:- Using this button, one can add the source and the target folder name for mapping.
- Edit:- With this button, we can edit or change the source folder or target folder name.
- Remove:- This button is provided to remove the added source folder and the target folder.
- Export in CSV:- Use this button to export the Folder mapping list into a CSV file for later use.
- Import from CSV:- With this button, map multiple sources with target mailboxes using a CSV file. Create a CSV file containing the source name in one column and the respective target in another column, then upload it using the Import from CSV option.
Email Translation: Users can change the email address according to the destination server's email addresses. I.e. user@sourcedomain.com to user1@destinationdomain.com. The email translation feature is a highlighted feature of this software.
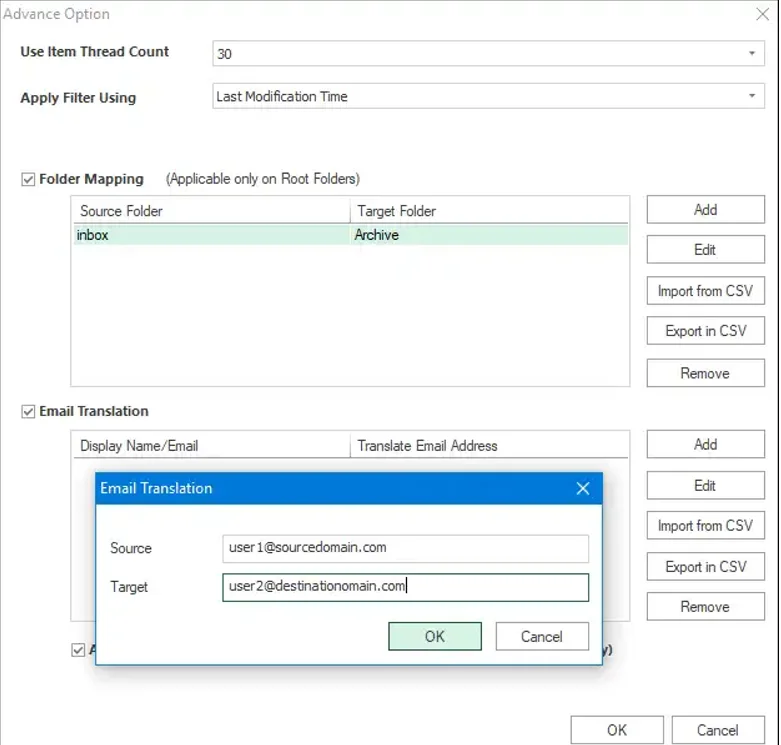
- Add:- With this button, we can add the source and the target folder name for mapping.
- Edit:- Using this button, we can edit or change the source folder or target folder name.
- Remove:- By this button, we can remove the source folder and the target folder.
- Export in CSV:- With this option, you can export the Folder mapping list into a CSV file to use later.
- Import from CSV:- With this button, map the source with target mailboxes using a CSV file. Create a CSV file containing the source name in one column and the respective target in another column, then upload it using the Import from CSV option.
Apply on Recipient Too: Enables email translation for recipients as well. By default, translation only applies to the From field.
After following all the required step using "Advance Scan", Click the 'Next' button.
Step 4: Once you start, the process will begin and the Status Wizard will display:
- Source Folder
- Target Folder
- Item Count
- Filtered Items
- Copied Items
- Processed Items
You can click Stop to halt the process, or wait until it completes.
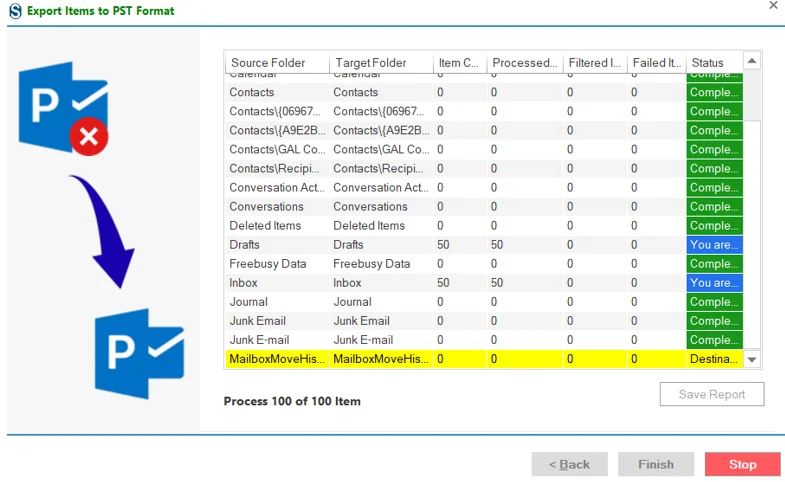
Step 5: Once the process gets completed successfully. click on the 'OK' button.
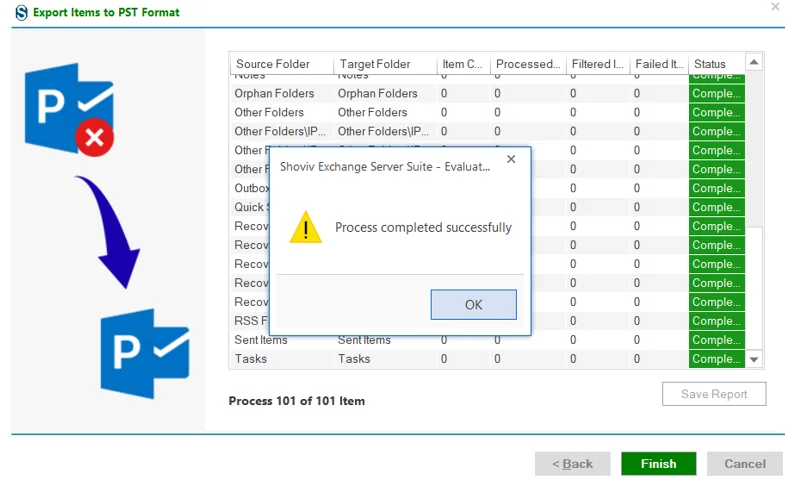
Step 6: You can save the report using the 'Save Report' button and at last click on the 'Finish' button to finish the process.