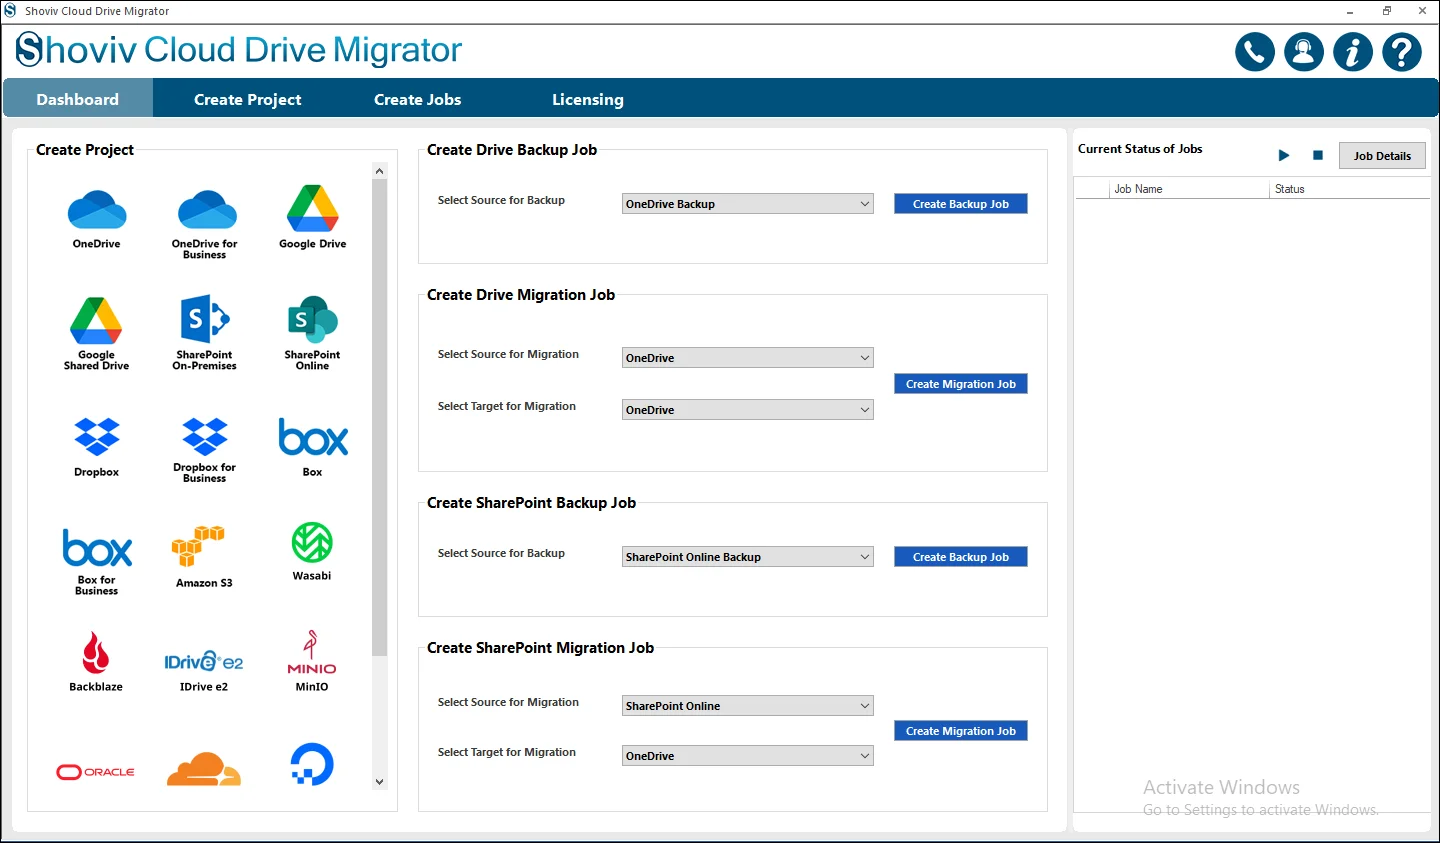
Step 1: Install and Run Shoviv Cloud Drive Migrator. The application opens with the main interface, from where you need to go to the Create Drive Migration Job.
Step 2: At this step, you must select both the Source and the Target. Choose Google Drive as your Source.
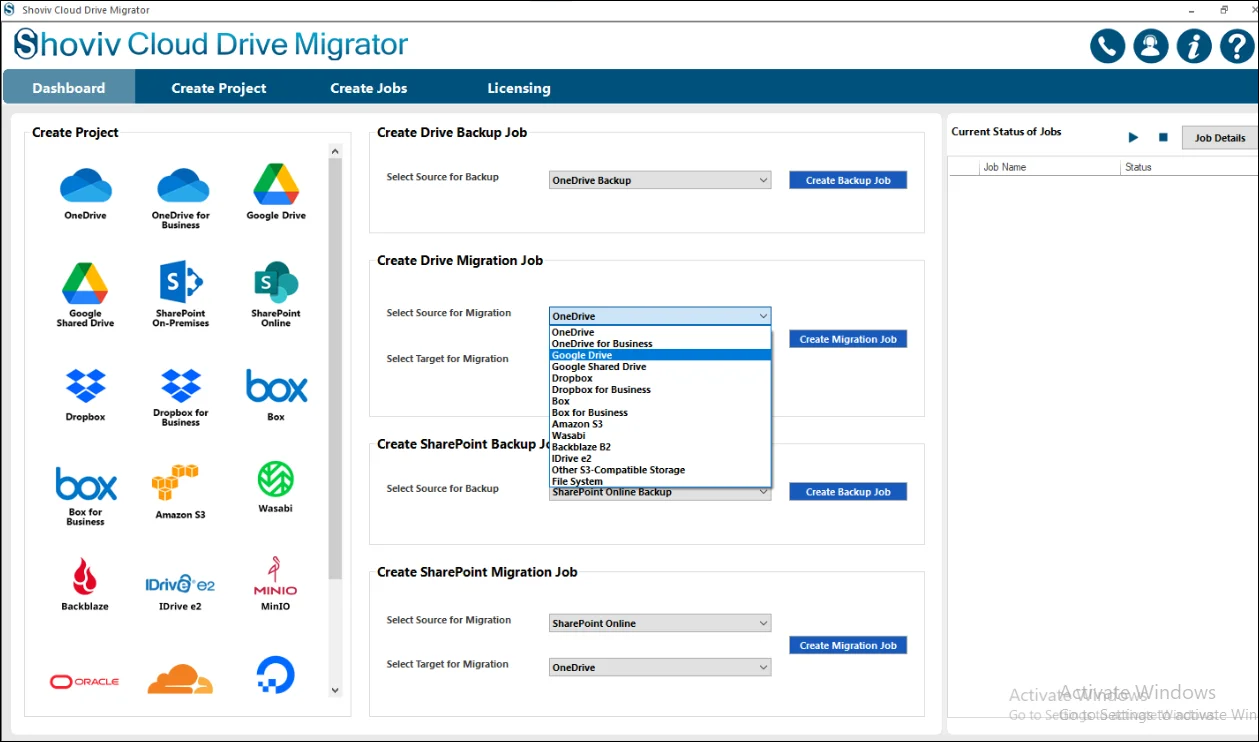
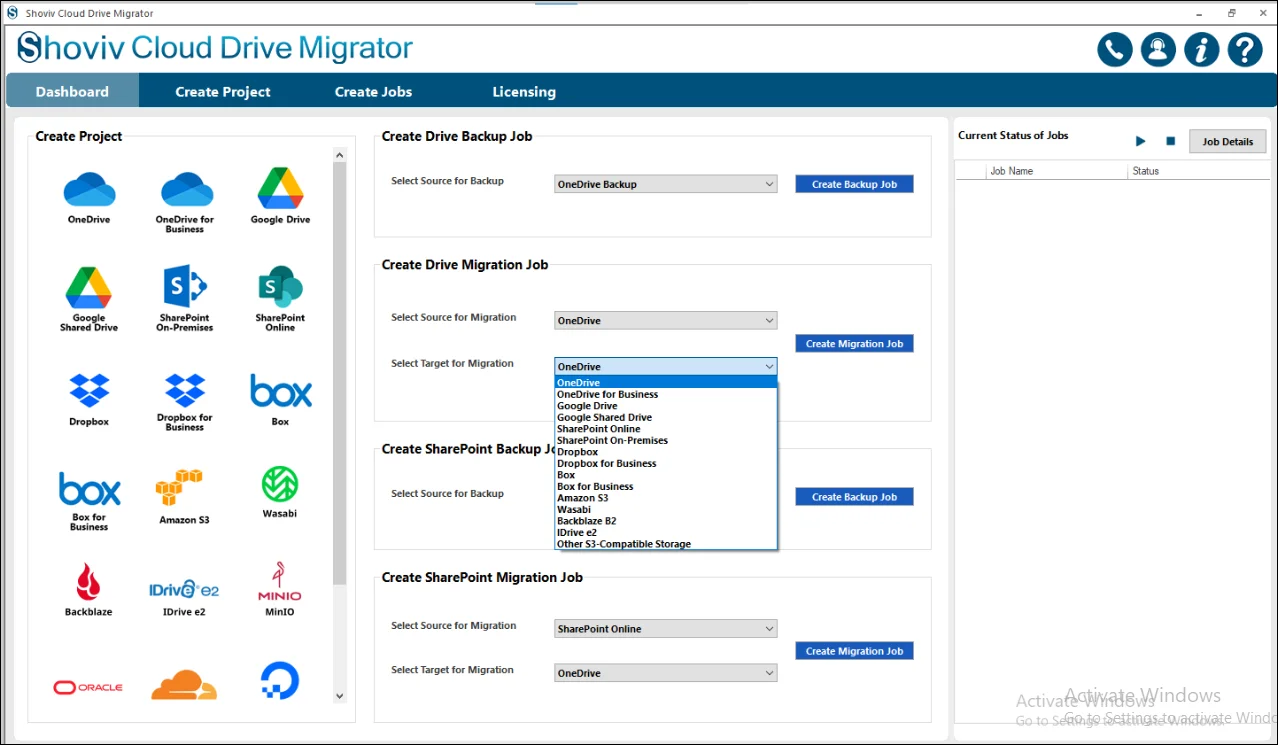
Step 3: Next, select OneDrive (Personal or Business), depending on your requirements as the Target destination.
- Then click Create Migration Job to finish the initial step of setting up the migration process.
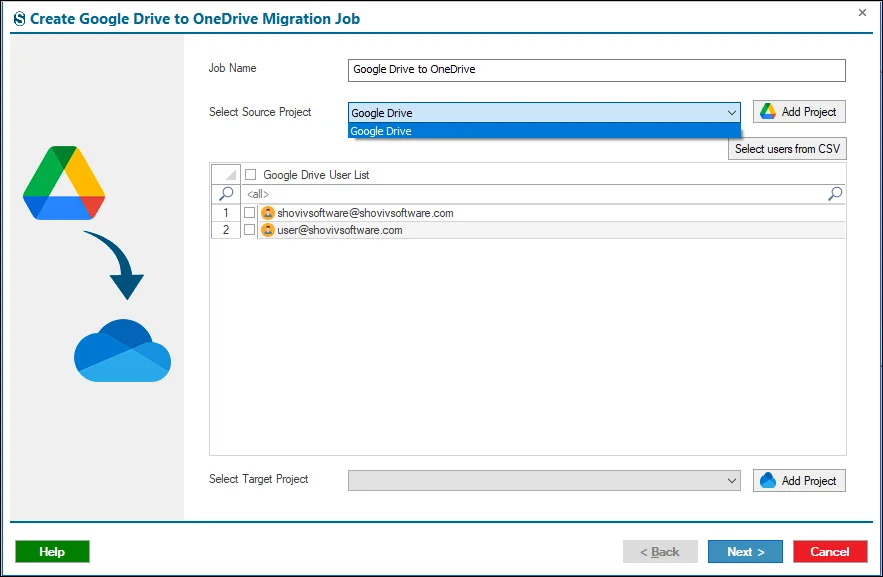
Step 4: Give the name of the Job within the Job Name in such a way that you can identify it later from the other created projects in the previous manner.
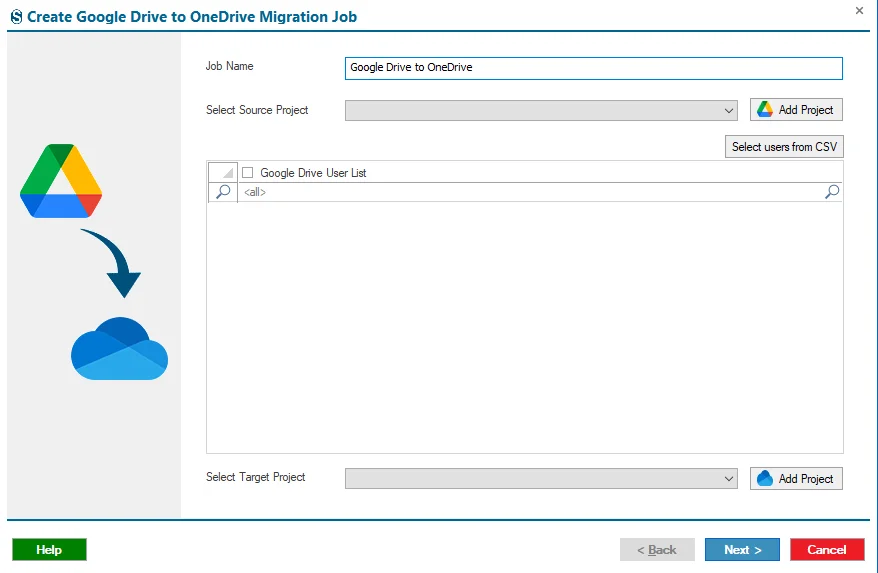
Step 5: Create a new Source Project by clicking Add Project.
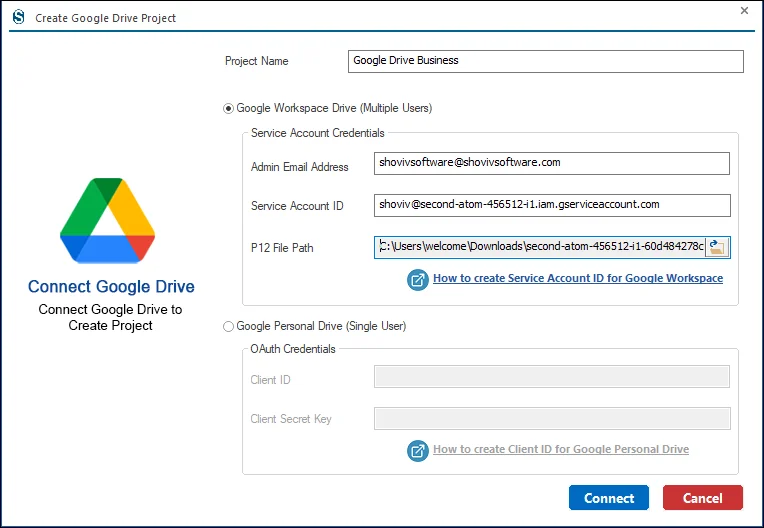
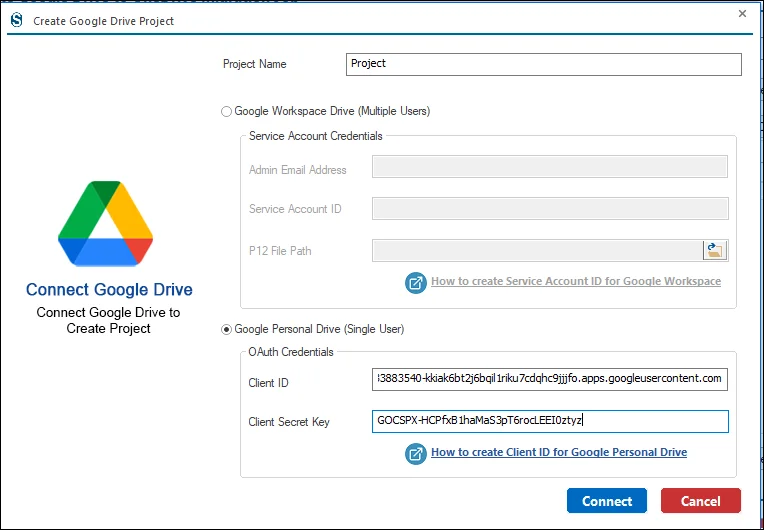
Step 6: If you need to migrate personal data, select the Google Personal Drive account and provide all the required credentials.
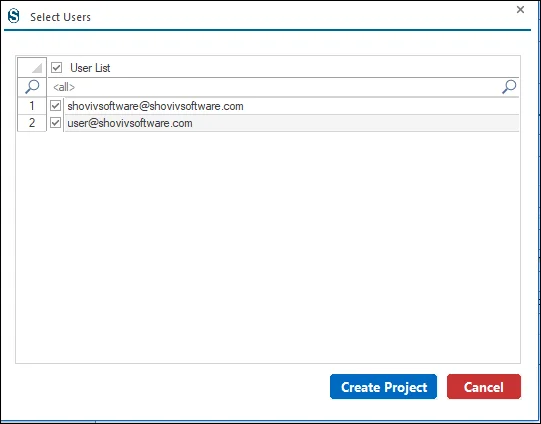
Step 7: If you selected Google Drive Business, choose the Source Drives from the list and then click Create Project.
Step 8: Source Project, you can select it from the dropdown menu and proceed with the next steps.
- Selecting many drives becomes effortless through the Source Users From CSV.
Step 9: To begin, connect to the Source project and select Add Project.
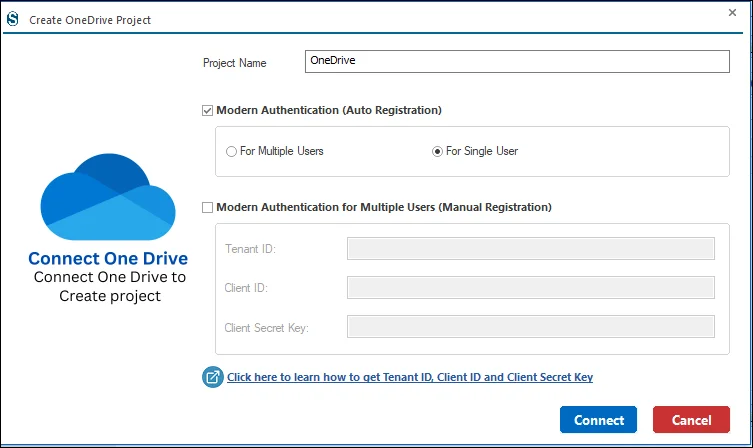
- When connecting a Personal OneDrive or OneDrive for Business account, you can authenticate using either Auto Registration or Manual Registration.
- Select Modern Authentication, which will display two options under Auto Registration: Single User and Multiple Users.
- Choose the option that best suits your requirement and click Connect to continue.
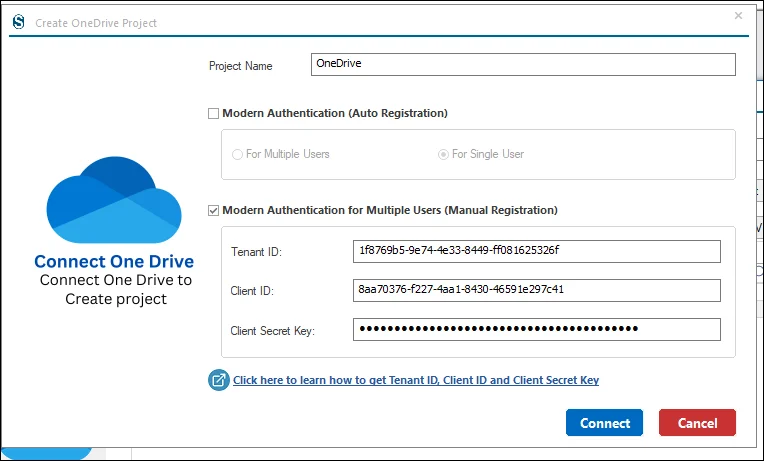
Step 10: Manual Registration: Requires you to manually enter credentials such as the Tenant ID, Client ID, and Client Secret Key.
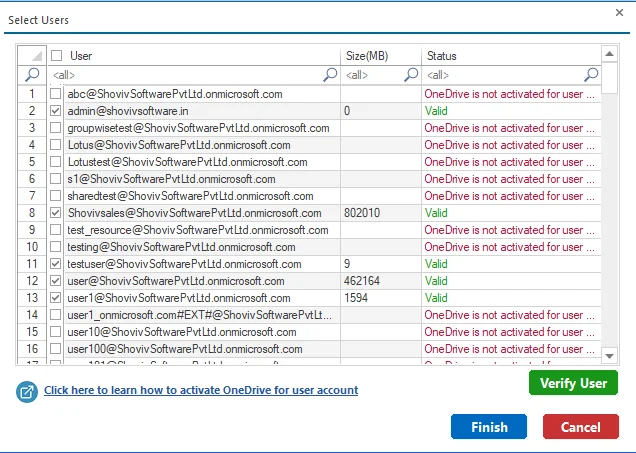
Step 11: Choose the Target Drives you want from the list. After verifying the drivers by clicking on the Verify button you need to complete the process with the help of the Finish button.
Step 12: If a Target Project for OneDrive already exists, select the appropriate project from the dropdown menu.

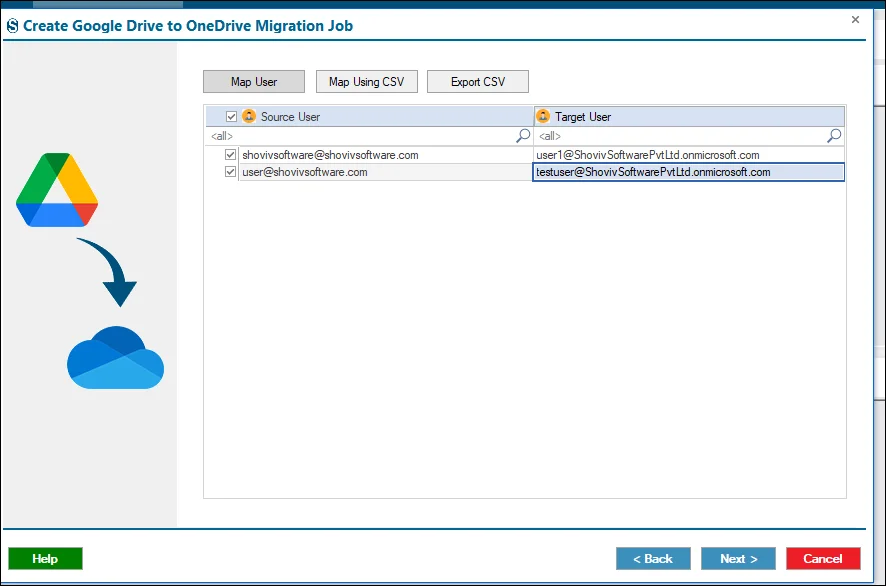
Step 13: Use the Mapping feature to match Source and Target Drives.
- Select the Source Drive.
- Click Map User to view the list of OneDrive Target Drives.
- Choose the specific OneDrive Target Drive you want to map to the selected Source Drive.
- Map Using CSV: Import a CSV to map users at once.
- Export CSV: Export mapping data into a CSV file
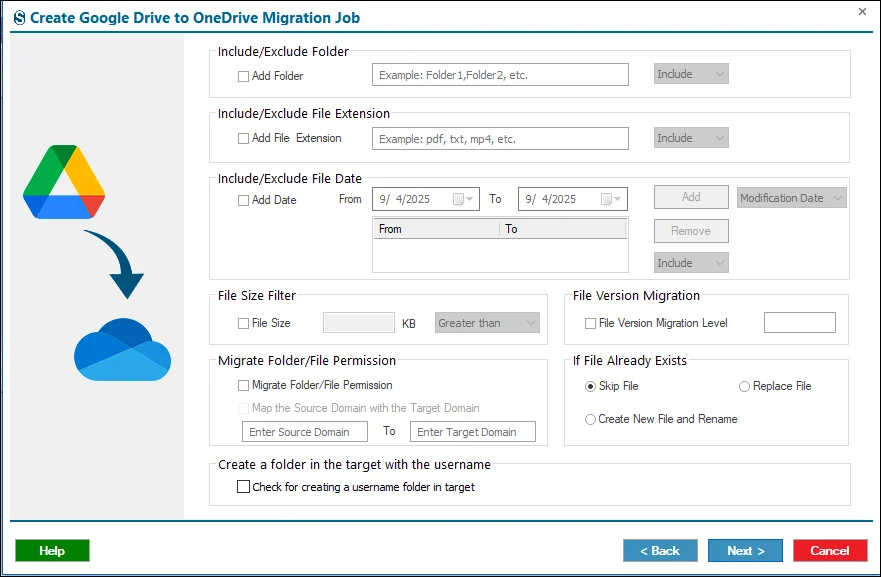
Step 14: The filter screen allows you to precisely control which data is included in the migration. You may refine the migration using the options below, or bypass this step by selecting Next.
- Date Filter: Transfer only files that were created or modified within a defined date range.
- Folder Filter: Specify which folders should be included in or excluded from the migration.
- File Size Filter: Set minimum or maximum file size limits to prevent migrating oversized files.
- File Extension Filter: Define which file types are permitted or restricted during the migration.
Duplicate File Handling:
- Skip File: Do not migrate files that already exist.
- Replace File: Overwrite existing files at the destination.
- Create New & Rename: Keep both files by renaming the new one.
Additional Settings:
- File Version Migration: Migrate selected versions of files.
- Check For Creating a New Folder: With the help of these options you can create a folder in the Target User by the name of the Source User, under this same structure of the folder/ file as the Source will be migrated.
If you do not need it then you can ignore it with the help of the Next button.
Step 15: Under the Settings page you can apply the advanced settings.
- User Thread Count: Determines how many users are migrated at once. Higher values speed up the process but require more system resources.
- Item Thread Count: Sets how many files or folders are handled simultaneously for each user. Increasing this improves speed, while decreasing it reduces system load.
- User Login Attempts: Specifies how many times the system retries a login if it fails.
- User Drive Item Retrieve Attempts: Defines how many retries are made when a file migration fails.
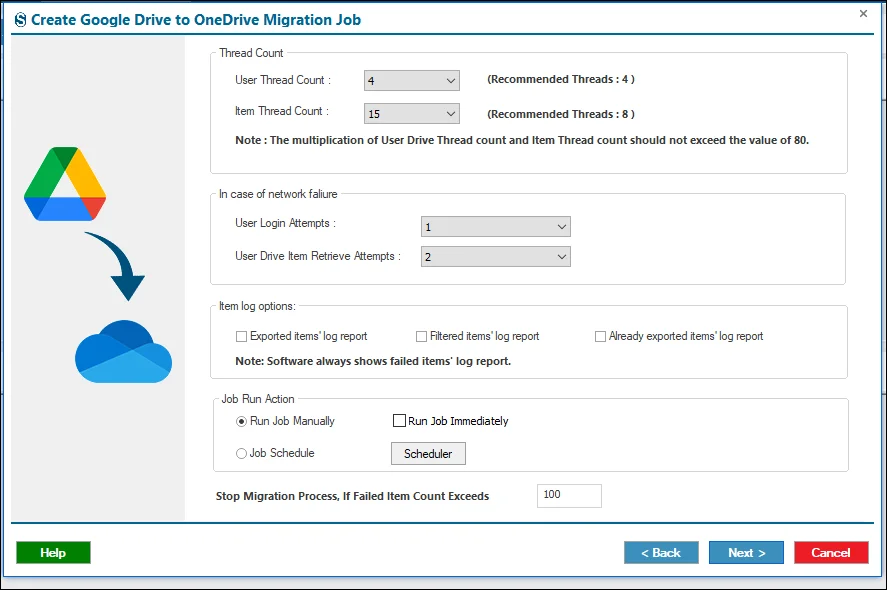
Step 16: Here you can set the scheduler option. You can set the options for how a job is migrated.
- Run Manually: Start the migration at any time directly from the dashboard.
- Start Immediately: The migration launches automatically as soon as it’s created.
- Run on a Schedule: Choose a specific date and time for the migration to begin.
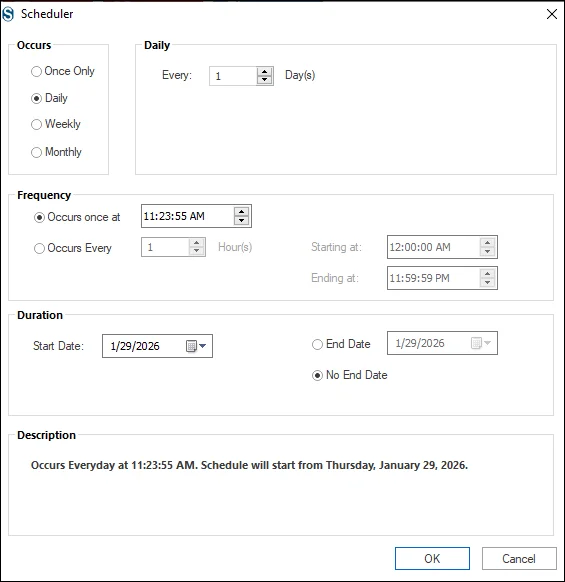
Repeat Options
- Daily: Runs the migration every day at a chosen time.
- Weekly: Executes once per week or on selected weekdays.
- Monthly: Runs on designated dates each month.
By using the Scheduler, you reduce the need for manual effort and ensure migrations run on time. You can also bypass scheduling and continue by selecting Next.
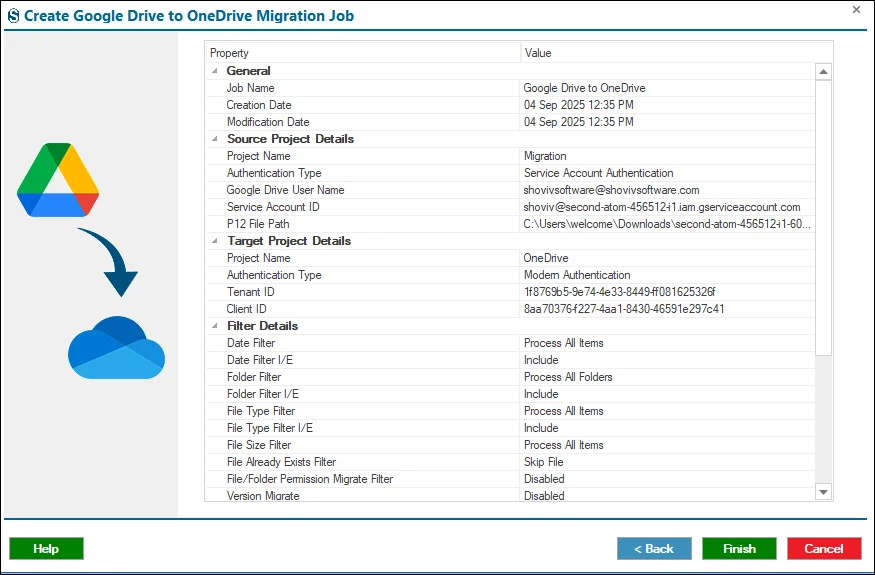
Step 17: Review all your selected settings carefully. If everything looks correct, click Finish. If you need to make changes, use the Back button to adjust the configuration before finalizing the migration.
Step 18: Once configured, the job executes automatically using your chosen settings.


