To create the service account and P12 path, users need to follow a certain set of procedures which are shared below:-
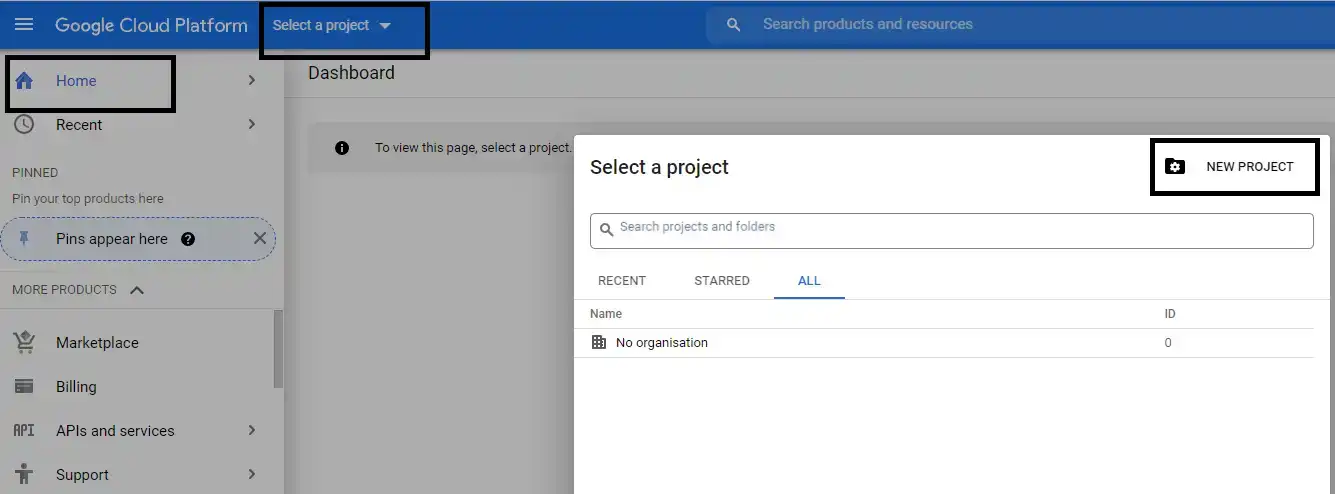
- Create a Google Cloud Project
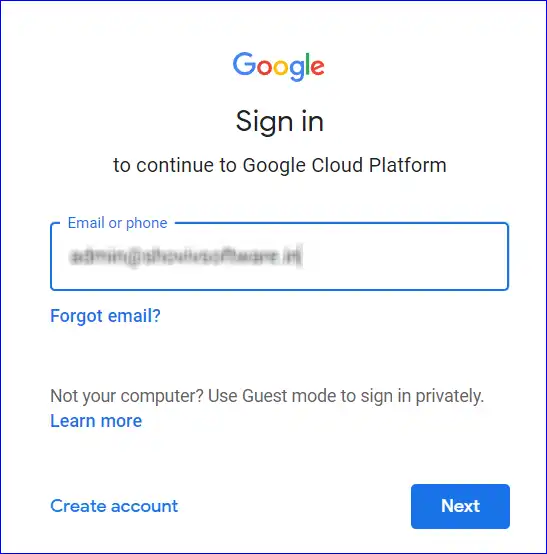
- Using the credential of your G Suite account, log in to your Google Cloud platform.
- In the Google Cloud Platform go to the Home. Firstly, select a project and then click on the New Project option.
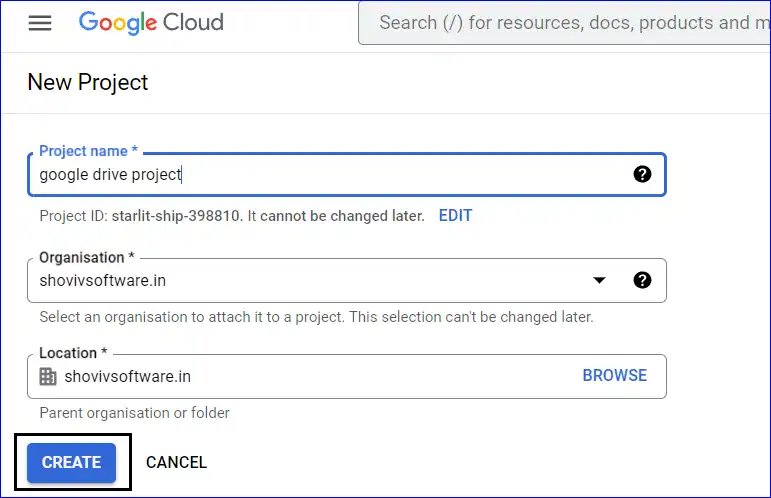
- Here, enter the details in the project name, organization, and location. Thereafter, click on the Create button.
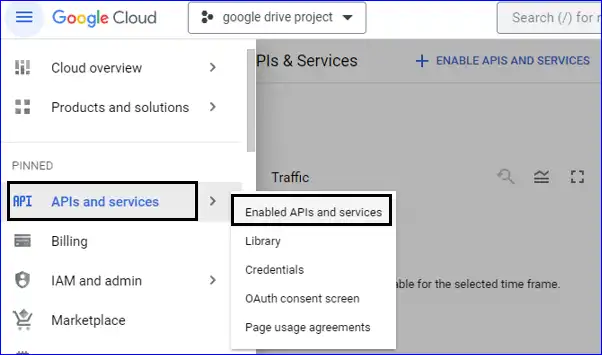
- Enable API & Services
- Click on the APIs and services and then select the enables APIs and services option.
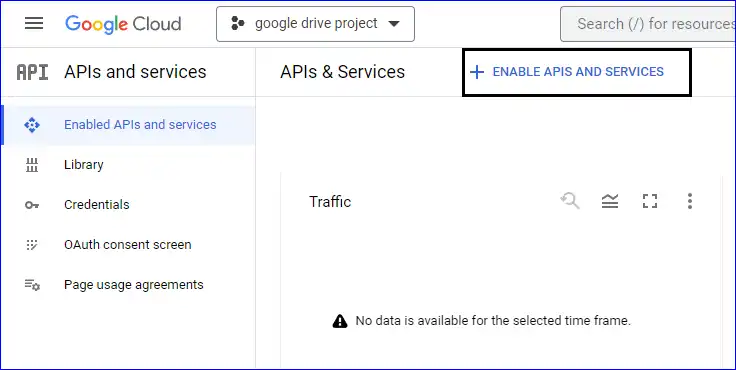
- Here, you need to choose the already created project and after that, click on the ENABLE APIS AND SERVICES option.
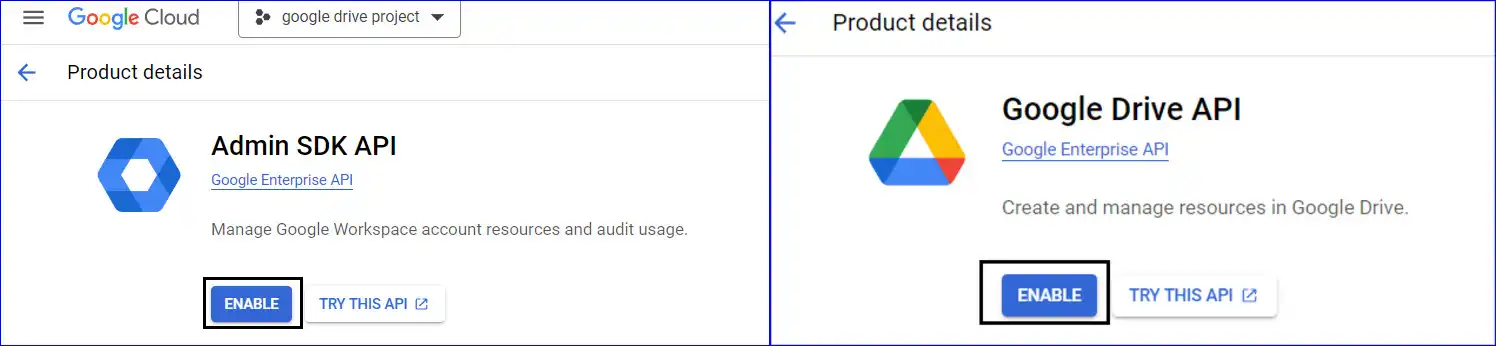
- Users need to locate for Admin SDK and Google Drive API in the search bar. Later on, enable them.
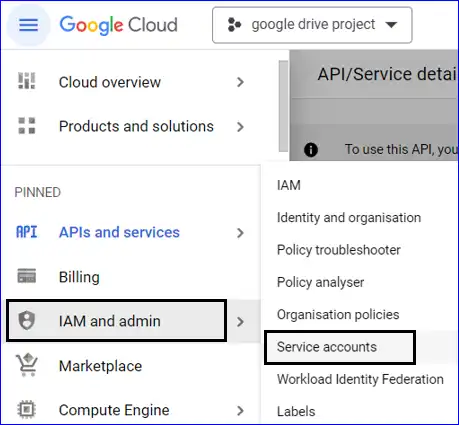
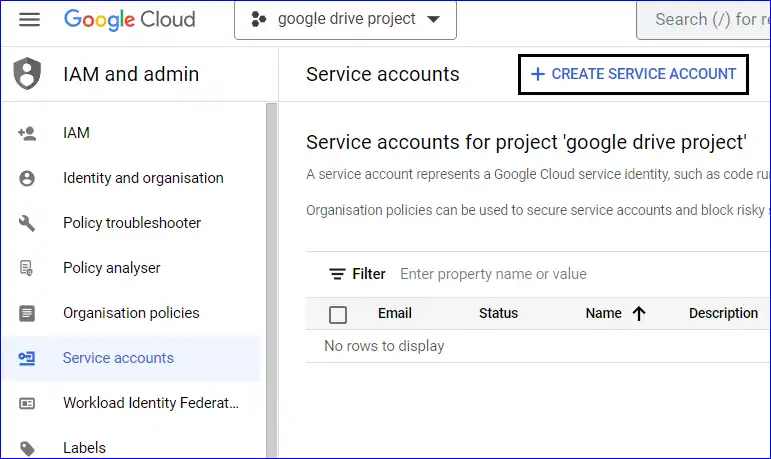
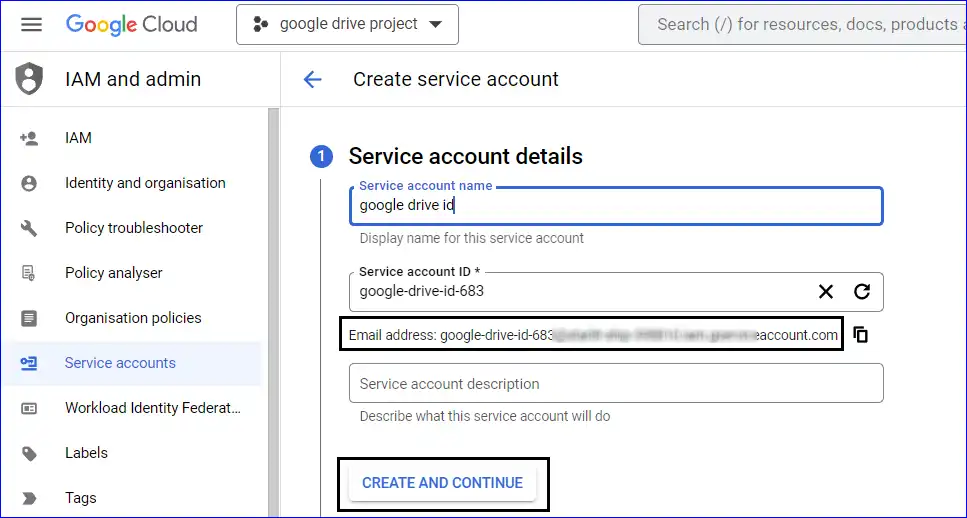
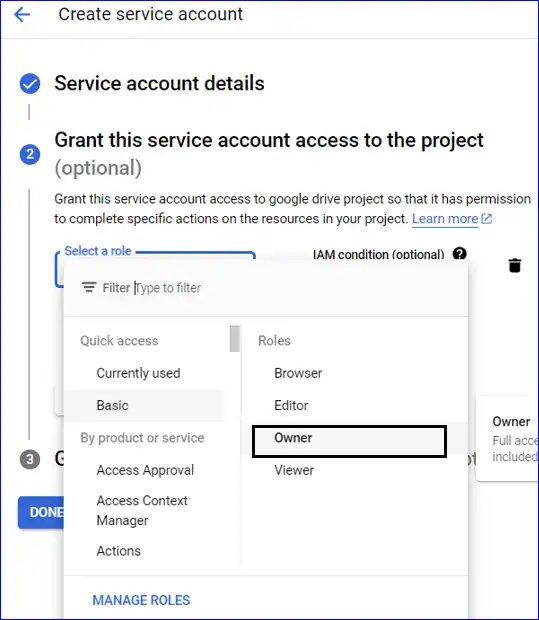
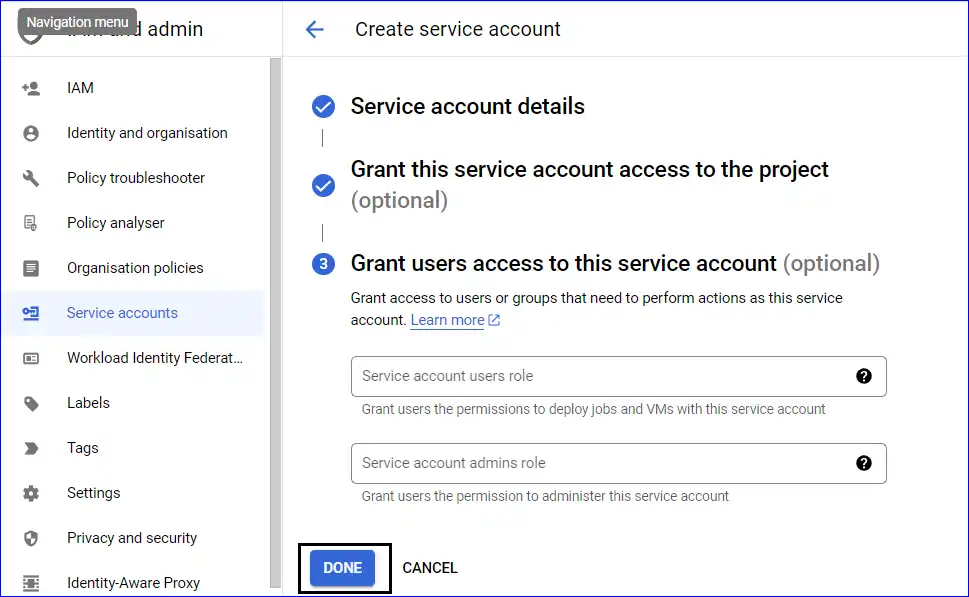
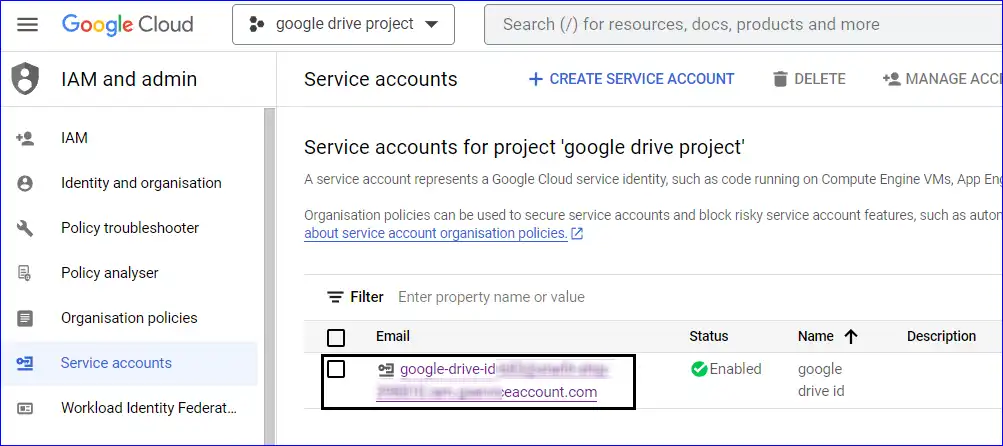
- Create a Service Account
- Delegating Authority to the Service Account
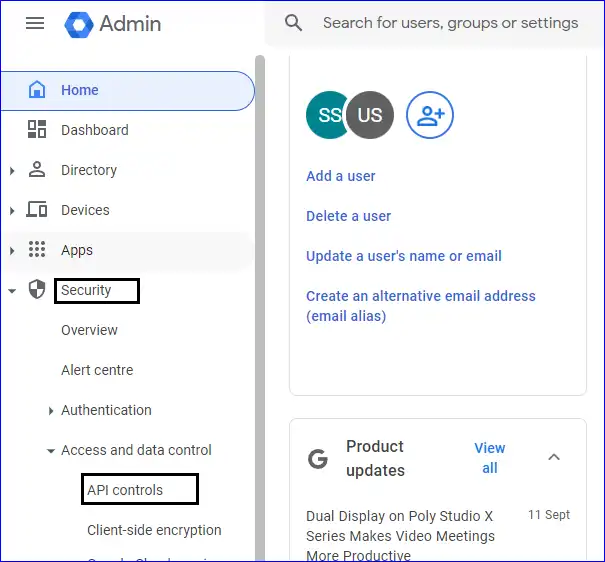
- In the Admin Console, click on Security option, and then on the API Controls option.
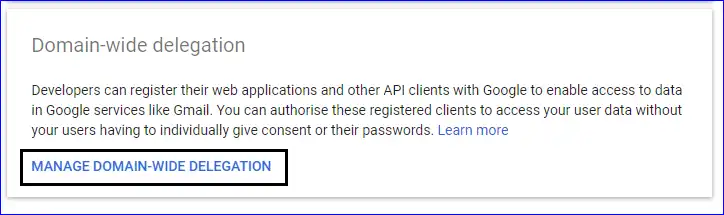
- Here, kindly click on the Manage Domain Wide Delegation button.
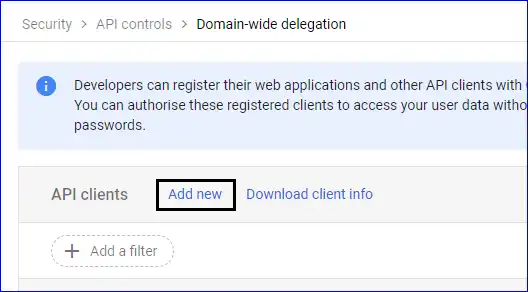
- In the Domain-wide delegation, click on the Add new option.
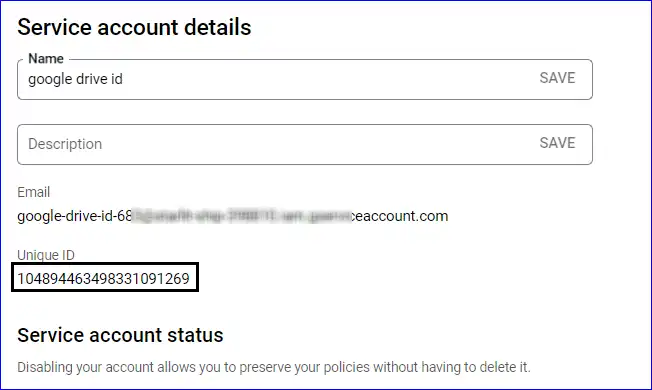
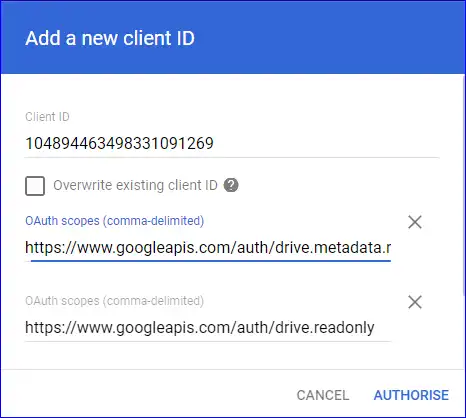
- Make sure to paste the Unique ID in the client ID field that you have earlier copied. Also, fill out the scopes in the given fields. Users can mention each scope in a different field or can also mention all of them in the same field by separating them by a comma. After entering them, click on the Authorise button. Those permissions are:-
- https://www.googleapis.com/auth/drive.metadata.readonly,
- https://www.googleapis.com/auth/drive.readonly,
- https://www.googleapis.com/auth/drive.file,
- https://www.googleapis.com/auth/admin.directory.user,
- https://www.googleapis.com/auth/drive
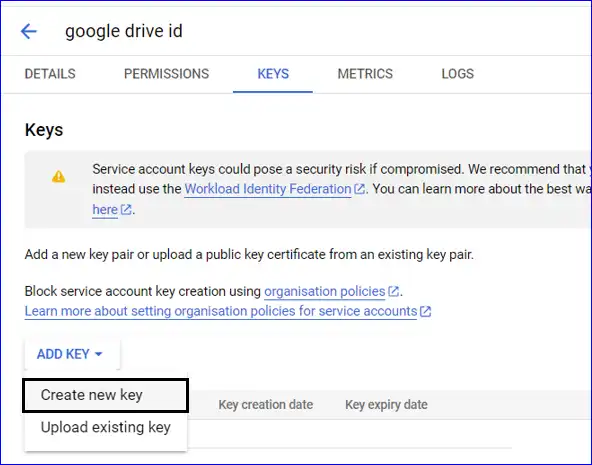
- Go back to the Service accounts and click on the Key. Click on the Add Key, where a list will appear, and choose Create new key.
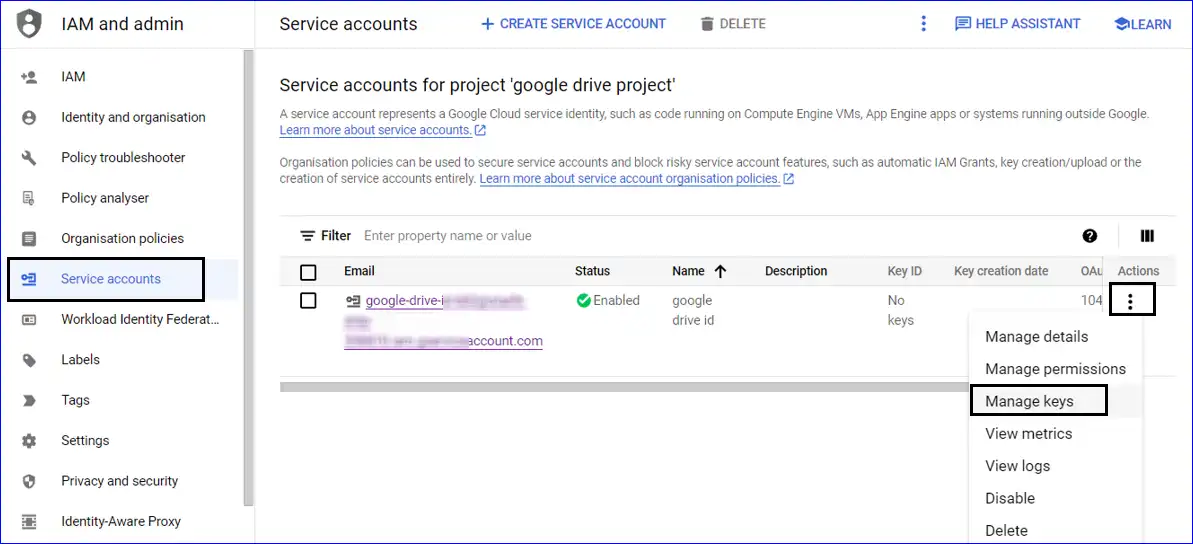
- On the service accounts settings option, click on Actions and select the Manage keys option.
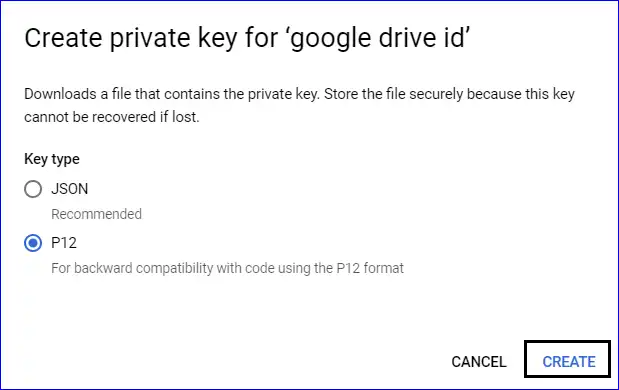
- Select the P12 option and click on Create to download a private key.
- If you are facing the below-mentioned error while creating the P12 File, then click here: https://www.shoviv.com/technical-guide/service-account-key-creation-is-disabled.html