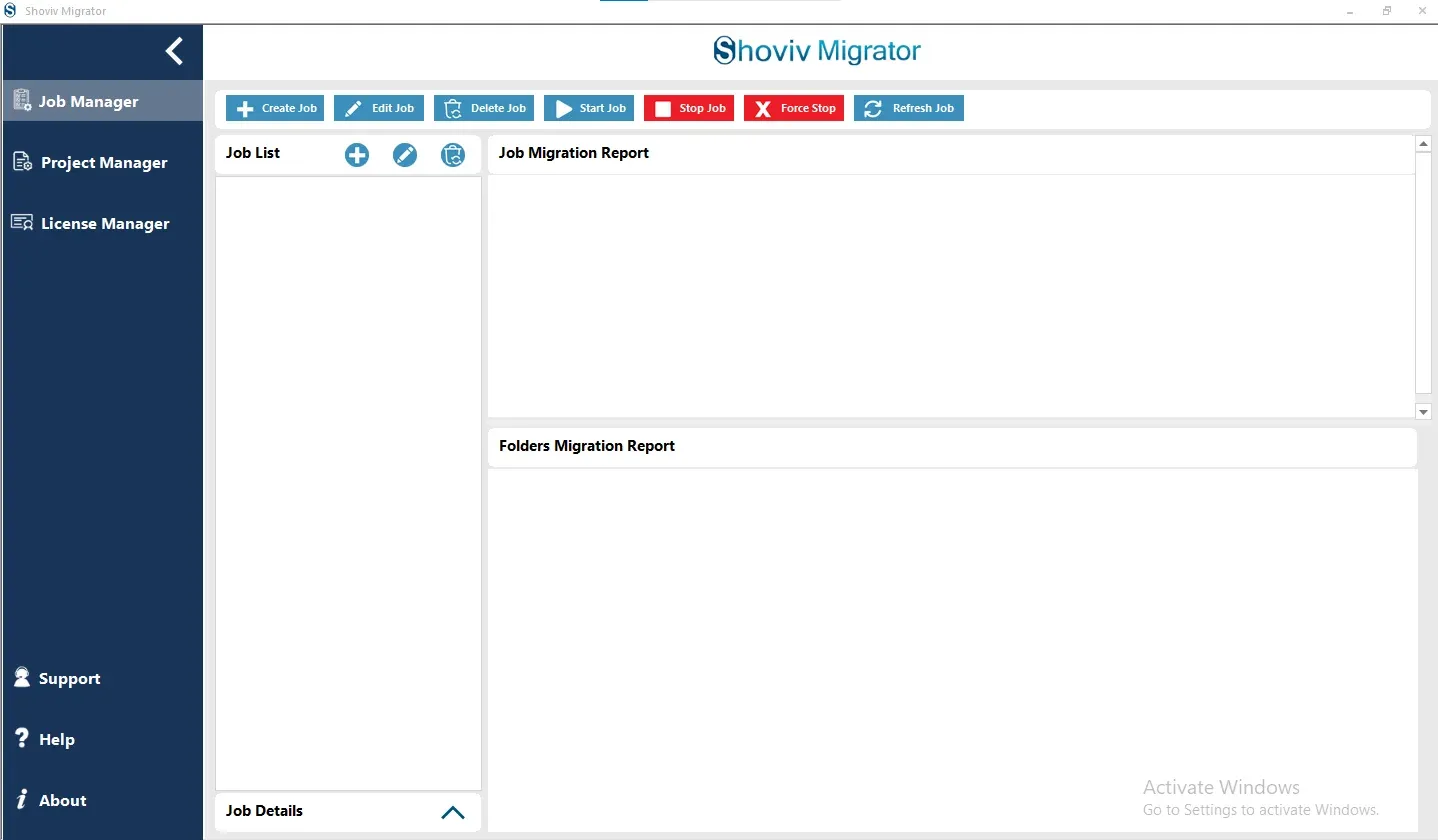
Step 1: After finishing the installation and opening Shoviv Migrator, the main interface will open. From the Job Manager window, click on Create Job from the ribbon bar.
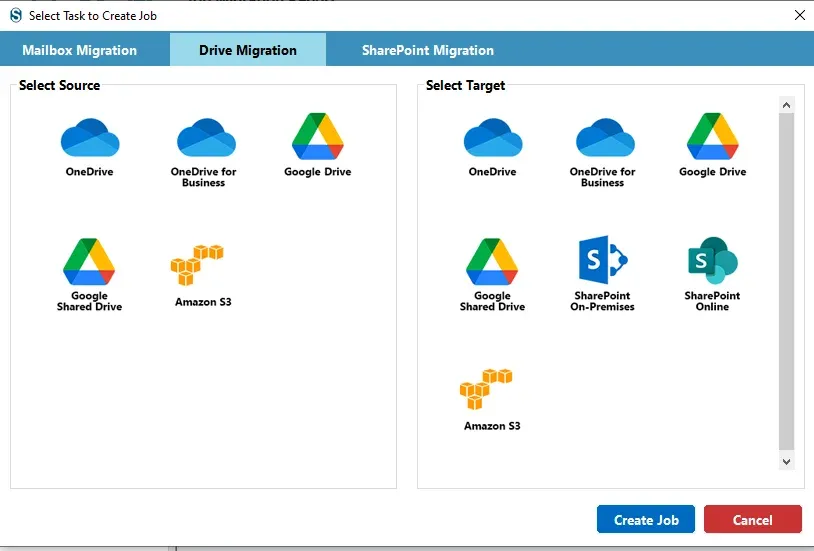
Step 2: In this window, click "Drive Migration" to proceed.
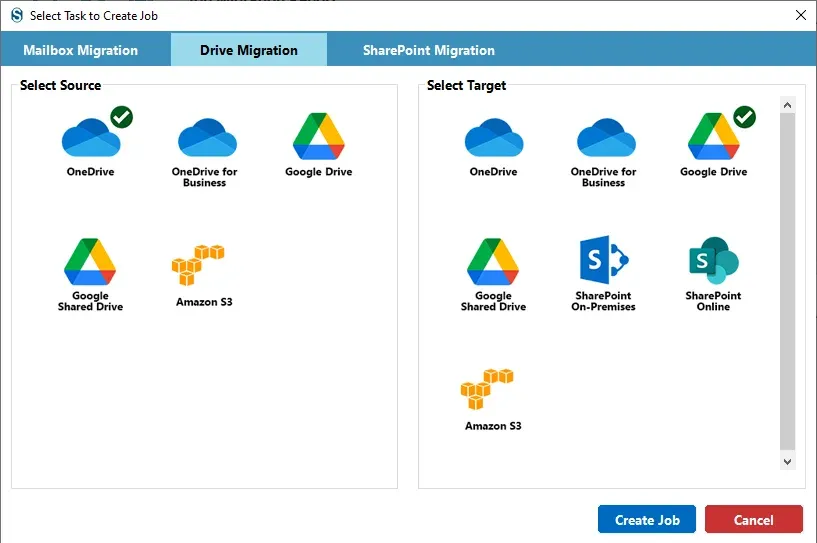
Step 3: Now select OneDrive as the Source and Google Drive (Business/Personal) as the Target. After that, click on Create Job.
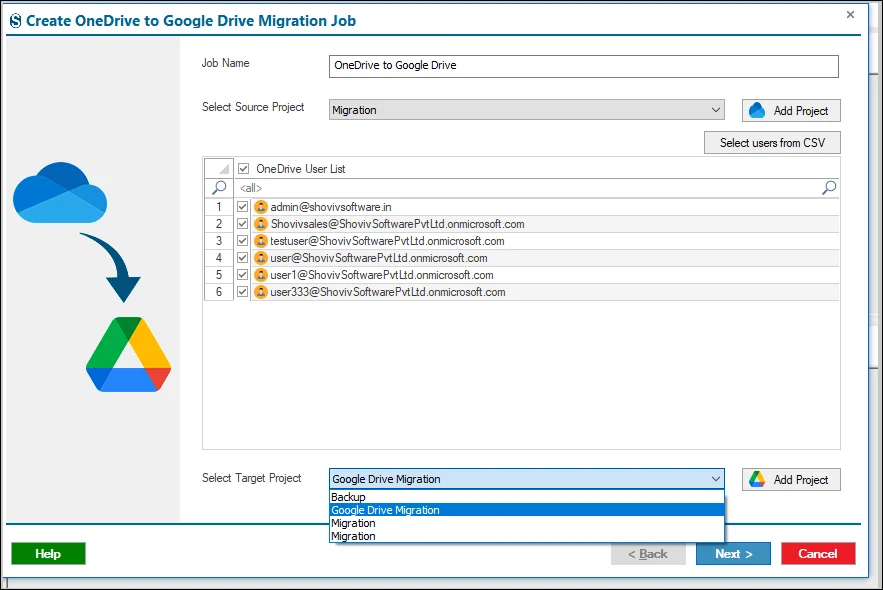
Step 4: After finalizing this, another screen appears with the Create Job, where you need to fill in the Job Name.
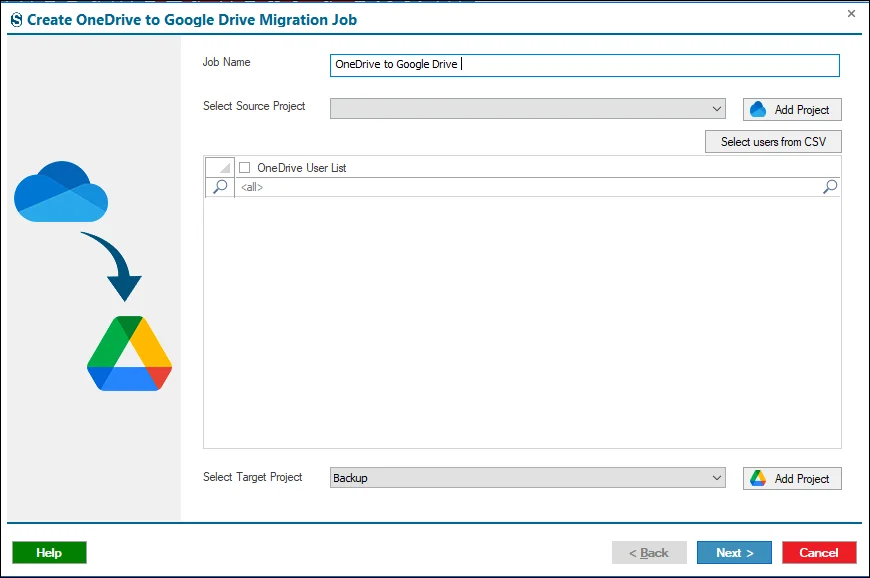
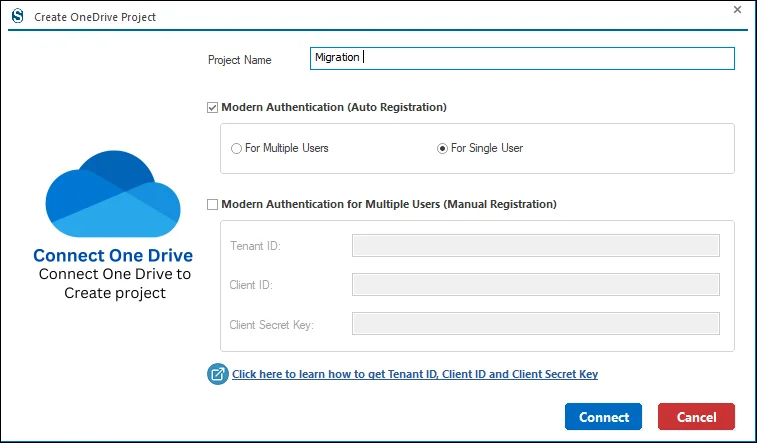
Step 5: Now you need to connect with the Source Project, to create a one by clicking Add Project. After clicking it a new page opens, where you have two options: Auto and Manual Modern Registration.
- With the Auto Registration, you have to do all the required processes that are needed, and you will connect with the Source Project.
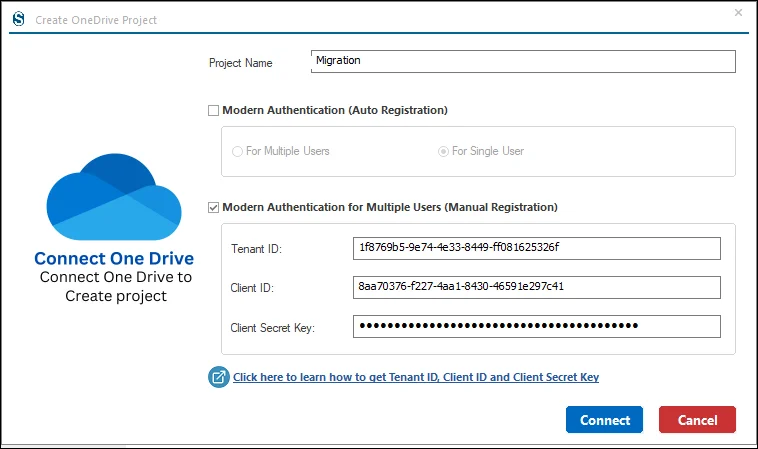
Step 6: If you want to connect with the Source Project through the Manual Registration, then you enter all the essential credentials which are present on that screen.
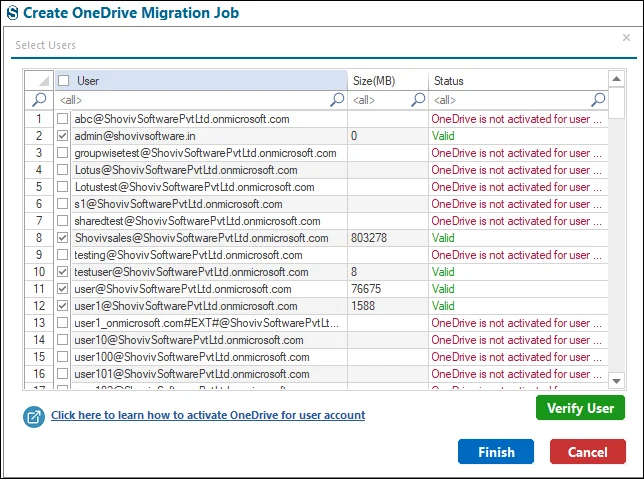
Step 7: Select the required User from the User List for the Source Project.
Step 8: In case if you already have the Source Project present in your system then you need to select it from the dropdown menu.
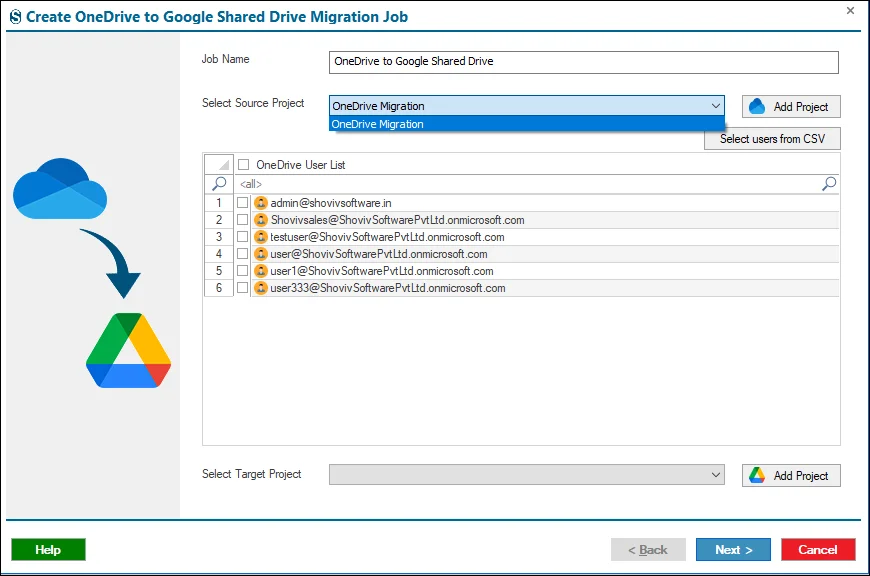
Step 9: Now you need to connect with the Target Project.
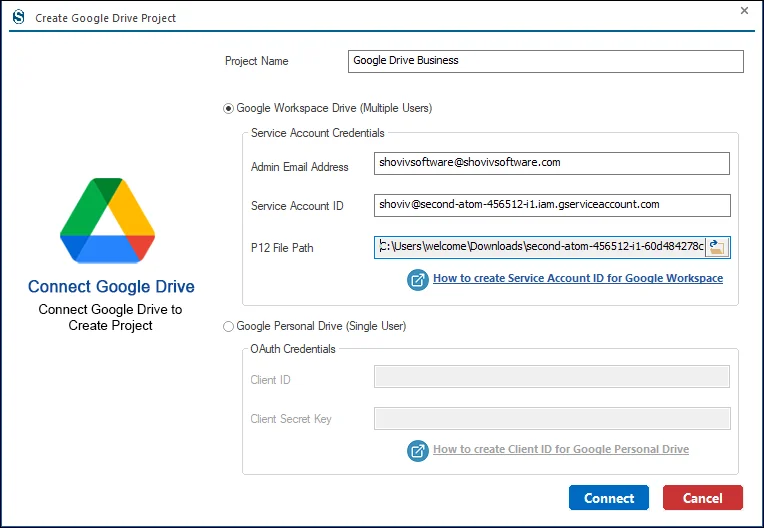
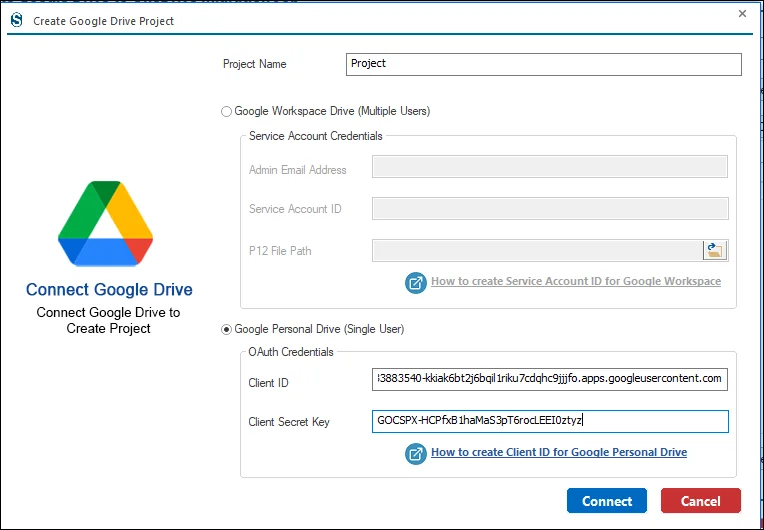
Step 10: At this point, you need to select the Target Users from the list and then hit the Create Project button to complete the process of the Target Project.
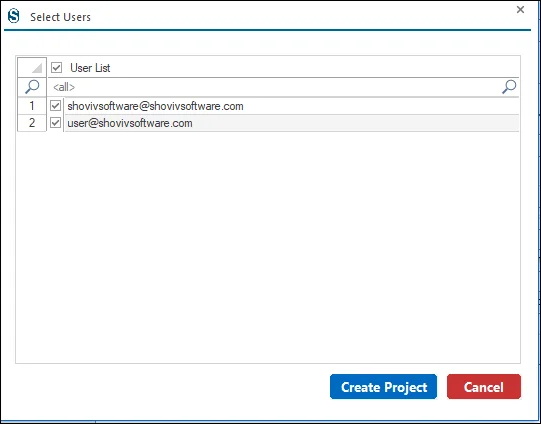
Step 11: Now, the process grows further with the Target project connection. If you have already previously opened the project, then select it from the dropdown section.
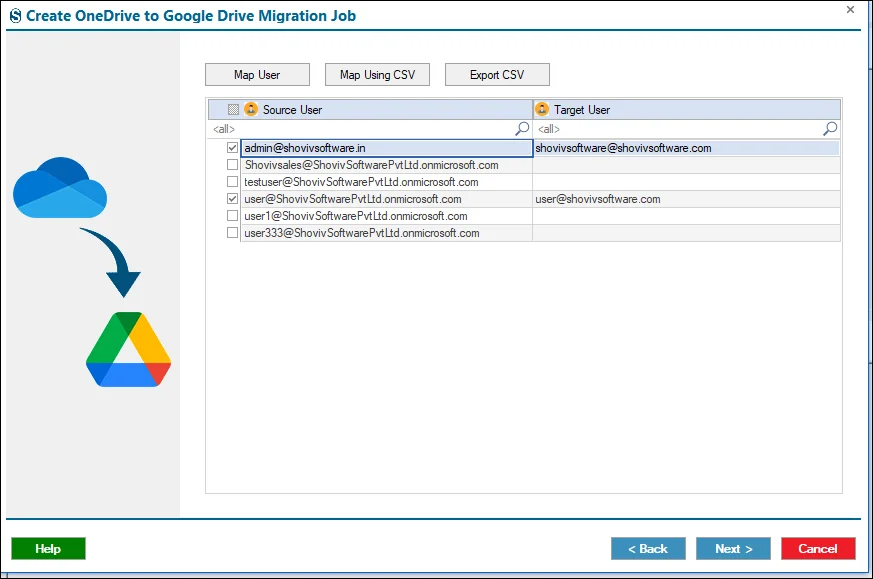
Step 12: For the accurate and smooth migration, match your target and source users with each other with the help of the Mapping Facility.
- You have seen the source users listed in the screen that you chose in the previous steps. Please select one from them that you want to work on at that moment.
- After that, click on the Map Users and then select the Target user for that specific source user. Click on Next.
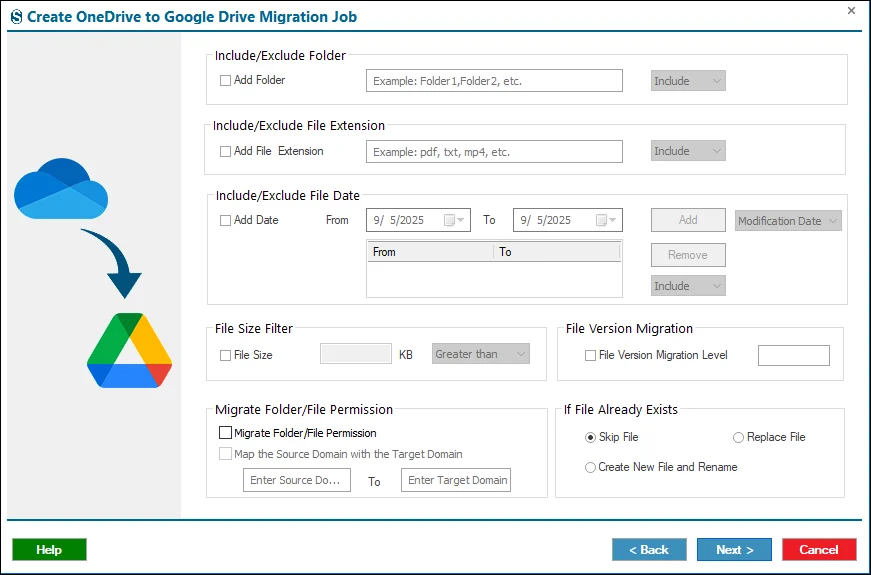
Step 13: If you want to apply any filter then you can choose from these windows, or if not, then skip with the Next button.
- Include/Exclude Folder Type – Select specific folders to include in or exclude from migration by entering folder names and choosing the appropriate filter option.
- File Extension – Filter files by their extensions, allowing only selected file types or excluding unwanted formats during the migration process.
- File Date – Filter files according to their creation or modification dates, ensuring only the required date range is processed.
- Size Filter – Filter files based on their size by defining a value and comparison condition before initiating the migration process.
- Version Migration – Specify the number of previous file versions to migrate along with the latest version to the destination account.
- Migrate Folder Permission – Preserve folder and file sharing permissions during migration, ensuring users retain the appropriate access after migration completes successfully.
- If File Already Exists – Choose how duplicate files are handled by skipping, replacing, or creating renamed copies in the destination storage.
- Skip File – Ignores files already existing in the destination, preventing duplicate content and reducing unnecessary migration time and storage usage.
- Replace File – Overwrites the existing destination file with the latest source version, ensuring updated content is available after migration.
- Create New File and Rename – Creates a duplicate file with a different name instead of replacing the existing file in the destination account.
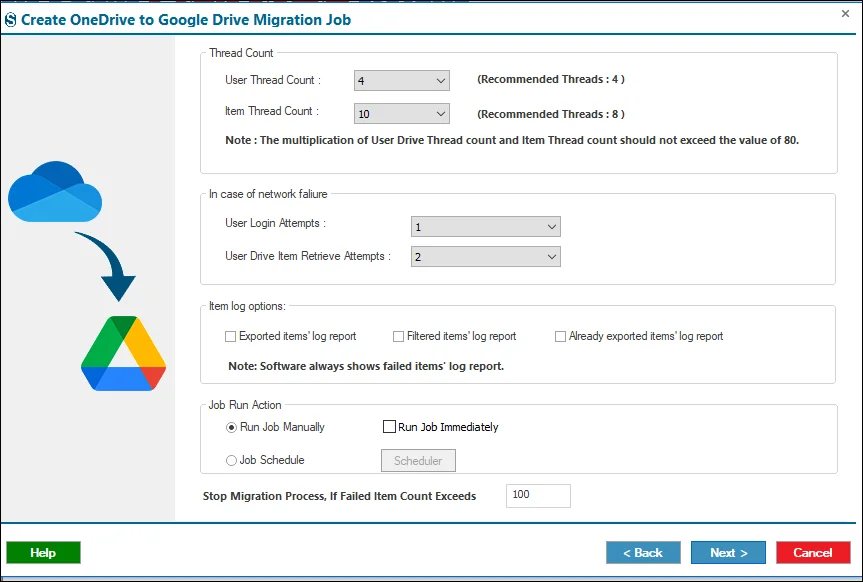
Step 14: Here, you can find which setting you want for your migration. If not needed, then click on the Next button.
- User Thread Count: Select the number of user migration threads to run simultaneously, improving migration speed while maintaining optimal system performance and stability.
- Item Thread Count: Specify how many file items migrate concurrently for each user, balancing migration performance and preventing excessive resource consumption effectively.
- User Login Attempts: Define how many times the software retries logging into the source account if authentication fails due to temporary issues.
- User Drive Item Retrieve Attempts: Specify the number of retry attempts for retrieving OneDrive files when network interruptions or temporary access failures occur during migration.
- Exported Items’ Report: Generates a detailed report containing all successfully migrated items, making verification and migration auditing easier after job completion.
- Filtered Items’ Report: Creates a report listing all items excluded by migration filters, allowing administrators to review skipped files and folders easily.
- Already Exported Items’ Log Report: Generates a report of previously migrated items skipped during incremental migration, preventing duplicate processing and simplifying migration tracking.
- Run Job Manually: Creates the migration job without starting it, allowing you to review settings before executing the migration at a preferred time.
- Run Job Immediately: Starts the migration automatically after the job is created, eliminating the need for manual execution and saving administration time.
- Job Schedule: Schedule the migration to run automatically at a specified date and time, supporting planned or recurring migration operations efficiently.
- Bad Item Count: Automatically stops the migration when failed item count exceeds the specified limit, preventing continuous errors and simplifying troubleshooting efforts.
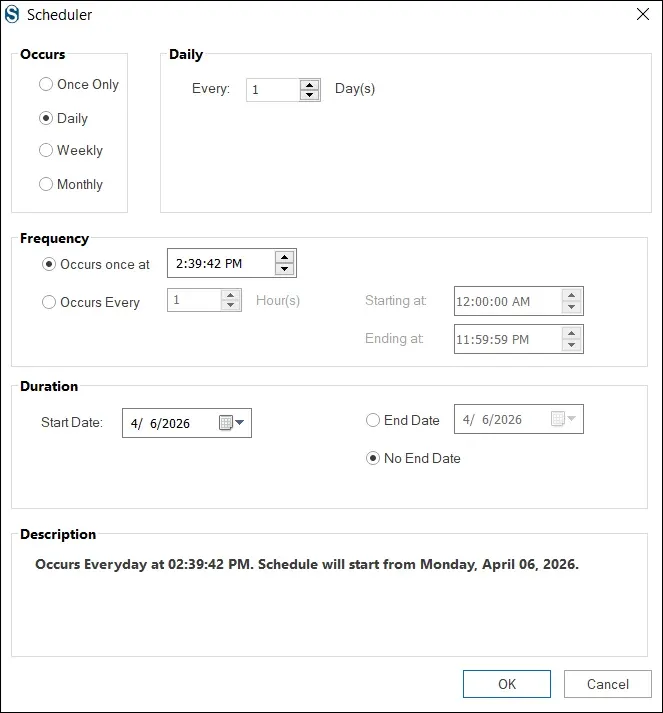
Step 15: The Scheduler feature automates migration execution based on your preferred schedule. Available options include:
- Run Job Manually – Start the migration from the dashboard whenever required.
- Start Immediately After Job Creation – Automatically launch the migration upon job creation.
- Job Schedule – Run the migration on a specified date and time.
- Daily – Execute the job every day at a designated time.
- Weekly – Run the job on selected days each week.
- Monthly – Schedule the migration on specific dates and months.
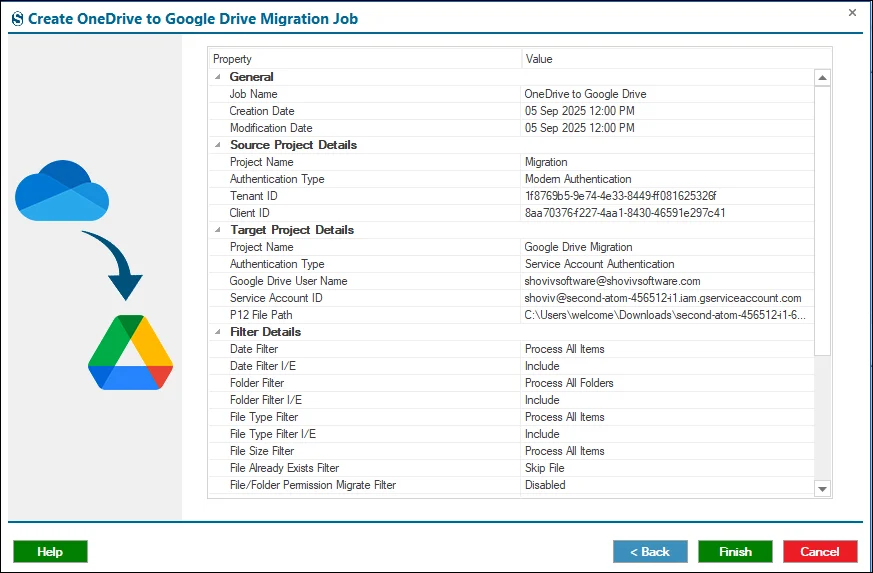
Step 16: Review your Job from this Job Summary.
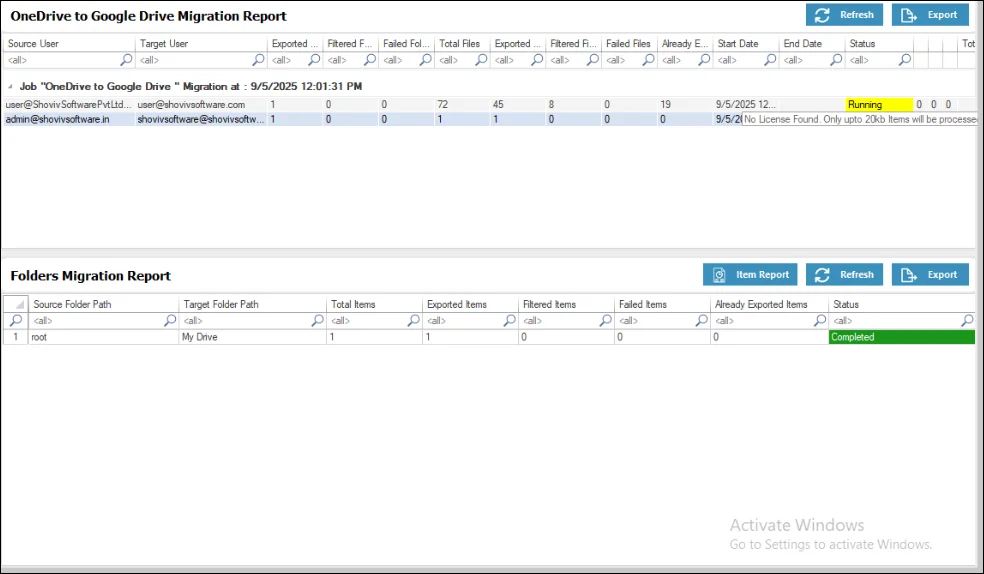
Step 17: Monitor the migration progress from the Running tab.