After installation, open the PST Management Suite and click the PST/OST Duplicate Remover option from the ribbon bar or the main menu.

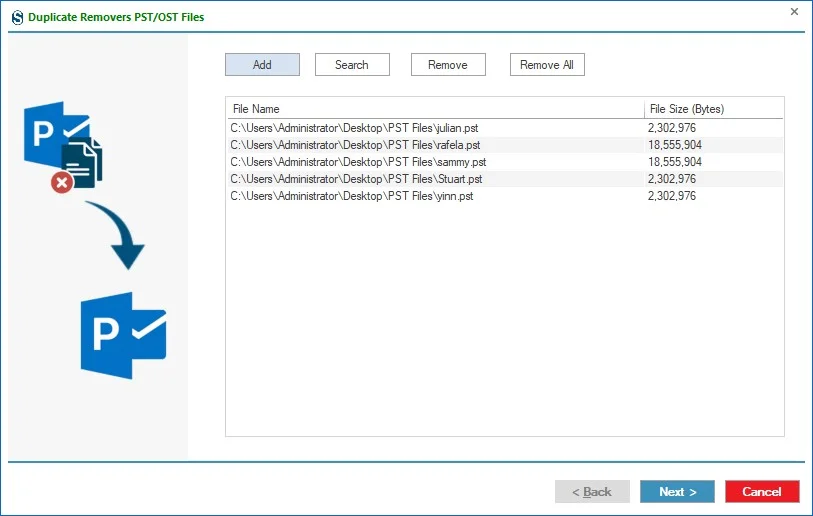
Step 1: Click on Add button to select and add the source PST/OST File.
You can also use the Search option to find the desired PST/OST files for conversion and tap OK.
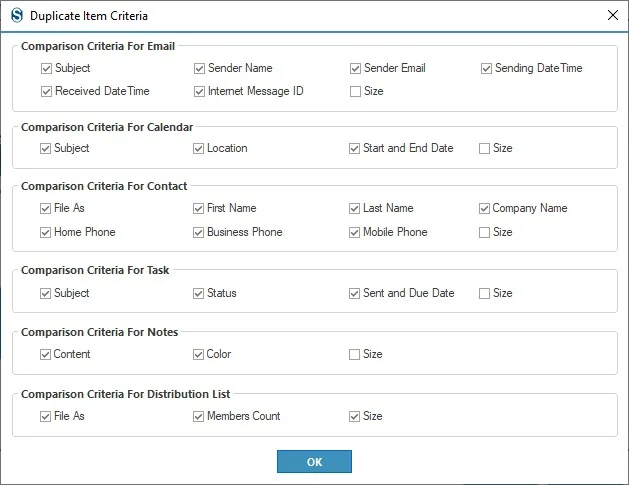
Step 2: Duplicate Item Criteria: The Duplicate Item Criteria allow choosing the properties you want to compare the items and find the duplicate items among them. The Software provides criteria for Email, Contact, Calendar, Task, Notes, and Distribution List.
Step 3: Outlook Duplicate Remover Options: This section will help you to remove duplicate items from the Outlook PST/OST file, following the comparison criteria.
1. Target Folder: This option allows the user to give the desired target location for the resultant PST/OST file anywhere on the disk by clicking on the browse button.
2. Comparison Criteria:
- Search Duplicate Items Within the folder: This choice allows you to scan for duplicate items in a folder only.
- Search Duplicate Items Across the folder: This feature allows to search out duplicate item across the folder and if any duplicate item exists outside the folder will consider as duplicate items.
3. Item Filter: Remove Deleted Items: Selecting this option will remove the "Deleted Items" from the Outlook PST/OST file.
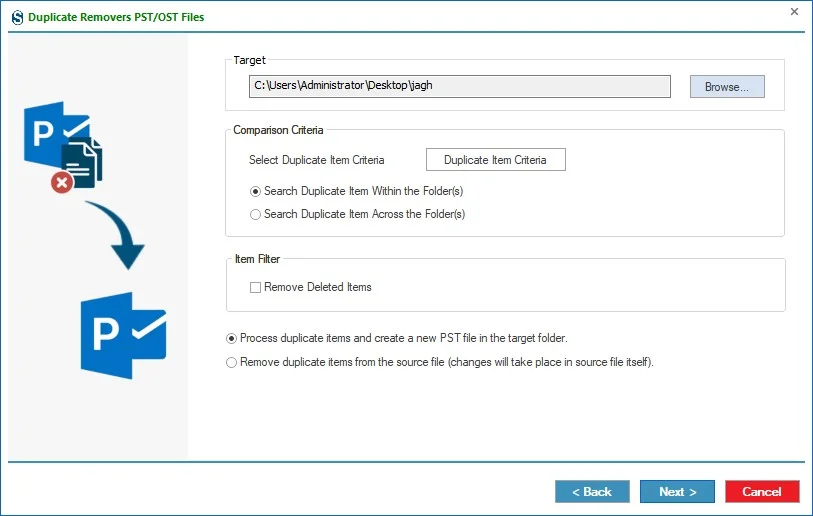
- Process duplicate items and create a new PST file in the target folder: Using this option you will get a new PST file in your selected target folder. The source file will remain unchanged but you will get a new resultant PST file.
- Remove duplicate items from the source file: With this option, the primary source file will itself get changes; there will be no creation of a new file. deduplication will take place in the added source file. (Changes will take place in the source file itself).
However, after deduplication, the OST/PST file size may not show less size (the actual size) even after it is compressed. It is due to the inability of PST/OST file size property change. Although, you can change the size property of the source file by following the below-given steps if you need:
- Open your file in Outlook.
- Now, make a right-click on the file.
- Click on the data file properties.
- Click Advanced.
- Finally, click on the Compact Now button
Now, you will get a file that shows the original size of the file. (The actual size of the file after deduplication).
- Once you have selected the target folder and applied comparison criteria according to the obligation, click the 'Next' button. After that, the 'Outlook Duplicate Remover Status' will display in the next window.
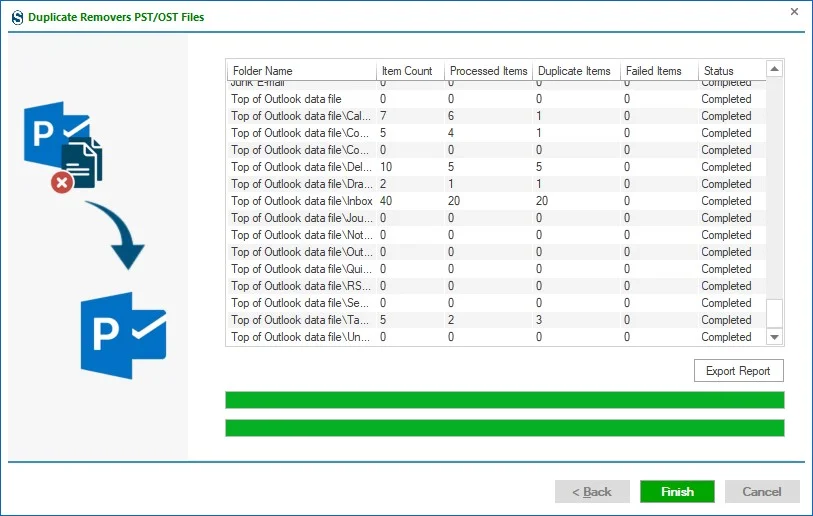
Step 4: Outlook Duplicate Remover Status
You can check the status of the current Duplicate Remover process like source folder, target folder, number of items, processed items, failed items, etc. of a selected PST/OST file.
You can stop the process through the Stop button. Otherwise, once the "Process completed successfully" message box appears, click the OK button.
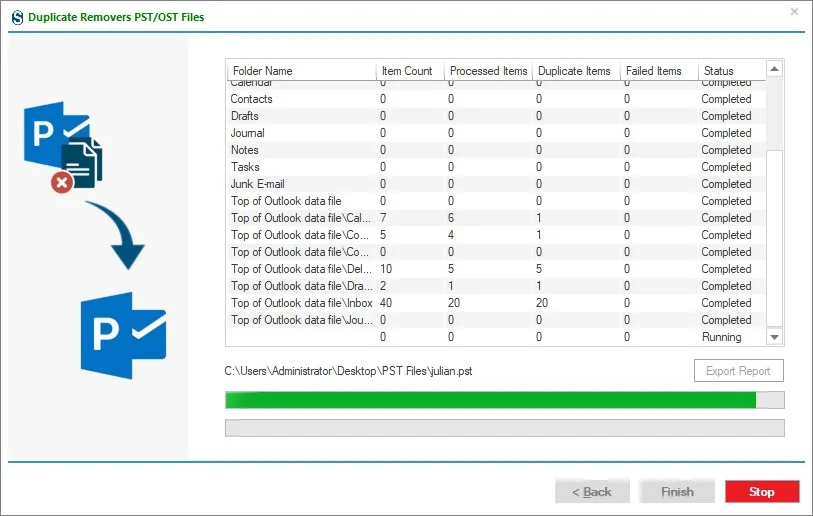
Export report: This option will help you to export the status of the Duplicate Remover process into an HTML file.
Finally, tap the Finish button once the task is completed. If needed, you can export the conversion task report.