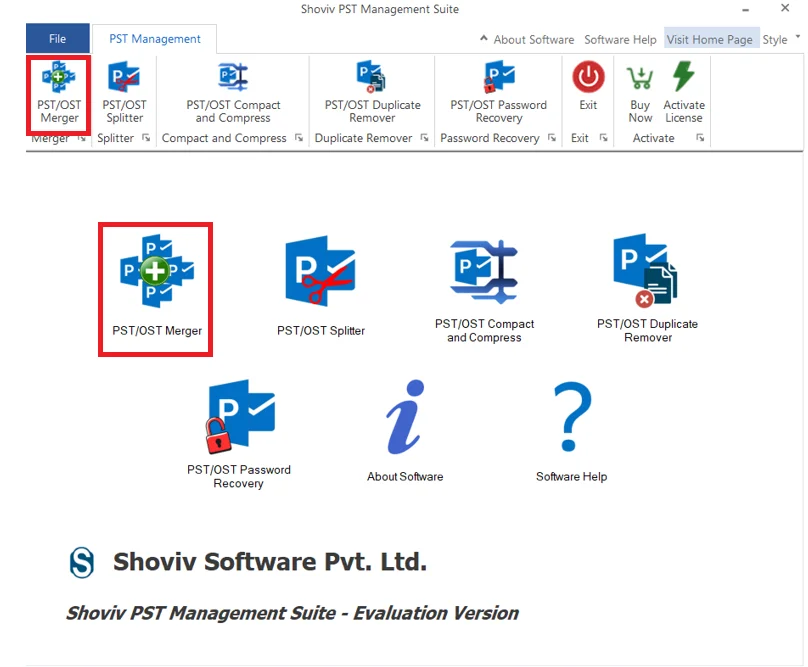
After launching Shoviv PST Management Suite, the main dashboard appears.
Step 1: From the available Options, click on PST/OST Merger to start the PST/OST merge operation.
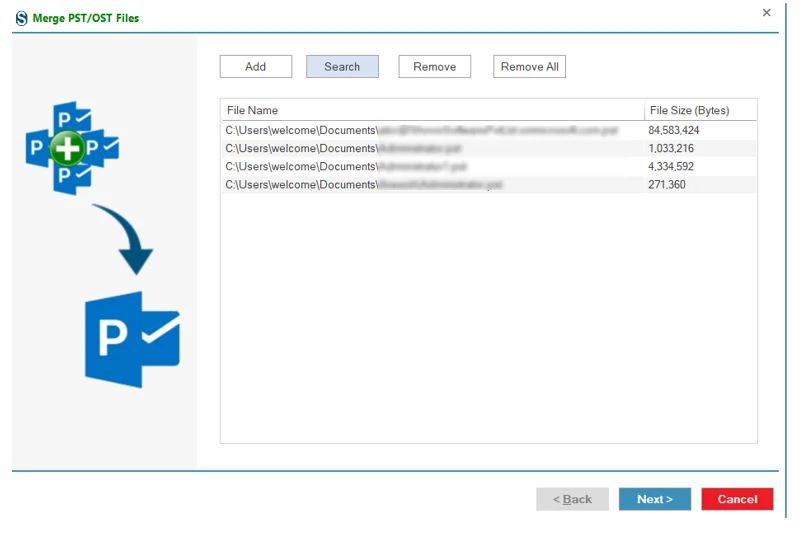
Step2: Add PST/OST Files
The Merge PST/OST Files window appears.
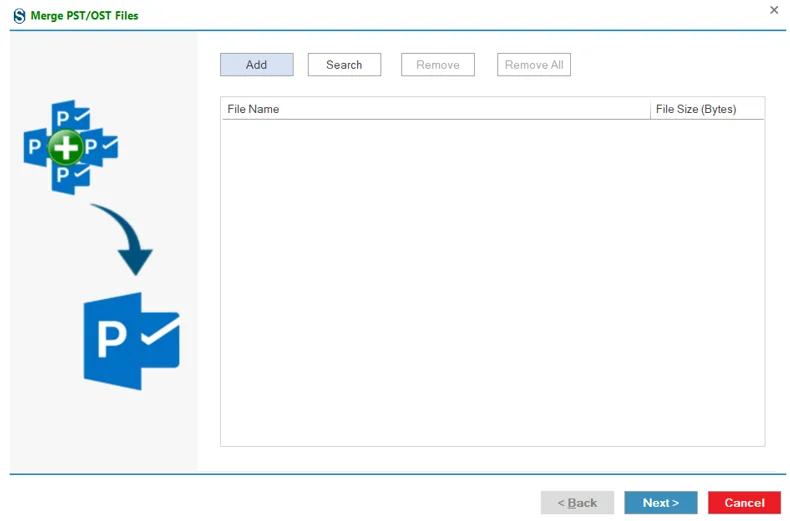
- Click Add to browse and select PST or OST files from the system.
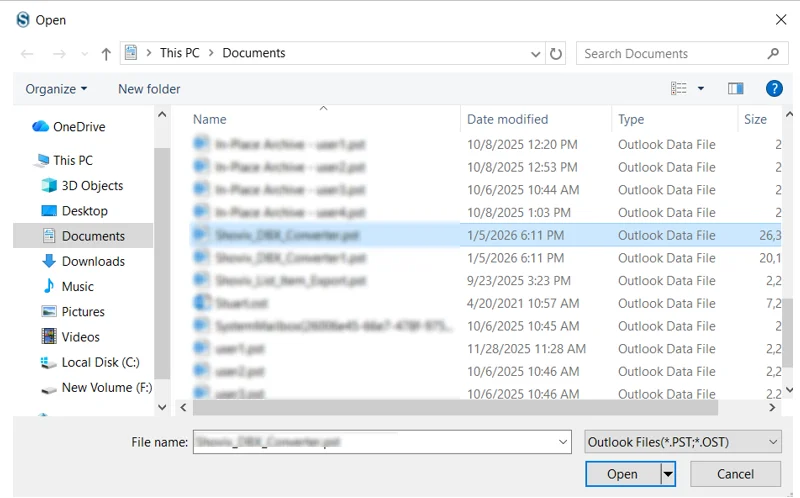
Click on open.
OR
- Click on search, a dialog box will appear again click on search.
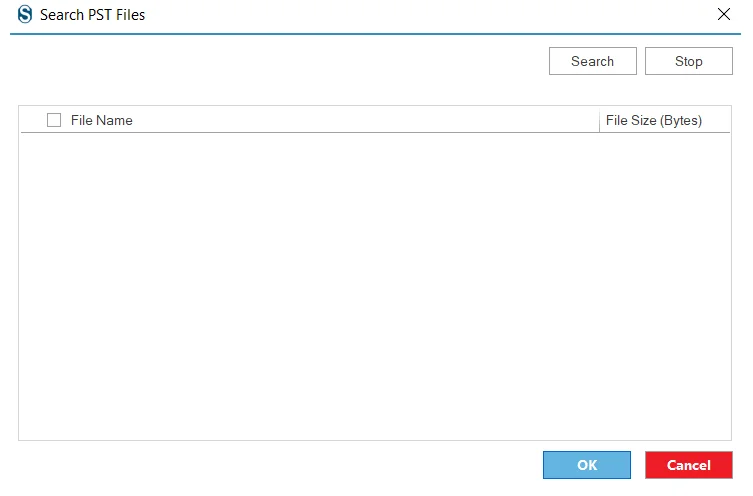
- Now select the target folder, to find the required PST/OST file.
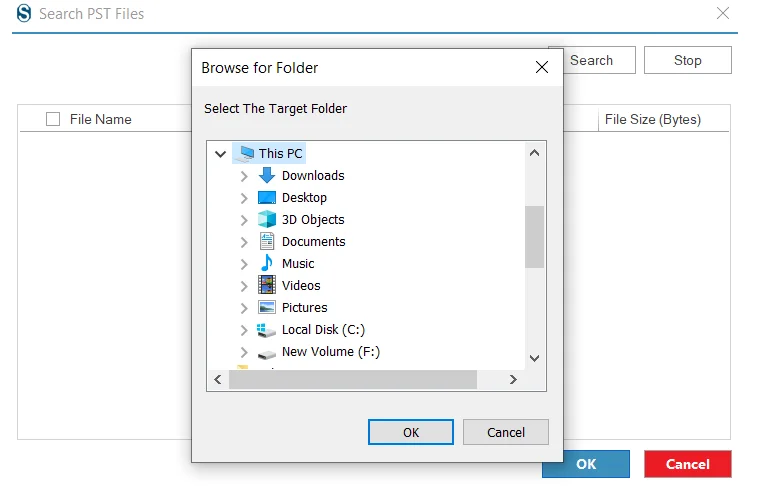
After selecting, click Ok.
New dialog box will appear, select the PST/OST files that are required.
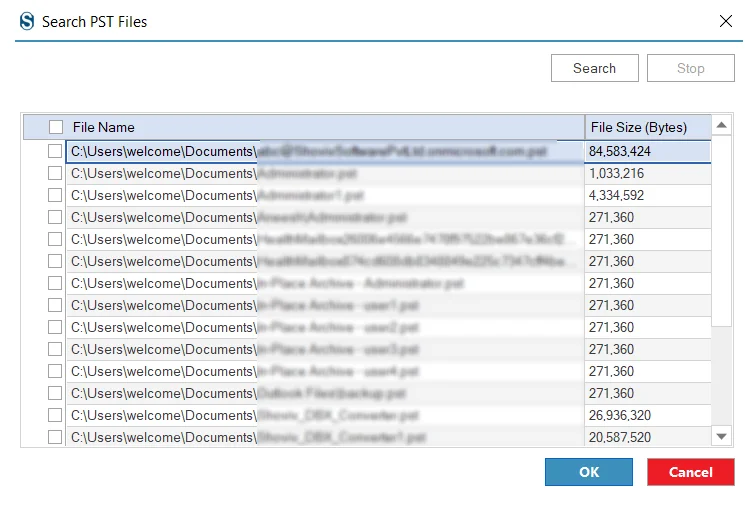
click Ok.
- After selecting the files you want to merge, click on next.
Step3: After adding PST/OST files, configure the destination and merge settings.
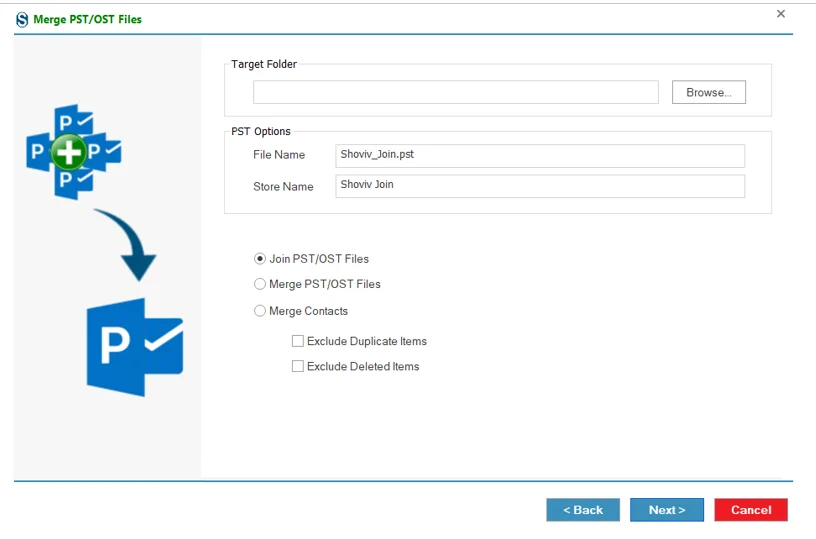
Target Folder
This field lets you choose the destination location where the final merged PST file will be saved. Click Browse to select or create a folder on your system.
PST Options
- File Name: Specify the name of the newly created PST file after merging.
- Store Name: Define the mailbox name that will appear in Outlook for the merged PST.
Merge Options
- Join PST/OST Files: Combines multiple PST/OST files into one file while keeping their original folder structure separate.
- Merge PST/OST Files: Merges mailbox data into a single folder structure.
- Merge Contacts: Merges only contact items from selected PST/OST files.
Additional Filters
- Exclude Duplicate Items: Prevents duplicate emails, contacts, or calendar items in the final PST.
- Exclude Deleted Items: Skips deleted items during the merge process.
- Once you have applied the Merge files option, according to the necessity. Then click the 'Next' button. After that, the merge PST Status will display in the next window.
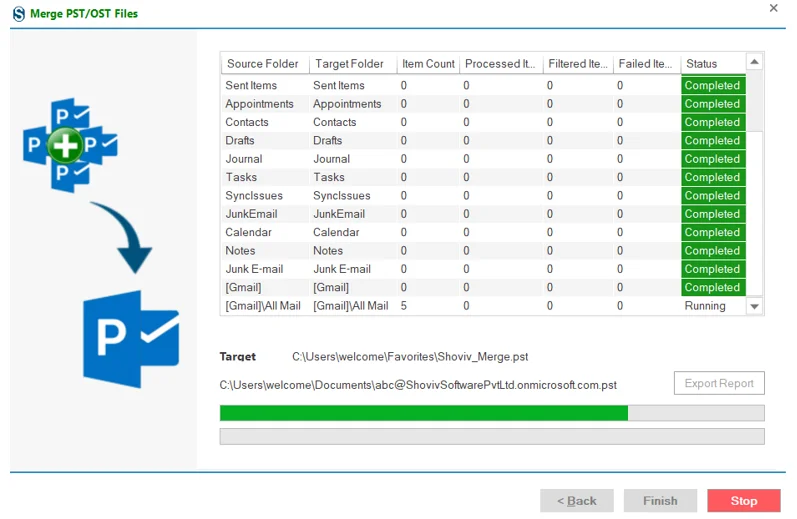
: PST Merge Status
- In the status section, you can see the current status of the PST merge process. You can check the total number of items counted, processed items, failed items of selected PST files through the status window.
After getting a message "Process completed successfully", then click the OK button.
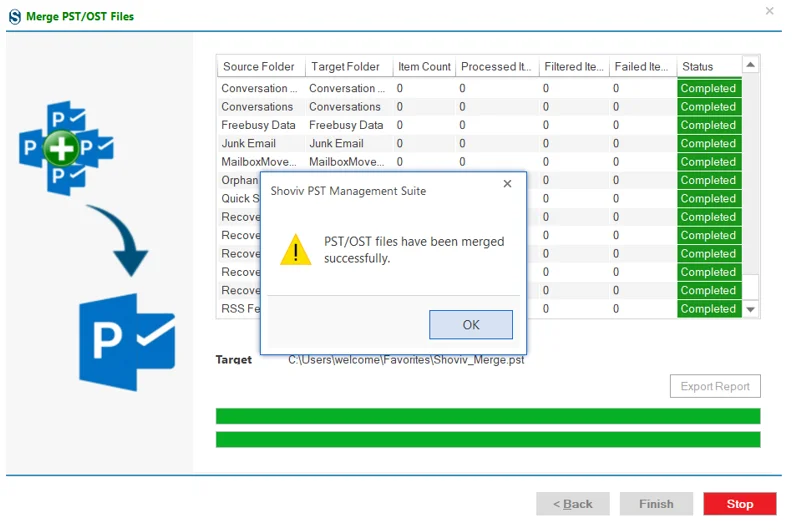
You can save the full report in an HTML file format on a local disk through the 'Export Report' button.