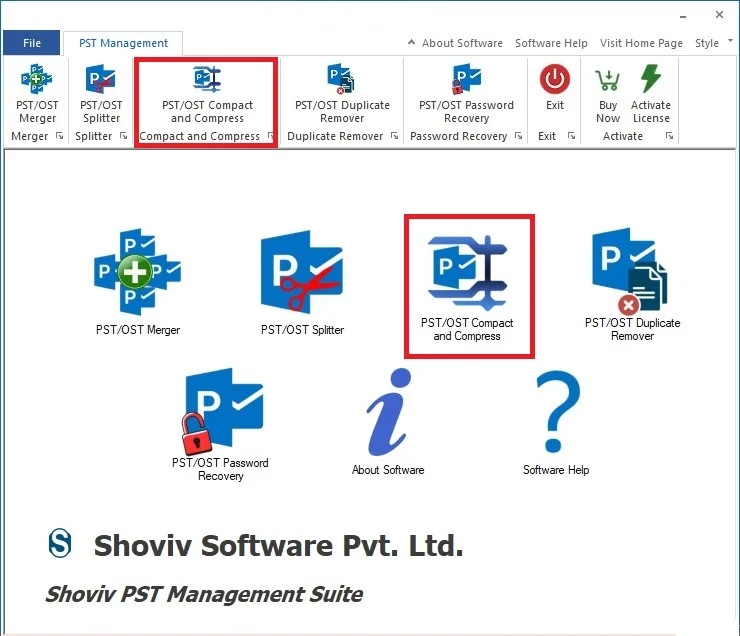
After installation, open the PST Management Suite and click the PST/OST Compact and Compress option from the ribbon bar or the main menu.
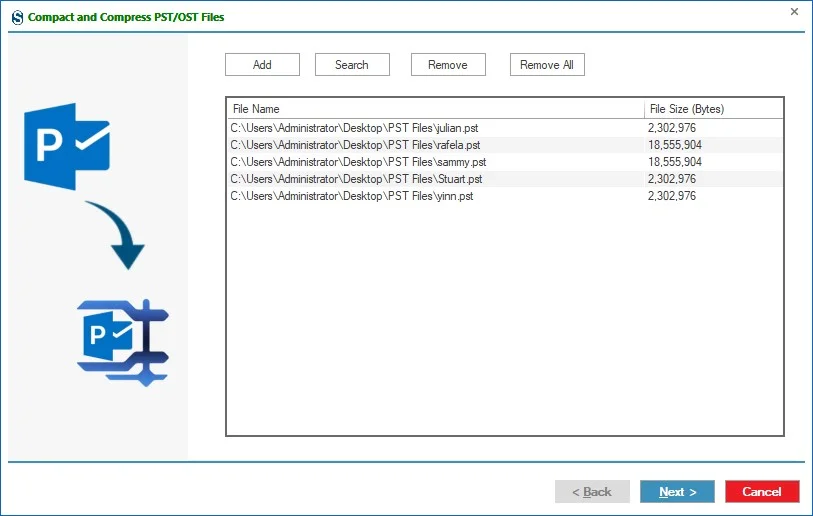
Step 1: Click on Add button to select and add the source PST/OST File.
You can also use the Search option to find the desired PST/OST files for conversion and tap OK.
Step 2: After Clicking on the Next Button a new Wizard opens.
The Compress & Compact option page has three parts:
1. Target Folder: This option will allow you to separately save all PST/OST file attachments at the target location.
2. Attachment Options: This also has two options for what you want to do with your attachments:
- Remove all Attachments: As you select this option, the software will remove all the attachments from the compressed PST/OST. There are two options as follows -
- Backup attachment in target folder
- Backup and leave a text attachment
- Replace Attachments by archive attachments: Select this option to replace the PST/OST file attachments with an archive attachment to reduce the PST/OST file size. There are two options as following;
- Backup attachment in target folder
- Archive Password
3. Mail Options: Mail option has two sub-options.
- Exclude duplicate Items
- Exclude deleted items
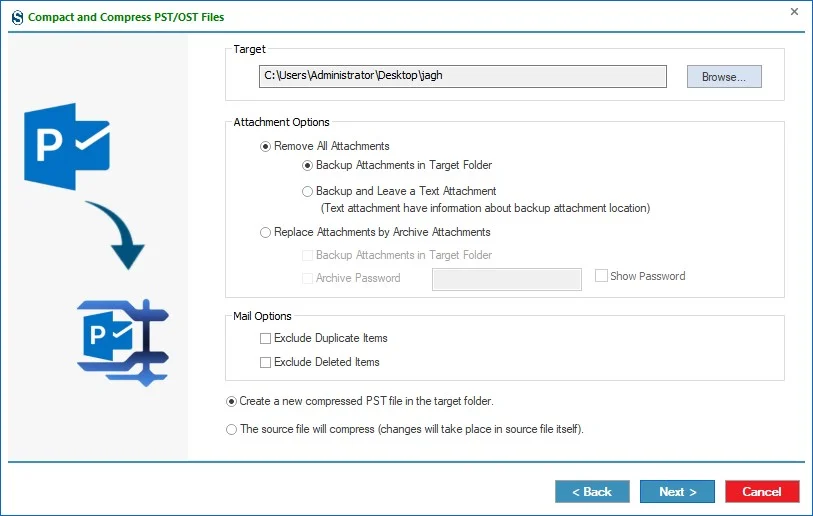
Create a new compressed PST file in the target folder: Using this option you will get a new PST file in your selected target folder. The source file will remain unchanged but you will get a new compressed resultant PST file.
The source file will compress (Changes will take place in the source file itself): With this option, the primary source file will itself get compressed; there will be no creation of a new file. Compression will take place in the added source file.
However, after compression, the OST/PST file size may not show less size (the actual size) even after it is compressed. It is due to the inability of PST/OST file size property change. Although, you can change the size property of the source file by following the below-given steps if you need:
- Open your file in Outlook.
- Now, make a right-click on the file.
- Click on the data file properties.
- Click Advanced…
- finally, click on the Compact Now button
Now, you will get a file that shows the original size of the compressed file. (The actual size of the compressed file).
- Once you have applied the compress files option, according to the necessity. Then click the 'Next' button. After that, the PST Compress & Compact Status will display in the next window.
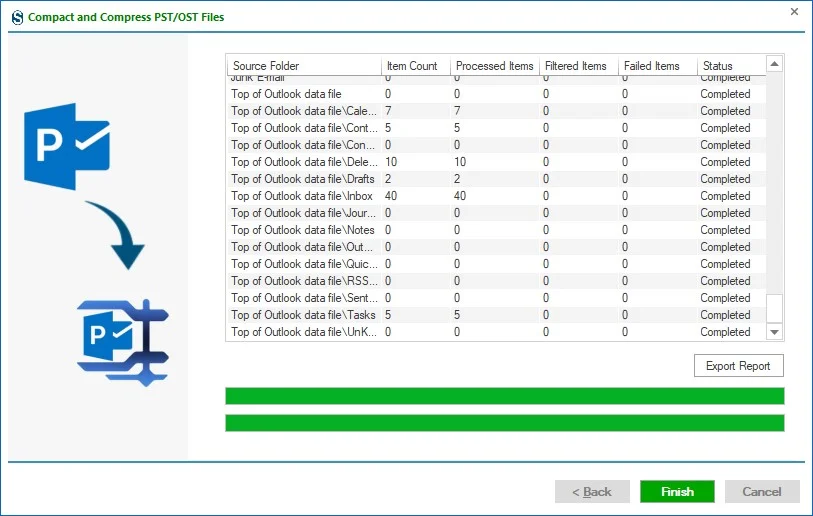
Step 3: PST/OST Compress & Compact Process Status
- In the status section, you can see the current status of the PST/OST Compress & Compact process. You can check the total number of items counted, processed items, failed items of selected PST/OST files through the status window.
- After getting a message "Process completed successfully", then click the OK button.
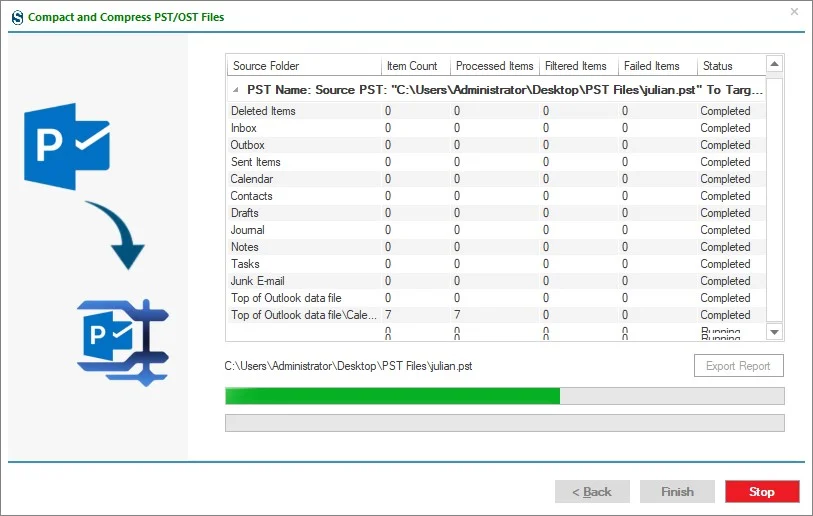
You can save the full report in an HTML file format on a local disk through the 'Export Report' button.