Mode 1: Using Modern Authentication:
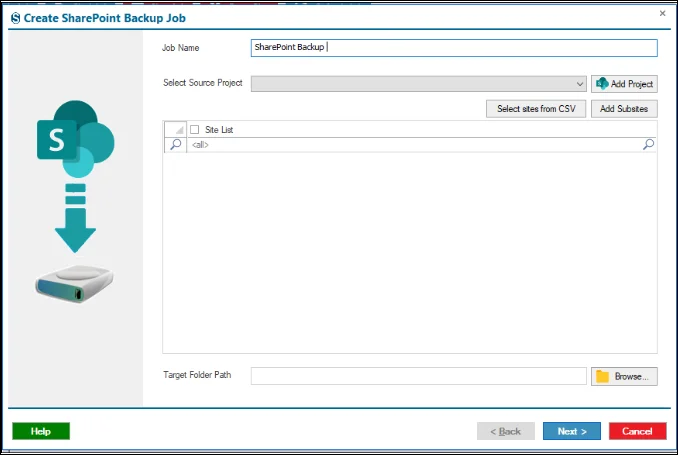
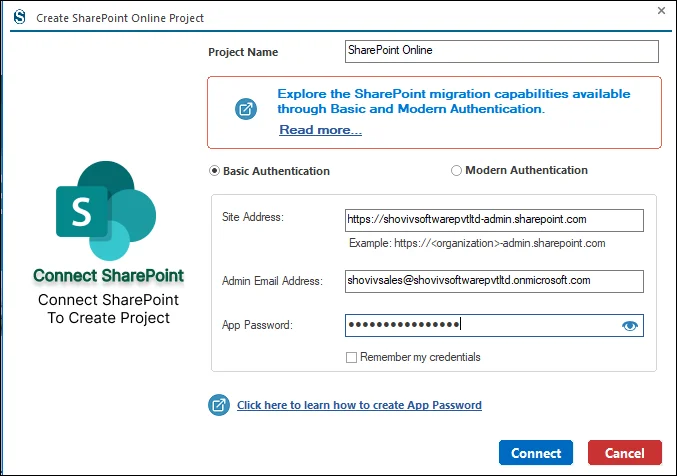
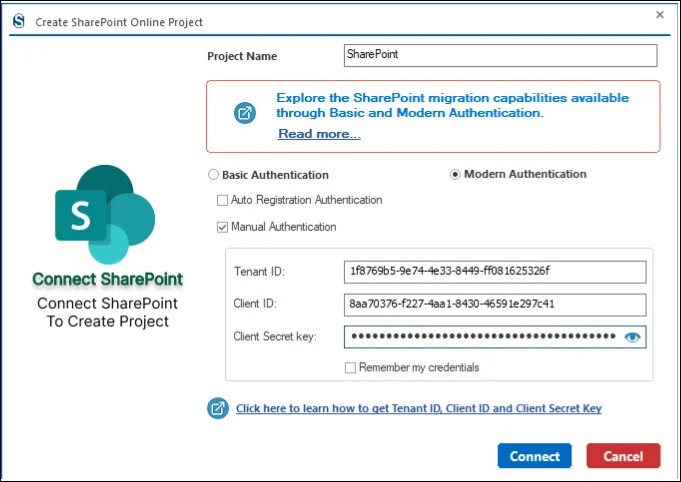
Step 4: Now you need to connect with the Source Project. Click on the Add Project button and then give the name of the Project within the Project Name.
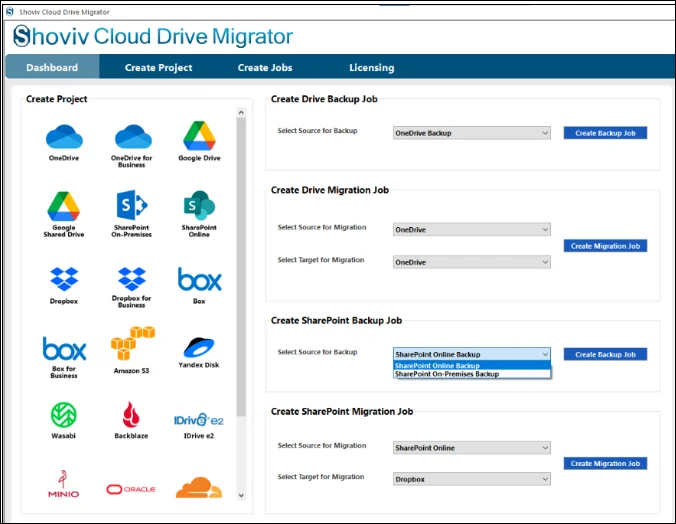
- Choose between Basic and Modern authentication.
- For a better understanding of the difference between the Basic and Modern, you can refer to Shoviv’s Technical Guide:- https://www.shoviv.com/technical-guide/what-can-be-migrated-in-sharepoint.html.
- In case you have chosen Modern Authentication, there are two other options for the authentication: Manual and Auto.
- For the Auto Modern Authentication, you need to connect with your email Id which is linked to the Microsoft authentication page.
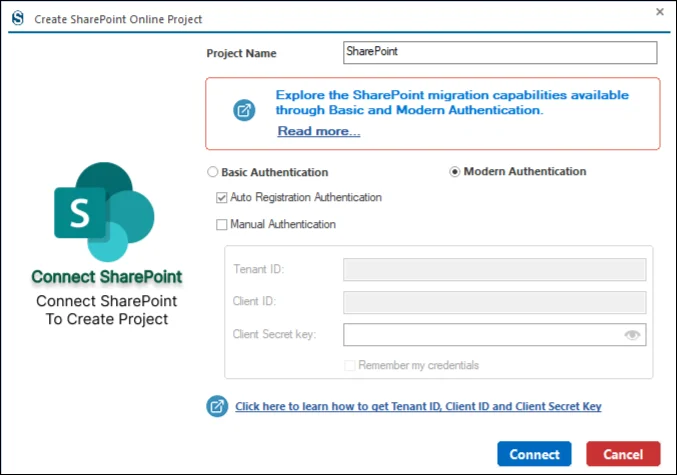
Step 5: On the other hand, if you have the credentials of the Manual Modern Authentication page, then enter them and click on the connect button.
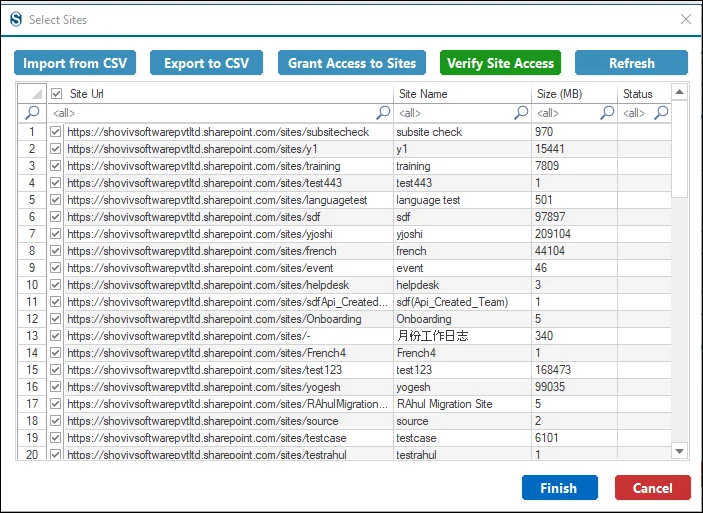
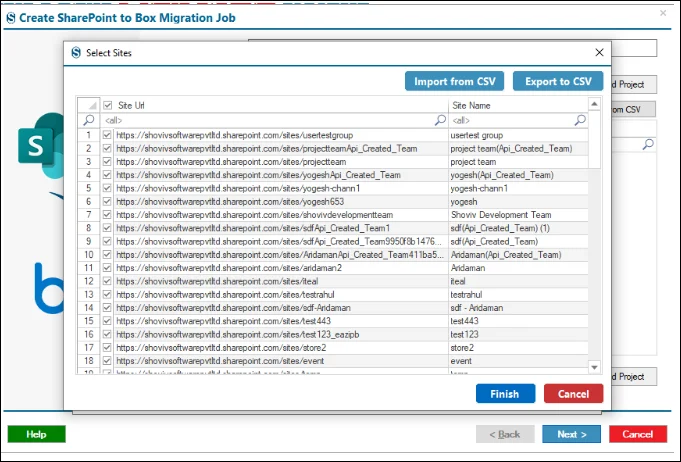
Step 6: Select the Source site from the list, and if you have a larger set of sites, then you can select them by clicking on the Import From CSV button, and save the current list of files by clicking on the Export CSV.
Step 7: You can also add the subsites with the help of the Get Subsite and Check All Subsite button and then click on the Ok to complete the process of the subsite selection.

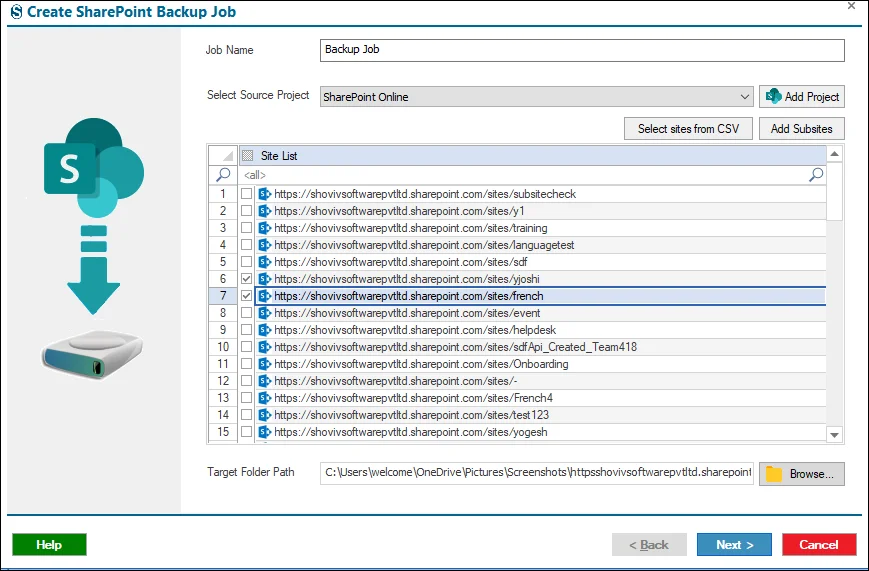
Step 8: If you have the Source Project present in your system, then you can select it with the help of the dropdown menu. For the larger site selection you can also tap on the Select Sites From CSV button.
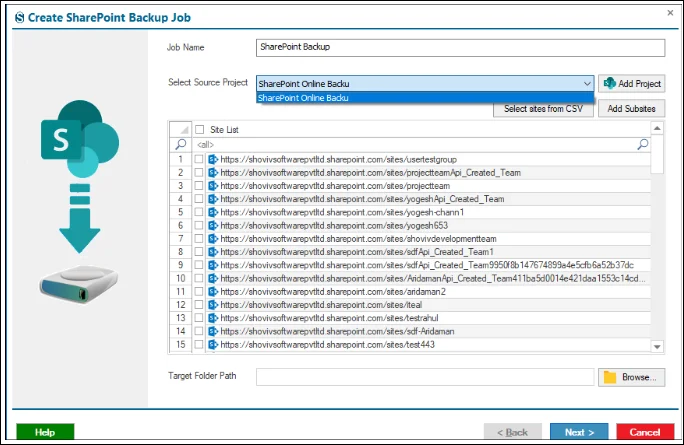
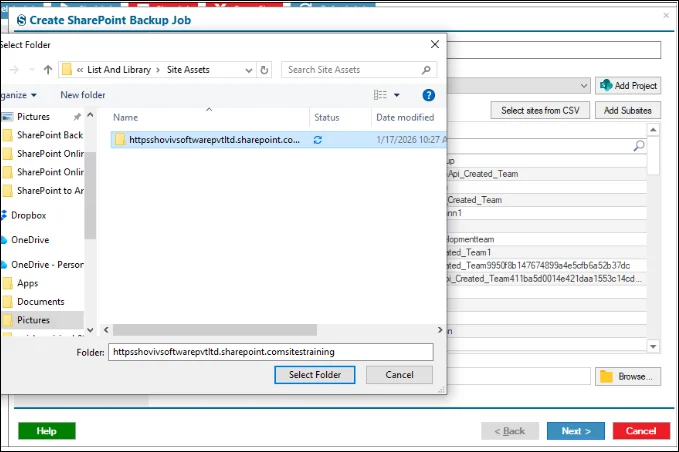
Step 9: At this point, you need to select the location for the backup with the help of the Browser.
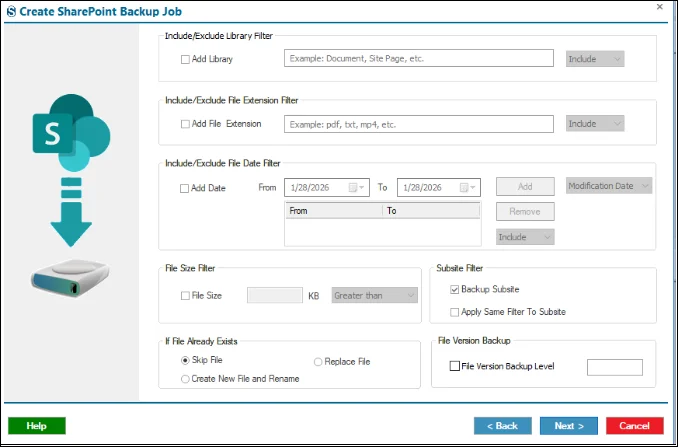
Step 10:
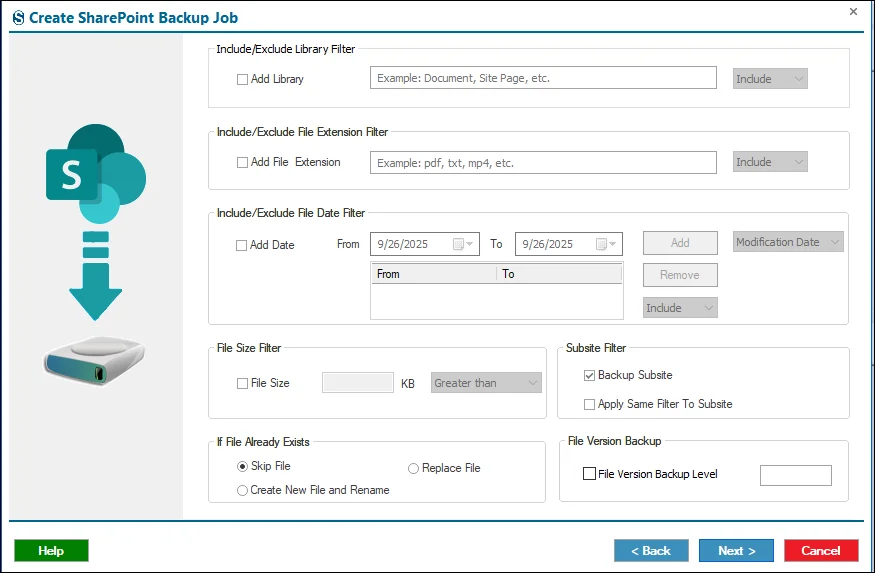
- Include / Exclude (Library) : Determines whether the specified library names are included in or excluded from the backup.
- Add Library : Enables filtering to include or exclude specific SharePoint libraries during the backup process.
- Include / Exclude (File Extension) : Specifies whether the entered file extensions should be backed up or ignored.
- Add File Extension : Enables filtering files by extension, allowing selection of specific file types for backup.
- Include / Exclude (Date Filter) : Controls whether files within the selected date range are included or excluded.
- File Size : Enables filtering files based on size to control storage usage and backup scope.
- Backup Subsite : Includes all SharePoint subsites under the selected site in the backup job.
If File Already Exists
- Skip File : Skips backing up files that already exist in the destination location.
- Replace File : Overwrites existing files in the backup destination with the latest version.
- Create New File and Rename : Creates a new backup copy with a renamed file to avoid overwriting existing files.
- File Version Backup Level : Specifies the number of historical file versions to include in the backup.
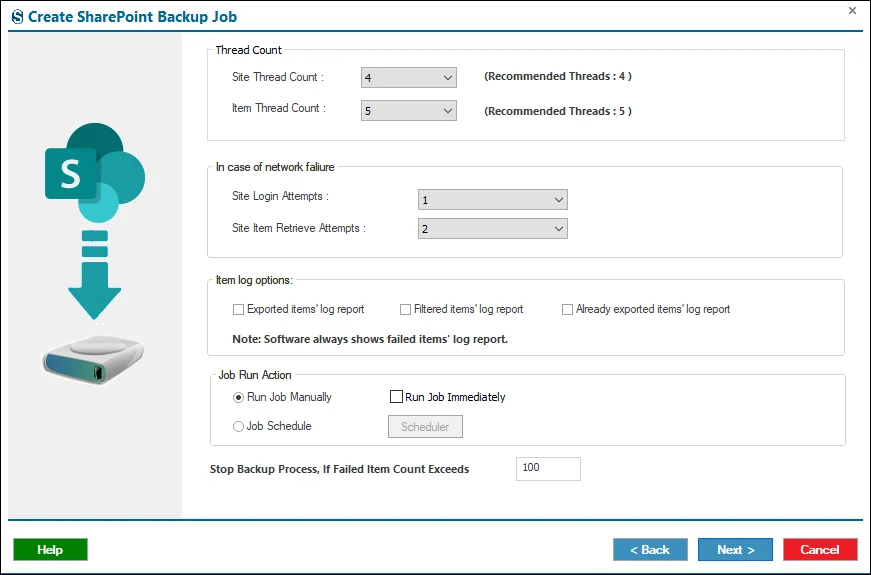
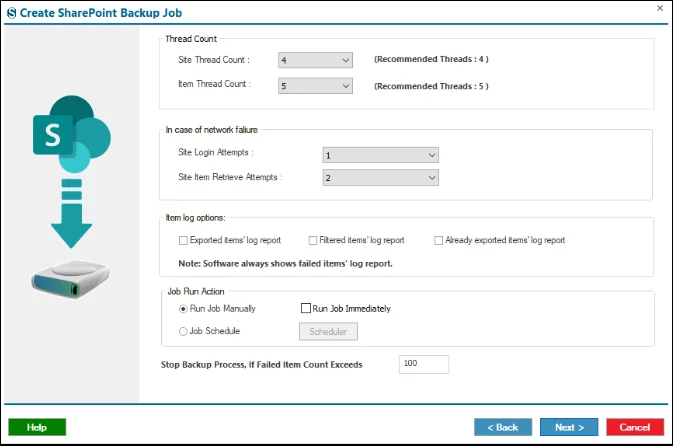
Step 11:
- Thread Count
- Site Thread Count : Sets the number of parallel threads used to process SharePoint sites during the backup operation.
- Item Thread Count : Defines how many concurrent threads are used to back up individual SharePoint items.
- In Case Of Network Failures
- Site Login Attempts : Specifies how many times the system retries logging into a SharePoint site after failure.
- Site Item Retrieve Attempts : Sets the retry count for retrieving SharePoint items if network or access errors occur.
- Login Reports
- Exported items' log report : Generates a report listing all items that were successfully exported during the backup.
- Filtered items' log report : Creates a report showing items excluded due to applied filters during the backup job.
- Already exported items' log report : Produces a report listing items that were previously exported and skipped.
- Job Run Action
- Run Job Manually : Configures the backup job to run only when manually started by the user.
- Run Job Immediately : Starts the backup job automatically as soon as the configuration process is completed.
- Job Schedule : Enables scheduling the backup job to run automatically at defined times or intervals.
- Stop Backup Process, If Failed Item Count Exceeds : Stops the backup automatically when failed items exceed the specified limit.
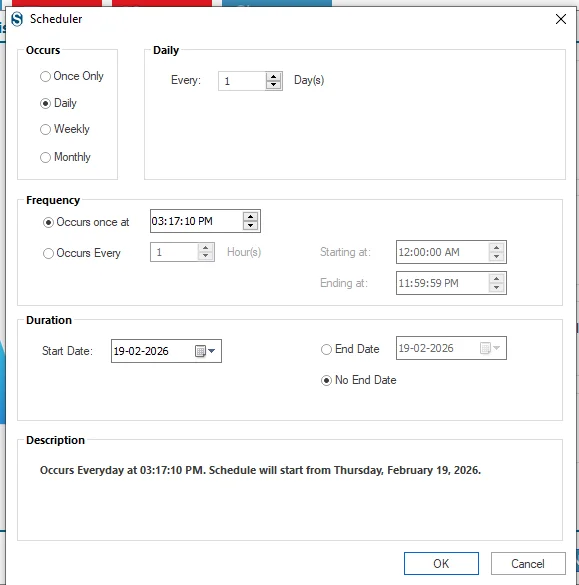
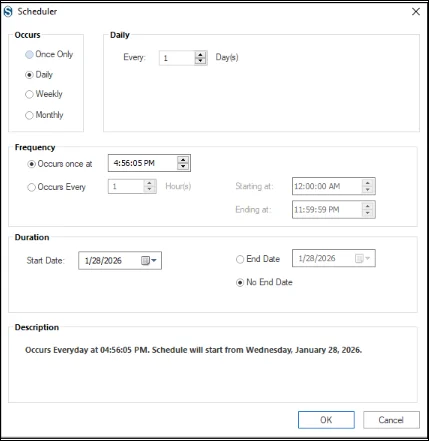
Step 12: The scheduler allows you to plan when a migration job will run so it starts automatically at the chosen time.
- Run Job Manually: Launch the migration whenever you want from the dashboard.
- Start Immediately After Creating a Job: The migration begins as soon as the job is saved.
- Job Schedule: Set a specific date and time for the migration to run.
- Daily: Run the migration every day at the selected time.
- Weekly: Run the migration weekly or on chosen days at a fixed time.
- Monthly: Run the migration monthly or on selected months and dates.
If you do not need to set these settings then you can ignore it with the help of the Next button.
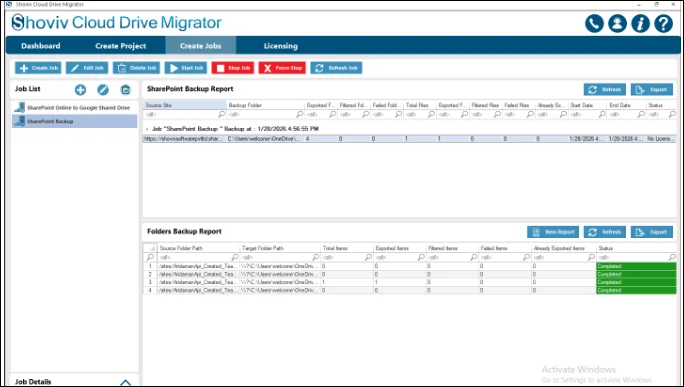
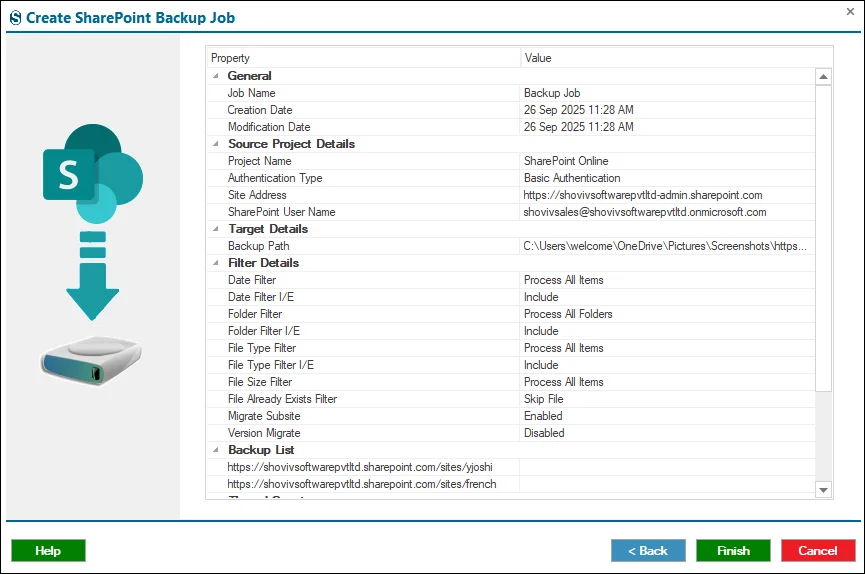
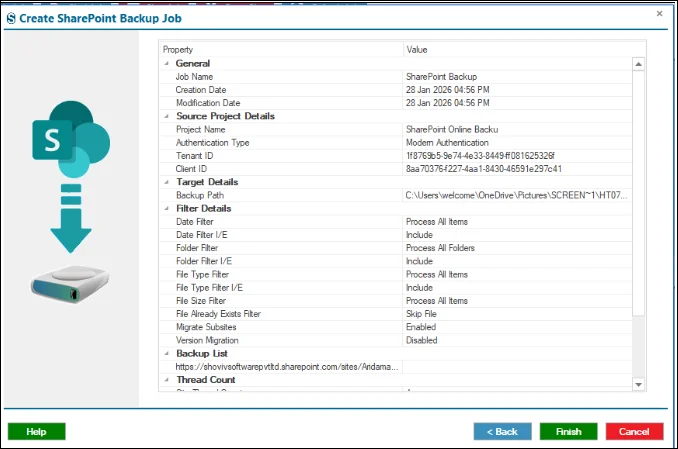
Step 13: Review the process of the job summary in a detailed manner, and if you want to change anything, then you can do it with the help of the Back button, and if not, then move forward by clicking on the Finish button.
Step 14: The job runs according to the options you have chosen in the above sections. If you have selected the manual options, then you need to click on the Start Job button.