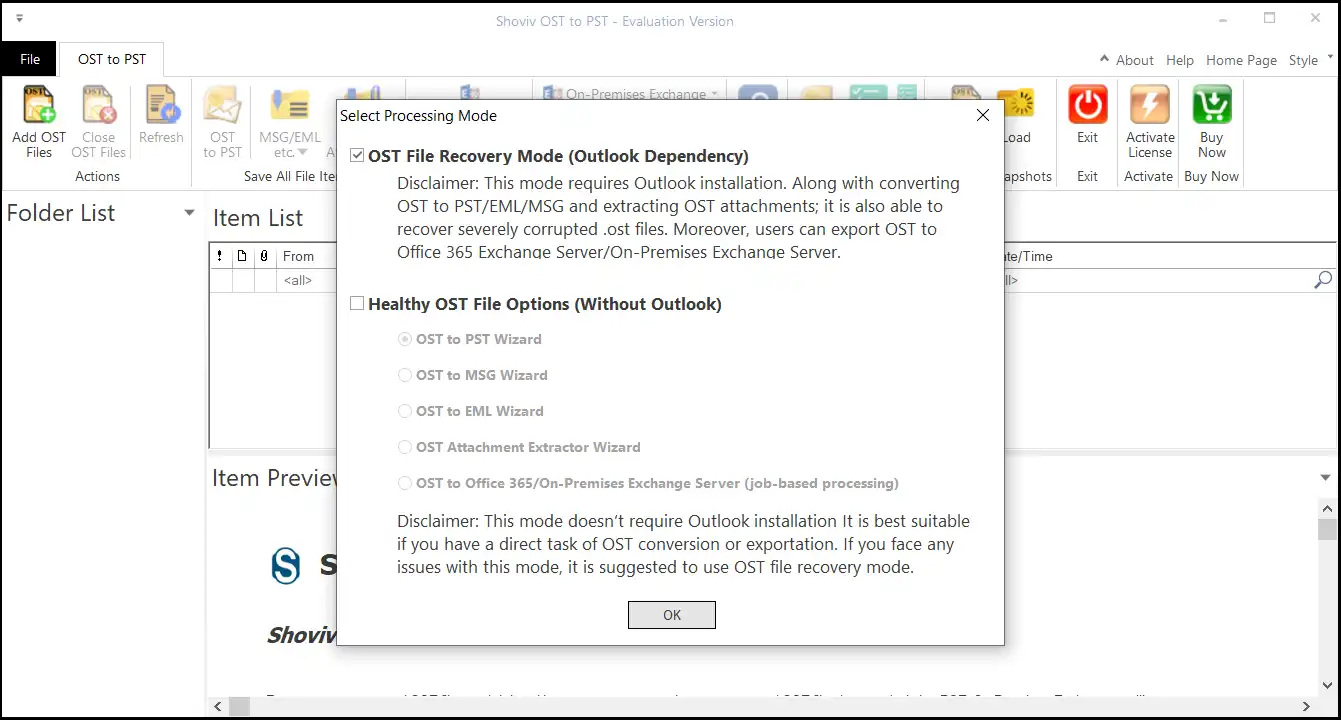
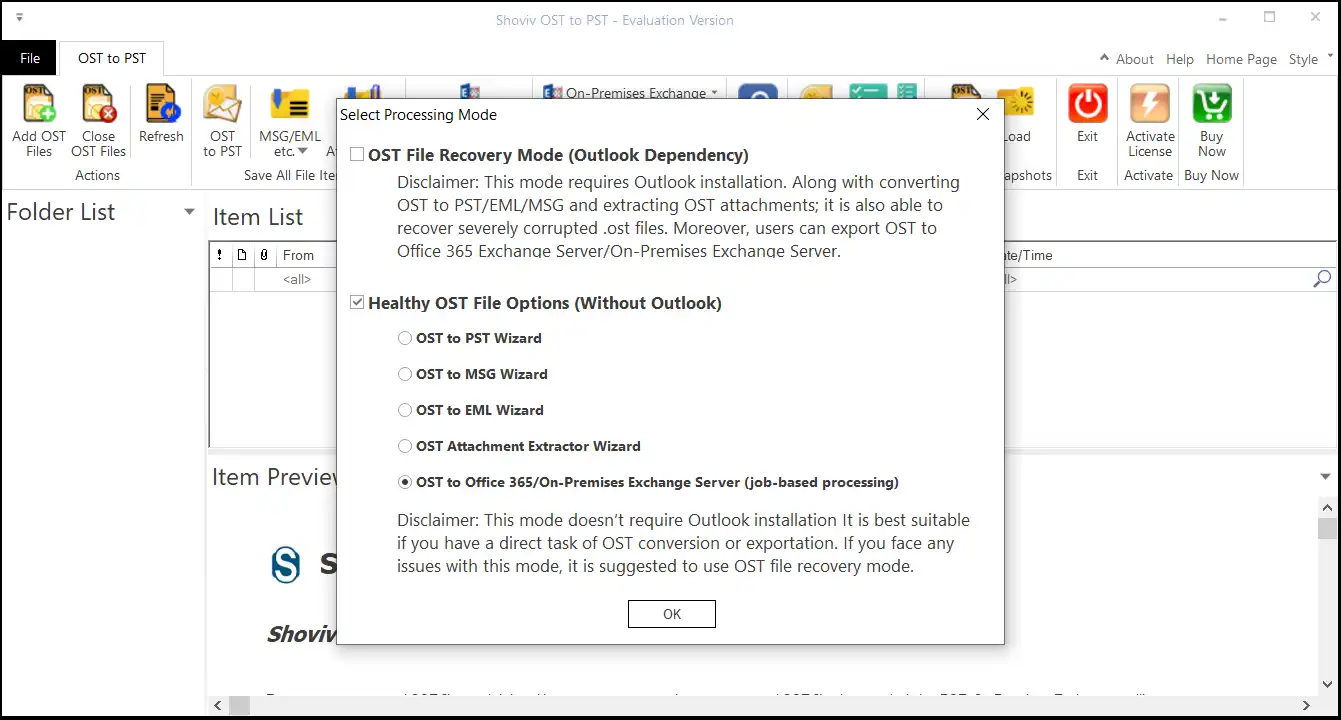
Mode 2: Healthy OST File Options (Without Outlook)
Step 1: Open the software and please select the Healthy OST File Options (Without Outlook). After that, select the OST to Office 365/On-Premises Exchange Server (job-based processing), and click the OK button.
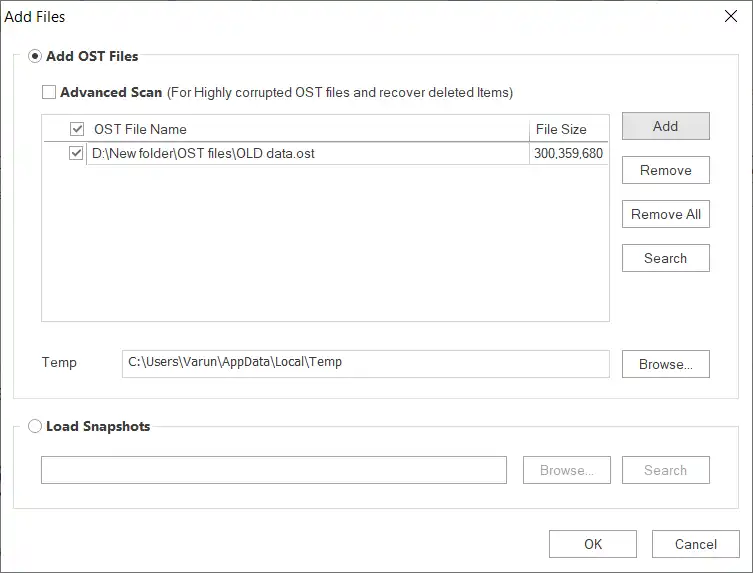
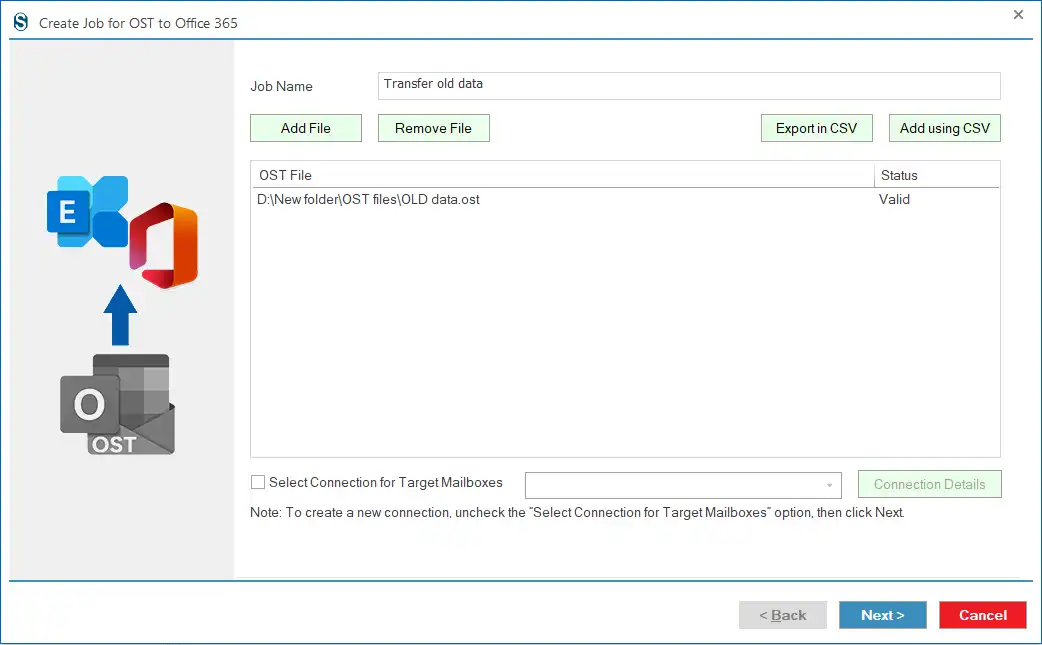
Step 2: Enter the Job Name, click the Add File to select the OST file, and tap the Next button. You can also use the CSV file to add the Source File.
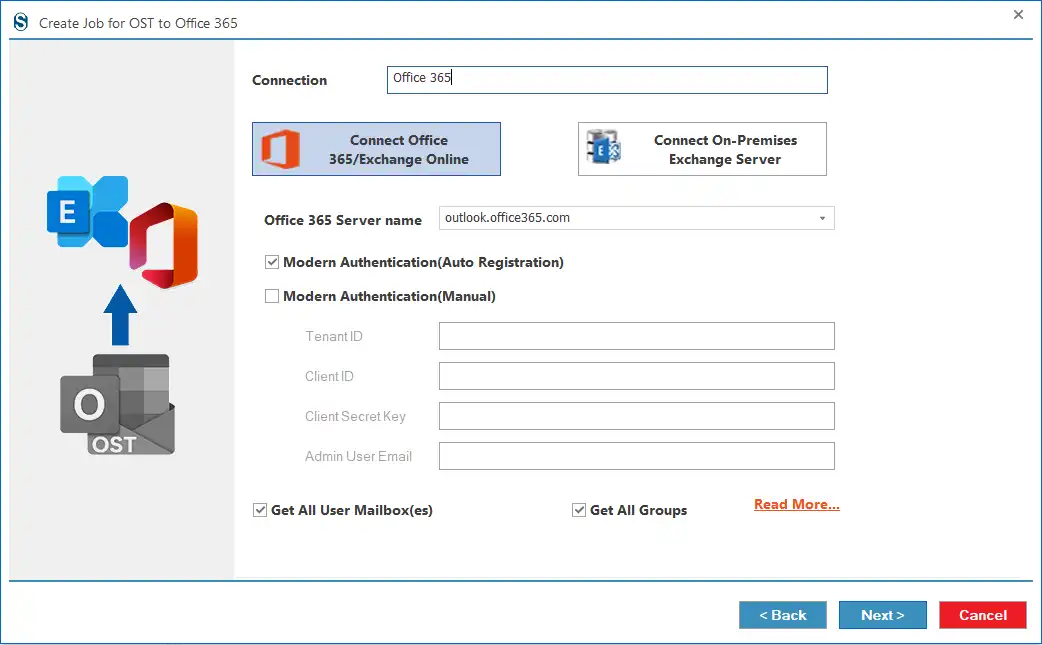
Step 3: Now, you have to create a connection for Office 365/Exchange Server. Follow the steps to make the Office 365/Exchange Server connection.
- For Office 365 Connection:
- By Modern Authentication (Auto Registration):
- Select the Modern Authentication (Auto Registration) option and click Next. Follow ongoing prompts and enter your account details.
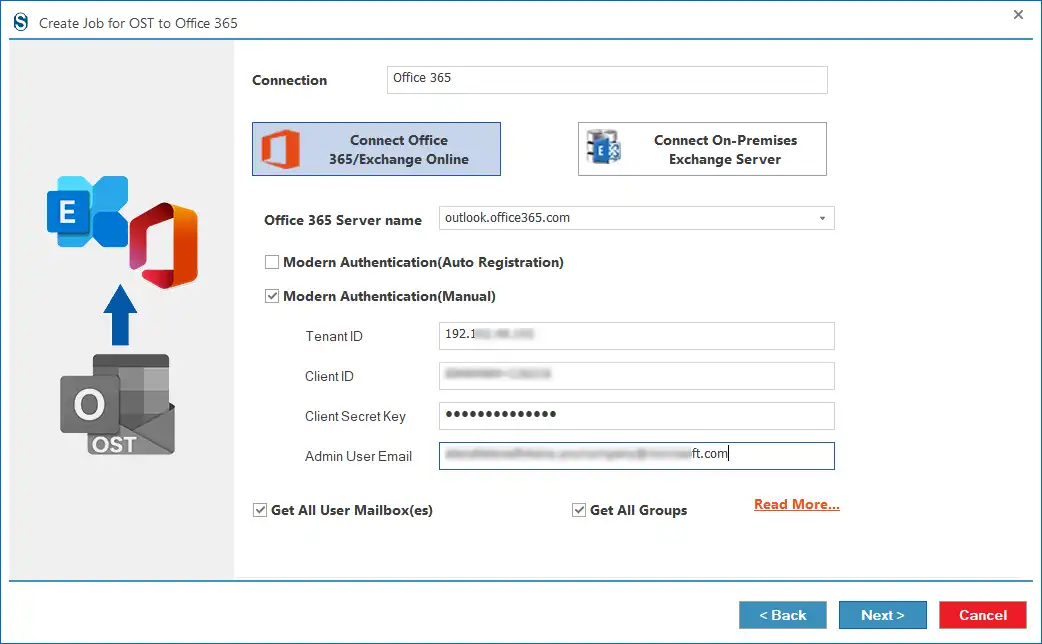
- By Modern Authentication (Manual):
- Choose the Modern Authentication (Manual) option and enter your account details, like Tenant ID, Admin User Email, etc. (To know more about the Tenant ID, Client ID and Client Secret Key, click on the Read More ..)
- After entering all the details, click the Next button.
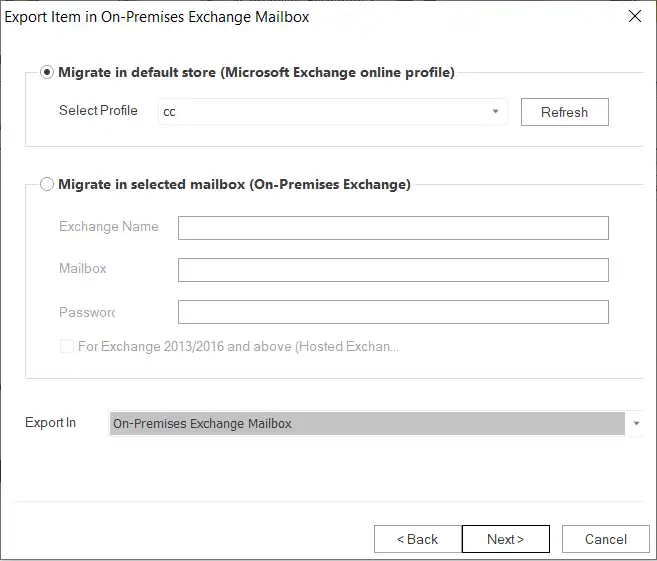
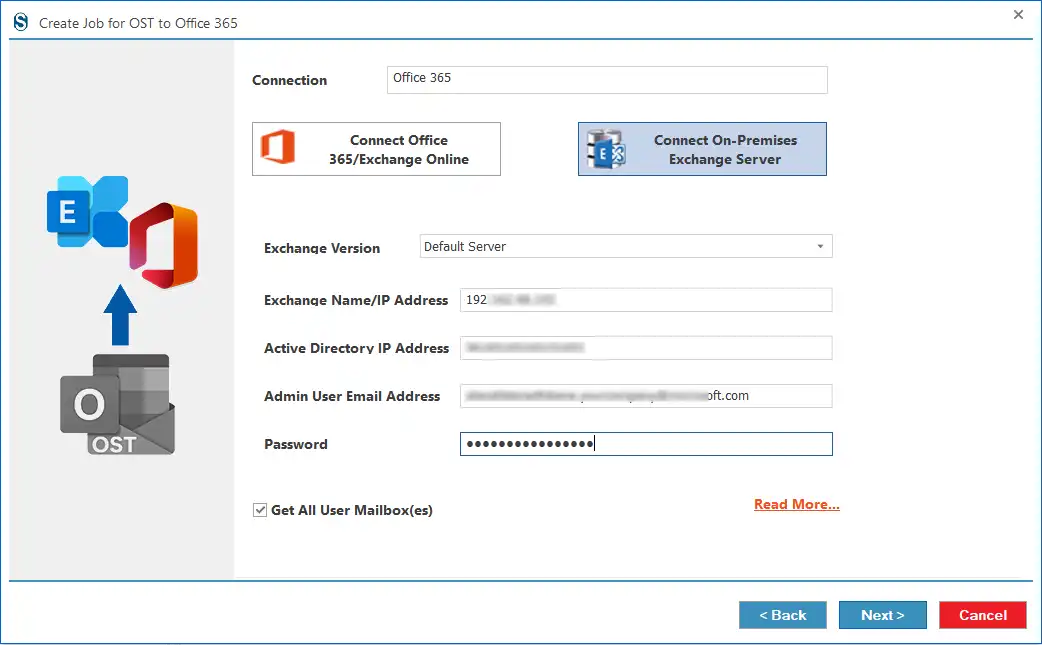
- For Exchange Server Connection:
- Select the Connect On-Premises Exchange Server.
- Then, you have to enter the Connection name, select the Exchange Version, and enter your Exchange Server details. Press the Next button.
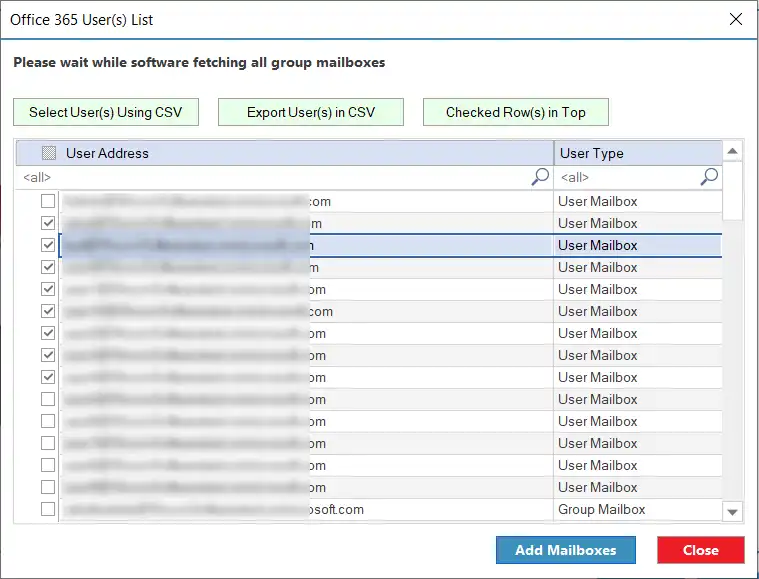
Step 4: Then, you have to select the mailbox from the list where you want to import the OST file. After choosing the mailbox, click the Add Mailboxes button.
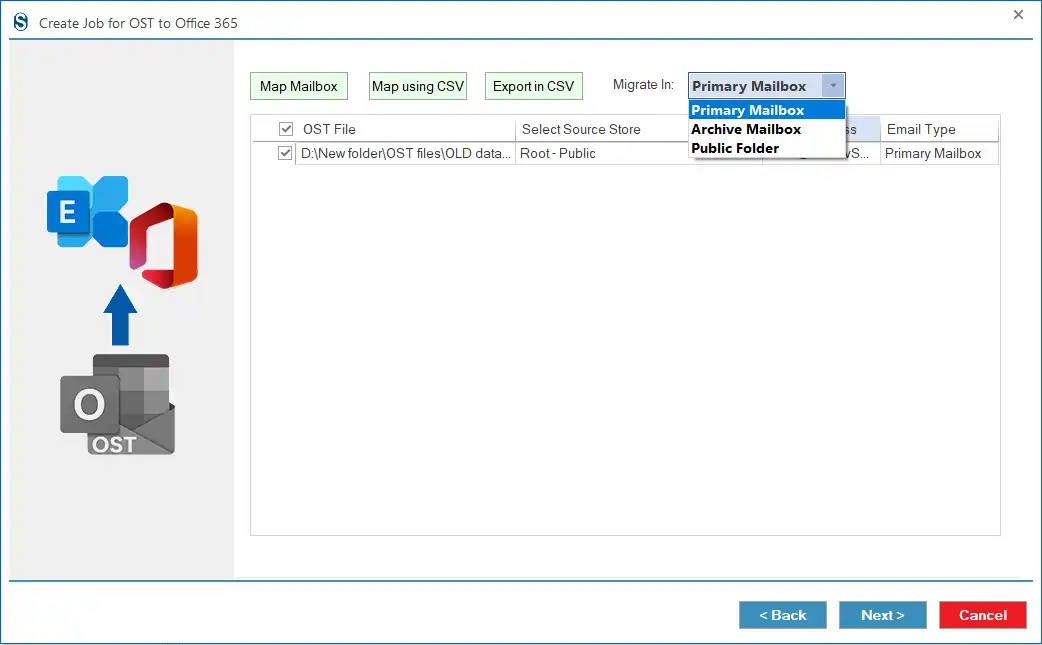
Step 5: Here, please map the Source OST File to the Office 365/Exchange Server mailbox and select the mailbox type in the Migrate In option: Primary/Archive or Public Folder. Afterwards, hit the Next button.
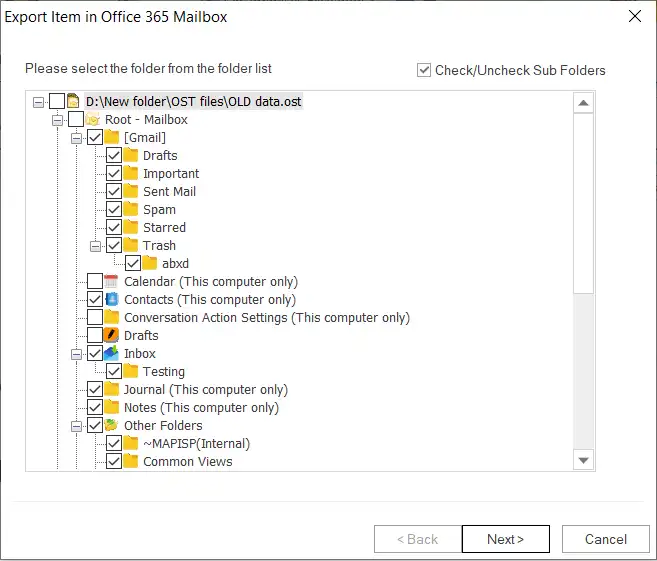
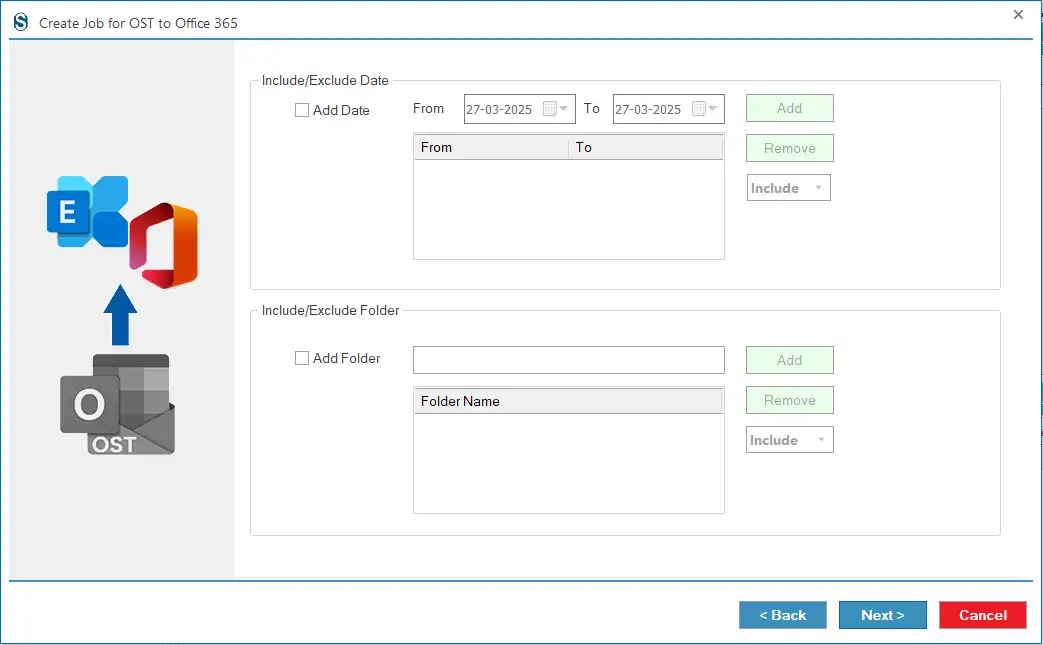
Step 6: Now, you can use the Folder Name and Date Range to filter OST file items. Click the Next button after applying filters.
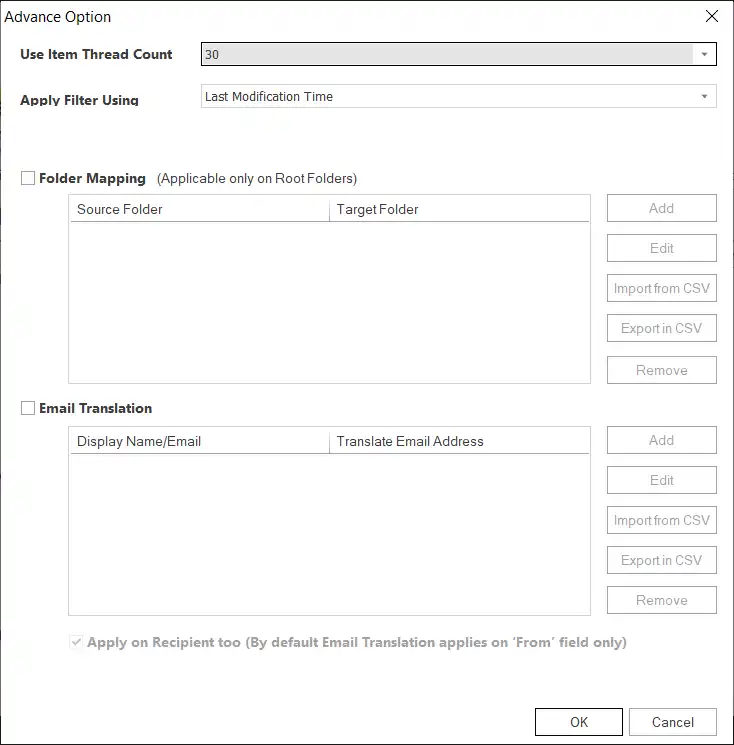
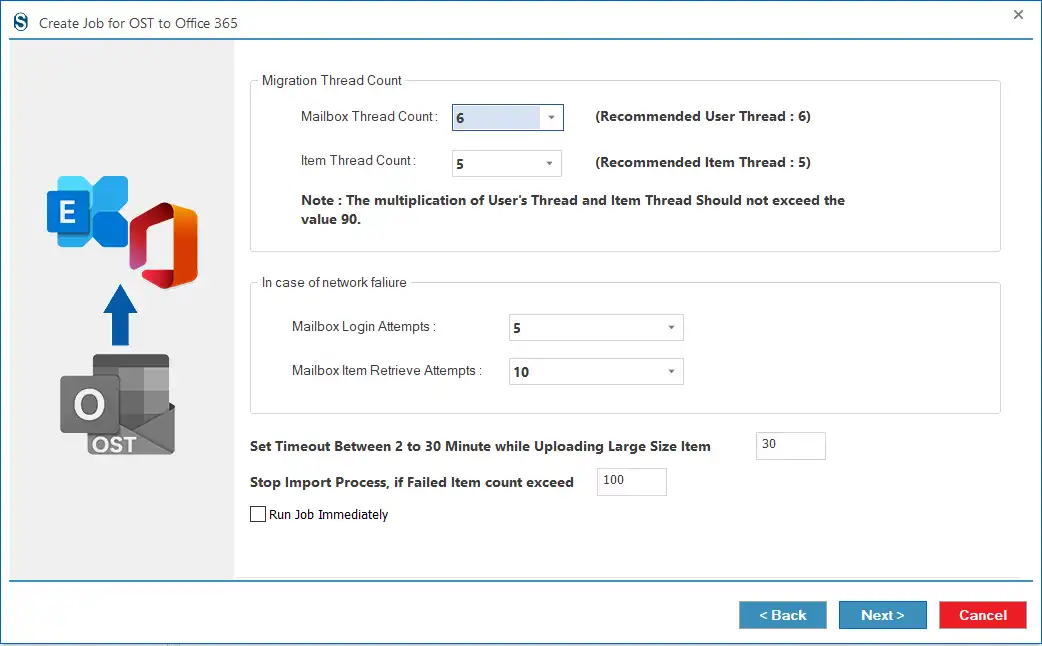
Step 7: Also, you can make additional changes, like Mailbox Thread Count, Item Thread Count, Failed Items Count, etc., and hit the Next button. You can also keep these settings as default.
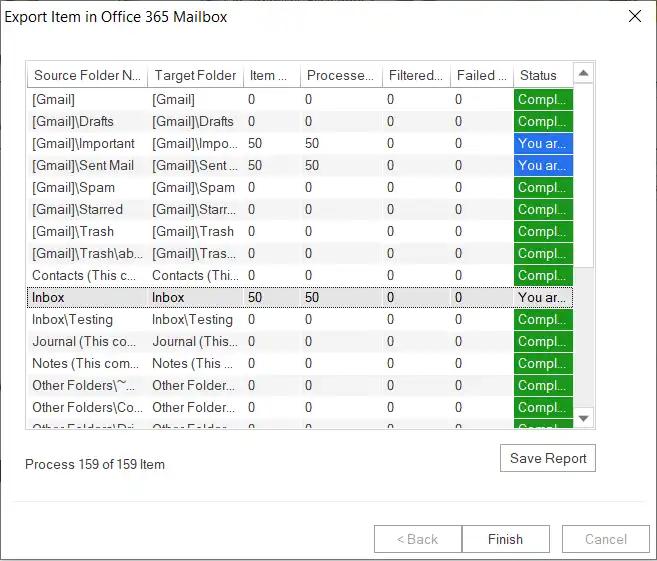
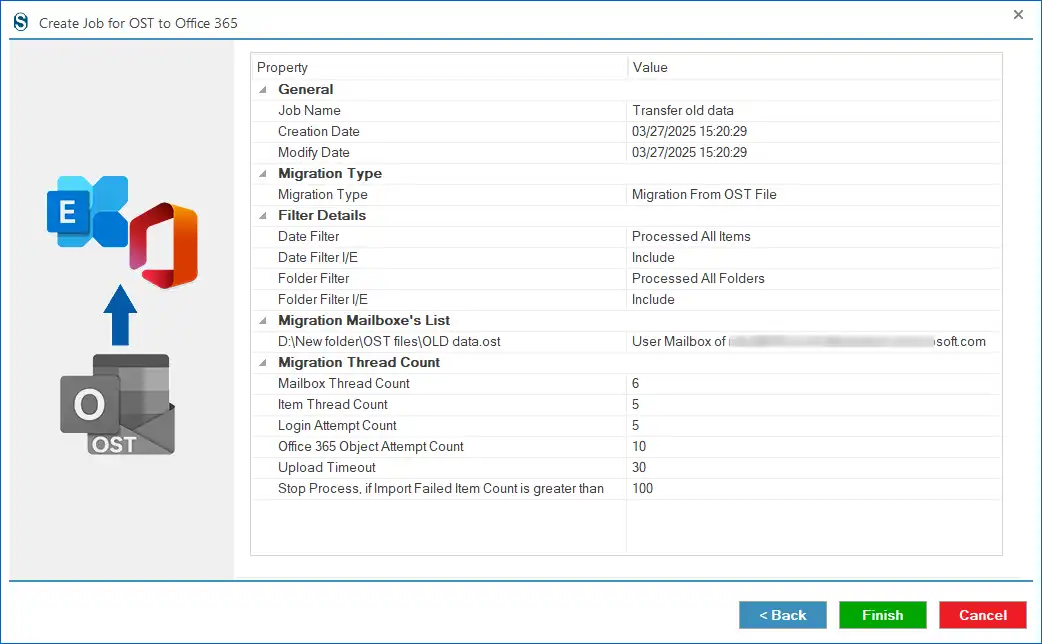
Step 8: Verify the migration project details and click the Finish button if all settings are correct. To make changes, click the Back.
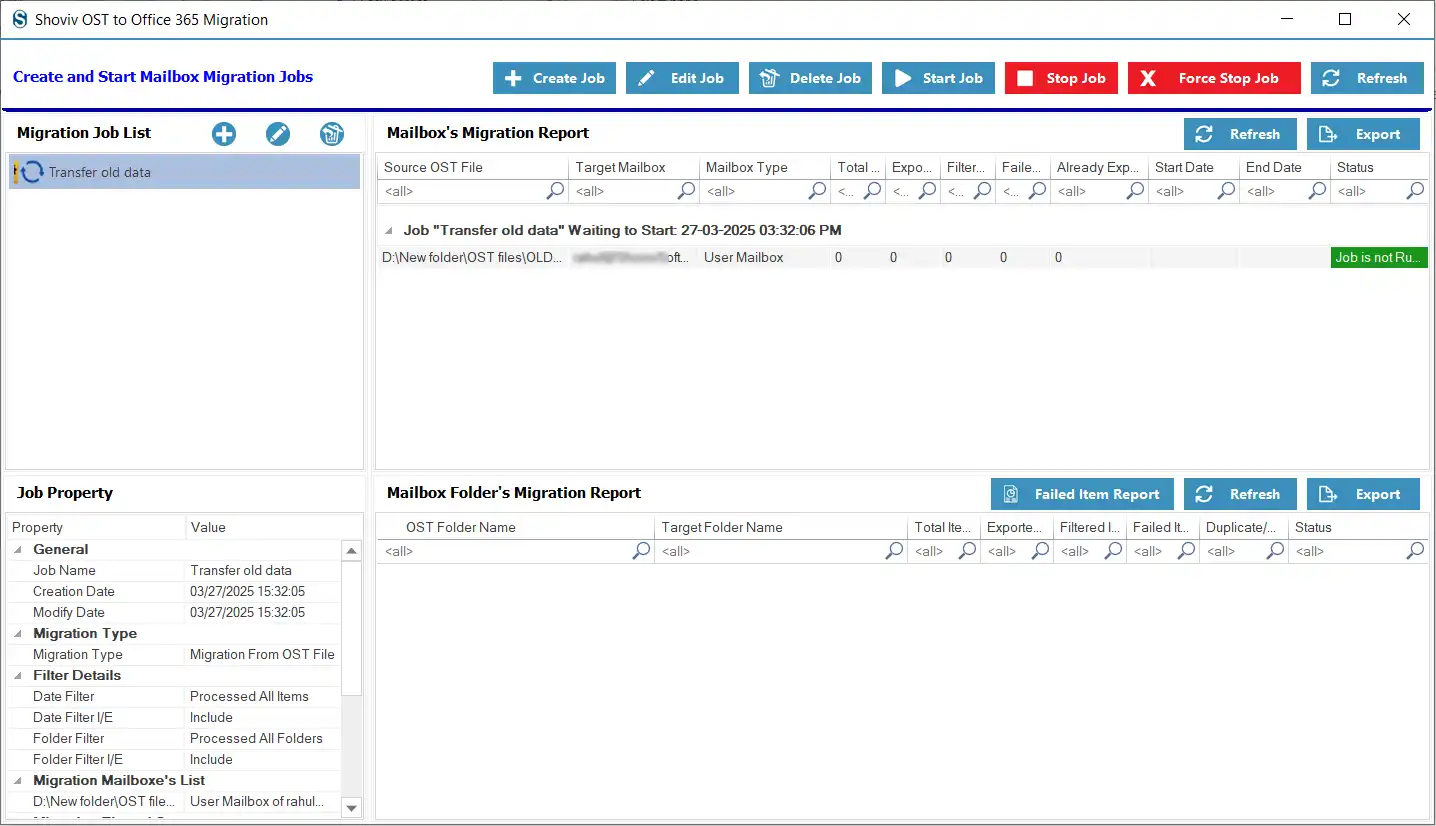
Step 9: The OST to Office 365/Exchange Server migration project/job will be created. Click the Start Job button to transfer OST to the Office 365 mailbox.
Step 10: The OST to Office 365/Exchange Server migration project/job will be created. Click the Start Job button to transfer OST to the Office 365 mailbox.