Step 1: Launch the Shoviv Cloud Drive Migrator on your system.
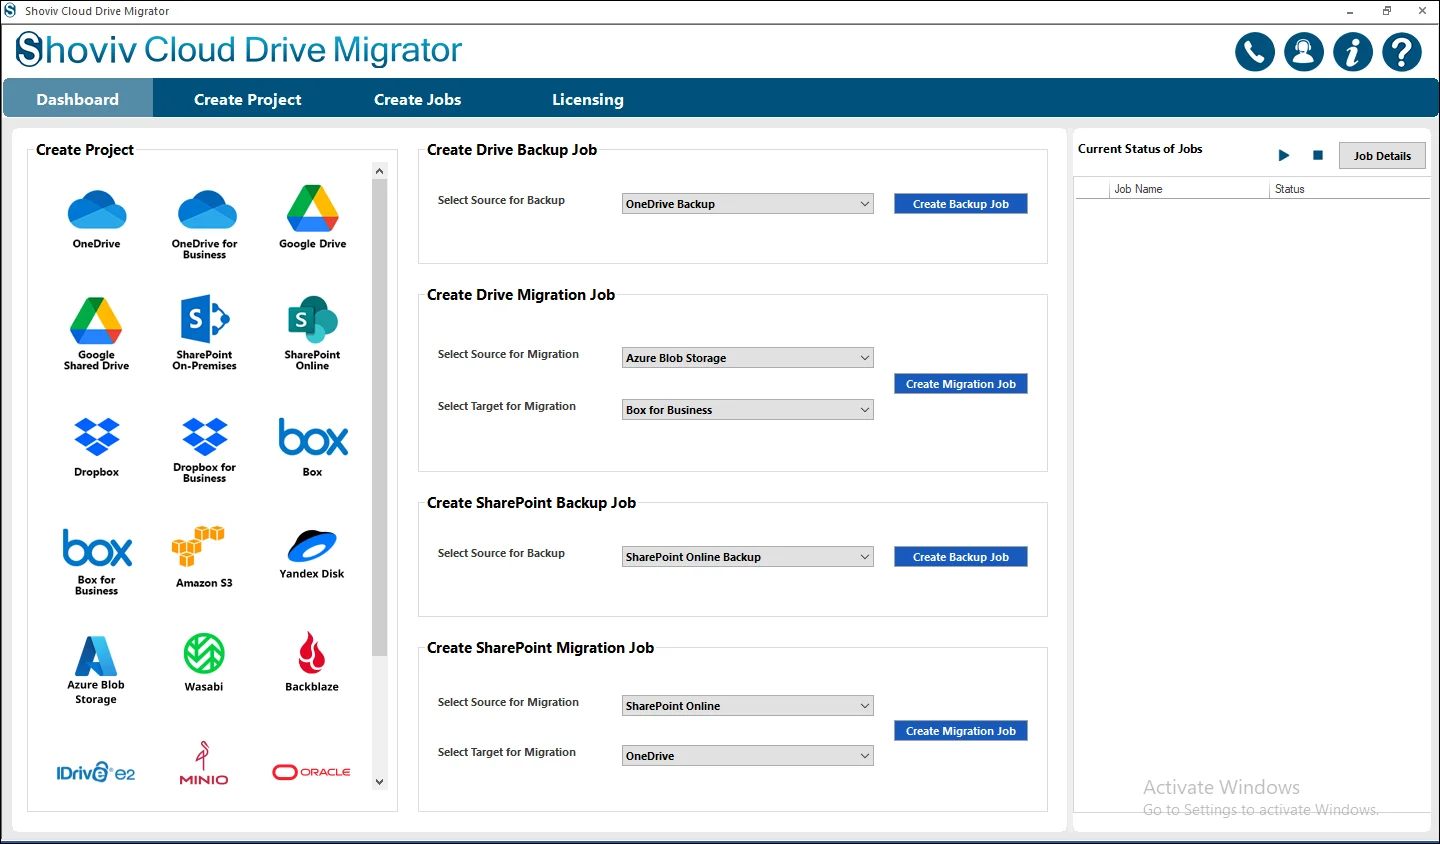
Step 2: From the dashboard, navigate to the Create Drive Migration Job section to begin the migration process.
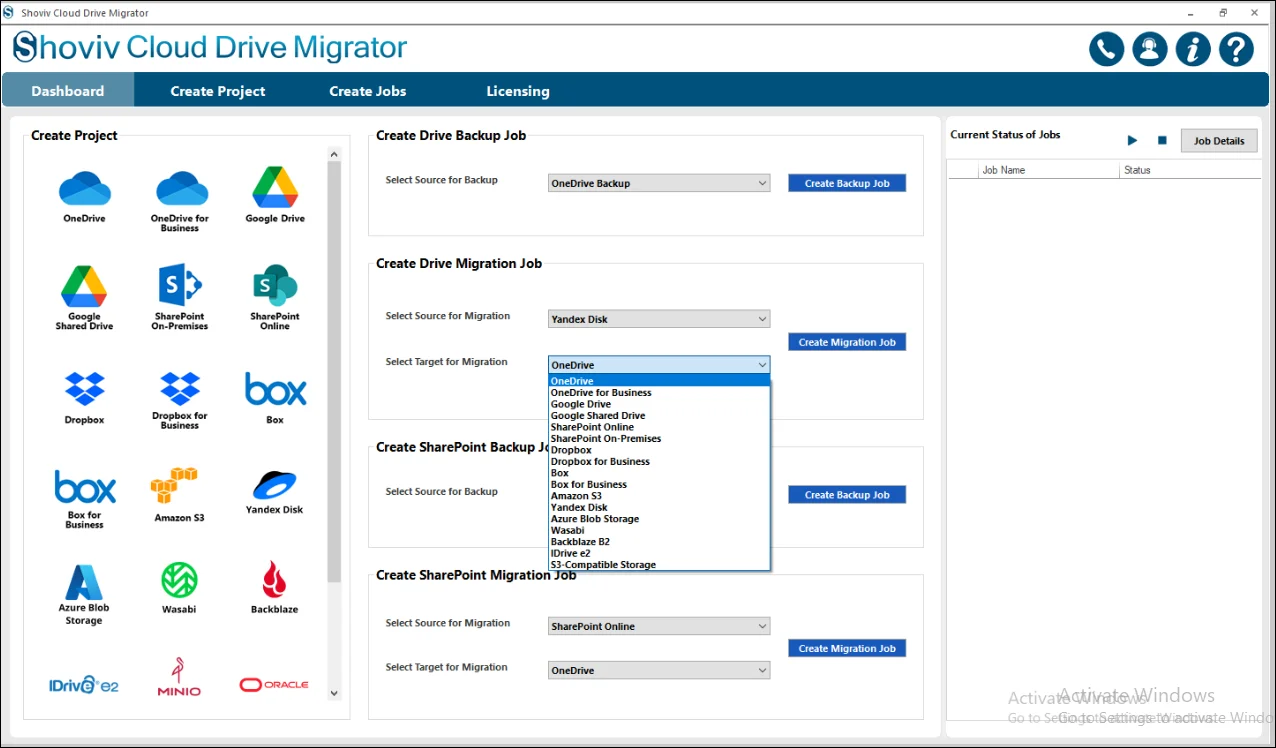
- Select Yandex Disk as the Source.
Choose the Target destination (The software supports multiple cloud platforms as destination locations, including Google Drive, Google Shared Drive, OneDrive (Personal and Business), SharePoint Online, SharePoint On-Premises, Dropbox (Personal and Business), Box (Personal and Business), Amazon S3, and S3-Compatible Storage services such as Backblaze, Wasabi, IDrive e2, MinIO, Oracle Cloud S3, Cloudflare R2, and DigitalOcean etc.) according to your migration requirements.
- Click on the Create Drive Migration Job to open the Create Job Wizard for job configuration
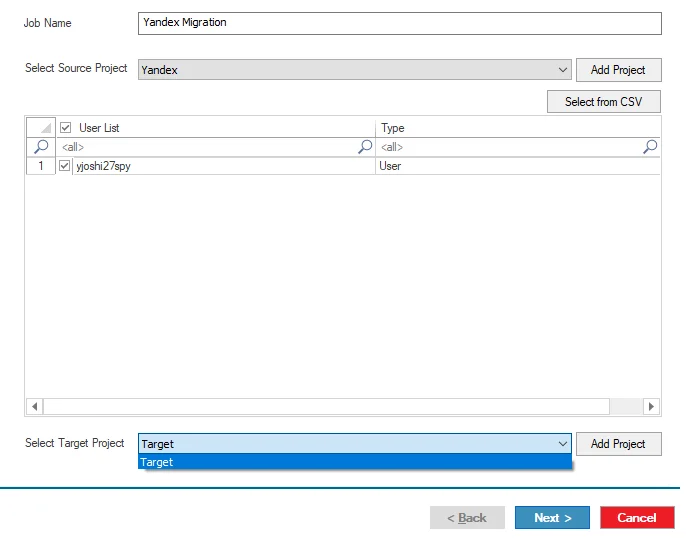
Step 3: This section allows you to configure a Job by entering a unique and meaningful Job Name and setting up both Source Connection and Target Connection. Follow the steps to Add Project, select users, and complete the configuration for successful Job creation.
- Enter the Job Name in the provided field.
- Note: The project name should be unique and meaningful and should not overlap with the other created jobs in the previous section if this happens that you will receive the notification about it.
Click on the Next button. After successfully connecting both the Source and Target projects, move to the Mapping section.
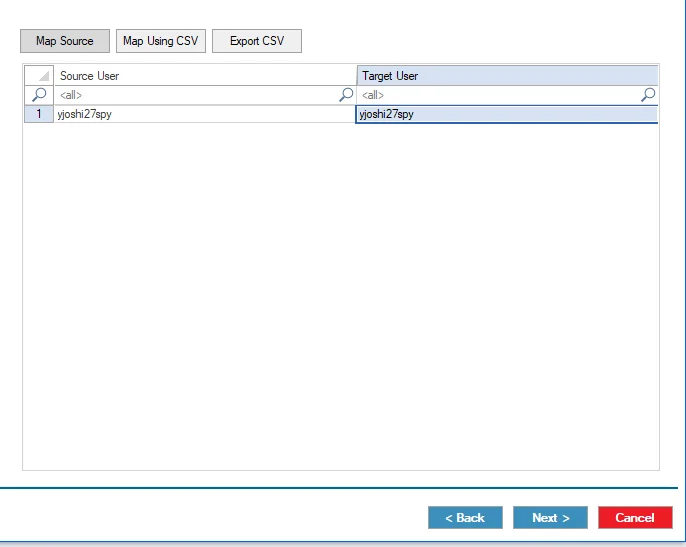
Step 4: In this stage, the Source Users are mapped with their corresponding Target Users.
- The mapping can be performed manually by selecting the appropriate Source User and Target User from their respective columns.
- For bulk mapping, select the Map Using CSV option confirming the mappings, click Next to continue with the Yandex Disk Migration process.
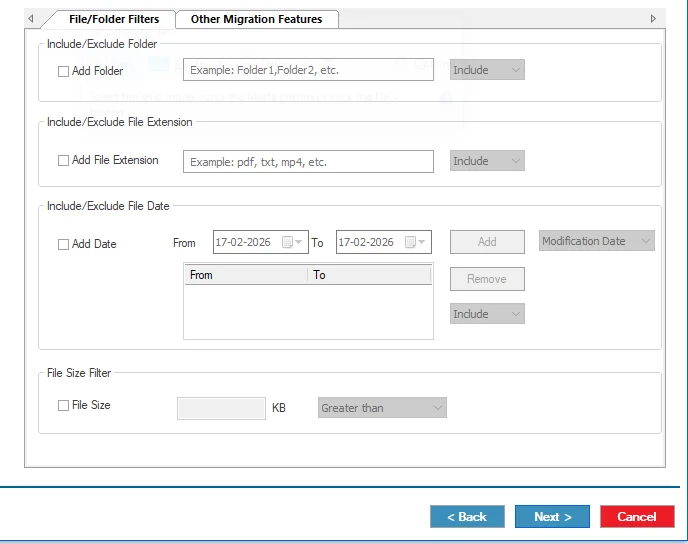
Step 5: The Filter Wizard window offers several options to refine the migration of user data. Under the File/Folders Filters section, the following filters are available:
- Folder Filter: Include or exclude specific folders for migration. You can add multiple folders and switch between Include or Exclude depending on whether you want to migrate only selected folders or skip them.
- File Extension Filter: Control migration based on file types by including or excluding specific extensions such as .pdf, .docx, .jpg, etc.
- Date Filter: Migrate files within a specific date range by selecting the start date and end date, then applying the criteria.
- File Size Filter: Filter files based on their size by defining a size range and choosing whether to migrate files greater than or less than the specified size.
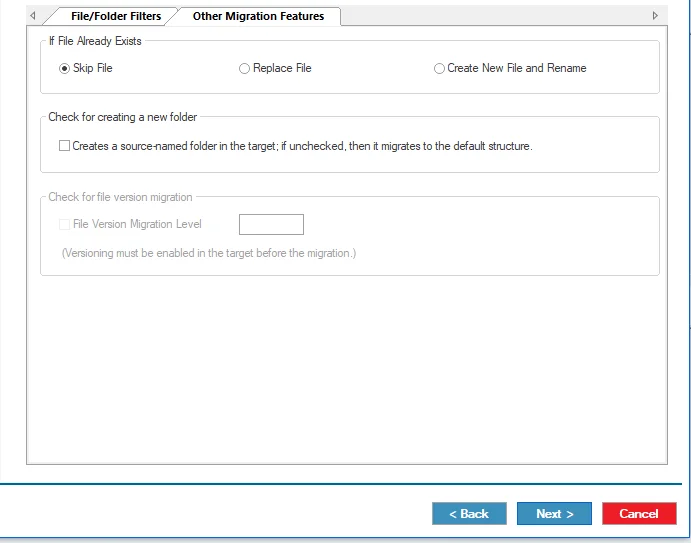
Step 6: On the right side of the Filter Wizard, the Other Migration Features section provides additional options to manage files during migration.
Step 6.1: If File Already Exists: This option defines the action when a file with the same name already exists at the destination.
- Skip File: The duplicate file is skipped, and the existing file remains unchanged.
- Replace File: The existing file at the destination is overwritten with the source file.
- Create New File and Rename: A new copy of the file is created with an automatic rename (e.g., Test (1), Test (2)) to avoid overwriting.
Step 6.2: Check for Creating a New Folder: When enabled, the software creates a new folder in the target user with the source name and preserves the original folder hierarchy and file structure during migration.
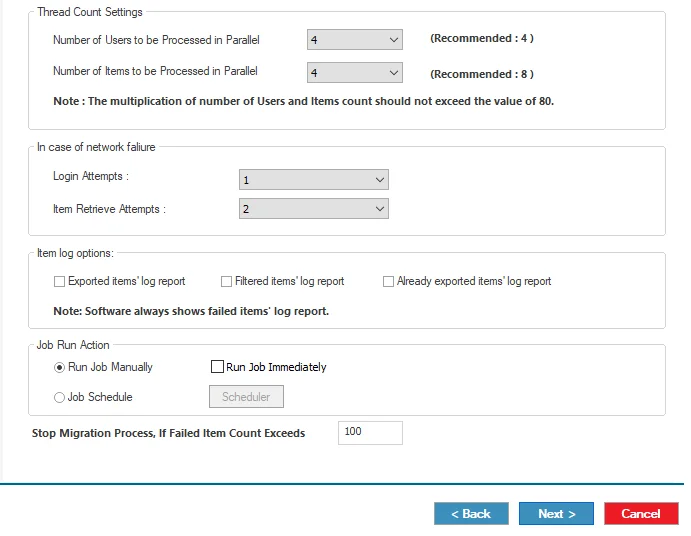
Step 7: Next, the Settings section allows you to customize and optimize the migration process. It includes options such as Thread Count Settings, In case of network failures, Item log options, Job Run Action, and Bad Item Count.
Step 7.1: Thread Count Settings
- Number of Users to be Processed in Parallel: This option defines how many users can be processed simultaneously during migration.
- Number of Items to be Processed in Parallel: This setting controls how many items the software can process at the same time for each user.
Step 7.2: In case of network failures
- Login Attempts: Specifies the maximum number of retry attempts if login fails due to temporary network issues.
- Item Retrieve Attempts: Defines how many times the software should retry retrieving an item before marking it as failed.
Step 7.3: Item log options
- Exported Items Log Report: Generates a report of all successfully migrated items.
- Filtered Items Log Report: Creates a report of items skipped due to applied filters such as date, size, folder, or extension.
- Already Exported Items Log Report: Opens the report folder containing logs of previously migrated items.
- Note: The software automatically generates a Failed Items Log Report, which includes details of items that could not be migrated due to errors.
- Step 7.4: Bad Item Count: This option sets the maximum number of failed items allowed before the migration for a specific user stops. For example, if set to 100, the process will stop for that user after 100 failed items. You can adjust the Bad Item Count as per your according.
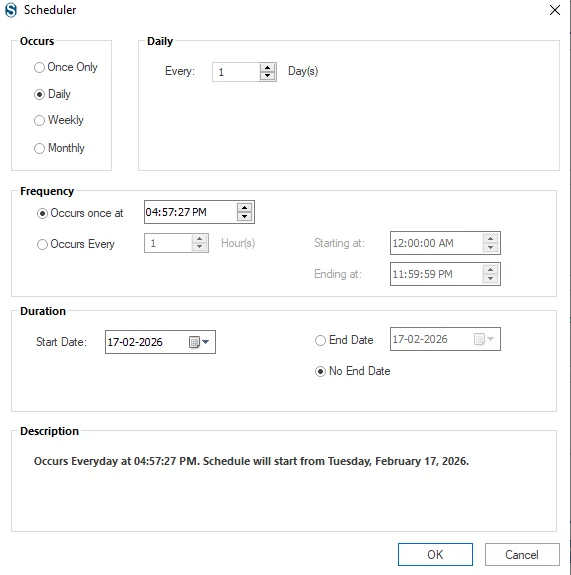
Step 8: The Scheduler is an important part of the job creation process that allows users to automate the migration at a specific time.
Step 8.1: Run Job Manually: This option allows the Yandex Disk migration job to be started manually from the dashboard at any time.
Step 8.2: Run Job Immediately: Select this option to start the migration as soon as the job setup is completed.
Step 8.3: Job Schedule: This option enables scheduling the migration at a specific time.
- Daily: Migrates users’ data every day at the specified time.
- Weekly: Migrates users’ data weekly. You can choose a single day or multiple days in a week at a defined time.
- Monthly: Migrates users’ data every month or in selected months on specific dates.
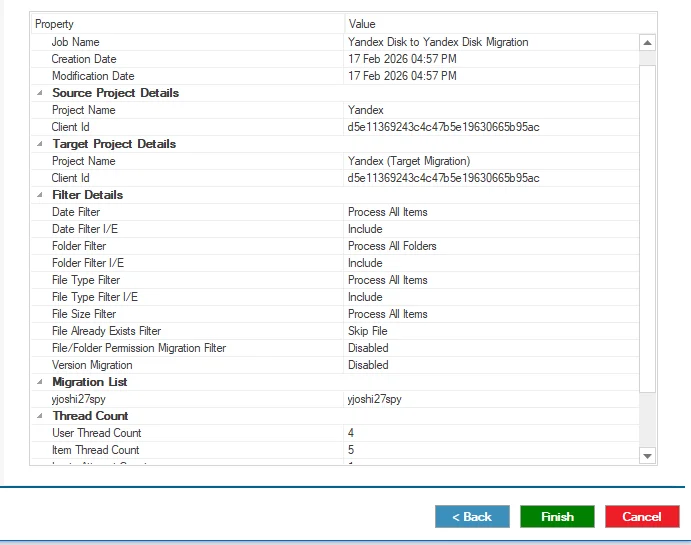
Step 9: After configuring the schedule, review the job details carefully. If any modification is required, use the Back button to make changes; otherwise, click Finish to complete the setup.
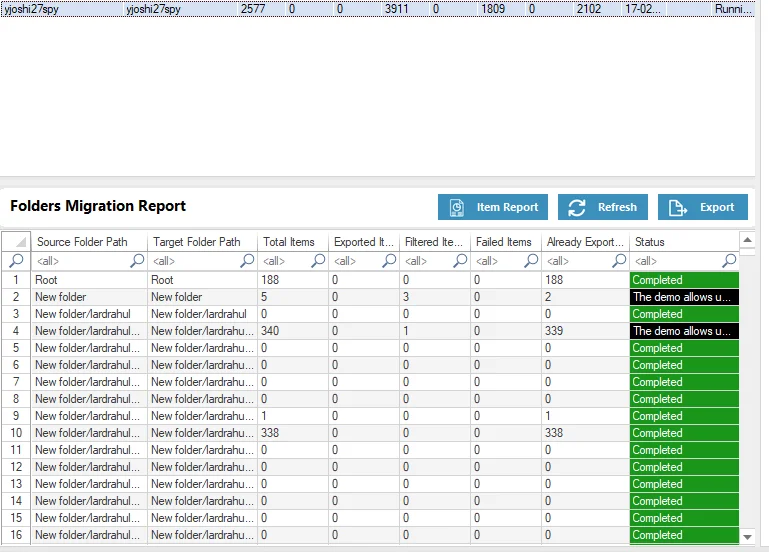
Step 10: The job will run according to the selected Filters and Settings. If the Manual option is selected, start the migration by clicking the Start Job button. After the process is completed, the Job Report will be generated and displayed based on the selected Target.