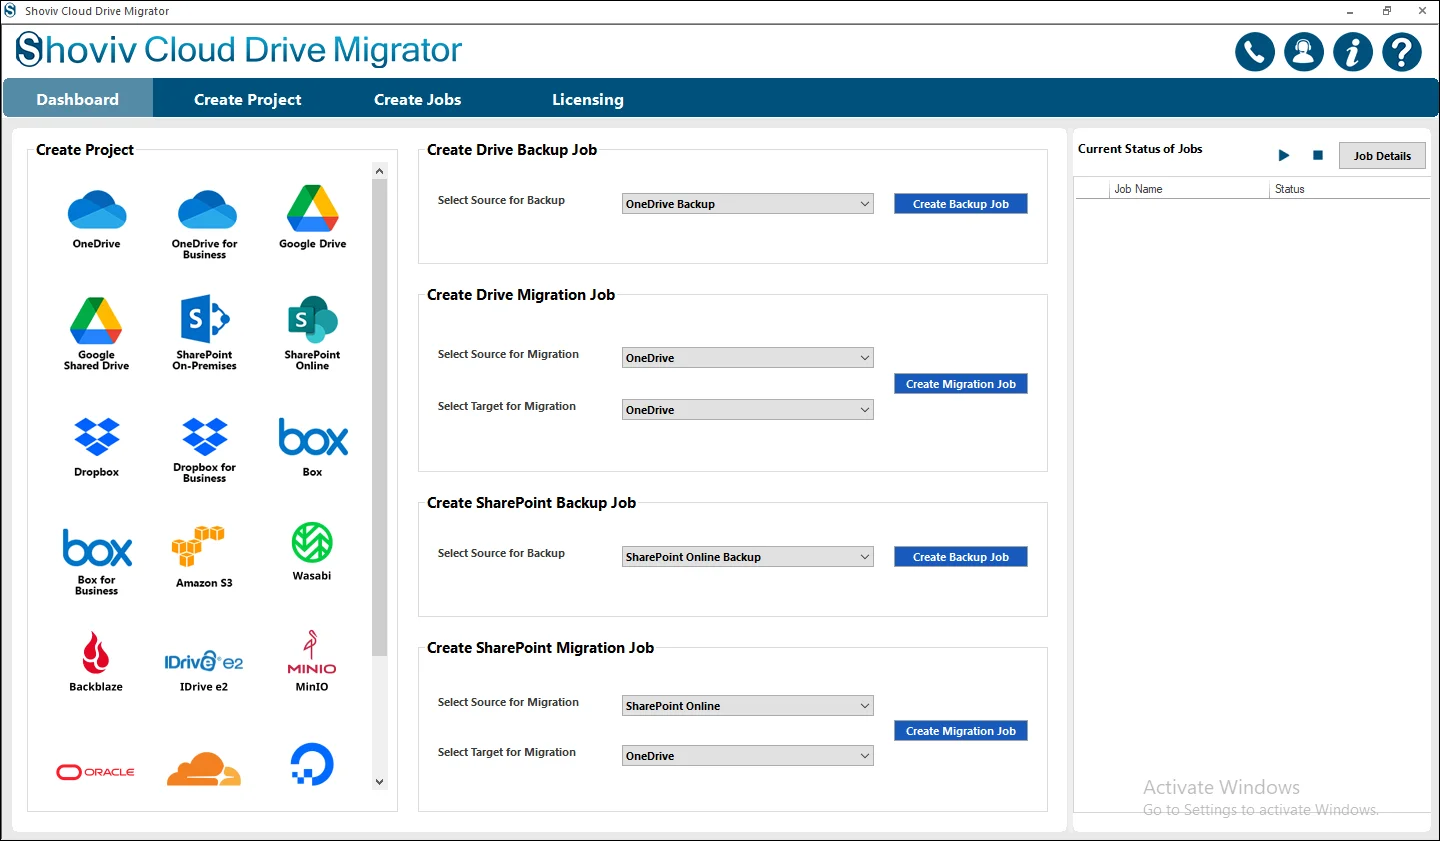
Step 1: Shoviv Cloud Drive Migratoropens with the main interface. Go to the Create Drive Migration Job..
- In this section you need to select the Source and Target destinations..
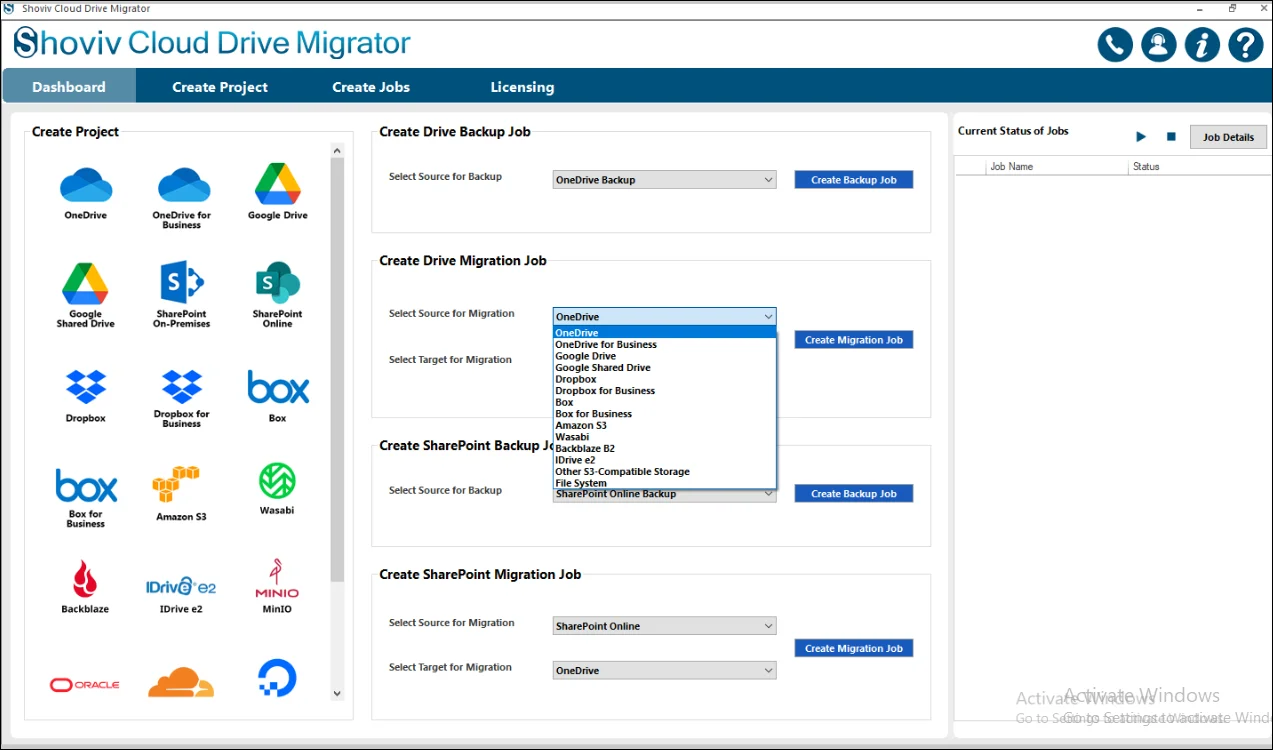
Step 2: At this point you need to select the OneDrive(Business/ Personal as per your needs) as the Source.
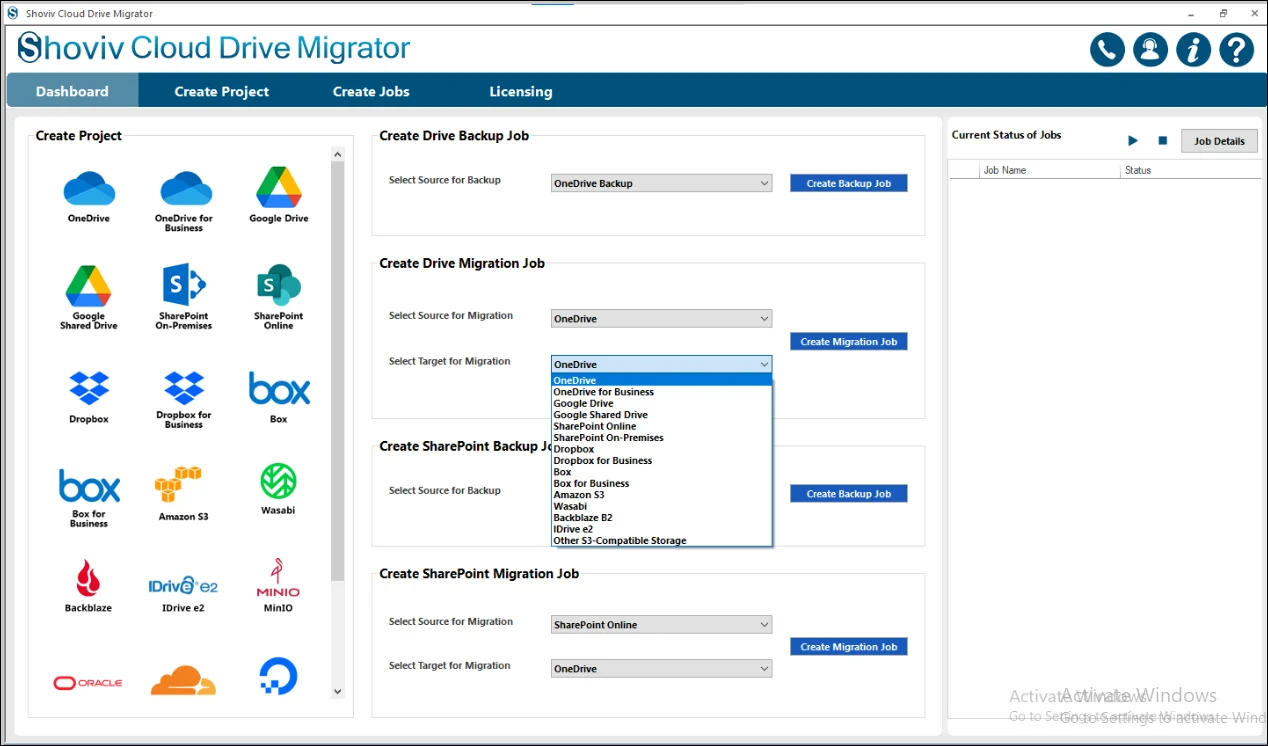
Step 3: On the other hand, again select the OneDrive(Business or Personal) as the Target destination.
- Click on the Create Migration Job to complete the first process of the Job Creation.
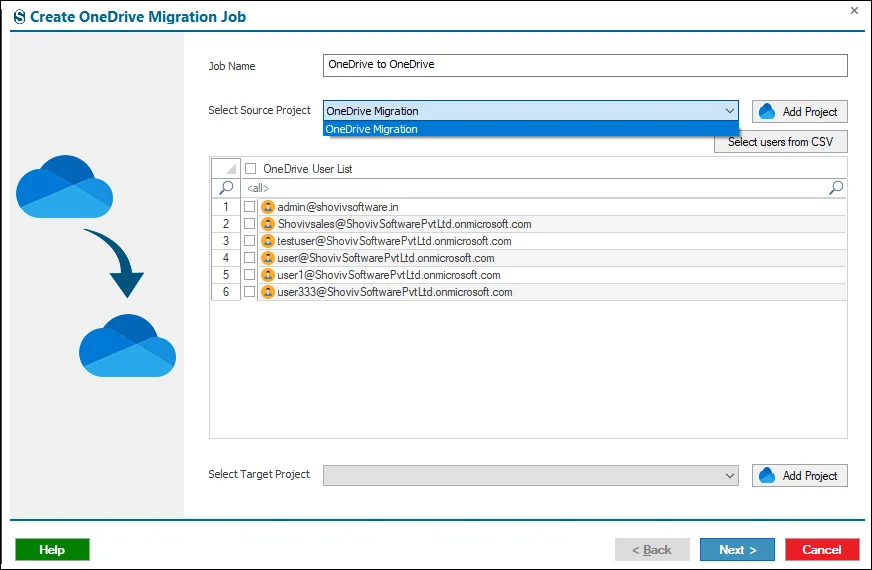
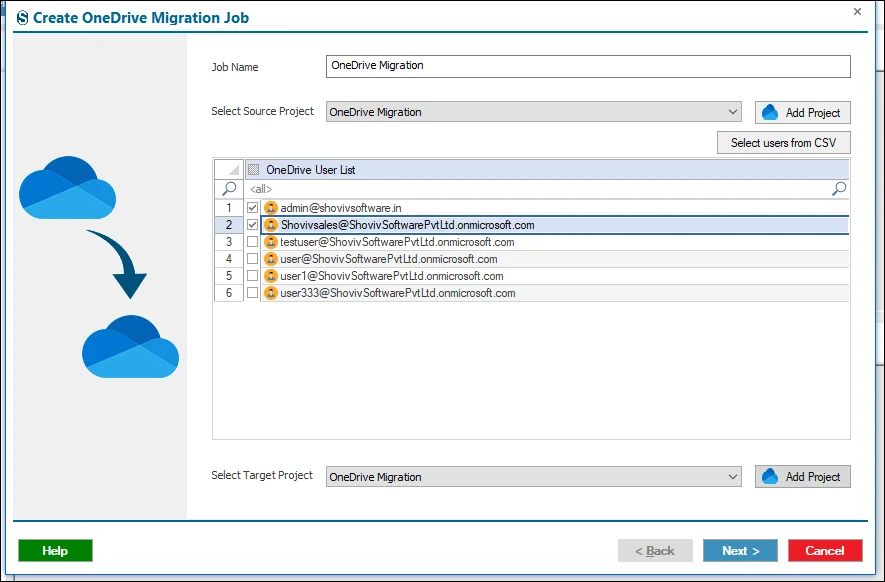
Step 4: For the initiation of the Creating Job, you need to enter the Job Name in such a way as to distinguish it from the other created jobs.
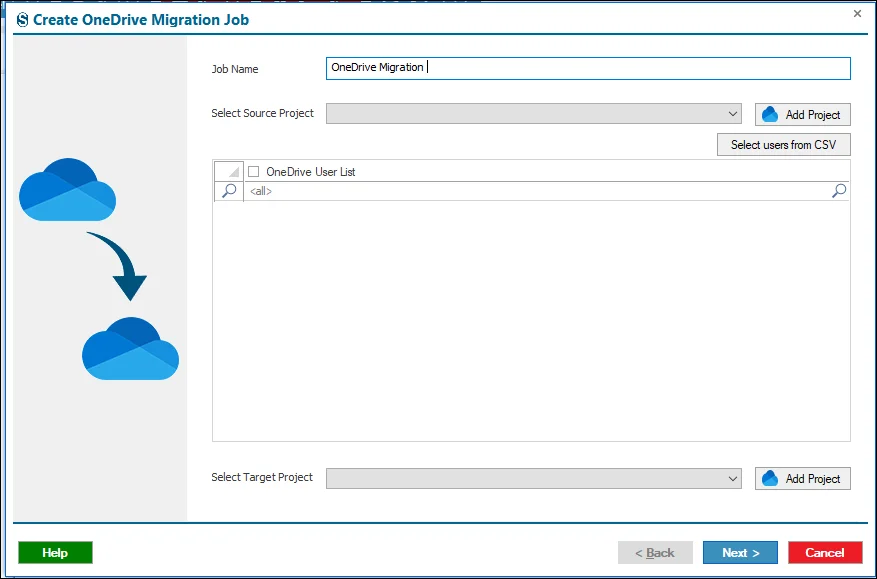
Step 5: First, connect to the Source project and click Add Project.
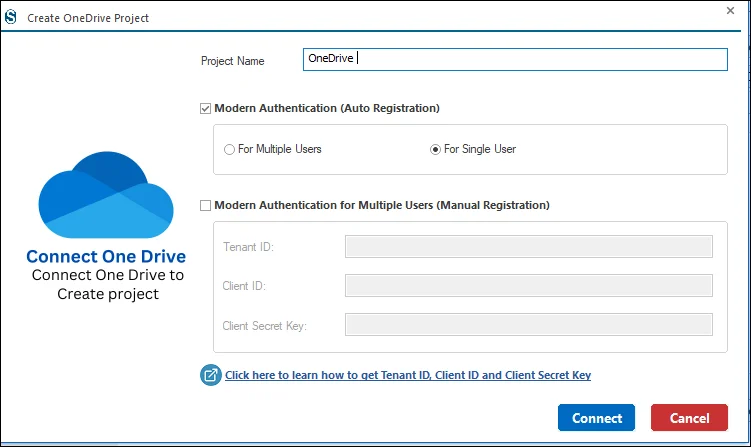
- To link a Personal OneDrive or OneDrive Business account, you can choose between Auto or Manual Registration for authentication.
- If you select Modern Authentication, it will display two additional options under Auto Registration: Single User or Multiple Users.
- Choose the option that matches your requirements, then click Connect to complete the process.

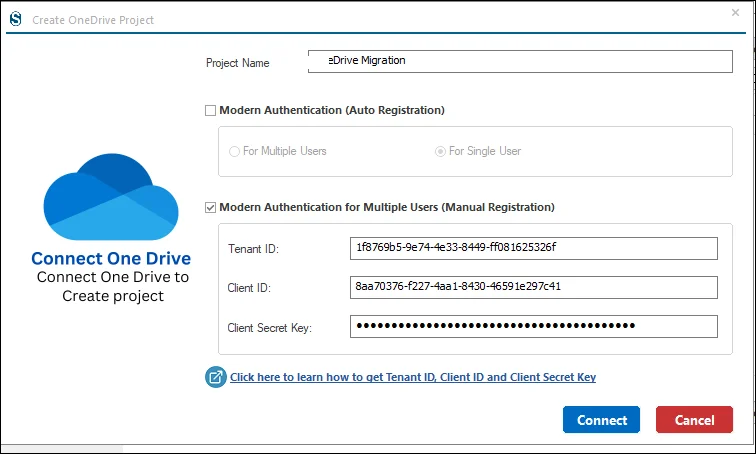
Step 6: Under Manual Registration, you need to enter all the credentials which were asked for carefully.

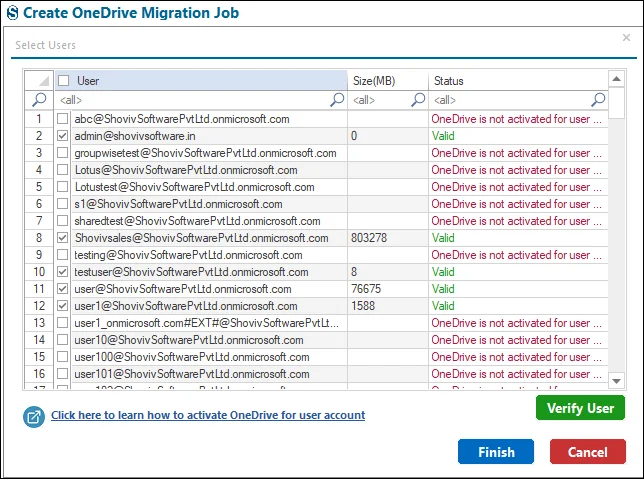
Step 7: Select the source drive from the list of available drives and verify whether OneDrive is enabled for the users.

Step 8: On the other hand if you already have a Source Project present in your system then need to select it from the dropdown menu.
- In case if you have the larger drives lists for the process then you can select it with the help of the Source Users CSV.
Step 9: After the establishment of the Source Project proceeds with the Target project
Step 10: Select the Target drive from the drive list.
Step 11: If you have Project, click on the dropdown menu and pick the required one.
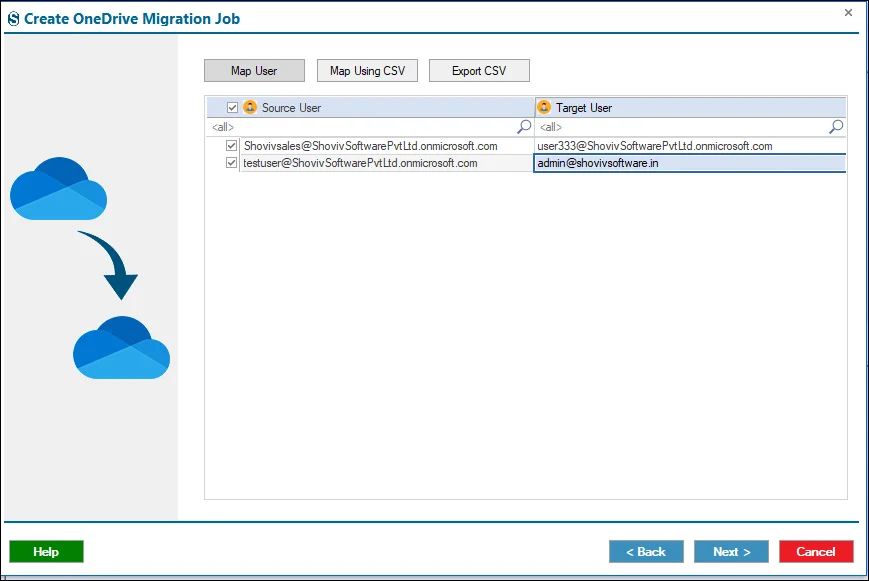
Step 12: After successfully working with the Source and Target Project, you need to proceed with the mapping of drives.
- Firstly, please select the desired source drives and then click on the Map User button. After clicking here, you will find the target drive list window. Please choose one of them for that specific source drive and click on OK.
- After reviewing, the drives are correctly matched or not, click on Next.
- Note you can also do mapping with the help of the Map Using CSV and Export CSV.
- Map Using CSV: with this button, we can add the CSV files in order to the Map User.
- Export CSV: uses this button to export the folder mapping list into the CSV files for later users.
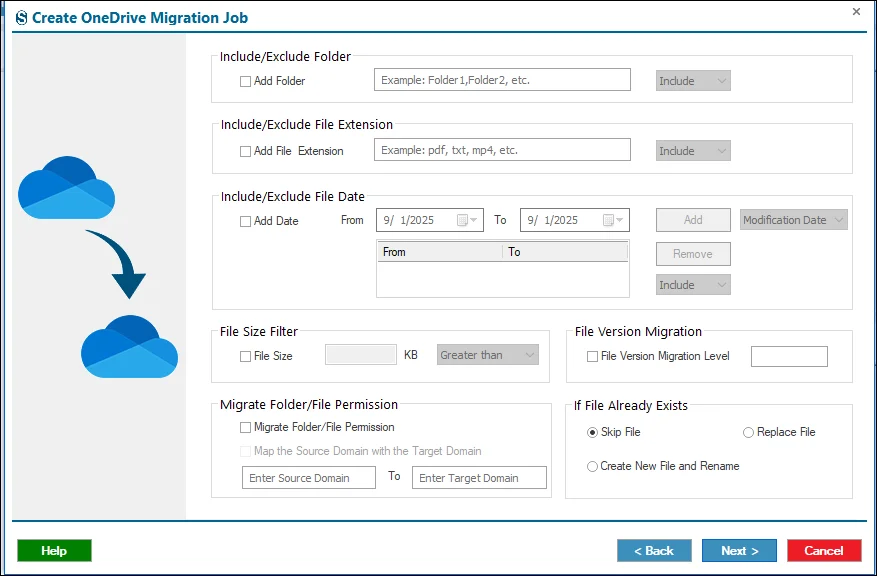
Step 13: Under the filters page you can apply the filters to refine your migration process and if not needed then you can ignore it with the help of the Next button.
- Date Filter: Allows selection of a defined date range for data inclusion. Click Add after selecting the range.
- Folder Filter: Enables inclusion or exclusion of specific folders from the user’s drive. Multiple folders can be added, or include mode can be used to migrate only selected folders.
- File Size Filter: Permits filtering files based on a specified size range. Click Add to apply.
- File Extension Filter: Supports inclusion or exclusion of files according to specified file extensions.
- To migrate file versions, enable File Version Migration and select the required version level under File Version Migration.
- To migrate permissions, enable Migrate Folder/ File Permissions by selecting the checkbox, then provide the Source Domain and Target Domain details.
- If you do not need these filters then you can ignore it with the help of the Next button.
Step 14: With the help of the Settings pages you can apply the different advanced settings.
- User Thread Count: This setting defines the number of users whose drives can be migrated simultaneously. For example, if there are 5 users in a job and the thread count is set to 3, the software will migrate the drives of 3 users at the same time.
- Item Thread Count: This option specifies how many concurrent threads are used to migrate items within each user’s drive. For instance, if the thread count is set to 10, the software will process up to 10 items simultaneously for a single user.
- User Login Attempts: During migration, temporary internet issues may cause login failures. This setting allows you to define how many retry attempts the software should make before marking the migration job as failed.
- Using Drive Item Retrieve Attempts: This option determines the number of times the software will attempt to retrieve a specific user item. If the item cannot be retrieved within the defined attempts, the migration job will be marked as failed.
- Item Log Options: Users can fetch the report of the items which is present in the Target Project. (Export items log report, filters item log report, Already exported items log report).
- Bad Item Count: This setting controls the maximum number of failed items allowed per user before stopping their migration. For example, if the bad item count is set to 100, the software will stop migrating that user once 100 items fail to migrate.
Step 15: Scheduler: The scheduler lets you automate migration jobs by defining when they should start. It ensures the migration runs automatically at the selected time without manual intervention.
- Run Job Manually: Start the migration job anytime directly from the dashboard.
- Start Immediately After Creating a Job: Automatically begin the migration as soon as the job is created.
- Job Schedule: Schedule the migration to run at a specific date and time.
- Daily: Run the migration every day at a chosen time.
- Weekly: Run the migration once a week or on selected days with a set time.
- Monthly: Run the migration monthly or on selected months and dates.
If you do not need to hold these settings then you need to click on the Next button to move forward.

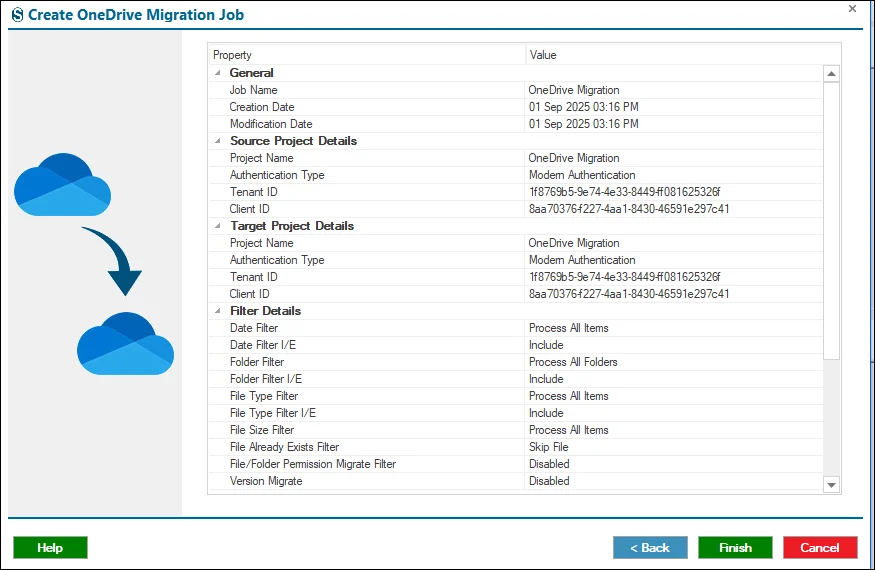
Step 16: After creating a job, this page allows you to review all job details, and if you find any mistakes and want to edit them, then click on the Back and if not, then click on the Next.
Step 17: The job runs according to the options selected in the previous section. If you selected Manual you need to start the job from the ribbon bar.


