Step 1: After downloading and installing Shoviv Cloud Drive Migrator from the main interface, go to the Create Backup Job.
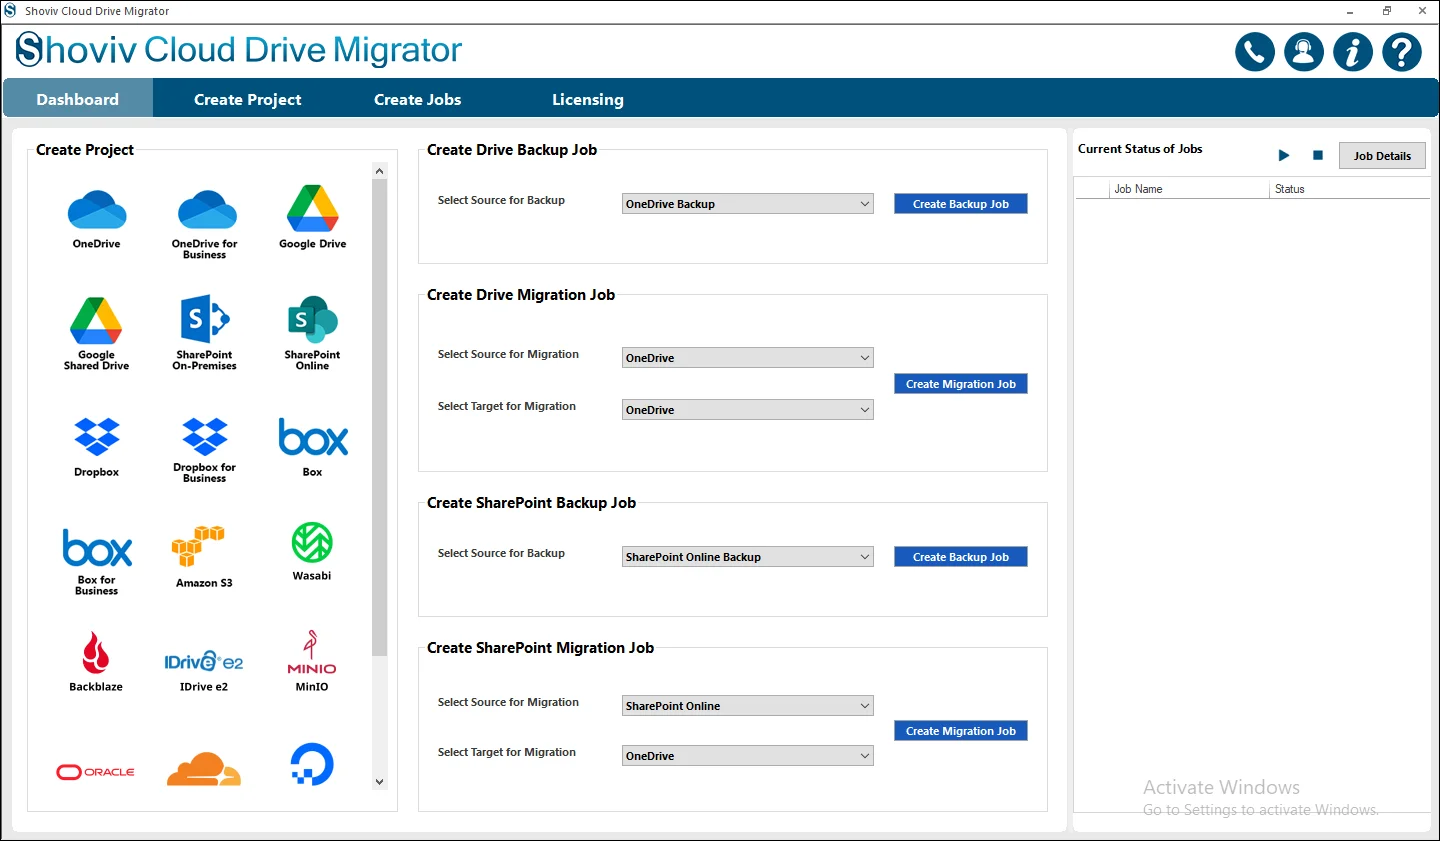
Step 2: OneDrive (Business or Personal) as the Source destination.
- Click on the Create Backup Job.

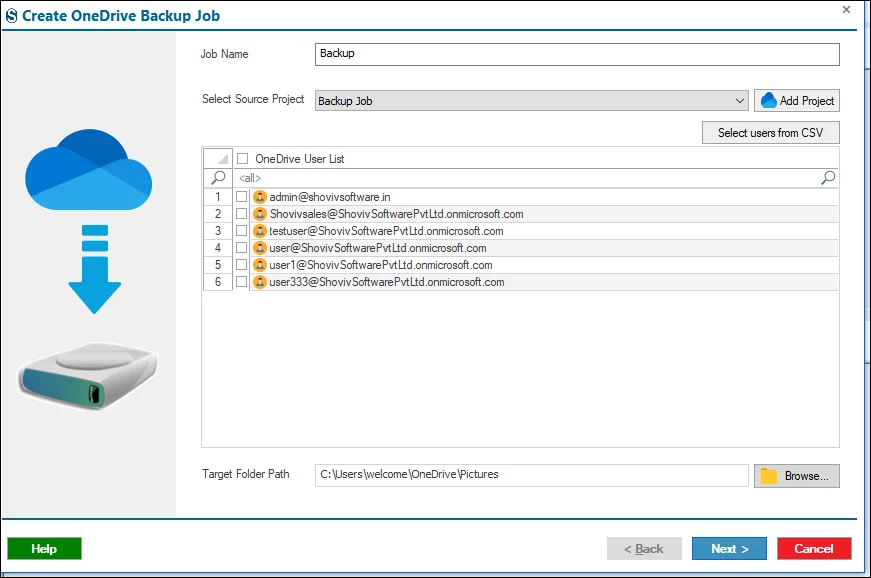
Step 3: Type the Job Name in a way that differentiates it from the other created backup Jobs.
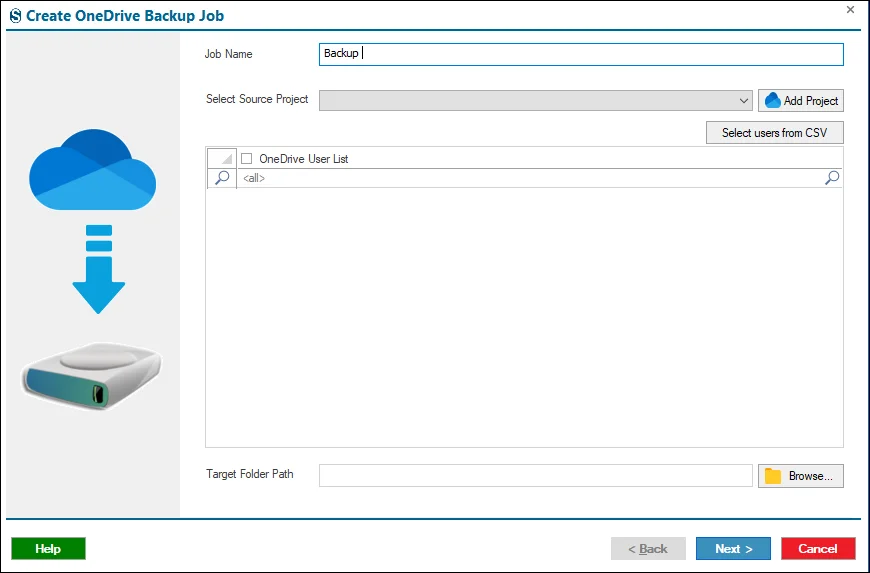
Step 4: Open the Source project and click Add Project.
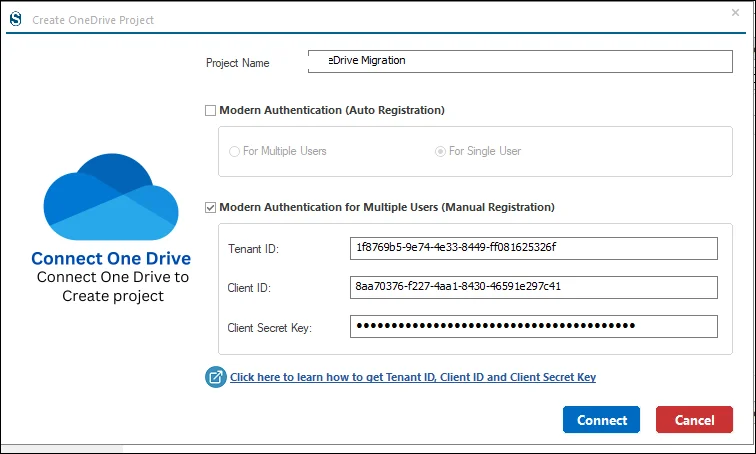
- To connect a Personal OneDrive or OneDrive Business account, select either Auto or Manual Registration for authentication.
- After choosing Modern Authentication, you will see two options under Auto Registration: Single User or Multiple Users.
- Choose the required option and click Connect to complete the connection.
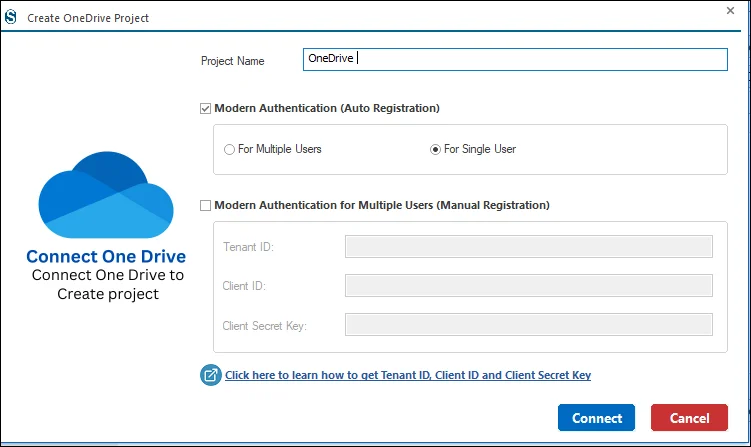
Step 5: For the Manual Modern Authentication, users need to enter the credentials which were present on the screen in a careful manner.
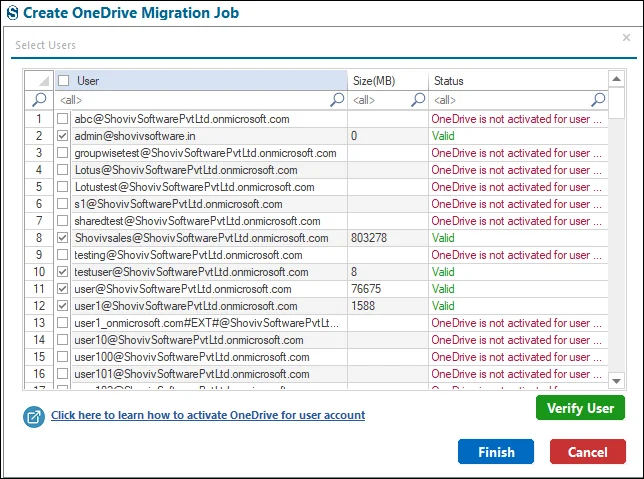
Step 6: Select the source drive from the list of drives.
Step 7: If a Source Project is already available on your system, select the appropriate option from the dropdown menu.
- For a large number of drives, you can easily choose them using the Source Users CSV file.
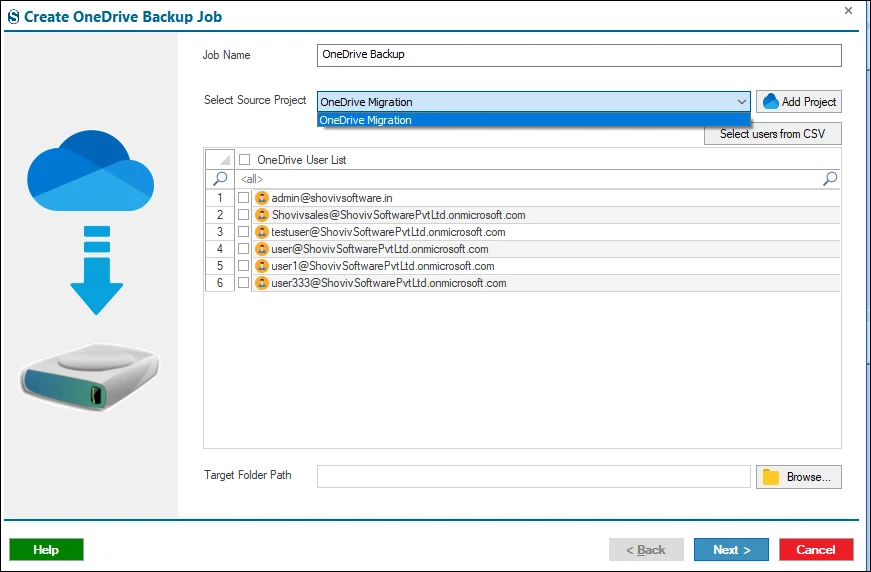
Step 8: Choose the target path where you need to backup your job.
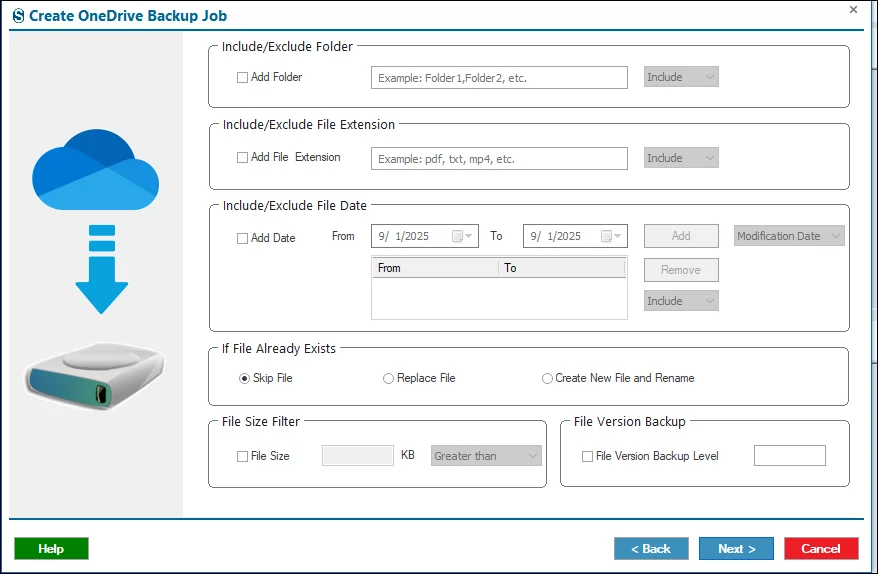
Step 9:
- Folder Filter: Choose folders to exclude or switch to include mode for migrating only selected folders.
- File Size Filter: Set minimum and maximum file sizes and click Add.
- File Extension Filter: Include or exclude files based on defined extesions.
-
To migrate file versions, enable File Version Migration and define the required version level with the help of the Other Migration Features.
-
Under the If File Already Exists you will find three options
- Skip File: Prevents duplicate files from being included in the migration.
- Replace File: Replaces an existing file with the latest version during migration.
- Create New File & Rename: Transfers the file by creating a new version with a modified name when a file already exists.
- If filters are not needed, select Next to continue.
Step 10: Here you can set the advanced settings with the help of the Settings page.
- User Thread Count: Sets how many users are migrated at the same time.
- User Drive Item Thread Count: Controls how many files move at once for each user
- User Login Attempts: Defines how many times the tool retries login if it fails.
- User Drive Item Retrieve Attempts: Sets how many times the tool tries to fetch a file before failing.
- Bad Items Count: Limits the number of failed items allowed per user.
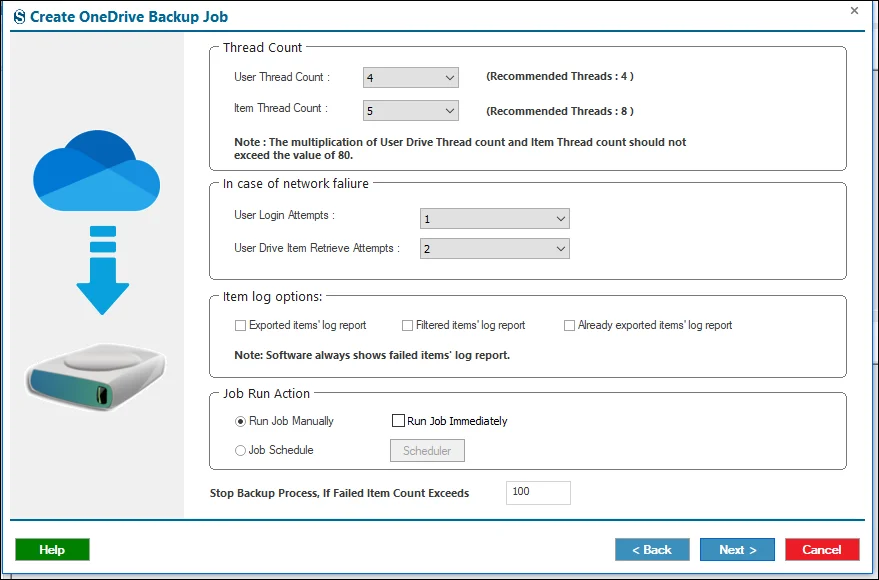
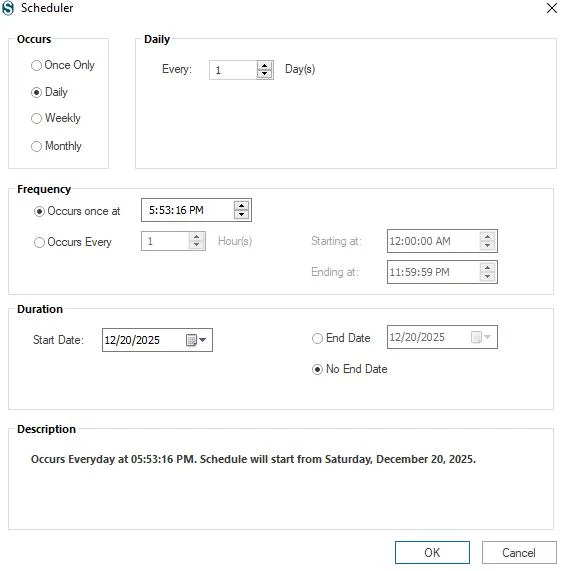
Step 11: The scheduler allows you to plan when a migration job will run.
- Run Job Manually: Launch the migration whenever you want from the dashboard.
- Start Immediately After Creating a Job: The migration begins as soon as the job is saved.
- Job Schedule: Set a specific date and time for the migration to run.
- Daily: Run the migration every day at the selected time.
- Weekly: Run the migration weekly or on chosen days at a fixed time.
- Monthly: Run the migration monthly or on selected months and dates.
If you do not need to set these settings then you can ignore it with the help of the Next button.
Step 12: Want to change the details, then click on the Back button after reviewing the summary of the job details on the page, and if not, then click on the Finish.

Step 13: The Job works based on the choices you made above. If you went with Manual, click Start Job from the ribbon bar.