Step 1: Install and run Shoviv Cloud Drive Migrator.
- From the dashboard, go to the Create Drive Backup Job.
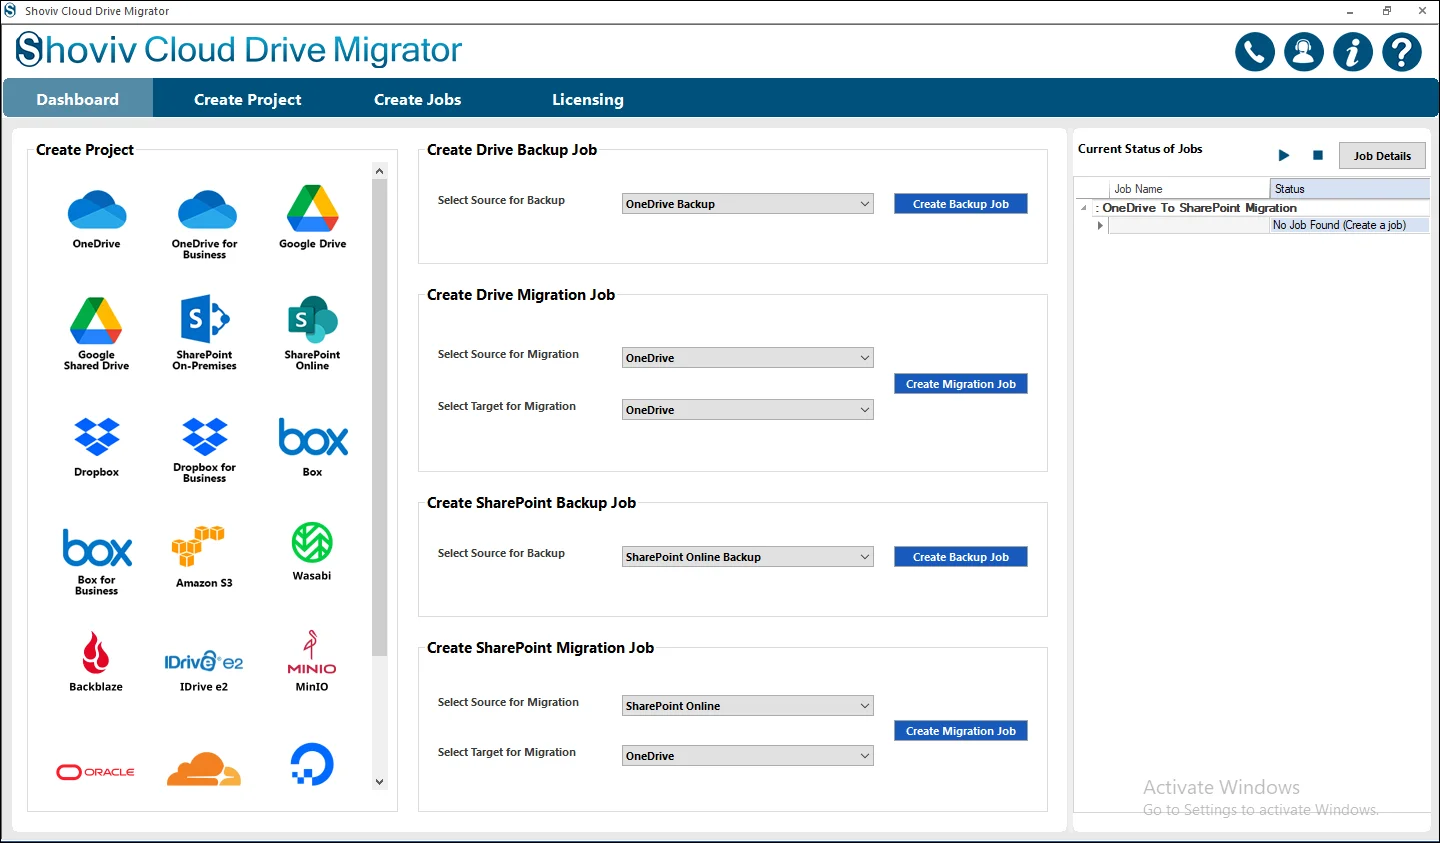
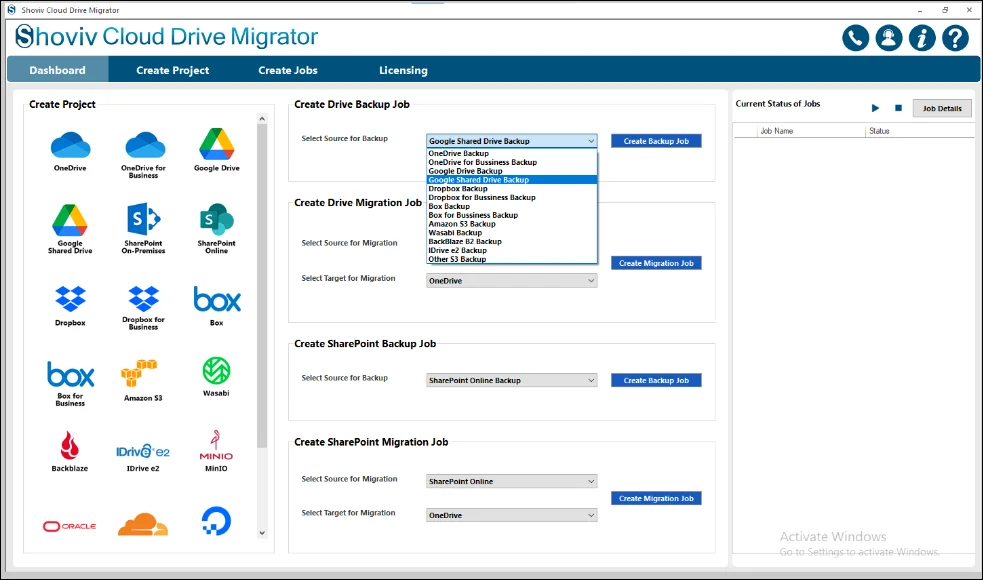
Step 2: From the dropdown menu select Google Shared Drive Backup for further processing.
- Click on the Create Backup Job.
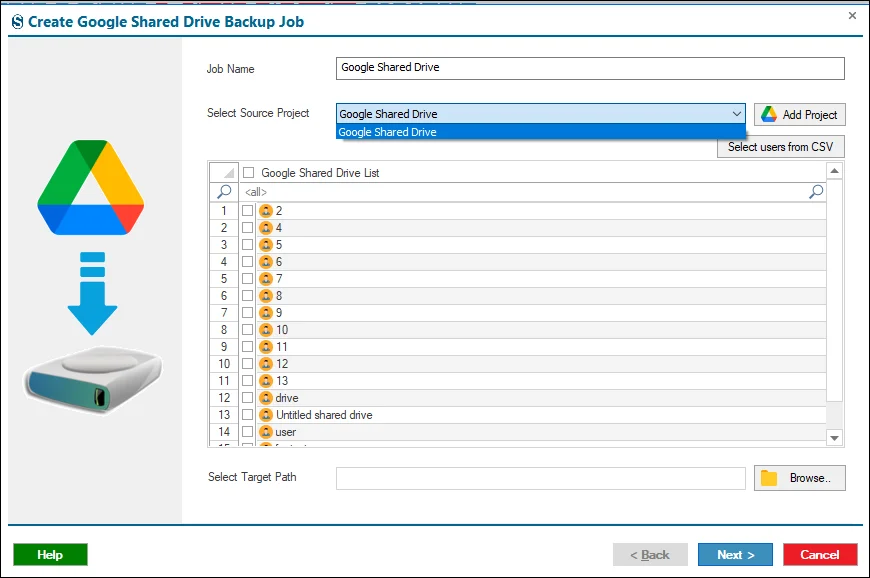
Step 3: In this window, you need to enter the Job Name.
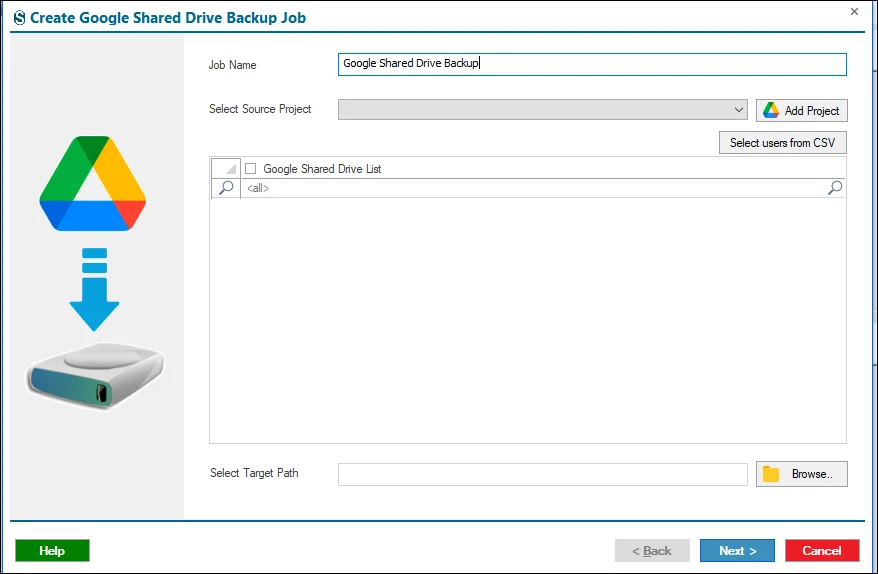
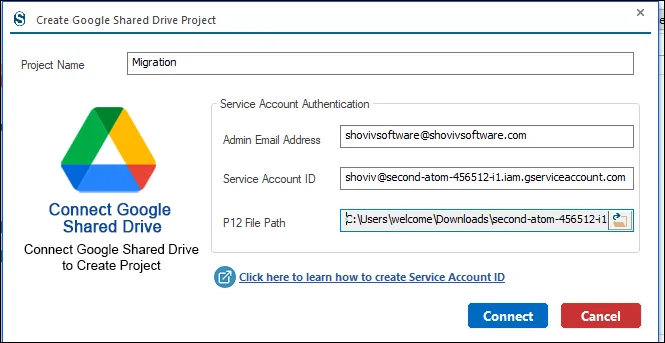
Step 4: After that you need to be done with the Source Project Connection, then click on the Add Project and enter the Project Name with the credentials that are asked for.
Step 5: Choose the required Source Drives from the list and then hit the Create Project button.

Step 6: Select the Source Project from the system in case if you already have the Source Project exists in the system.
- Large drive lists are best handled using the Source Users from CSV file.
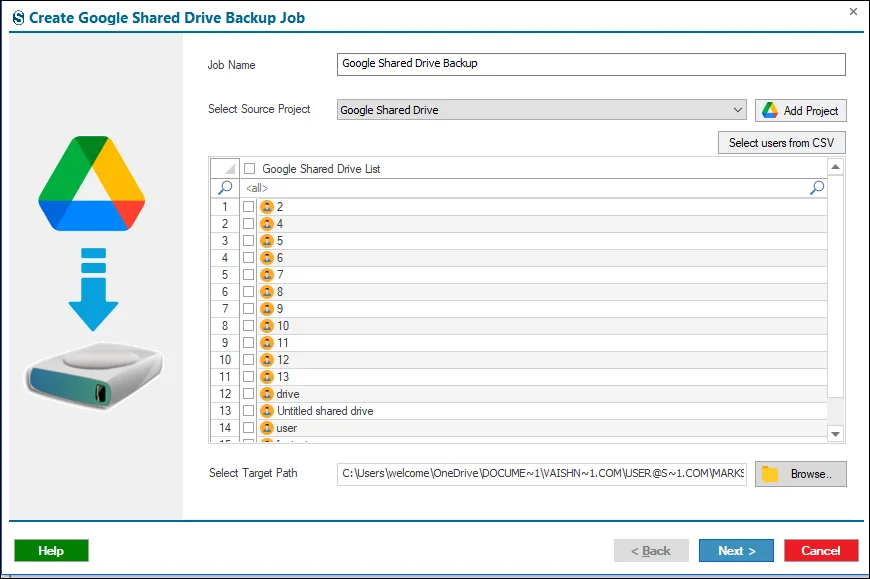
Step 7: Select the Target Path where you want to download your backup job. Then, click on the Next button.
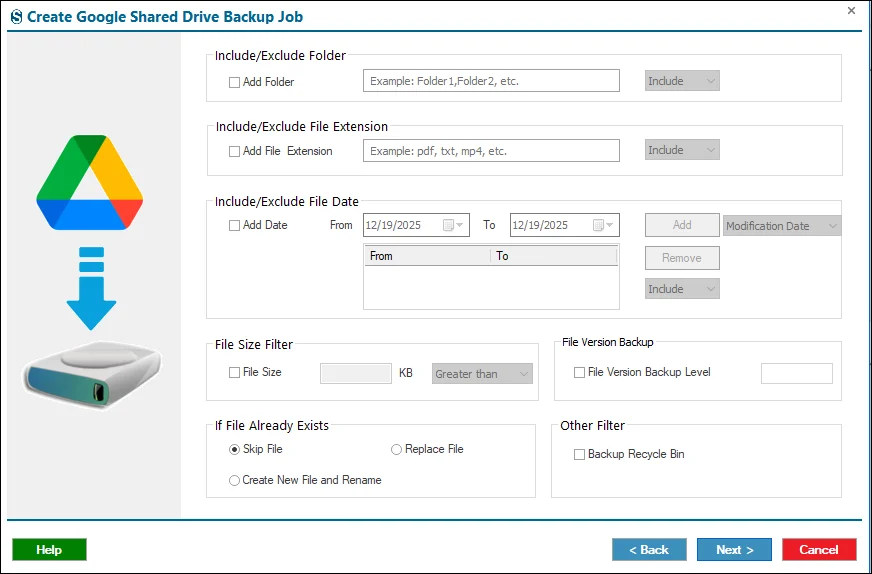
Step 8: You can configure filters to customize and refine the migration process. If you do not wish to apply any filters, you can skip this step by clicking Next.
- Date Filter: Select a specific date range to include in the migration and click Add to apply it.
- Folder Filter: Choose which folders to include or exclude from migration. You can add multiple folders or enable Include Mode to migrate only the selected folders.
- File Size Filter: Specify a file size range to control which files are migrated, then click Add.
- File Extension Filter: Define particular file types to include or exclude during migration.
If File Already Exists, the following options are available:
- Skip File: Prevents duplicate files from being migrated.
- Replace File: Overwrites existing files with the newer versions.
- Create New File & Rename: Migrates the file by creating a new copy with a different name if the file already exists.
- Backup/Recycle Bin: Enable this option to migrate files to a backup or recycle bin instead of overwriting or skipping, providing an extra layer of data safety.
- In case you do not need these settings then you can ignore it with the help of the Next button.
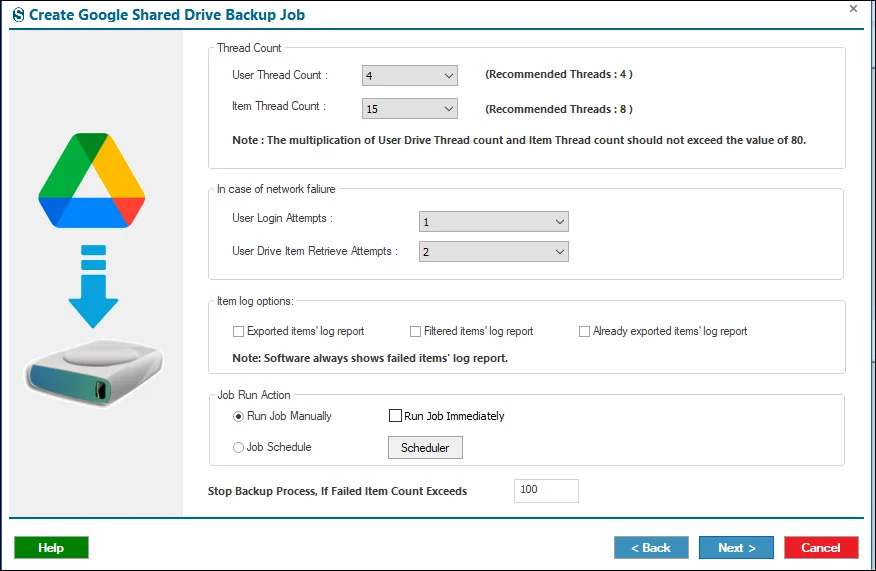
Step 9: On the Settings page, you can configure advanced migration options to optimize performance and reliability:
- User Thread Count: Determines how many users’ drives are migrated at the same time. For example, setting it to 3 will process only three users concurrently.
- Item Thread Count: Controls how many files or items are migrated simultaneously for each user.
- User Login Attempts: Specifies how many times the software will retry logging in if a login fails due to network or connection issues.
- User Drive Item Retrieve Attempts: Sets the number of attempts the software will make to retrieve a file before marking it as failed.
- Bad Items Count: Defines the maximum number of failed items allowed for a user. Once this limit is reached, the migration for that user stops automatically.
- These options are not needed then you can ignore it with the help of the Next button.
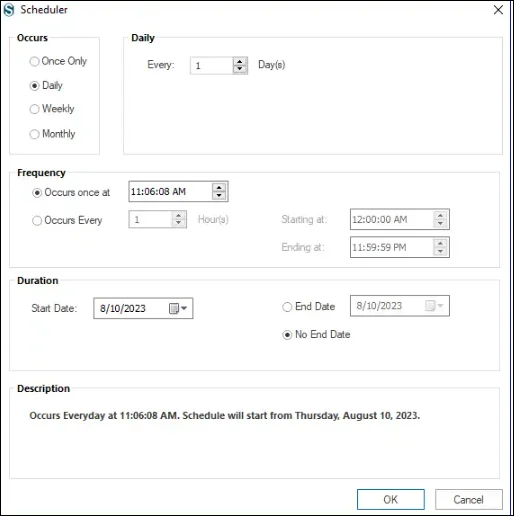
Step 10: The Scheduler lets you plan migration jobs so they run automatically at your chosen time.
- Run Job Manually: Start the migration anytime directly from the dashboard.
- Start Immediately After Creating a Job: Begin the migration automatically as soon as the job is created.
- Job Schedule: Specify a particular date and time for the migration to run.
- Daily: Run the migration every day at a set time.
- Weekly: Run the migration once a week or on selected days at a fixed time.
- Monthly: Run the migration monthly or on selected months and dates.
If you do not need to configure these settings, you can skip this step by clicking Next.
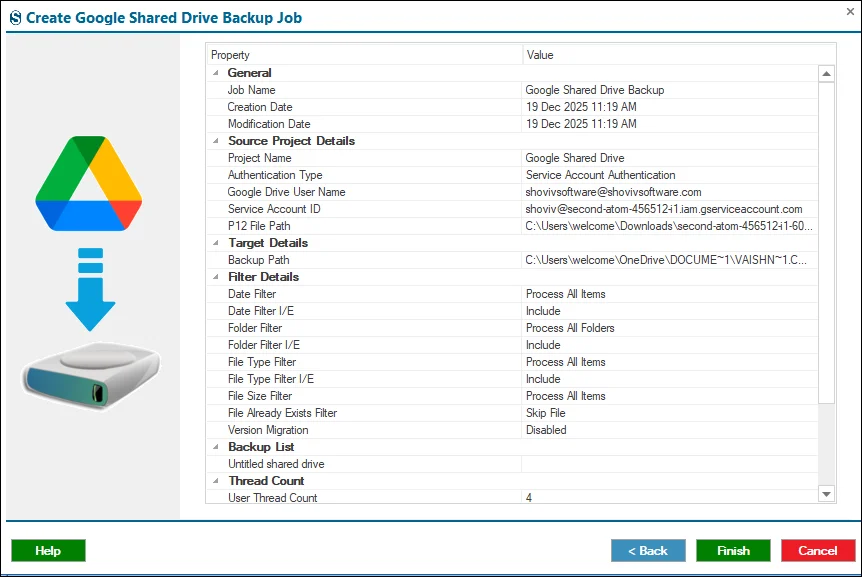
Step 11: Review the Job Report with a careful manner. If you want the details changed, then click on the Back button. If not then click on the Finish.
Step 12: The job will execute based on the settings you selected earlier. If Manual mode was chosen, you must click on the Start Job button from the ribbon bar.


