Step 1: You need to download and install the Shoviv Cloud Drive Migrator on your software. You can launch the utility from your desktop or Start button. When the software opens, it takes you to the main interface or dashboard.
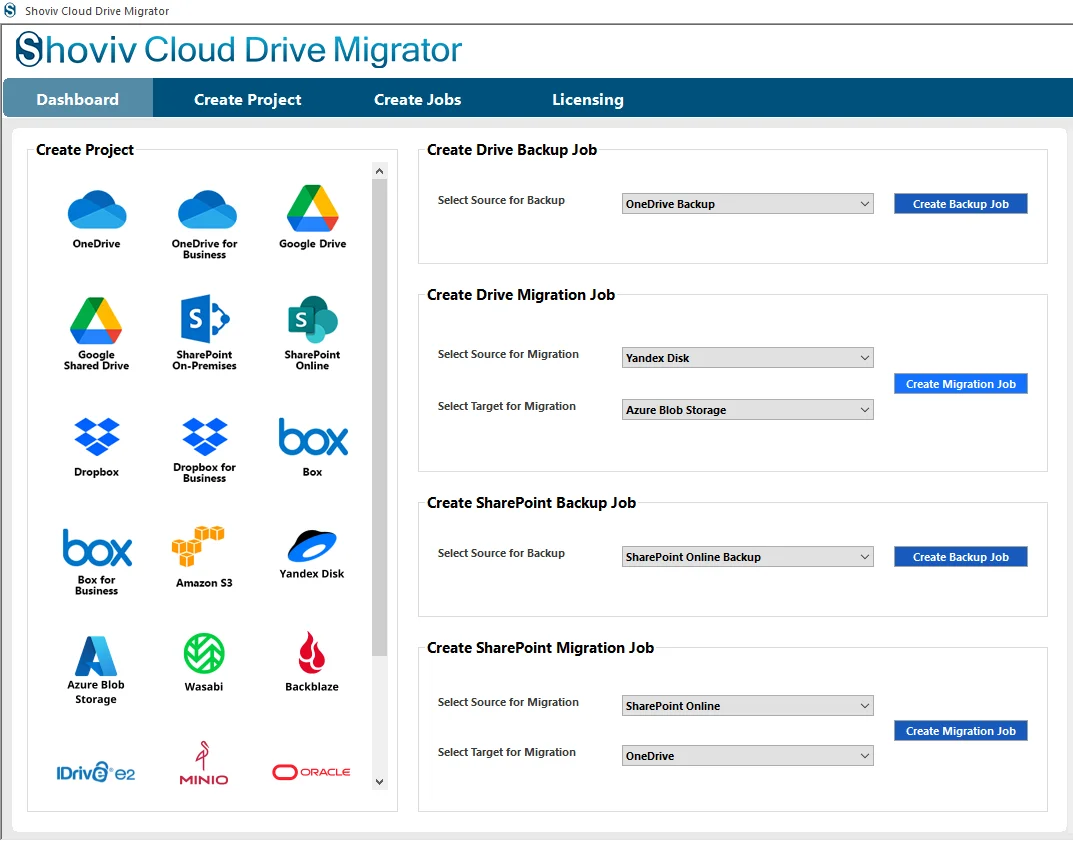
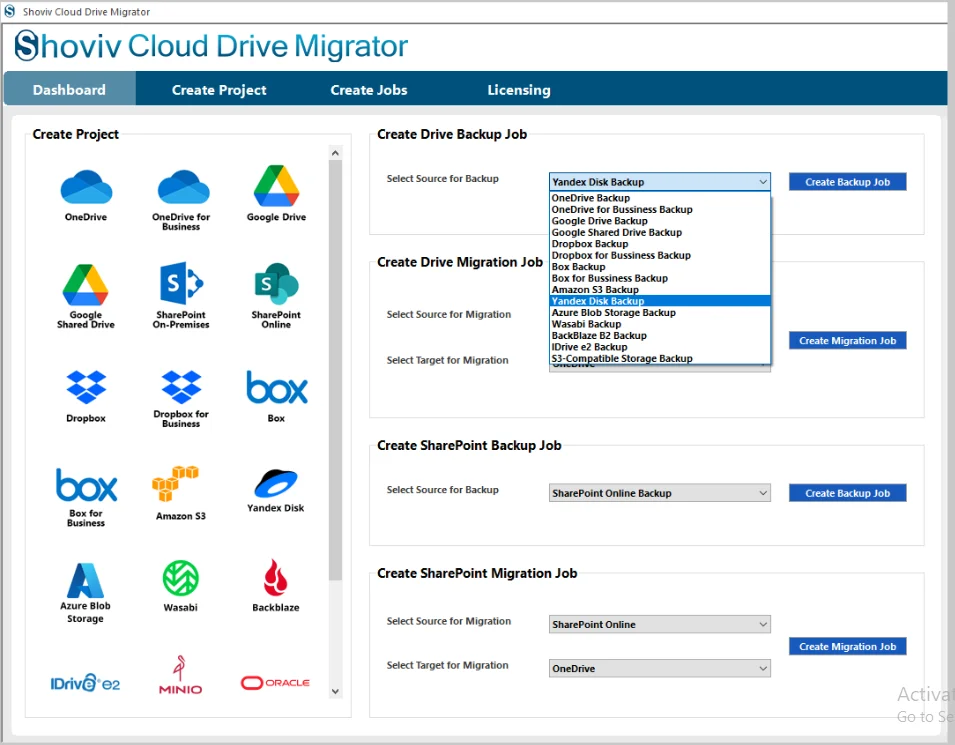
Step 2: From the dashboard, you need to navigate to the Create Drive Backup Job. In this section, you need to pick the Source for the Yandex Disk Backup Job.
- Pick the Yandex Disk as the Source from the dropdown list and then hit the Create Backup Job.
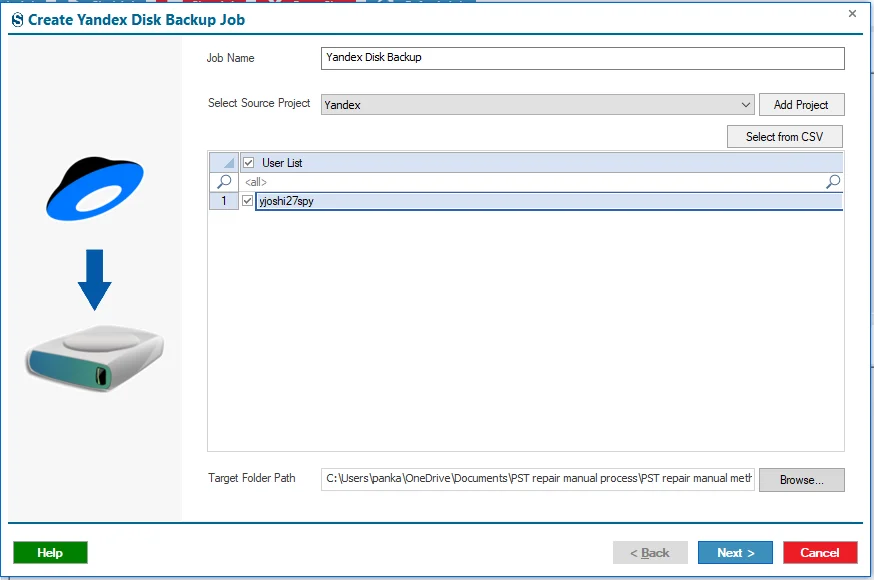
Step 3: As soon as you click on that button, there is another page that leads you to enter the name of the job in the field of the Job Name.
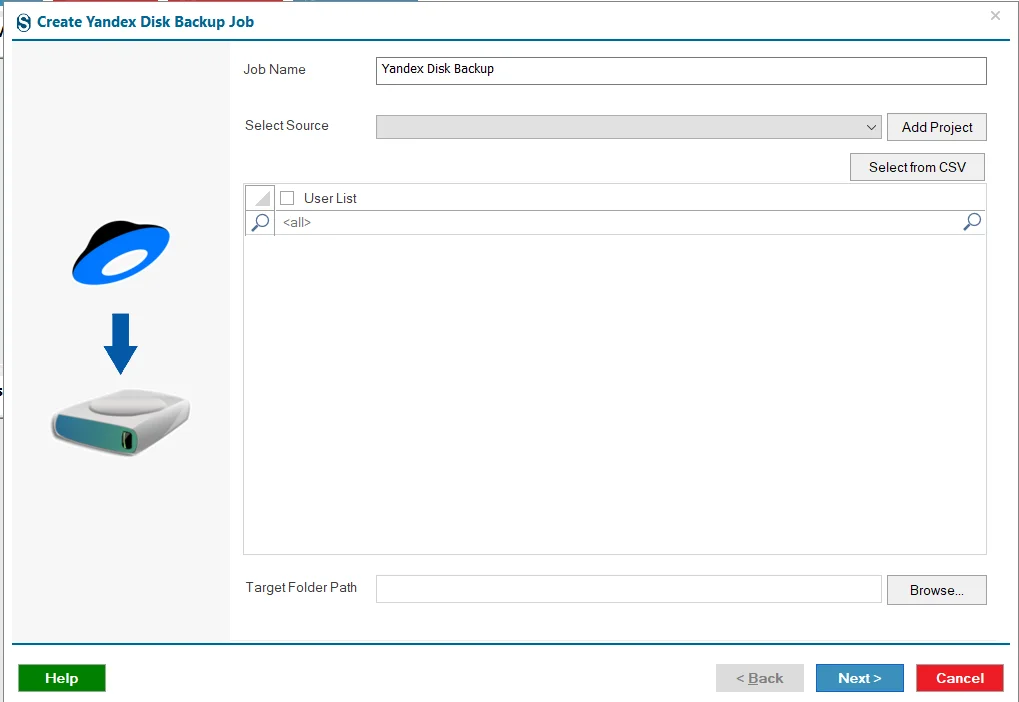
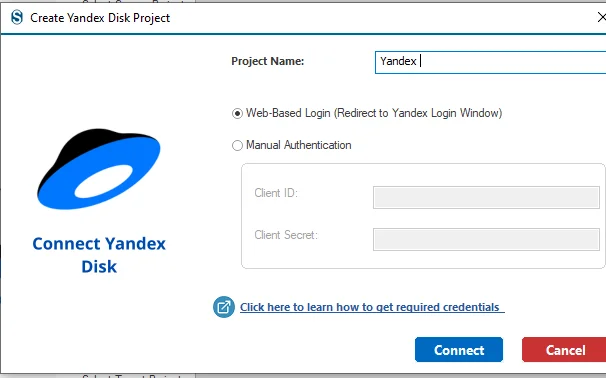
Step 4: Next, connect to the Source Project and click on the Add Projec
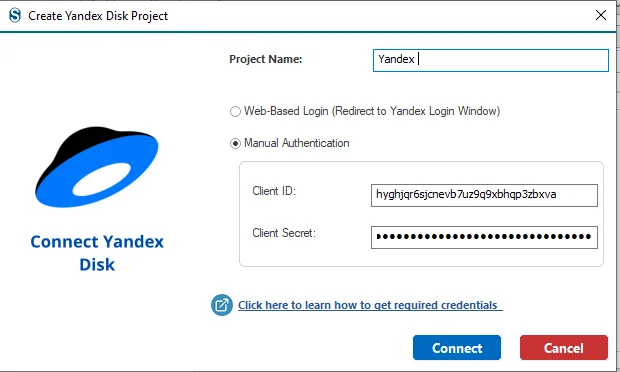
- Give the name of the Project.
- Web-Based Login (Redirect to Yandex Login Window):-Click on the Connect button, which leads you to the direct Yandex ID Login Window.
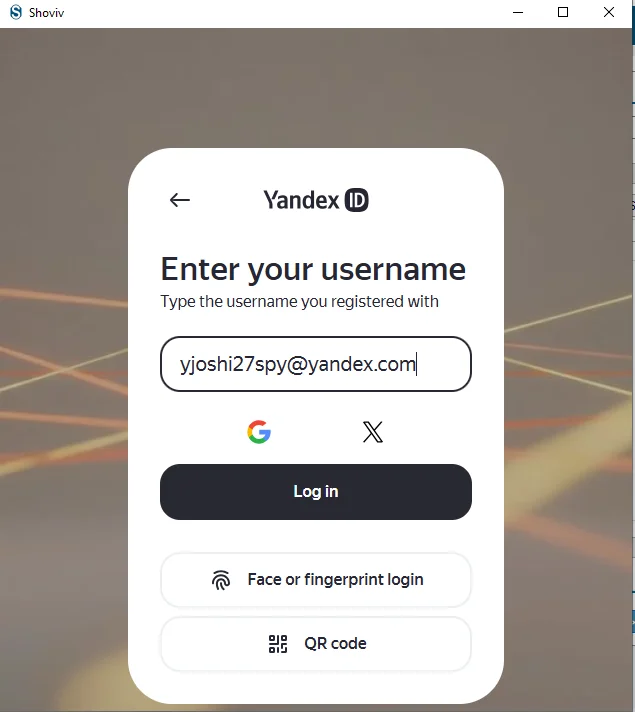
Step 5: On this page, you need to give your Username or the email address that is linked to your Yandex Disk Account. Then tap on the Log In button.
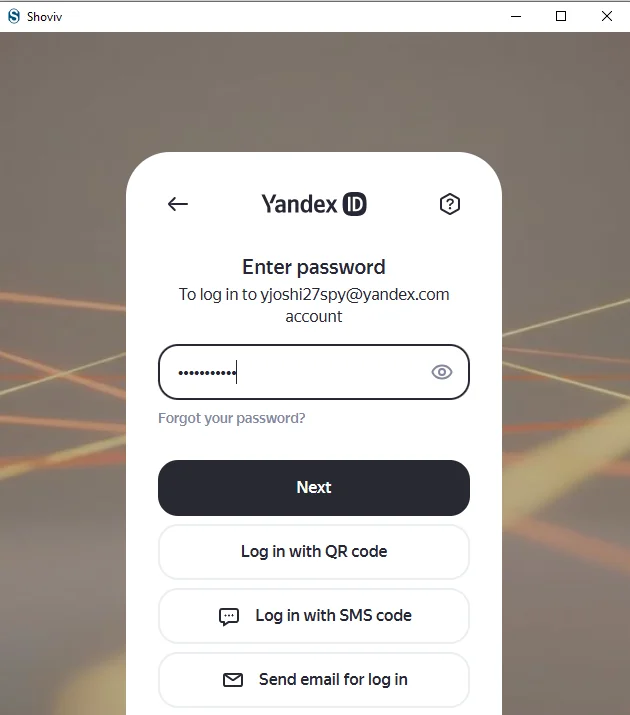
Step 6: On the next screen, enter your password for the established connection with your Yandex Disk account.
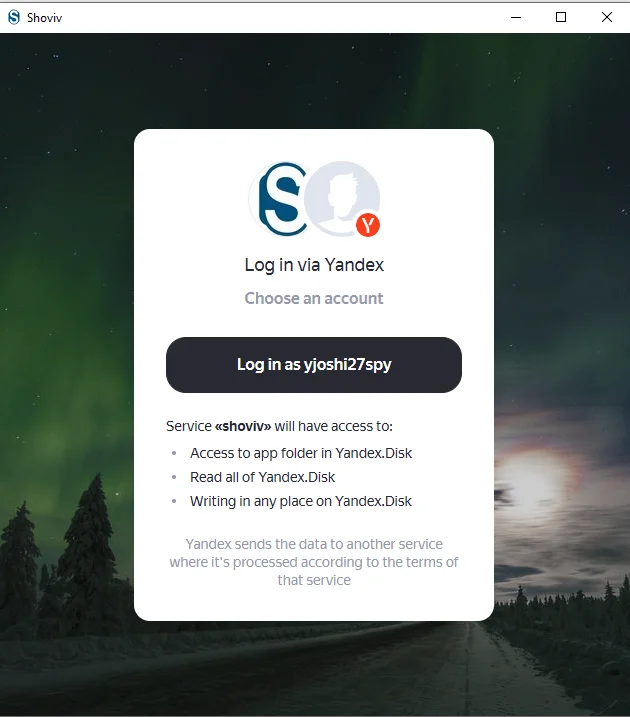
Step 7: There is another window open which asks for permission from you to log in via Yandex Account and choose the required account. Click on the Log in as your account name to access the permission. This allows the Shoviv application to access, read, and write data in your Yandex Disk account. If the permission is granted, the Source Project connection will be completed successfully.
Step 8: Manual Authentication:- Enter Client ID and Client Secret. Click on the Connect button.
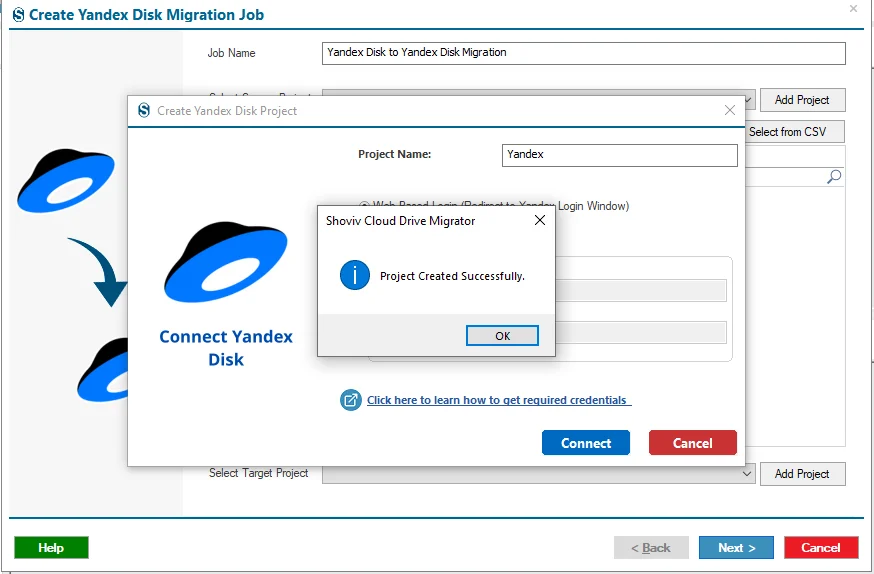
Step 9: Once the authentication and permission of the Source Project are done, there is a dialogue box which notifies you that the Source Project Created Successfully clicks on the Ok button to move forward.
Step 10: In case you have the Source Project present in your software, then you can select it with the help of the dropdown menu. As soon as you select the existing project, it displays in the Source Project field, and its users are displayed on the screen. You need to choose from them.
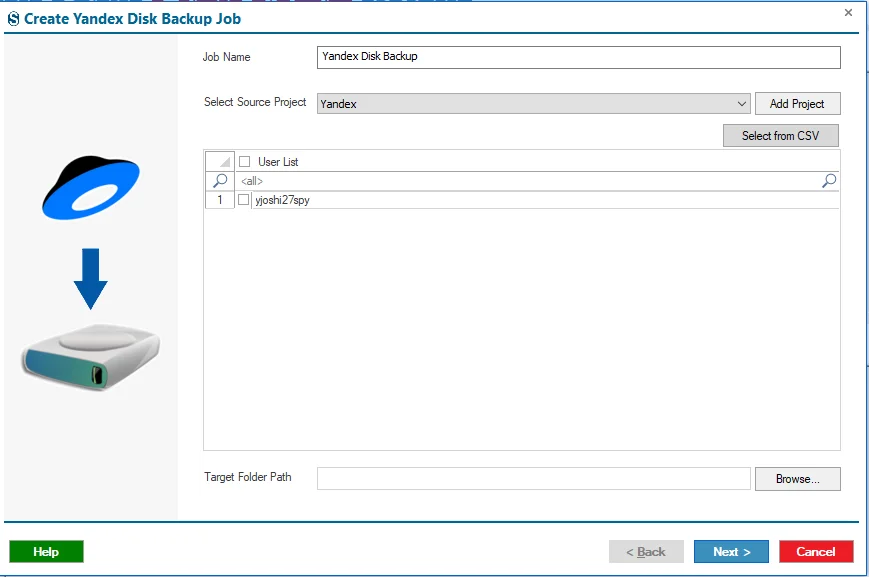
Step 11: If you have the larger list of source accounts, then you can select them by clicking on the Select From CSV button.
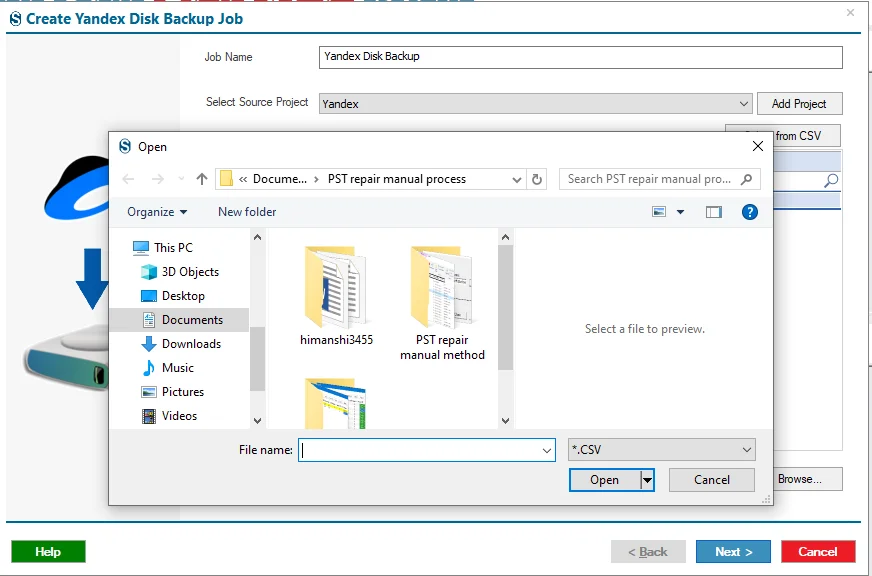
Step 12: After completing the connection with the Source Project connection you need to select the path for the backup data. Click on the Browse. There is another window open; you need to pick the location and then hit the Open button.
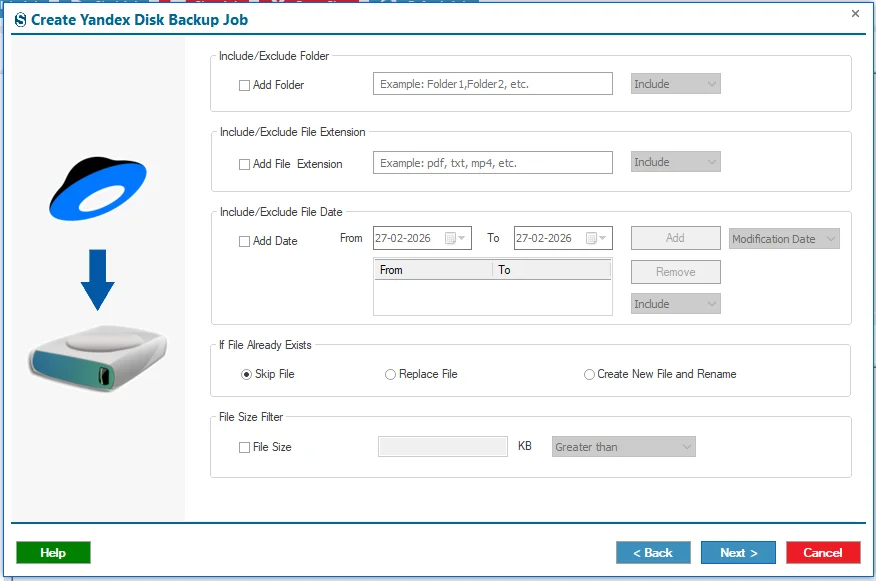
Step 13: As soon as you click on the Next button, you will land on the Filters page. With the help of the various filter options, you can refine your backup process. In the Filter page, you will find the various options such as Data Filter, File Extension, Date, If File Already Exists or File Size Filter. These options are explained in the section below.
- Folder Filter:- This option allows you to exclude or include specific folders for the selected user. You can add a batch of folders to the list of exclusion/ inclusion if you require. If you wish to backup only certain folders instead of excluding them, switch the selection from Exclude to Include to transfer only the chosen folders.
- Extension Filter:- As the name shows, this option allows you to manage the specific extension. You can select them by setting the Include or Exclude option.
- Date Filter:- This option allows you to set the date range to take a backup of the folder within the date range modification or creation of the folder, and then click on the Add Button.
- If File Already Exists:- This filter option defines what action should be taken for the file if the same file is already present in the target destination. Here you will find three options or methods, such as:- Skip File, Replace File, Create New File and Rename.
- Skip File:- Select this option to ignore taking a backup of the duplicated files.
- Replace File:- With this option, you can overwrite the existing file with the newer version from the source location during the backup process.
- Create New File and Rename:- This option allows users to create a separate copy of the file in the target destination by automatically renaming it, for example, Test-1, Test-2 and so on, to prevent overwriting issues.
- Size Filter:- In this option, you can set the size of the file and also set the greater than and less than. After selecting it, the size of the files is backed up.
- After setting up the filter options, you need to click on the Next button to move forward or, in other cases, if you do not need these filter options, then you also ignore them by clicking on the Next button.
Step 14: Next, you will find in this window that there are various advanced and user-centred settings options present on the page to refine the backup process. The advanced settings options, such as Thread Count, In case of network failure, Item log options, Job Run Action, these options are explained in a detailed manner in the section below.
- Thread Count Settings:- This setting allows you to define how many jobs run at the same time. This option has extended with two more options, such as User Thread Count and Item Thread Count.
- Number of Containers to be Processed in Parallel:- This setting defines how many disks (users) can be processed at the same time during the backup process. For example, if there are four disks in the job and the thread count is set to five, the software will backup all the disks at the same time.
- Number of Items to be Processed in Parallel:- This option specifies the number of threads the software can run for each individual disk. For instance, if the thread count is set to ten, the software will backup ten items concurrently for each disk.
- In case of network failures:- This option allows you to handle the problem of network failures. Within this option, you will find two further options, such as:- Login Attempts and Item Retrieve Attempts.
- Login Attempts:- During the backup process, network issues can be created and cause users' login attempts to fail. This button allows you to set the maximum number of retry attempts during the backup process.
- Item Retrieve Attempts:- This setting option allows you to define how many retry attempts that the software should make to retrieve a disk during the backup job.
- Item Login Reports
- Exported Items’ log report:- With this option, you are able to review the log report, which is generated by the software, which contains the details about the items that backuped in the successful manner.
- Filtered Item’s log report:- This option creates a log report for items that were skipped due to applied filters, such as date range, file size, folder section, or file extension filters. It helps users to understand which items are excluded and what is the reason.
- Already Exported Items’ log report:- By checking this option, you will open the folder within the job report where you can find the log report of the items that have already been exported.
- Bad Items Count: This option determines the maximum number of failed items allowed before the software stops backing a specific user. For example, if the bad item count is set to 100, the backup for that bucket will stop once 100 items fail. You can adjust the bad item count as per your according to it.
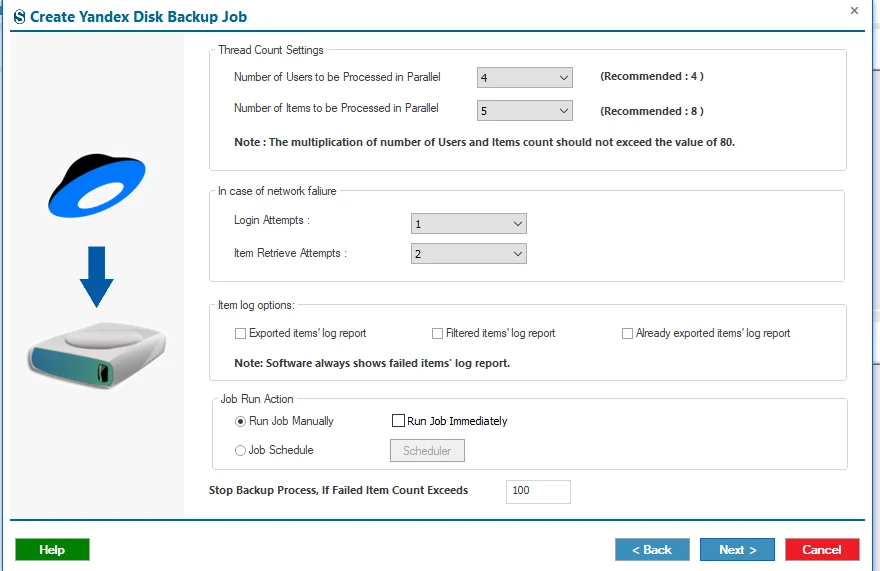
Step 15: The tool supports the automated backup process in the form of a scheduler option. The scheduler allows you to automate the task by specifying when the job should be run. This is especially useful for the periodic or recurring backups.
- Run Job Manually - Select this option if you want to start theYandex Disk Backup Job manually at any time from the dashboard.
- Run Job Immediately - Enable this option to run the backup job automatically as soon as the job creation process is completed.
- Job Schedule - This option allows you to schedule the backup job to run at a specific time. You can configure it to run on selected days or at defined intervals.
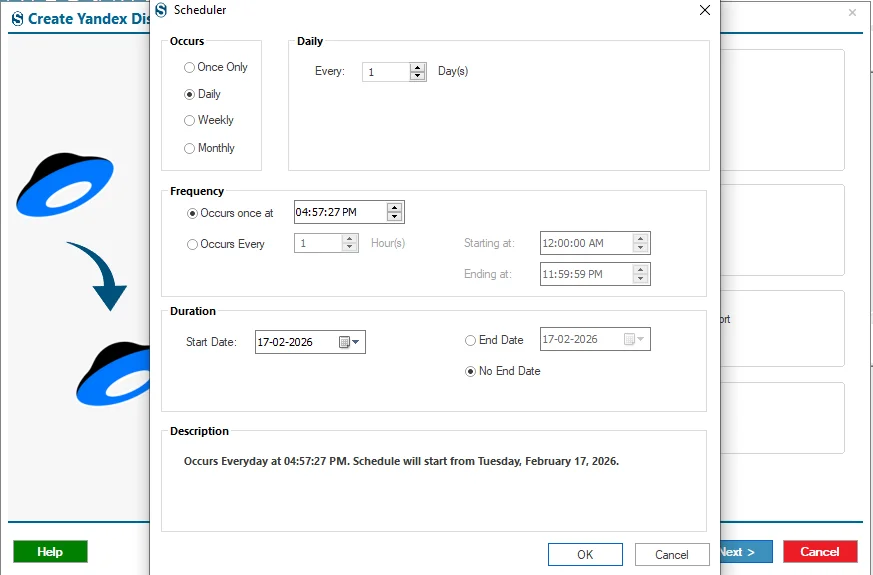
- Daily: Runs the backup every day at a specified time.
- Weekly: Runs the backup every week. You can choose a single day or multiple days within the week and set a specific time.
- Monthly: Runs the backup every month. You can select specific months and define the date(s) and time for the backup.
- After completing the settings options, you should click on the Next button, or, on the other hand, if you do not want to apply the advanced settings to your backup process.
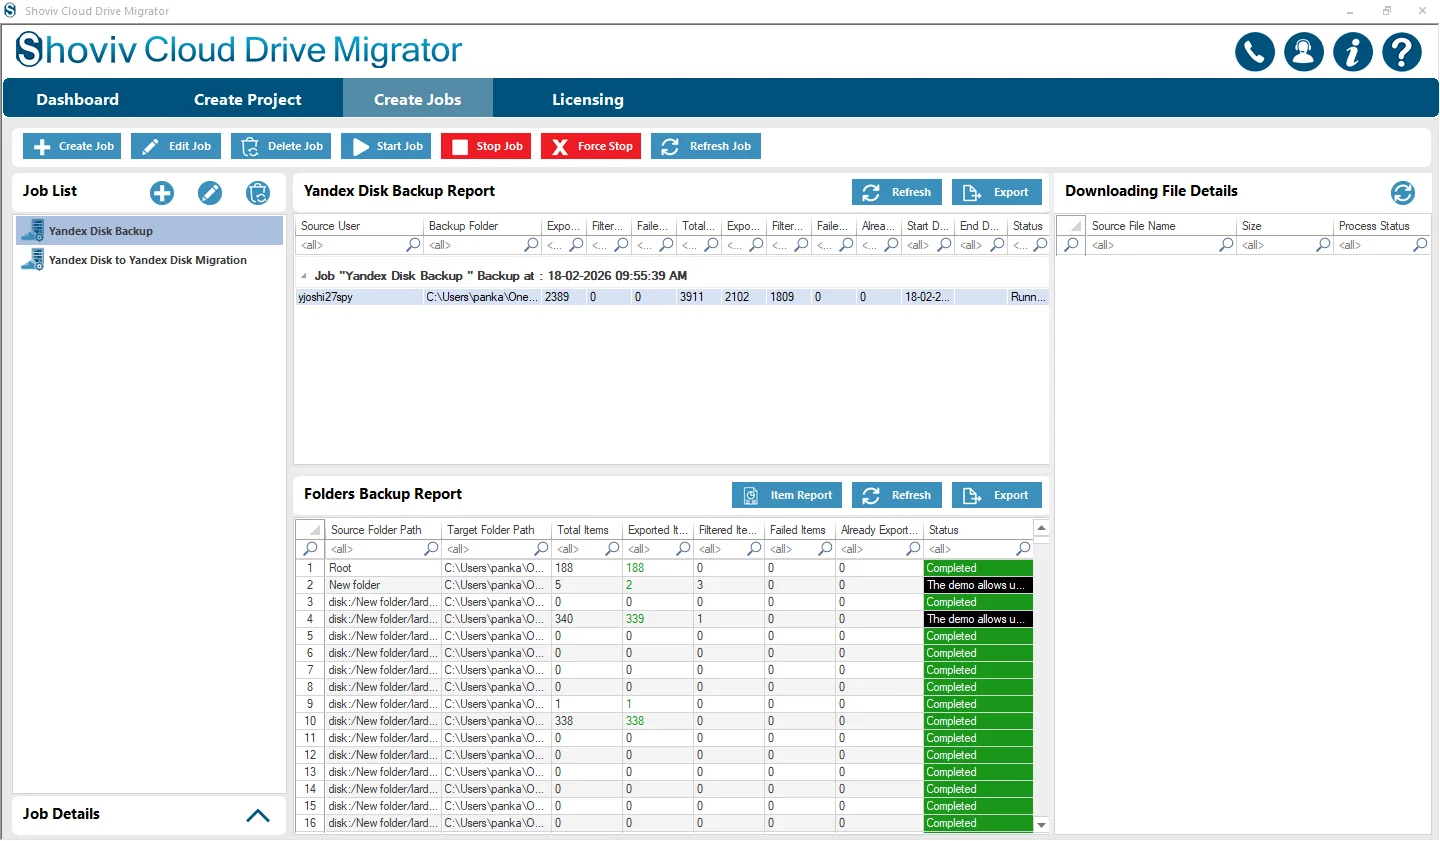
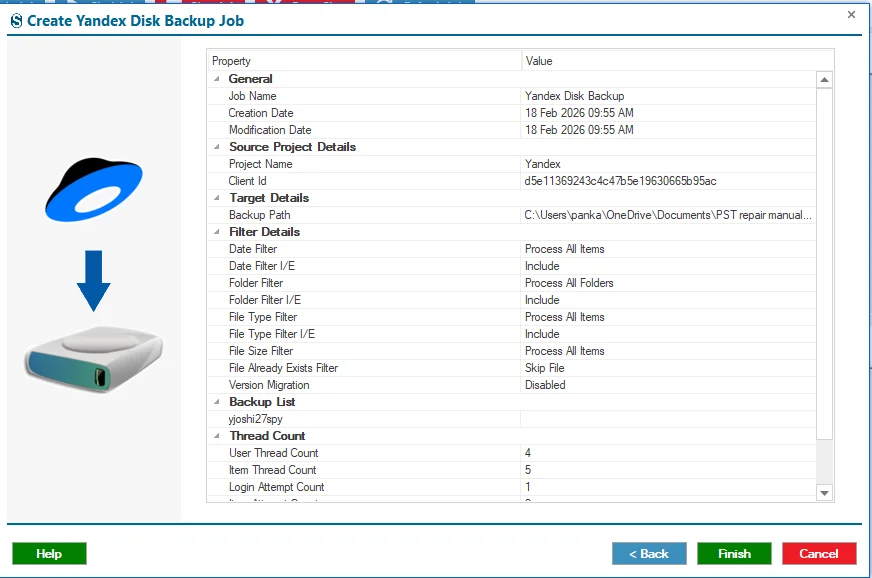
Step 16: Review the job details carefully. If you want to change anything, then you can do it with the help of the back button, and if not, then click on the Finish button to complete the backup process.
Step 17: The job runs according to the option you have chosen within the Job Run Action, and if you have chosen the manual option, then you need to click on the Start Job button, which is present in the ribbon bar.