This is the third edition of the blog on how to Migrate Exchange Server 2013 to 2016 Using Step by Step Guide. In the Previous two series of this blog, we have discussed about the installation methods for exchange and installation of SSL certificates in Exchange Server 2016.
This blog covers all the dimensions of the Exchange Server 2013 to Exchange 2016 migration; if you also want to explore Exchange 2019 and need a dedicated blog for Exchange 2013 to Exchange 2019 migration, then click here…
For other parts of the series follow the links below:-
Migrate from exchange 2013 to 2016 (PART-1)
Migrate from exchange 2013 to 2016 (PART-2)
Migrate from exchange 2013 to 2016 (PART-4)
Migrate from exchange 2013 to 2016 (PART-5)
Migrate from exchange 2013 to 2016 (PART-6)
Migrate from exchange 2013 to 2016 (PART-7)

Here in this third edition of the blog, we will provides beneficial information on how to configure virtual directories and Outlook anywhere setting on new server. We will then
The following services have to be configured:-
- Set Outlook Anywhere
- Set Exchange Control Panel URLs
- Set Outlook Web Access URLs
- Set Exchange Web Services URLs
- Set ActiveSync URLs
- Set Offline Address Book URLs
- Set MAPI Virtual Directory
Outlook Anywhere Settings
The following set up should be run to configure Outlook Anywhere settings
Get-OutlookAnywhere | Set-OutlookAnywhere –InternalHostname –InternalClientAuthenticationMethodNtlm -InternalClientsRequireSsl $true -IISAuthenticationMethods Negotiate,NTLM,Basic
Exchange Control Panel URLs Setting
The following set up command should be run to configure Exchange Control Panel URLs.
Get-EcpVirtualDirectory -Server Kurt-ex07 | Set-EcpVirtualDirectory -InternalUrl https://www.Xyz.com/ecp -ExternalUrl https://www.Xyz.com/ecp
Outlook Web Access URLs Setting
The following set up command should be run to configure Outlook Web Access URLs.
Get-OwaVirtualDirectory -Server Kurt-ex07| Set-OwaVirtualDirectory -InternalUrl https://www.Xyz.com/owa -ExternalUrl https://www.Xyz.com/owa
Exchange Web Services URLs Setting
The following set up command should be run to configure Exchange WebServices URLs.
Get-WebServicesVirtualDirectory -Server Kurt-ex07 | Set-WebServicesVirtualDirectory -InternalUrl https://www.Xyz.com /EWS/Exchange.asmx -ExternalUrl https://www.Xyz.com /EWS/Exchange.asmx
ActiveSync URLs setting
The following set up command should be run to configure ActiveSync URLs.
Get-ActiveSyncVirtualDirectory –Server Kurt-ex07 | Set-ActiveSyncVirtualDirectory -InternalUrl https://www.Xyz.com/Microsoft-Server-ActiveSync –ExternalUrl https://www.Xyz.com/Microsoft-Server-ActiveSync
Offline Address Book URLs Setting
The following set up command should be run to configure Offline Address Book URLs.
Get-OabVirtualDirectory -Server Kurt-ex07 | Set-OabVirtualDirectory-InternalUrl https:// www.Xyz.com/OAB -ExternalUrl https:// www.Xyz.com /OAB
Set MAPI Virtual Directory
The following set up command should be run to configure MAPI Virtual Directories settings. This step can be avoided if you are not using MAPI over HTTP.
Get-MapiVirtualDirectory -Server Kurt-ex07 | Set-MapiVirtualDirectory-InternalUrl https:// www.Xyz.com/mapi -ExternalUrl https:// www.Xyz.com/mapi
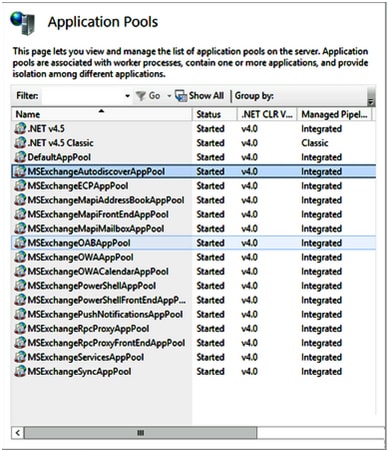
MS Exchange AutoDiscovery AppPool Recycling
The compellation of Autodiscover service is required, to use a new URLs for which we need to recycle the MSExchangeAutodiscoverAppPool that can be done without switching off the server.
NAT rule firewall configuration
A new static public IP is required for new Exchange server migration 2016 server for establishing external client connections. For which first, open the port 443 (i.e. the standard TCP port for SSL connections) to the server and assign static one-to-one NAT rule.
CAS Server Migration Testing
‘X’ record is used to establish the client connectivity in old Exchange server 2013 and also use an external client to retrieve autodiscovery settings. When the new Exchange server’s Outlook anywhere configuration and virtual directories settings have been done, the client can easily be migrated over to the new server.
Add X record in a hosted file to redirect it new server (Exchange 2016) as an alternative to the old server. To configure the following setting first; Open the host file using notepad after which add new lines to point X records to new Exchange server’s IP as an administrator.
11.2.0.32 <>
11.2.0.32 <>
When the above configuration setting is done, make a note that clients can connect to new Exchange server. Also ensure to test the shared mailboxes, public folders, calendars for accessibility and you can also send/receive emails and can also download offline address book.
After all the necessity test, kindly update the host file to resolve X records to public IP of the Exchange server. Make sure that the clients on external network are also connected to the server. After all the testing work has been done, the entries from the host files need to be deleted.
CAS server migration
Change internal ‘X’ records for FQDNs for resolving the internal IP of the Exchange Server 2016 after the testing has been completed.

Log into public DNS provider and change the public X records for FQDN after the process is completed to resolve the public IP of Exchange server 2016.
Conclusion
In this third edition of the how to migrate Exchange server 2013 to exchange 2016 step by step we have covered all the major aspects on configuring the virtual directories on Exchange Server 2016 along with the migration of Client Access Server roles from Exchange Server 2013 to Exchange 2016. The following Part-04 of the edition, we discuss the process to migrate mailboxes and public folders to Exchange Server 2016.