Exchange On-Premises and Office 365 have large user bases, but users also migrate between them depending on their requirements. Office 365/Microsoft 365 is a cloud-based software service offering users a one-stop solution. Users are showing a keen interest in Office 365, hence migrating from the existing platform to Office 365, and Exchange users are not an exception. If you are an Exchange On-Premises user and want to do Exchange On-Premise to Office 365 migration, then you have landed on the right post.
In this blog, I am sharing all the details of this task, along with an advanced solution. Read the blog till the end and get a complete solution.
Before moving towards the how, firstly, it is good to understand why; hence, let’s start with some common reasons that initiate users for On-Premise Exchange to Office 365/Microsoft 365 migration.
Some probable reasons for Exchange On-Premise to Microsoft 365 migration:
- One-stop solution: Office 365 offers a bundle of products like Skype, Outlook.com, Teams, OneDrive, Yammer, and SharePoint, like many user-centric products, in a single subscription.
- All-time accessibility: Office 365, a cloud-based software as a service, offers all-time accessibility from anywhere at any time. This mobility is also a big reason behind users’ Exchange On-Premise to Office 365 migration.
- Pricing: On-Premise Exchange asks for the hardware setup, while with Office 365, users save cost using it as there is no requirement for hardware setup.
- No downtime: Office 365 always remains updated; hence, there is no such downtime.
- Never-ending support: Like an On-Premises Exchange Server, Office 365 never goes old. I.e., the technical support and update for Exchange 2010 were closed in October 2020, while Exchange 2013 is proposed in 2023. It is also a common reason for Exchange On-Premise to Office 365 migration.
What are the possible ways for On-Premise Exchange to Office 365 migration?
For the On-Premises Exchange to Exchange Online migration, users have two methodologies: trying the traditional manual methods or using an advanced third-party tool.
In this write-up, we will learn about all the available manual ways and a professional solution. Manually, we have a few methods that are described below, along with professional utility:
- Staged Migration: In this manual migration, data migrate from source to target in two or more stages. This way allows users to migrate 2000+ mailboxes. It is best suited for small and mid-size companies. However, it is not compatible with all the Exchange versions. Staged migration works for only Exchange 2003 and Exchange 2007.
- Cutover Migration: The Cutover migration method works only for mailboxes less than 2,000. This method works for the Exchange 2003 and later versions. It doesn’t work for all Exchange versions. Users can dive deep into this method by visiting this link.
- Hybrid Migration: For the Exchange On-Premise to Office 365 migration, hybrid migration provides a way to synchronize both environments. However, this method also does not work for all Exchange versions; it works only for Exchange 2010 and later versions. Explore this method in more detail by visiting this link.
- Professional method: All three manual methods explained above provide a way but not a satisfactory way. Manual ways ask for technical hands and also consume a lot of time without any guaranteed result. For the professional On-Premise Exchange to Office 365 migration, the Shoviv Exchange to Office 365 Migration Tool facilitates a featureful and user-friendly way. Below, I have explained the Shoviv Exchange to Office 365 Migration Tool holistically for the On-Premises Exchange to Exchange Online migration.
Why Shoviv Exchange to Office 365 Migration Tool is professional’s first choice?
Shoviv Exchange to Office 365 migration tool, aka Shoviv Exchange Migrator, is the first choice of users for various reasons. It is developed by keeping the users’ needs at the centre of the development process. It comes with easy-to-understand processing and offers a user-friendly GUI for the Exchange On-Premise to Office 365 migration. Here is a glance at the features that make it the best professional utility.
- This utility can migrate On-premise Exchange to Office 365 and vice versa.
- It runs on the job-based process and can create and run multiple jobs altogether.
- In each job, you can add multiple mailboxes for the migration, regardless of size.
- The tool is boosted with the incremental export facility that resumes the process, hence preventing duplicity in the target.
- It supports all versions of the Exchange Server.
- Shoviv Exchange Migration Tool properly maintains the folder hierarchy and data originality.
- A free trial version of this utility is also available to download.
Steps to Migrate Exchange On-Premises to Office 365:
- First, install and launch the Shoviv Exchange Migrator.
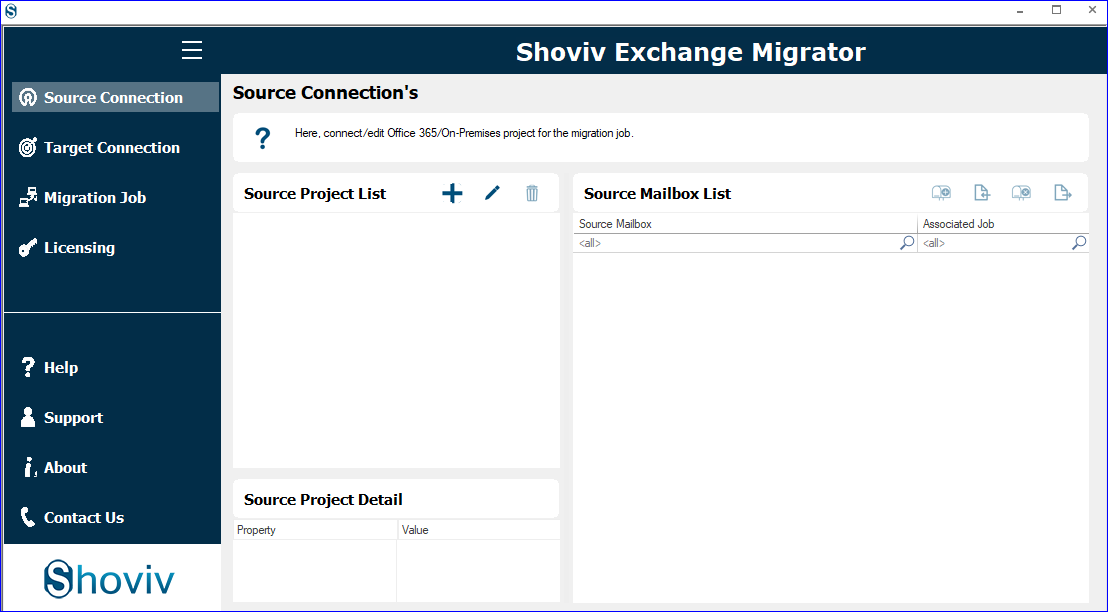
- Second, make a connection with the source. Enter the Project Name, and select another Exchange Server as the server. Enter the Server name and use Basic Authentication for the connection.

- Now, in the same way, connect Office 365 as the target. Select Global Office 365 as the server name and use Modern authentication (Auto-Registration).
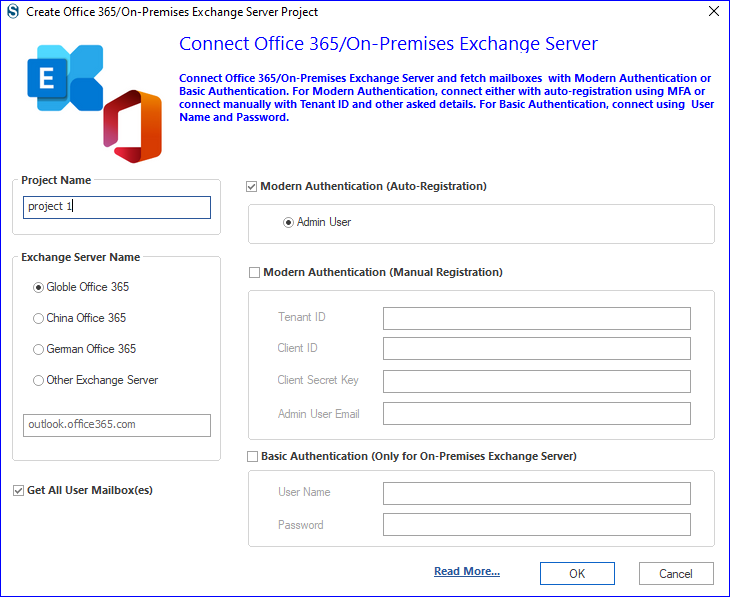
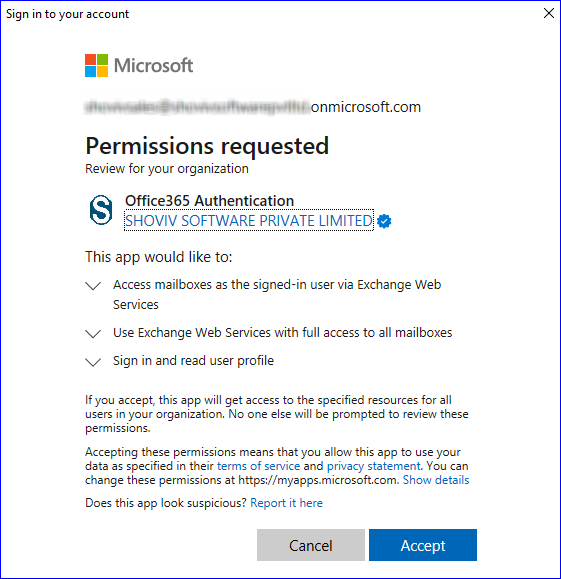
- You will be prompted to Microsoft’s login page, where you have to permit the asked request to connect the Office 365 as the target.
- Now, click on the Migration Job tab and select the default mailbox type.

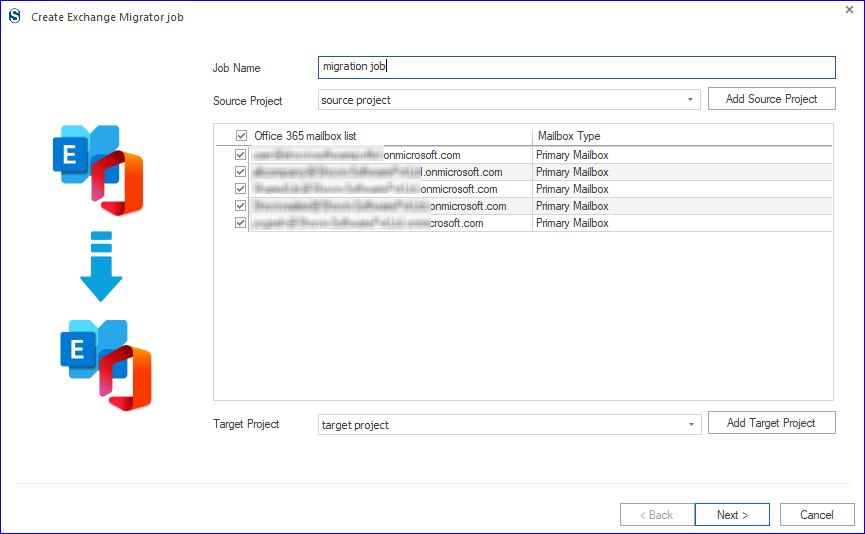
- In order to create a migration job, first give a name, then add a source project and check the mailboxes for the migration. Add the target project and click on Next.
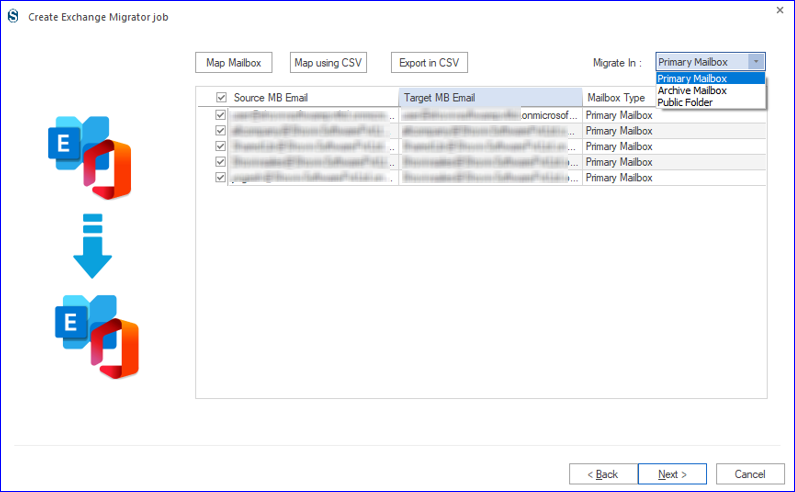
- Here, must map the source mailbox with the target mailbox and click on Next.
- Now, you are prompted to the filter page, where you can apply the filter as per the requirement.

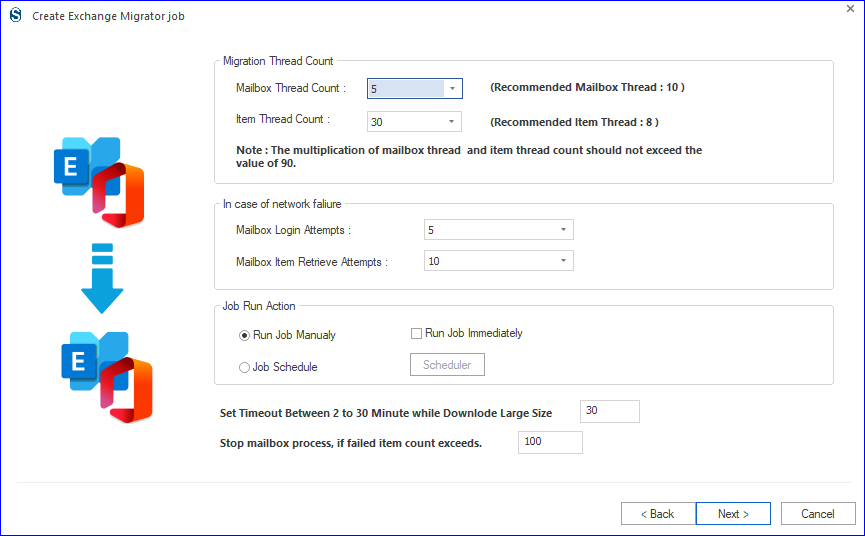
- In the settings page, apply settings as per the need. You can also select the Job Run Action. If you want to schedule the migration after creating a job, then you can do so.
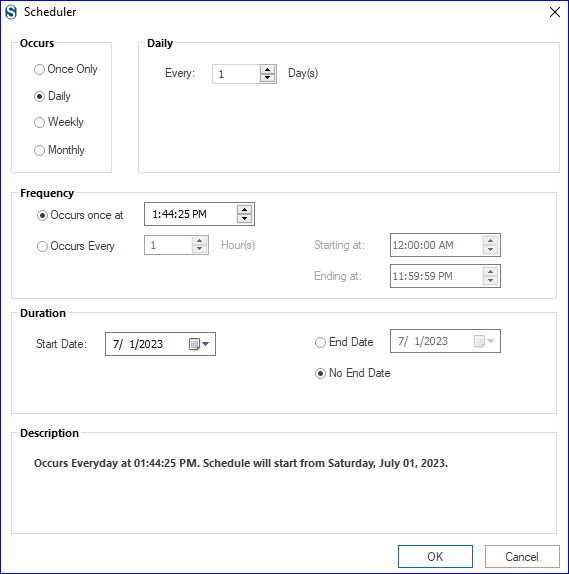
- If you are scheduling the migration job, then you must select the must-set frequency, occurrence, and duration. Click OK.
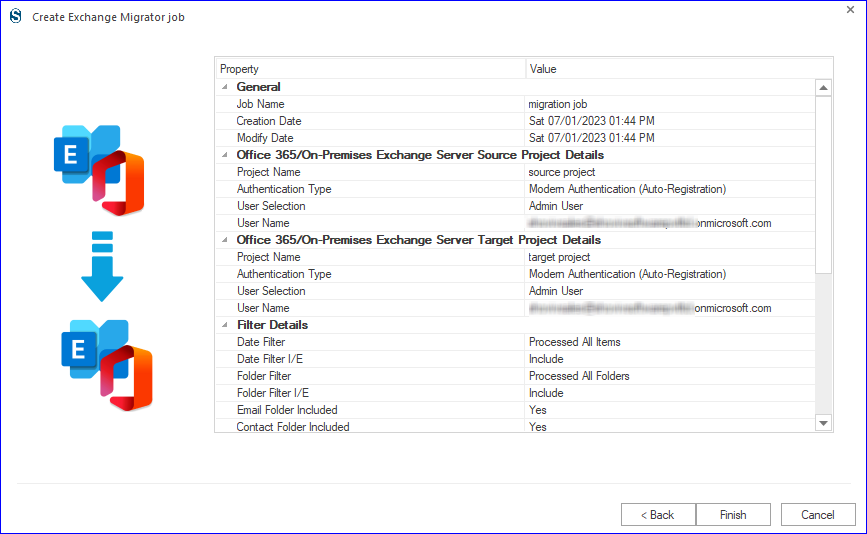
- Finally, you can see all the settings. If all is okay, then click Finish; otherwise, you can edit the job by going back.
Wrapping:
In this write-up, we learned about On-Premises Exchange to Exchange Online migration. I included the manual ways with all its dimensions, and later, I explained the Shoviv Exchange On-Premises to Office 365 migration tool. Shoviv’s utility offers advanced and user-friendly processing that speedily executes migration from Exchange On-Premise to Office 365. Shoviv Exchange to Office 365 Migration Tool also offers a free trial version that allows you to migrate the first fifty items per folder. Download the demo version and have a trial of the tool.