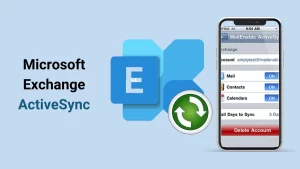
If you want to migrate an On-Premise Exchange Server to Office 365, you have landed in the right place. This article will provide all the information you need on the Cutover Migration to migrate Exchange to Office 365. Also, it will touch on other dimensions of this migration task.
Many users believe that migrating Exchange to Office 365 is a complex process that not many can do. However, you can quickly deploy On-Premise Exchange to an online or Cloud-based server with the right skills and knowledge.
Instant Solution: Effortlessly Migrate your Exchange mailbox to Office 365 (Exchange Online)
using Shoviv Exchange Migration tool.
Cutover Migration: Migrating Exchange to Office 365:
Microsoft offers a method called “Cutover migration,” through which you can Migrate Exchange to Office 365 by yourself. It is a quick way to move your on-premises Exchange Server to Office 365. But before we discuss how to perform cutover migration to migrate Exchange to Office 365, let us find out more about cutover migration.
Things You Should Be Aware of Before Using Cutover Migration:
The first thing that determines if you are eligible to migrate Exchange to Office 365 via cutover migration is your organization size. Office 365 cutover migration process is not recommended for large organizations since this process has its size limits.
Cutover migration allows up to 2000 mailboxes for migration. However, Microsoft recommends that organizations only migrate fewer than 150 mailboxes.
No turning back:
It is another aspect that you need to ensure before making an Exchange to Office 365 migration plan. You have to ensure that you don’t want to keep any of the mailboxes on-premises. This is because cutover migration will transfer every mailbox to the online server and decommission the on-premises mailboxes. Cutover Migrations are available in Exchange server versions 2003 and above. However, this should not be a huge problem since most people are using later versions of Exchange.
Your domain names must match
If you want to perform cutover migration, you need to add your current domain name to the online server/Office 365 and prove that you own the domain. You have to do this by adding a TXT record to your DNS server. The process can be painless or not, depending on your experience. Since this verification process can take a while, ensure you have sorted this before the transfer.
Subscription for each mailbox
It is a simple thing that most users need to remember when they migrate Exchange to Office 365 via the cutover migration method. We are moving from an on-premises service to a subscription-based service like Office 365. Your existing Exchange licenses will not apply to the Office 365 client, so you need a subscription for each mailbox you transfer.
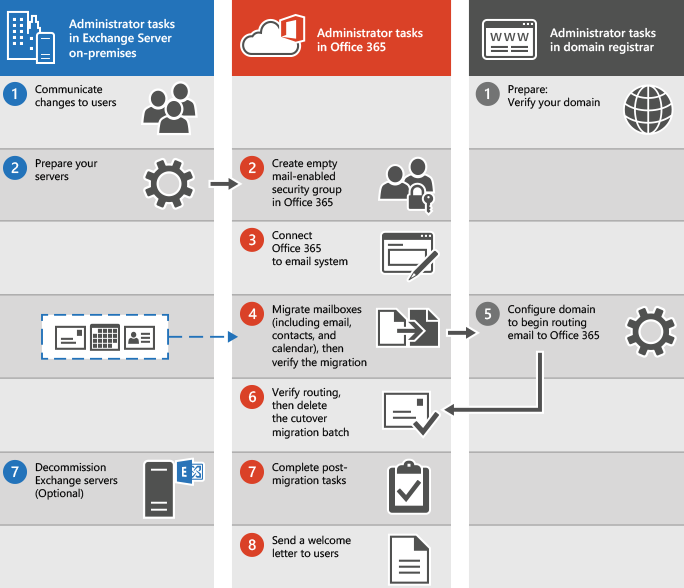
Perform Office 365 Cutover migration to migrate Exchange to Office 365:
- Create a Receiving Point
You have to create a vacant mail-enabled security group in Office 365. If you don’t know how to do this, follow these steps.
Go to Office 365 Admin Centre>Group>Create New.
If you still don’t get it, you can find out how to do this right here.
- Create a Migration Endpoint
After creating a receiving point, you have to link your Office 365 to the on-premises Exchange server.
Open Exchange Admin Centre> Recipients>Migration>New>Migrate to Exchange Online.
Now, choose “Cutover Migration.” On the page that follows, you will see the info of your endpoint.
- Get User License Permissions
If you need access to your migrated mailboxes, you will need Office 365 license permissions.
- Re-route Domain from Exchange to Office 365
It is the final step where you need to re-route your domain.
So, it was the cutover migration to migrate Exchange to Office 365. If you have come so far, you may now have some understanding of what it takes to shift your on-premises Exchange Server to Office 365 manually. You might have realized that doing this manually, takes a lot of time and effort.
Things You Should Be Aware Before Moving Exchange to Office 365:
- The process takes a lot of time.
- There are a lot of complex steps involved.
- You need experience and skill to understand complex procedures.
- Even a single mistake can bring data loss.
- If you fail, you can lose a large amount of data from mailboxes.
- This process is prone to data corruption if done without care.
- Only skilled Exchange administrators can do this successfully.
- Not all Exchange versions can be migrated to Office 365; only Exchange 2003 or later.
Migrate Exchange to Office 365 using the Shoviv Exchange Migration Tool
If you want to automatically migrate your Exchange to Office 365 without wasting time or taking any risks, this professional tool is the ideal choice. The Shoviv Exchange Migrator tool is developed to streamline the migration from all versions of Exchange to Office 365.
Why Shoviv Exchange Migration Tool is the first choice of Professionals?
- It runs over the job-based processing and is easy to edit and operate. Also, you can run multiple jobs having multiple user mailboxes and migrate them simultaneously.
- Along with Exchange to Office 365 Migration, it can also migrate Exchange to Exchange, Office 365 to Office.
- This utility is very easy to run hence any user without much technical expertise can easily migrate.
- It is boosted with advanced features like Incremental Export (resume the process and prevent duplicity, Filter facility, and Scheduler.
- It properly maintains the folder hierarchy and metadata properties, and this tool is tested and verified by Microsoft MVPs.
- Shoviv Exchange Migrator works for all versions of Exchange Server and is compatible with all Windows OS.
Simple Steps to Migrate Exchange to Office 365:
- First, install and launch the Shoviv Exchange Migrator.
- Connect with the Source(Exchange) and Target (Office 365).
- Create a migration job as per the requirement for the task.
- Preview the created job and click on Finish.
- Migration will start with running the migration job.
Try before Buying
If interested, get a free trial of the Shoviv Exchange Migrator. The free trial of the tool allows you to transfer the first 50 items per folder to be assured about the software. The free trial offers all the benefits of the full version. No need to go with cutover Migration to migrate Exchange to Office 365. Once you are sure this tool is right for you, you should upgrade to the full version at an affordable cost. Must download and give it a try.