Nowadays, many organizations are moving towards Office 365 from their current email client/server. But if you’re an Exchange Server user, then it is not an easy process for you. Manually Exchange to Office 365 migration is a hectic task and asks for technical knowledge.
Are you ready to move from your Exchange Server to the cloud O365? This guide will help you migrate to Microsoft 365 in easy steps. We’ll start with the basics, avoiding confusing technical terms. Our goal is to make your move to Microsoft 365 simple and easy. Buckle up, it’s time to move to Microsoft 365!
The Secrets to finding the best way for your Office 365 Migration:
Many organizations prefer tools over their colleagues or any other people’s suggestions. But to find a perfect solution for your migration, first, you have to check your requirements. For example,
- How much time do you have for O365 migration?
- In how many phases do you want to complete the migration?
- How big is your migration budget is and how many users do you want to migrate?
- Is there any tech geek in your team that can tackle the technical issues?
- Which version of Exchange Server you’re using?
These are the few questions that you have to ask yourself before moving forward with the migration plan.
For the easiest Microsoft 365 migration plan, download the free version of the Shoviv Office 365
Migration tool. If you have any queries, our Support team is here 24*7.
How to migrate to Microsoft 365?
Commonly there are 3 Micosoft Office 365 migration types; Stagged migration, Hybrid Migration, and Cutover migration.
- Staged Migration: Staged Migration is the migration, which users complete in two or more stages. It is used in Exchange 2003 and 2007 versions to migrate more than 2,000 mailboxes.A staged migration is performed through the migration dashboard of the Exchange Admin Center or Exchange management shell scripts. It can take weeks to months to complete the O365 migration, depending on the number of mailboxes you have.
- Hybrid Migration: With the help of Hybrid migration, users can migrate on-premises mailboxes to on-site. The Hybrid migration is idol way to migrate 150 to 2000 mailboxes in batches. This approach ensures seamless and easy migration to Office 365.
Keep in mind: The Hybrid migration doesn’t support migrating Public folders and only works in Exchange 2010 and 2013.
- Cutover Migration: It is also known as Express migration and is the simplest migration type to implement. A cutover migration is supposed to migrate all the mailboxes in a single go. It is a suitable migration option for small and medium size’s organizations for Exchange to Microsoft 365 migration with as little effort as possible.
With Cutover migration, organizations can migrate a maximum of 2000 mailboxes, but we recommend not exceeding the count of 150 mailboxes. The Cutover migration type work with Exchange 2003, 2007, 2010, and 2013.
These are the common types and ways to migrate mailbox to Microsoft 365, but to perform these migrations, you need good technical knowledge, or at least you have a technocrat in your team that will help you if stuck in a critical situation.
Facts that Might Get you to Change Your Office 365 Migration Strategy:
In my opinion, a well-planned migration can reduce business risks, improve end users’ satisfaction and help your organization unlock the benefits of the cloud. Now it’s on you which way you pick, but a few factors may affect your decision. These factors include the amount of support your organization requires to train IT and end-users, your budget, and the need for third-party solutions to ease the transition.
Many organizations prefer using third-party tools to take the headache out and automate the Microsoft 365 migration from Exchange Server.
Alternative Solution to Have (A) More Perfunctory Office 365 Migration:
Microsoft 365 administrators and Microsoft MVPs suggest using third-party tools for quick and error-free migration. There are a few software on the internet that can simplify the migration task.
Shoviv Exchange Server Suite:
It is a multi-functionality Office 365 migration tool that allows users to migrate Exchange mailboxes into Office 365, and users also can migrate mailboxes between Office 365 tenants. The software provides multiple features to make the migration process a cakewalk.
Specialties of the tool:
- The software can migrate Exchange Server mailboxes and EDB files to Office 365 mailboxes, Public Folders, and Archive mailboxes.
- It has an advanced incremental export option that allows users to resume the interrupted Office 35 migration process. Also, this option comes in handy to prevent already available and migrated items from migration.
- Being a professional utility, the software is developed with an advanced algorithm and has the fastest item fetching and filtering speed.
- It also offers a free variant so users can examine the skills and compatibility before purchasing it.
Let me show how you can migrate Exchange to Office 365 using Shoviv Exchange Server Suite.
Exchange to Office 365 migration easy as pie
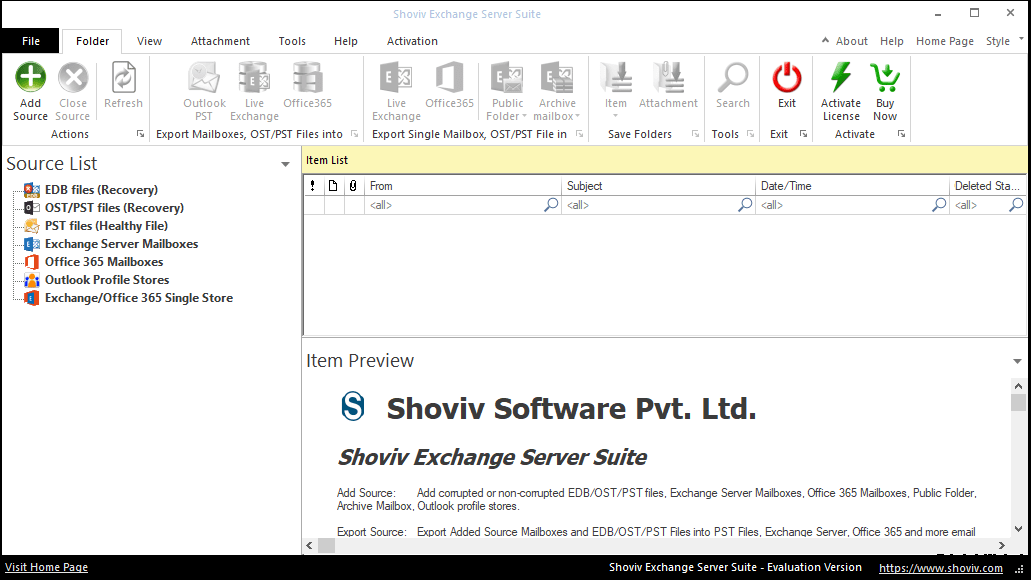
- Install and open the software.
- Click on the Add Source.
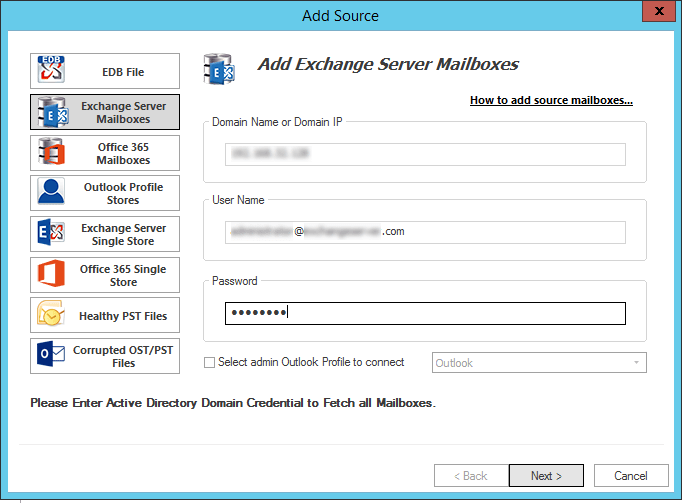
- Add Exchange Server.
- Then, click on Office 365.
- Enter Office 365 administrator.
- Apply filters and click on the Next.
- The Exchange to Microsoft 365 migration will start.
Demonstration for Exchange to Office 365 migration:
- Firstly, install the tool from the Shoviv website and launch it in your system.

- Secondly, click the Add Source button on the ribbon bar. Then select the Exchange Server Mailboxes option from the Add Source wizard and provide the Exchange Server credentials. Once done, click on the Next button.

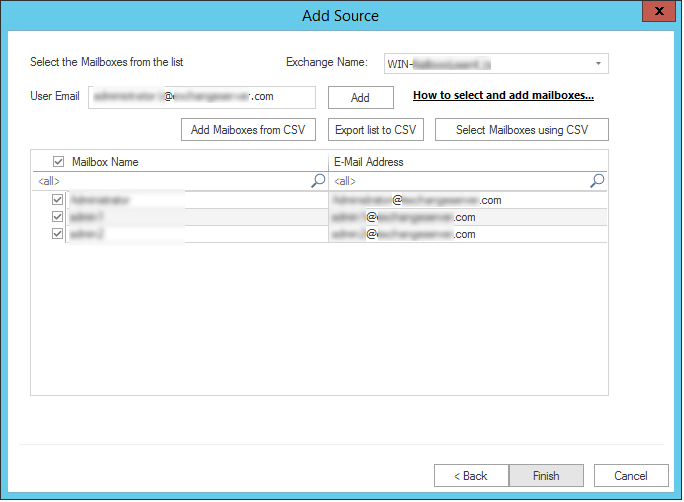
- Then, select the mailboxes you want to migrate and click on the Finish button. If any mailbox is missing, you can add them manually by uploading a CSV file.

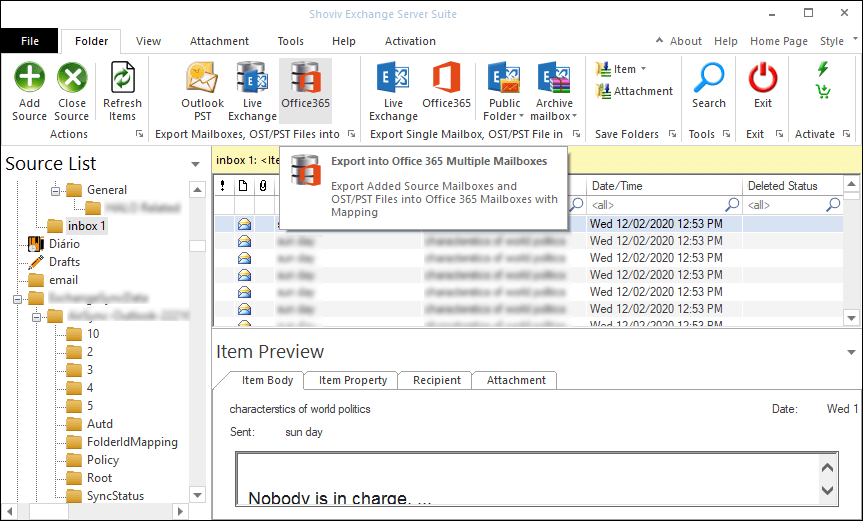
- Now, click on any mailbox in the folder view section and click on the Office 365 option from the ribbon bar.

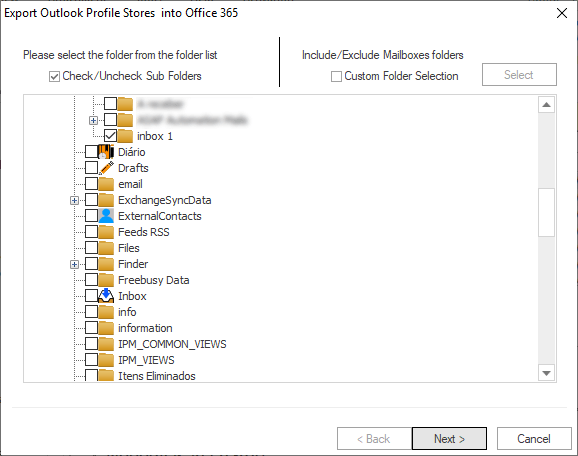
- A new wizard gets open now, here check/uncheck the folder and subfolders of the mailboxes; one can also select the custom folder. After that, click the Next button.

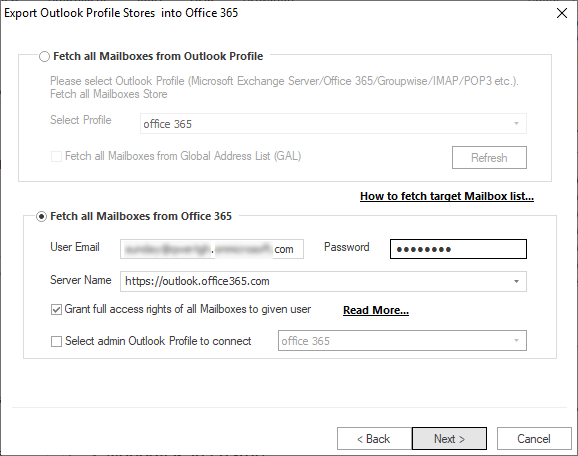
- Next will be Export mailboxes into Office 365 wizard. Here, provide the Office 365 admin credentials (Username and Password) in which you want to migrate Exchange Server data. And click on the Next button.
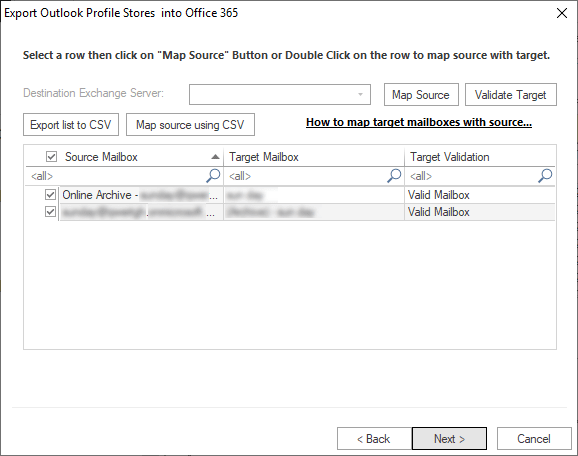
- Now the map mailboxes wizard gets open, map source, and target mailboxes according to your requirements. After mapping, click the Next button. (One can also map mailboxes by uploading a CSV file).
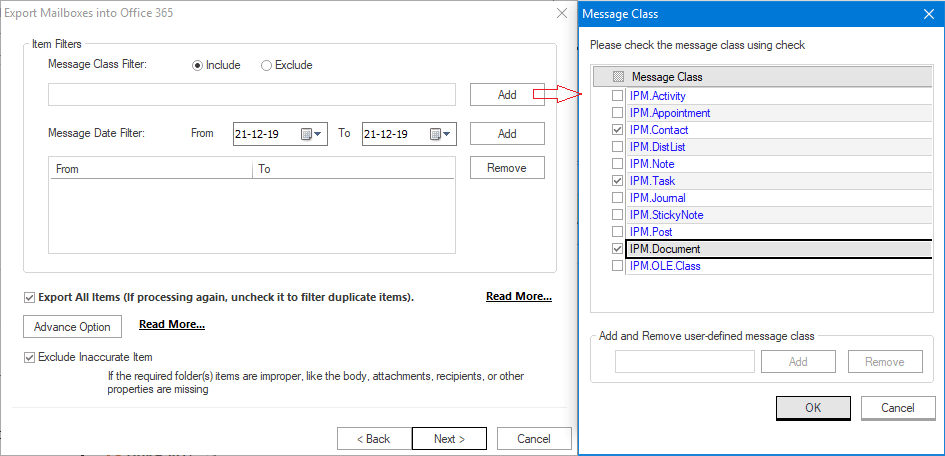
- A filter wizard gets open. The filter option is on the Include/Exclude message class and message date. Users can select a date range or add a message class to include/exclude desired items in Exchange to Office 365 migration process.

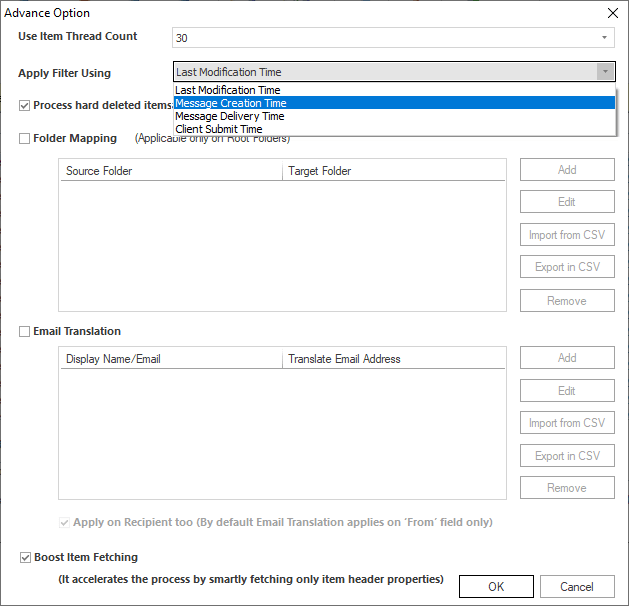
- Additionally, click on the Advance option to use the folder mapping and email translation feature.

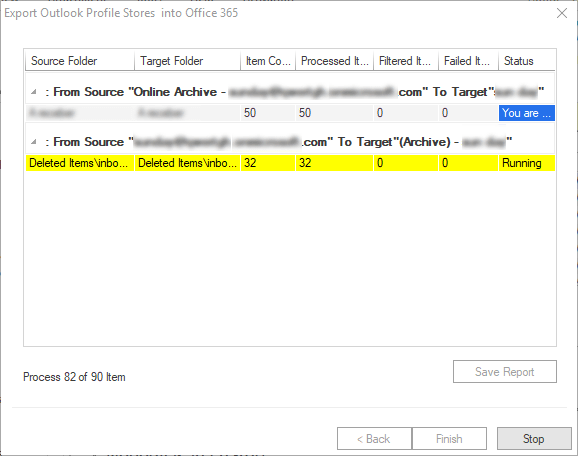
Once you are done with the Advance option, click the Ok button and click the Next button. - At last, the software will start the Exchange to Office 365 migration process, and display a live log report.
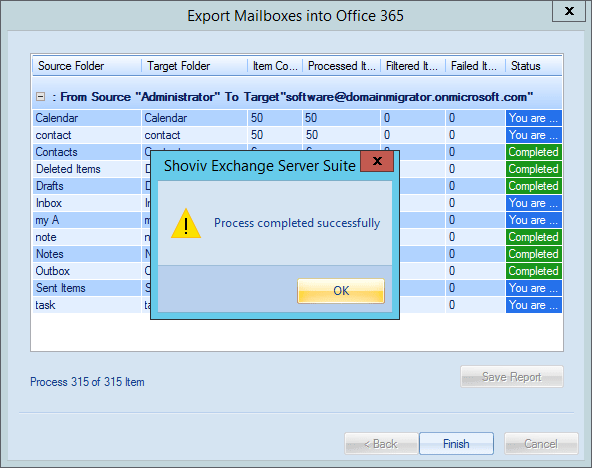
- Once the process gets completed, click Ok and then click the Finish button. (Users can also save the log report in HTML format).

It is the complete process to migrate Exchange Server mailboxes to Office 365. Besides the migration from Exchange to Office 365, the software allows users to migrate Office 365 to Office 365. You also can check out this Office 365 migration plan for a better understanding.
Bringing all together:
There are many more advantages of using the Shoviv Exchange Server Suite. It automates the complete Exchange to Office 365 migration process and eliminates human error chances. You can get assured about the software by using the free version of the Shoviv Exchange Server Suite.