For the past few days, I’ve been thinking about the steps I took to export EDB files to PST format using the New-MailboxExportRequest cmdlet. It was a difficult process, and I’ve finally decided to write about it.
Microsoft Exchange is a widely used platform for managing email. As a Windows user, you don’t get many replacements for it. I have been using it since 2007 and really liked it because it’s easy to use. However, since I started using Outlook and other cloud services, I realized that Microsoft Exchange is complex and hard to use, and I had to change it.
What is New-MailboxExportRequest in Exchange Server 2016?
This cmdlet is one of the many cmdlets in Exchange Server 2016 and 2019 that are simplified from their Exchange Server 2013 counterparts. It is capable to export mailbox to PST from Exchange Server 2016 and 2019.
How to use New-MailboxExportRequest to export Exchange mailbox?
It is quite a technical process, so go through the complete blog before starting. To perform this cmdlet, you need to provide a mailbox import-export role from the Exchange admin center. The process goes as follows:
- Log in to the Exchange admin center using Admin credentials.
- Now go to the permission from the left pane.
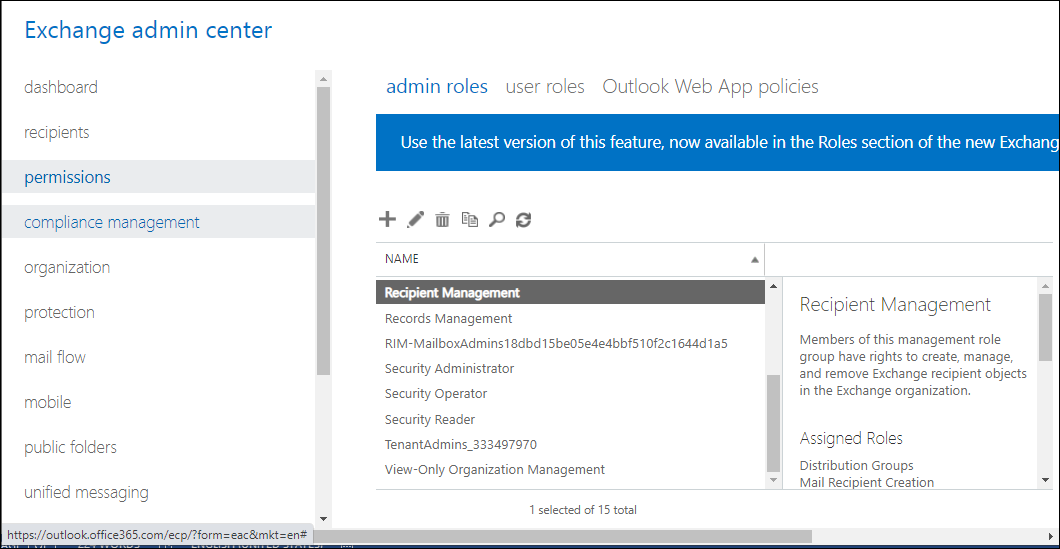
- Select the Recipient Management and click the + button.
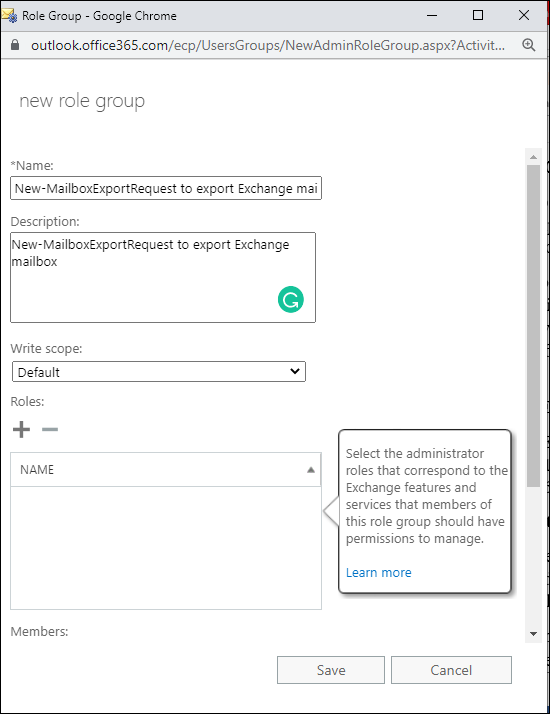
- Provide a name and description for your Role Group and click the + button adjacent to Roles.
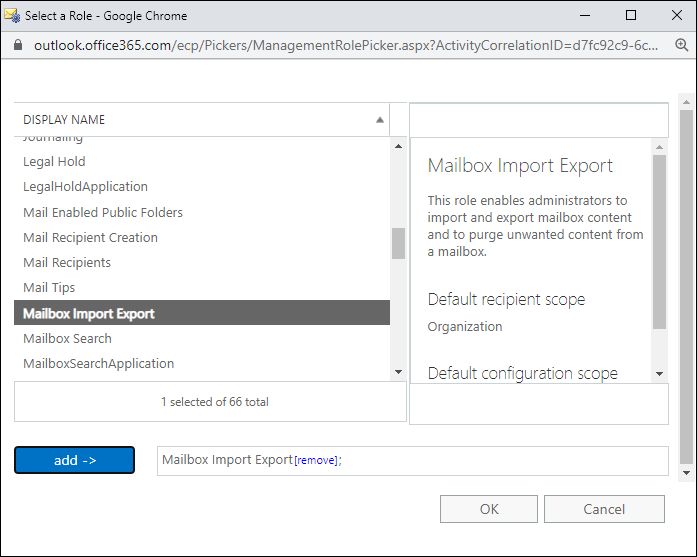
- In the roles group, select Mailbox import-export and click add -> button.
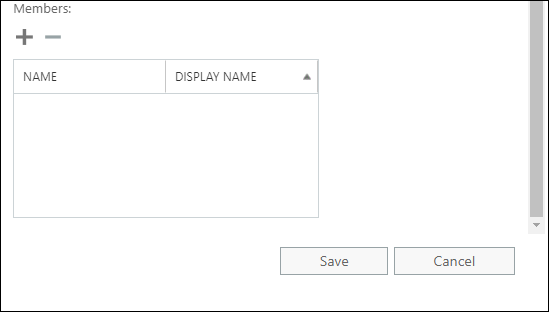
- Following, click the + button adjacent to Members and add members you want to export into the PST file.
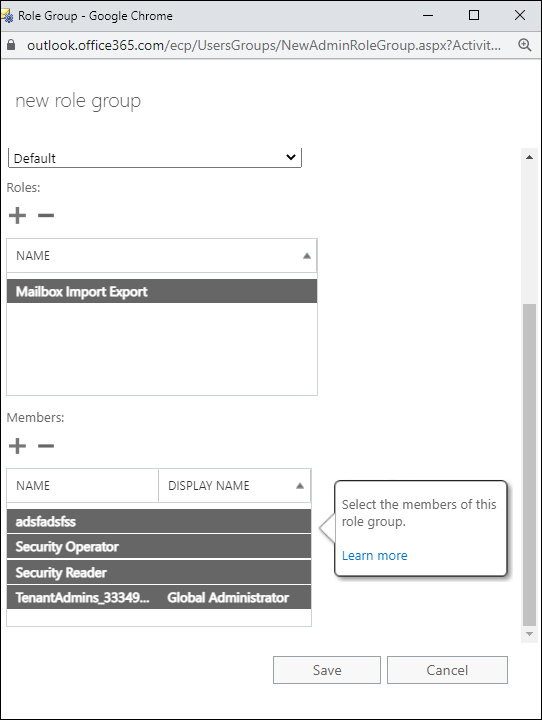
- Once done with adding roles and members, click on the Save button.
Create a shared folder to save resultant PST files
To use the New-MailboxExportRequest to export to PST, you must first create a shared folder where the PST files will be exported. You can’t save your PST files to D: PST. It must first you have to create a shared folder EX07:PST on the server or PC; and grant it the appropriate permissions.
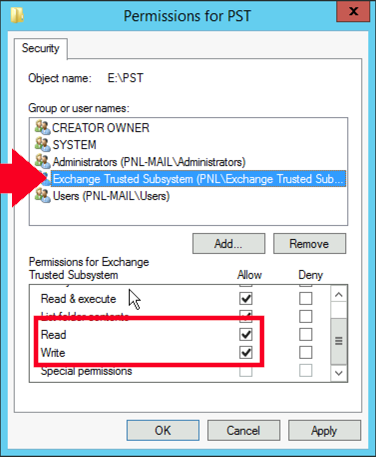
You need to share the folder with the user who has the Import/Export role permission and add the Exchange Trusted Sub System to the permissions.
Exporting Mailbox to PST from Exchange
Now you’re all set to use the MailboxExportRequest cmdlet. Let’s start with a single mailbox.
Export single mailbox
New-MailboxExportRequest -Mailbox Hitesh –FilePath \\EX07PST\Hitesh_Recovered.pstHere the mailbox Hitesh will get exported to the shared folder “PST” on the server “EX07”.
Export Archive Mailbox
In case you want to export an archive mailbox, put Is Archive at the end of the cmdlet.
New-MailboxExportRequest -Mailbox Hitesh –FilePath \\EX07/PST\Hitesh_Archive.pst" –IsArchive To check the mailbox export process
To view the process of mailbox export, run the following syntax:
Get-MailboxExportRequest | Get-MailboxExportRequestStatisticsExport specific Folders
Let’s suppose you need to filter the mailbox content and only want to export inbox and Sent items.
New-MailboxExportRequest -IncludeFolders “#Inbox#/*”,”#SentItems#” -Mailbox {Hitesh} -FilePath \\{EX07}\{PST}\{file-name}.pst Export data from a specific date:
This will import the items which are received after 05/04/2017:
New-MailboxExportRequest -Mailbox {Hitesh} -ContentFilter {(Received -lt ’05/04/2017’)} –FilePath \\{EX07}\{PST}\{file-name}.pstThis cmdlet will export items received before 05/04/2017:
New-MailboxExportRequest -Mailbox {Hitesh} -ContentFilter {(Received -gt ’05/04/2017’)} –FilePath \\{EX07}\{PST}\{file-name}.pstExport data of a specific date range:
New-MailboxExportRequest -ContentFilter {(Received -lt '01/01/2020')-and (Received -gt '01/01/2019')} -Mailbox User1 -Filepath \\{EX07}\{PST}\{file-name}.pst Exclude deleted items from the mailbox export
New-MailboxExportRequest -ExcludeFolders,”#DeletedItems#” -Mailbox {Hitesh} -FilePath\\{EX07}\{PST}\{file-name}.pstThese are a few syntaxes that respectively export mailbox to PST, but I’ll not suggest this method for novices. Like being techy, I understand the glitch and hassle one can face manually, and also there are limitations in this cmdlet which goes as follows.
Why is New-MailboxExportRequest not frequently used?
This cmdlet works, but it offers a few filtering options, and you have to export mailboxes one by one, which makes the process lengthy and hectic. Besides this, it will only export the mailboxes which are dismounted from the Exchange Server. Also, a single mistake in the cmdlet can make all your data vanish, so before using this cmdlet, make sure you are a tech geek or at least have a tech geek in your team.
Better Alternative to export mailbox to PST
If you want a better and hassle-free experience of Exchange export to PST format, I suggest you to use Shoviv Exchange Recovery Manager.
Several Microsoft MVPs and migration engineers have tried this tool and highly regarded it. Also, our tester had tried this software in several complicated scenarios, and every time, it has become a data savior. Some of its features go as follows:
- No need for Technical Hands: You might get happy ‘cause there is no need to be a tech geek to utilize this professional tool. The tool is simple as an android application, and even the first-time user can recover their mailboxes from EDB or export Exchange mailboxes to Outlook PST format.
- Compatibility: Where New-MailboxExportRequest is only available in Exchange 2016 and 2019, Shoviv Exchange Recovery Manager is compatible with all versions of Exchange Server. When we say all, we mean it.
- Multiple mailbox export: The software can export Exchange mailboxes in bulk and without any alteration. Also, you can preview all your Exchange database content before exporting it into PST files.
- Filtration & Split: Being a professional utility, you will get a filter option on the Message class and item date range. Along with this, an option to split the resulting PST file is also available.
Conclusion
Since the release of Outlook and cloud- services, users frequently leave the hosted server. However, to migrate Exchange Server, users just need to convert EDB to PST. There are two ways for the same: New-MailboxExportRequest, a walk on eggshells, and another is Shoviv Exchange Recovery Manager, a cakewalk.
Frequently Asked Questions
Ans. It requires some PowerShell knowledge, but with proper guidance, it can be manageable.
Ans. Yes, it can be used on various mailbox types, but specific parameters may vary.
Ans. Corruption in mailbox files, delivery queue issues, and performance bottlenecks.
Ans. -Mailbox, -RepairRequest, -Force, -Confirm, -WhatIf.
Ans. By analyzing event logs, mailbox properties, and performing diagnostics.
Ans. Incorrect usage can lead to data loss or further mailbox corruption.
Ans. Yes, there might be temporary interruptions in mailbox access during the repair process.
Ans. It’s generally recommended to involve an Exchange administrator, especially for complex issues.
Ans. Regular backups, user training, and proactive maintenance can help minimize issues.