Exchange Server is Microsoft’s platform that offers Email, Calendaring, Contact, Scheduling, voicemail transcriptions, collaboration, etcetera. It runs only on Windows server operating system. Exchange Server provides a helping hand in Official appointments, Security and confidentiality of emails, Portability, Mobility, and Address book feature to maintain email addresses. In contrast, PST (Personal Storage Table) Files are Microsoft Outlook Data files storing the users’ Outlook data. Here, we will learn how to export Exchange Mailbox to PST and its reasons.
Why Exchange database export to PST is in High Trend:
- The primary reason behind the Export of Exchange mailbox to PST is having a backup to avoid the risk of data loss.
- The user can also export Exchange to PST for Compliance and legal discovery purposes.
- In the condition, if any employee leaves the organization and the administrator wants to retain archive mailboxes but not in Exchange Mailbox, they can export the mailbox to PST.
- If you’re techy and have been using Exchange Server from the very beginning, then you may know, that Exchange Server has a life period of 10 years. After that, Microsoft discontinued/end its support for them.
How to Export Exchange mailbox to PST:
We have both manual and automated methods (Exchange Recovery Tool) to Export Exchange Server mailbox to PST. Let’s have a look at both methods:
Manual Method for Exchange mailbox export:
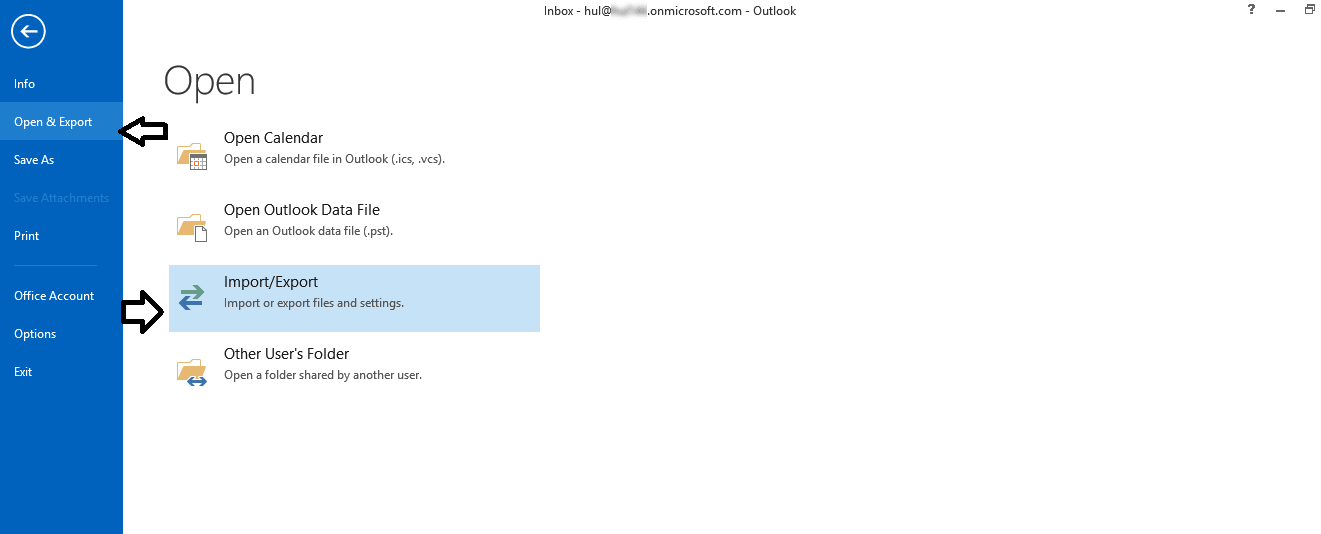
Step1: Firstly, open Outlook and go to the File menu.
Step2: Click on Open & Export and then on Import/Export option.
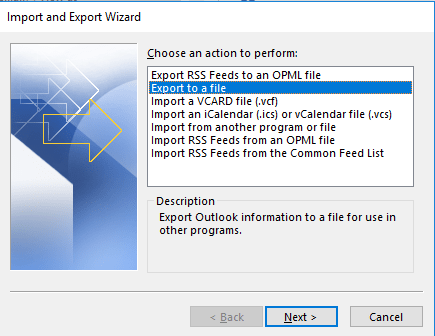
Step3: Choose the second option of “Export to a file” and click “Next”.
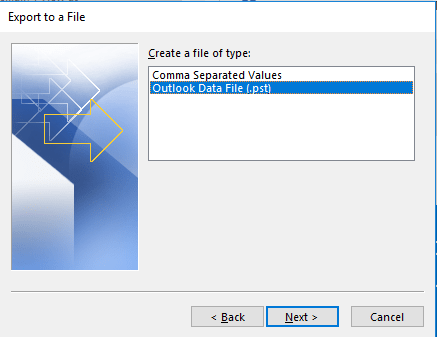
Step4: Now, select the Outlook Data File (.pst) and click next.
Step5: Select the Folder that has to be exported in the new Outlook PST.
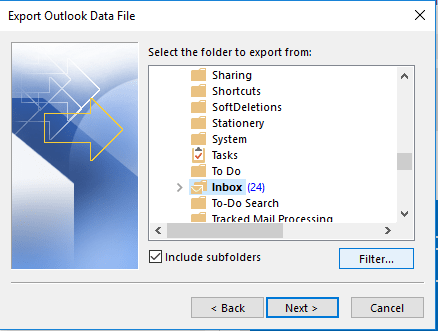
Step6: Use the provided filter option as per the requirements.
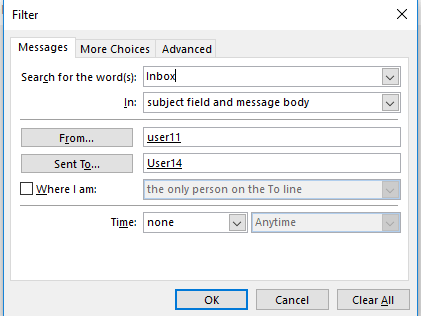
Step7:You can also go for the More Choice and Advanced. Then, click OK.
Step6: Browse the location for the destination PST file and click Finish.
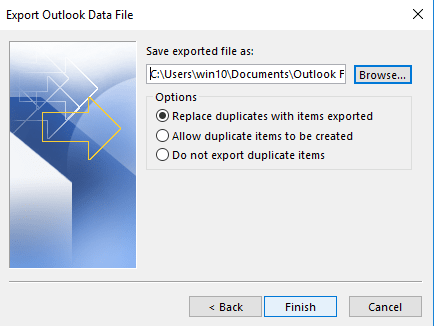
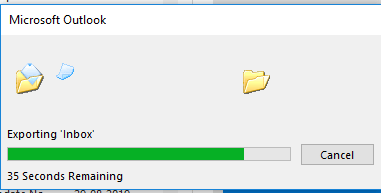
Step7: By clicking Finish, the exportation will start.
This is how you can export the exchange mailbox to PST, but as a famous saying “nothing comes for free”, so as the manual methods.
Why don’t professionals utilize the manual method?
- Exchange export mailbox to PST with the manual method is a lengthy and time-consuming process and requires technical hands to perform the task.
- The manual method doesn’t guarantee accurate and perfect exportation; chances of data loss.
- It doesn’t permit us to choose multiple folders as per the choice.
- You cannot split the resultant PST file if you have a large amount of data size.
- One cannot export multiple mailboxes data at a time.
- There is no option to resume the interrupted process.
- It doesn’t assure you to maintain the data hierarchy; chances of data alteration.
These are the few reasons why professionals don’t prefer manual methods to export Exchange mailbox to PST file format.
For the perfect and professional export Exchange database to PST, automated software are also available.
Microsoft MVPs Suggested Exchange Export Mailbox to PST tool.
The Shoviv Exchange Recovery Manager is a picture-perfect tool to effortlessly export Exchange mailboxes to PST. It is a hassle-free and easy way. Several Microsoft MVPs and businesspersons had tried and utilize the tool.
Stepwise Process for Exchange Server Mailboxes Export:
- Firstly, open the free Exchange Recovery software variant in your system and click on the “Add Source” at the left of the ribbon bar.

- The next window will display, choose the second option “Exchange Server Mailboxes”. You can add any Exchange version; our task here is to export Exchange 2016 mailbox to PST.

- Fill the asked credentials, the Domain name (where the active directory is installed), the User name (user having the administrative rights) as well as the Password and click the Next.
- Now select the mailboxes that you want to Export and click Finish. After that, the selected mailboxes will be visible in the “Source list>>Exchange server mailboxes” section, which is at the left pane.

- Now Export the mailboxes to PST by going to the ribbon bar and click on Export mailboxes>>Outlook PST. You can also make right-click on folder list and in the context menu choose the “Export in Outlook PST” option.

- After Clicking on the “Export in Outlook PST” option next window will open. Find “Check/Uncheck Sub Folders”, checking this will automatically check all the sub-folders of checked folders and vice-versa.

- Checking Custom Folder Selection you will find three options to filter the Export added source.
-
- Include: Only the selected folder will export.
- Exclude: Selected folders will not export.
- Add and Remove: Here you can add/remove the folders.
Now you will have two options to export mailboxes to PST files:
- Export in Existing PST: To export mailbox into Existing PST file. (This option will only work if the source is a single mailbox).
- Browse: Browse existing PST files to Export Mailbox to PST.

- Export and Create New PST files: Checking this radio button will create a new PST file for your Exchange mailbox.
- Select Folder: Choose a folder to save the resultant PST files.
- Set PST file password: Checking this option will enable you to protect resultant PST with a password.
- Incremental Export: Check this option, if your process gets interrupted and you want to resume it.
- An option to split PST file is also available, by using this option, you can create desired size PST file. (This option will work in both Existing and new PST file)
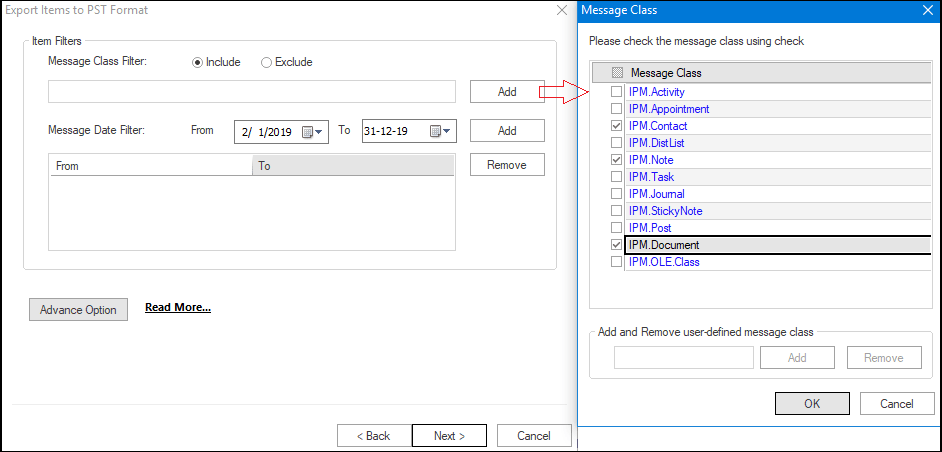
- Moving by the “Next”, Process Message Class and item date range filter option will display, where the user can add message class and message date to Include/Exclude items on the applied filter basis. If required users can use the Advance option. Click on the “Next” when all is done.
- Click on the “Next” button and the Export of mailboxes will start. The software will show the status of the process.

- After completing you can save the report and click the Finish
Why this software is the first choice of Microsoft professionals:
Before choosing a tool to export the Exchange database to PST, several points are to consider.
After using the tool, Microsoft MVPs has described the features of Shoviv Exchange Recovery Manager, which they like and consider as persuasive reasons to prefer it.
- Easy to Use and DIY utility: Shoviv always believes in making the product easy to use so even non-technocrats can utilize the software. Microsoft MVPs and other professionals also have stated this as one of the most effortless ways for Exchange mailbox export to PST.
- Secure tool for Business-related data: Being a professional, we know data is the utmost priority for professionals. Keeping this in mind, our software doesn’t require any additional software installation. Also, the software doesn’t store added mailboxes data anywhere. Hence, you don’t even need to share your data or mailbox credentials with anyone, which makes it the securest approach to export business-related data.
- Preview added Exchange mailboxes: We know having a preview of data before export is icing on the cake, and Shoviv offers this. When users add Exchange database to export into PST file, software fetches the mailboxes and displays a preview of every bit.
- No risk of data loss and human error: It is an automated software that removes around 95% of the manual hassle. Also, the software is evaluated in several complicated scenarios, and every time, it has become a data savior. There is no need to worry about data loss and human error in Shoviv Exchange Recovery Manager.
- Desire Export of Exchange Database: Being a professional utility, we have embedded the software with a filter option. Using the filters, you can exclude unwanted items from the Exchange mailbox and export only desired emails to the PST file. This will save your time and boost the processing speed.
- Resumes interrupted process: Last but not least, keeping users’ requirements and Microsoft professionals’ suggestions in mind. We offer an incremental export option. This option, by default, filters duplicate items, and also, users can check this option to resume the interrupted Exchange mailbox export process.
Conclusion:
To Export Exchange Server mailbox to PST, firstly, we discussed a manual method that is lengthy, unsecured, and confusing, then we moved to the professional and handy solution; Shoviv Exchange Recovery Software. In conclusion, by going with the above context, we can easily conclude that for a professional, secure, and handy; the Shoviv tool is the best solution. To check its performance, the software also facilitates a demo version of the software, which allows the Export of the first 50 items per folder.


[WPSM_AC id=8080]