OST stands for Offline Storage Table. In OST files the users can easily save the data in the absence of data connectivity or while being offline. In an offline mode, users can easily perform various functions like draft saving, the composition of new mails, etc. The OST files get sync automatically when it reconnects with Outlook client. But have you ever been in a situation where your OST files get damaged either deleted unwillingly? And you are searching for the solution to re-create and recover damaged OST files.
Nowadays, re-create and recover damaged OST files in Outlook is not a difficult task. Before that, let’s discuss how the OST files get damaged. There are different reasons behind the corruption.
Reasons for the Corruption of OST File:
- OST file gets corrupt due to virus infection; it is one of the most common reasons.
- During the synchronization process of the OST file to Exchange server account, if any of the network devices stop, there may be more chance of corruption of the OST file.
- Improper termination of Outlook while the process is running. Then in that condition, there is much prone to corruption of OST file.
So, it is clearly understood by the above discussion that what may be the reasons behind the corruption of OST files. After that, most of the user comes with the request to find a solution to overcome with the corrupted OST files. Now, what to do next? There are some methods of re-creating and recover damaged OST files.
Let’s start discussing the manual method to re-create the OST file. Sometimes, when the OST files get deleted unwillingly and it becomes necessary to recreate a new OST file then in that situation you can again download the fresh copy from the server very easily. To start working with this method, follow the steps:-
1st Manual Method:
- The first step is to close the Outlook application.
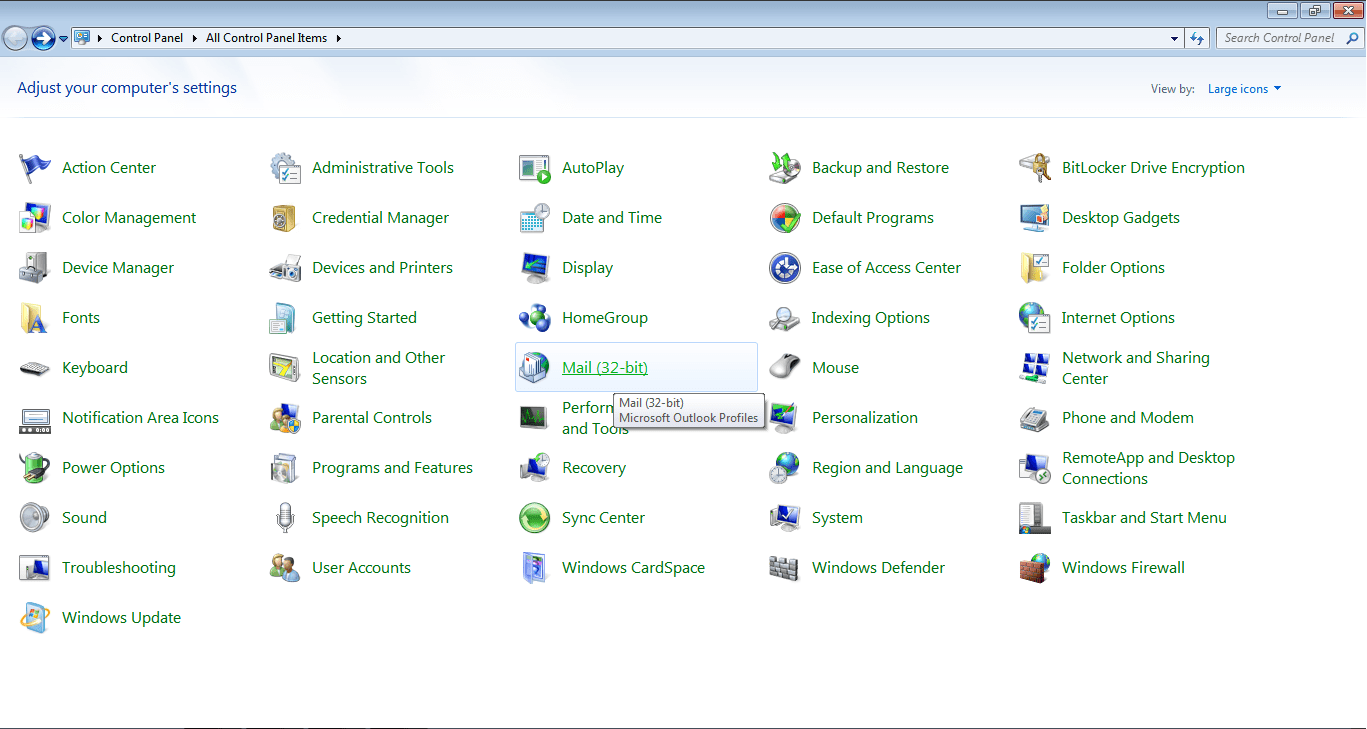
- Open control panel>mail

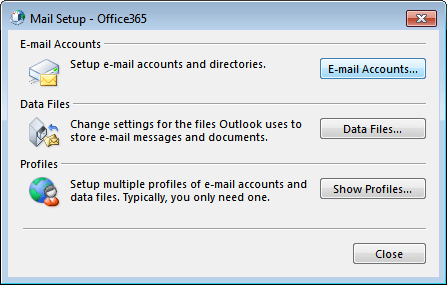
- Now, the mail setup-Outlook wizard appears. Click on the Email Account option on the right side.

- After that, the account settings dialog box opens. Select the data file option. Choose the OST file and click on the open file location present at the rightmost corner.

- Locate the OST file location. After that delete that file.
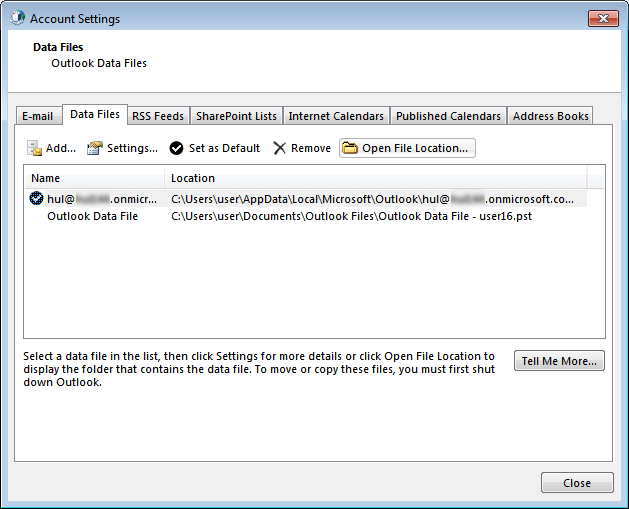

Note:-Before deleting the OST file, try to take a backup of the OST file. After that, close all the mail setup and account settings window open in the background.
- Then, the next step is to restart the Outlook. It will automatically create the new OST file.
After applying the above steps, the user came across with some limitations. The manual method does not allow the user to re-create more than one OST file at one run. Even sometimes there is much prone to data loss.
For better understanding of OST to PST Conversion you can read our previous post on “OST to PST“
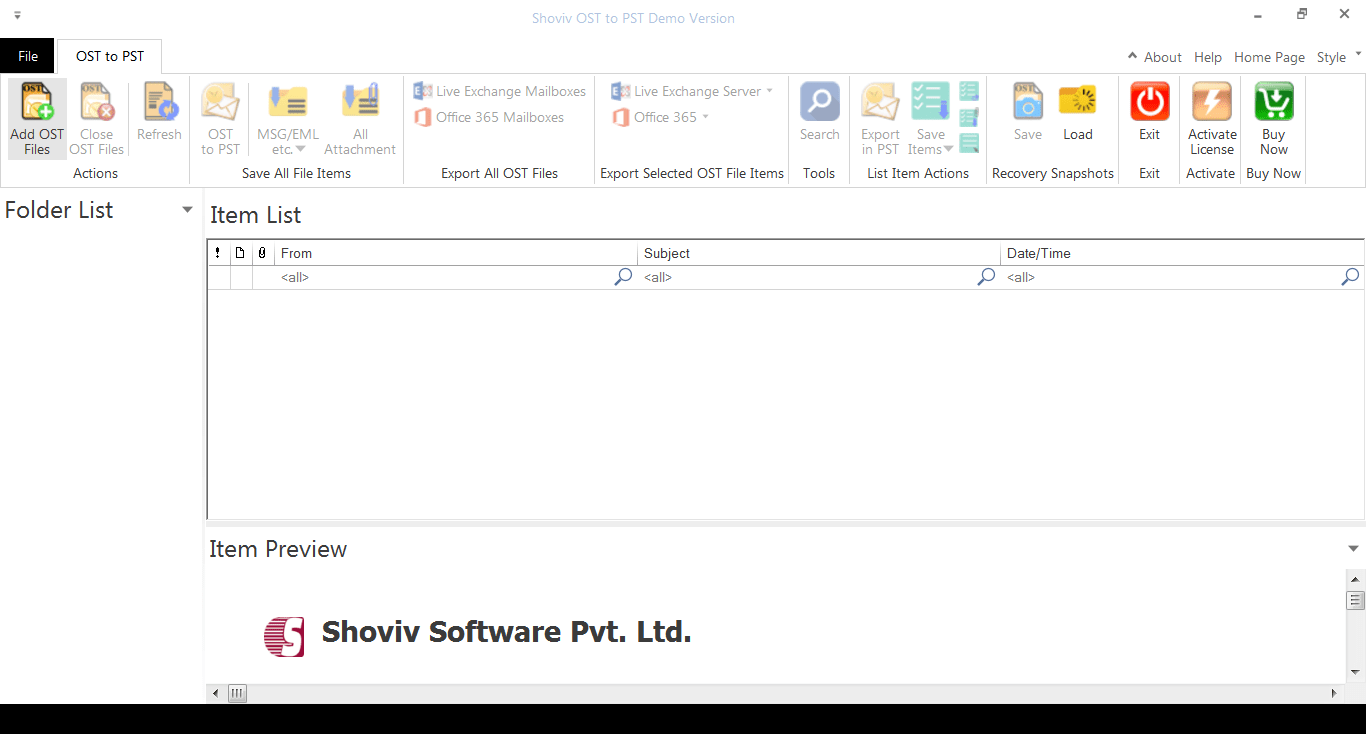
Hence, an automatic and professional tool known as Shoviv OST to PST converter is required. It is one of the best-recommended tools to recover damaged OST files without any size limitation effortlessly. It provides a facility for smooth and quick recovery of permanently deleted items. The tool offers to easily recover damaged OST files along with their properties. Furthermore, it gives the facility to convert the recovered OST files into multi-destination like PST, Live Exchange and Office 365 along with its data items. Let’s start working with OST to PST converter.
- Download and install the software.
- Open the OST to PST software.
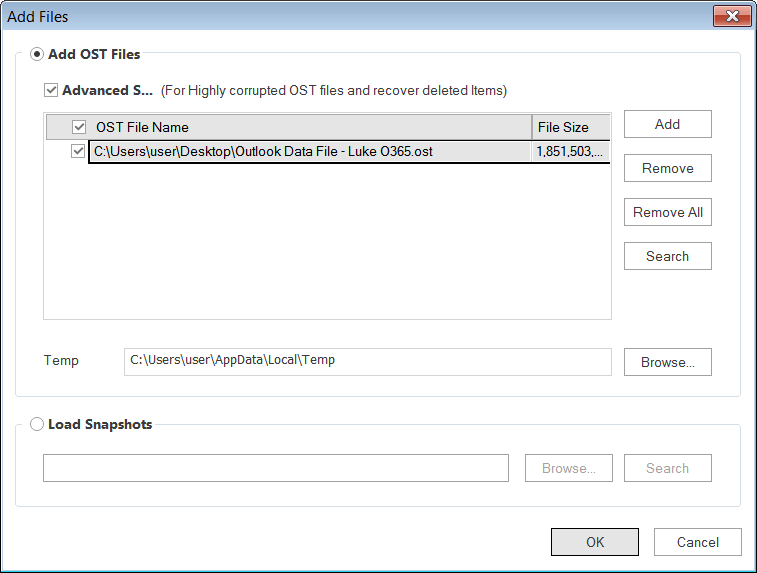
- Click on Add OST files.

- Click on the Add or Search button to OST files.

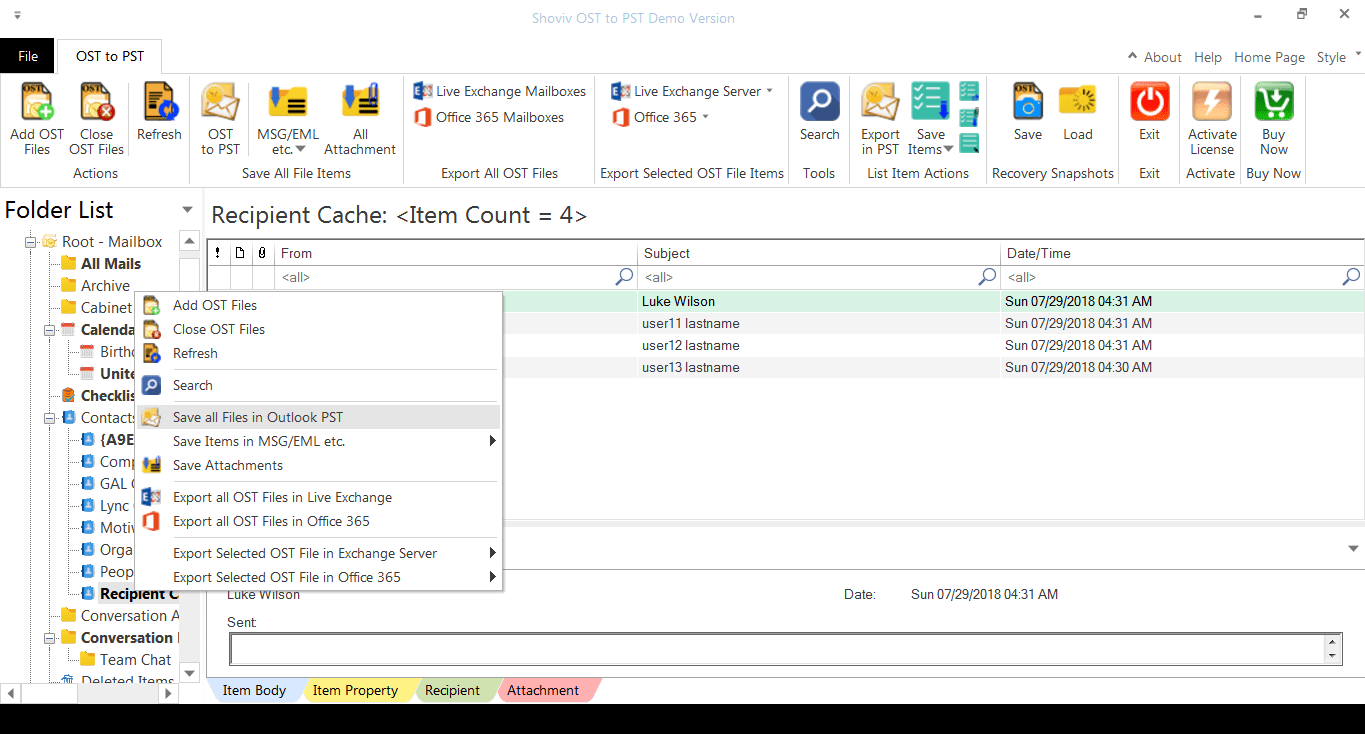
- Now, the users can see the content present inside the OST files. Select the required file and choose to save all files in Outlook PST.

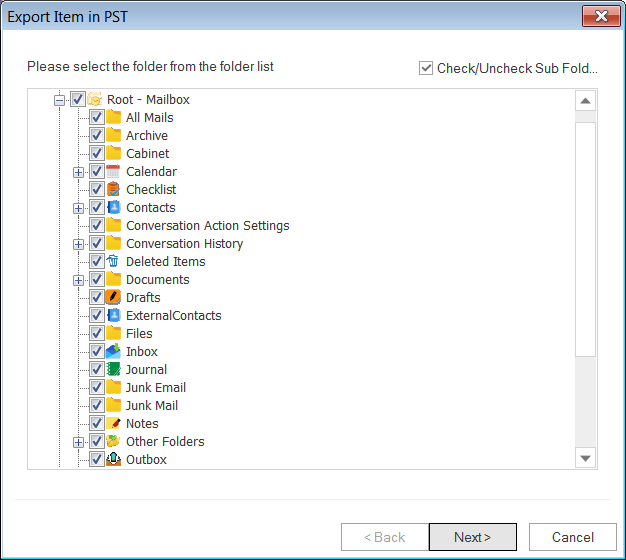
- Then at the right corner, there is an option to check either uncheck for the subfolders. Click Next.

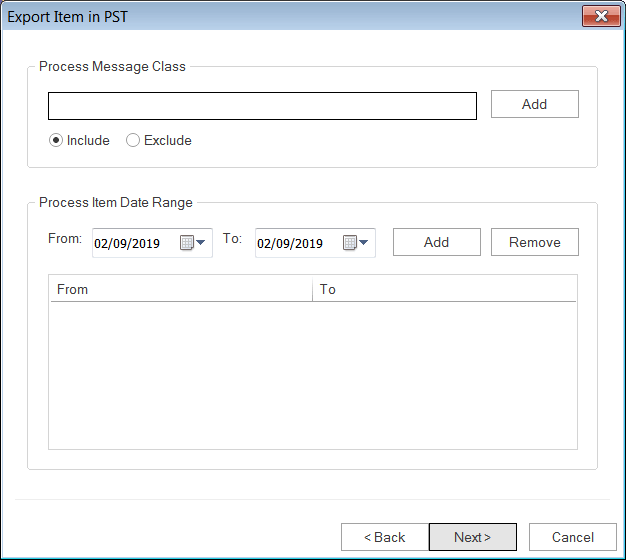
- Set the filter option either by process message class or process item date range. Then, click on the Next button.
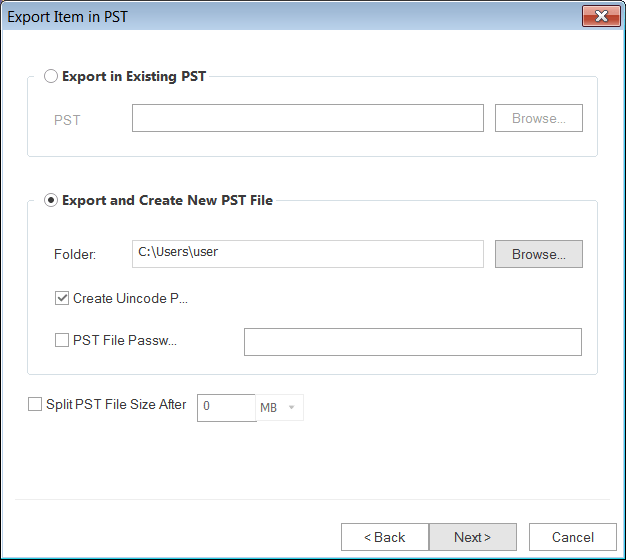
- Choose the desired option to export the item in the existing PST or by creating a new PST. If you create a new PST, then there is also an option to set the PST file password. Then, click on the Next button to continue the process.
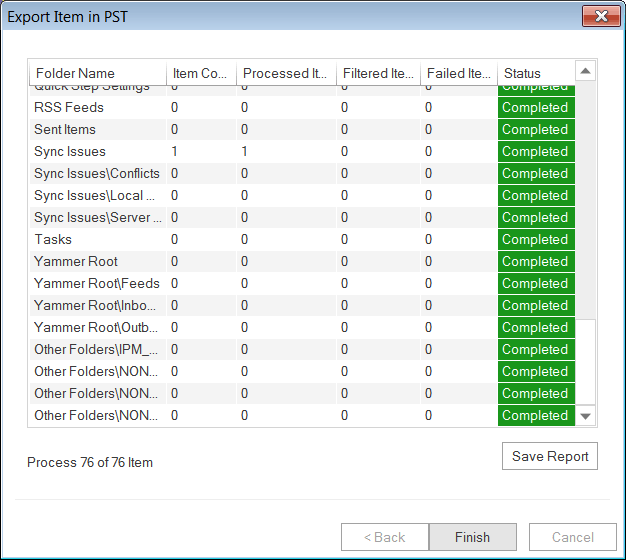
- Finally, the process gets completed successfully. After that, there is an option to save a report.
Conclusion:
The above article provides different approaches to overcome the issues related to OST files. Besides that, it is clear from the above discussion that the manual method fails to recover the major level of corruption. It can only be able to handle small size OST files. Hence, another alternative method called Shoviv OST to PST converter is required for easy, professional and accurate processing.