Exchange 2010 is outdated, and Microsoft ended its support on the 13th of October 2020. Due to this reason, Exchange 2010 to Office 365 migration is the talk of the town, as many users are migrating to advanced Office 365. Office 365 is a cloud-based software service with numerous user-centric features and services. It has a lot more to offer you. Unfortunately, users of Exchange Server have a limited manual method to migrate Exchange 2010 to Office 365.
Be with the blog till the end and explore the manual methods and the professional solution for Exchange to Microsoft 365.
Cutover Migration for Office 365 migration from Exchange 2010:
If less than 200 mailboxes are on your Exchange Server, the cutover migration process can be used for Exchange 2010 to Office 365 Migration. This can be done using the Setup wizard or by EAC (Exchange Admin Center). Using the Setup wizard, users can move 150 mailboxes only. You can also move 2000 or more mailboxes with Exchange Admin Center.
Know more about the Cutover Method:
At first, you need to open the ‘Exchange Deployment Assistant’ site. It covers all the scenarios to migrate Exchange 2010 to Office 365. Use the cloud-only option for a better response.
Now, it should be checked that the Exchange 2007 server infrastructure supports MS Outlook Anywhere and Auto Discover. Use the guide to authenticate the Exchange Server 2007 setup after that. After verifying the setup, use Microsoft Remote Connectivity Analyzer and verify Outlook Anywhere. Also, the user needs to be sure that you assigned the migration permissions for the correct account to the mailboxes you will move.
Download Shoviv Exchange Server Migrator to Migrate Exchange Server mailboxes to Office 365. If you have any query and want any support, our Technical Team is online 24*7.Note: This Software Supports all Editions of MS Exchange Like 2019, 2016, 2013, 2010, etc.
Open Microsoft Remote Connectivity Analyzer website.
- Click Outlook Anywhere (RPC over HTTP) test. Click Next to proceed further.
- Enter the required information.
- Then, verify the usage of Auto Discover to detect server settings.
- Enter the Verification code now.
- Click Perform Test.
Cutover Migration Process Configuration:
- At first, login into Office 365 Admin Center.
- Open Exchange Admin Center
- Click the Migration button.
- Then, click on the Plus (+) button and choose Migrate to Exchange Online option
- Choose cutover migration now and click next.
- Enter on-premises account details and proceed further.
RPC Proxy Server Setting, along with Next Exchange Server, will be selected automatically. Click next after that.
- Rename New Migration Batch. Click Next.
A completely new Exchange Server Migration batch file will be formed, and you’ll see the status of syncing the provided information from the old file. One can check migration details by clicking “View Details” under Mailbox Status.
Migration Process Completion
After Exchange 2010 to Microsoft 365 migration, the synchronization status will change from Syncing to Synced. You will also receive a confirmation report by mail.
Hybrid Migration Method:
As a hybrid approach, it serves as both a migration and an implementation strategy in and of itself. Exchange 2003 and 2007’s staged migration can be modernized with this new approach. It’s possible to use Exchange 2010 and Office 365 Hybrid in the same environment. This option is ideal if you have a lot of data to migrate Exchange 2010 to Office 365, and the procedure will take a long time. The only native way to relocate more than 2000 mailboxes is a hybrid approach. When moving more than 150 mailboxes, Hybrid is the best option.
Depending on the demands of each user, some businesses employ hybrid deployment as the final stage rather than an intermediary step. In these cases, users are distributed across on-premises and online environments.
A Hybrid Configuration Wizard sets up the hybrid environment (HCW). By reading this article, find out how to use the HCW and address issues with deploying a hybrid environment.
Limitations of Hybrid Migration:
Moving to the hybrid migration is a time-consuming and slow process. Similar to the cutover method, you need geeks in your team to accomplish this task with minimum data loss.
Exchange 2010 to Office 365 Migration by PST files
The final native migration is accomplished using the Office 365 PST Import Service. The basic concept is to export Exchange 2010 mailboxes to PST files and then import them into an Office 365 organization. This method entails some manual work on the part of the administrator. This involves virtually constructing an Office 365 setup from scratch.
Exporting all mailboxes to PST is a task that is best accomplished using PowerShell and the New-MailboxExportRequest cmdlet. The PST files must be shared or stored on a file server. You must then upload them to the Azure storage location and create a CSV mapping file from this location. The PST Import service imports PST files into the appropriate user mailboxes using the mapping file.
Microsoft also offers them the option of shipping physical drives, which entails copying PST files to physical storage devices and sending them to Microsoft. This service is charged at $2 per gigabyte of data.
Limitations of Migration through PST Export:
Ah, you think Exchange 2007/2010 to Office 365 migration using PST will be easy or quick, so don’t think about it if you have several mailboxes. Don’t know where to start, but this method is not convenient or hasty. You first need to migrate Exchange to PST, and for this, you have to use PowerShell in several steps, which is also a walk-on eggshell on itself. I’ll only suggest this method if you have only a few emails to migrate and don’t mind recreating your Exchange 2010 environment in Office 365 from scratch.
Common Drawbacks and Limitations Associated with Manual Ways:
Limitations don’t end here; there are a few limitations that are common in all native options, such as:
- Numerous steps of the migration will require the use of PowerShell. While knowing how to utilize this strong scripting language is beneficial, you must have a particular skill level. During this challenging process, learning on the fly may be unpleasant for you and detrimental to the (server) environment.
- If migrating Exchange 2010 to Office 365 is disrupted, restart it immediately.
- It is a very complex process and does not give 100% assurance of success.
- You might have lost some files while migrating them between servers.
- Upgrade your servers to the latest version for the most incredible migration experience. It is advised that you upgrade to Exchange 2010 SP3. As a result, if you still need to upgrade your machines, you should plan on doing some maintenance.
- Downtime is unavoidable, particularly when migrating public files. You’ll need to plan carefully, even more so if the resources on your servers are used continuously.
Shoviv Exchange Migrator – Professional’s Way
Professionals always search for an effortless and efficient way. Shoviv Software has developed an advanced tool named Shoviv Exchange Migrator to answer professionals’ needs. This tool is built with a user-friendly GUI that makes running this tool a cakewalk process. Some of the prominent features of this tool are:
- Users can connect Exchange Server and Office 365 as the source and target.
- The tool runs on job-based processing and allows the creation and running of multiple mailboxes.
- It supports all the versions of Exchange Server.
- Users can also schedule the migration after creating the migration job.
- Default incremental export is also given within the Shoviv Exchange Migration Tool. This feature resumes the process from the last stop, hence preventing duplicity.
- Users can also apply a filter based on the Date, Folder, and Item Type.
- Shoviv Exchange Migrator Tool also offers a free trial version that users can easily download and try.
Migrate Exchange 2010 to Office 365 Step by Step:
- First, install and launch the Shoviv Exchange Migrator.
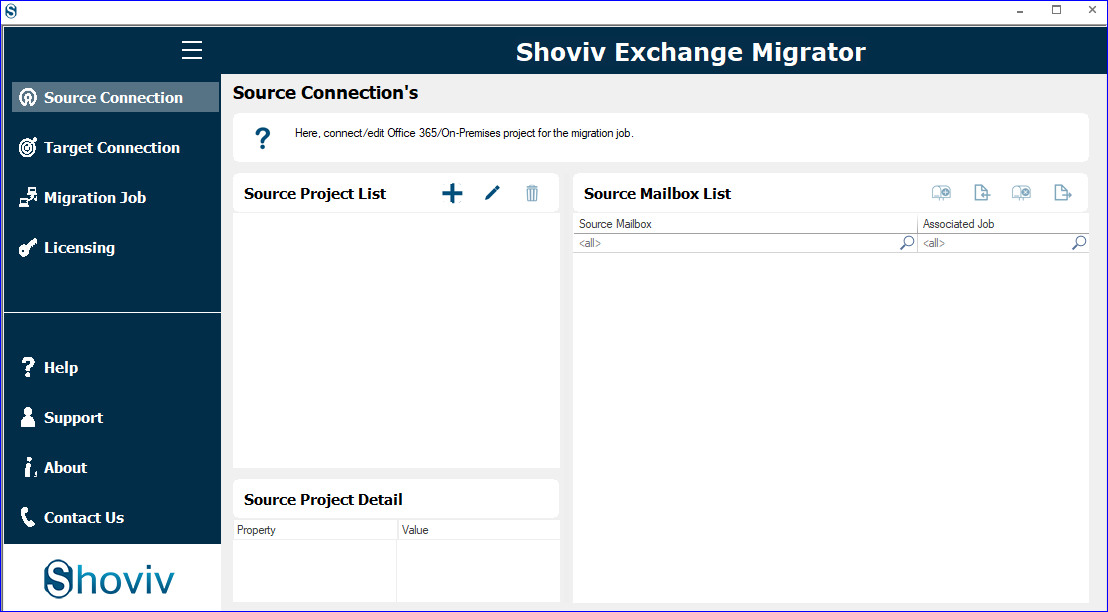
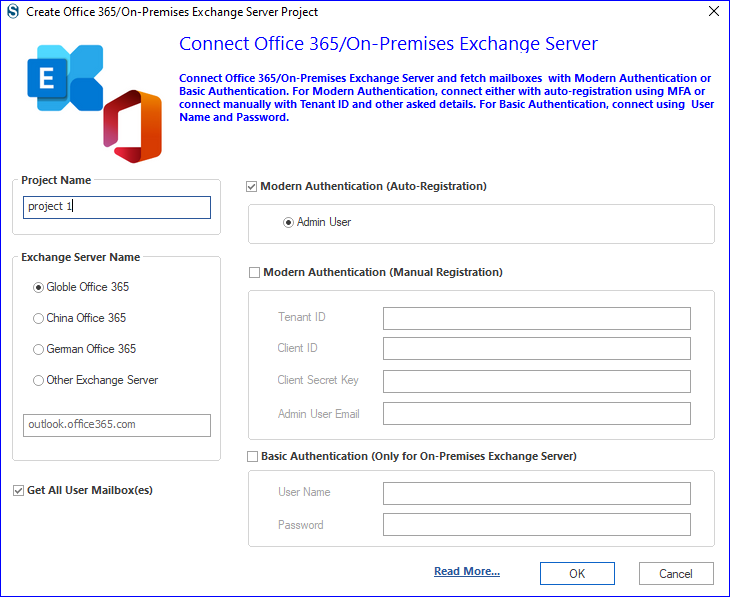
- Click on the Source Connection tab, enter the project name, and go with the Other Exchange Server option. Choose the Basic Authentication option and enter the User Name and Password.

- Now click on the Target Connection tab, select Global Office 365, and use Modern Authentication (Auto-Registration).
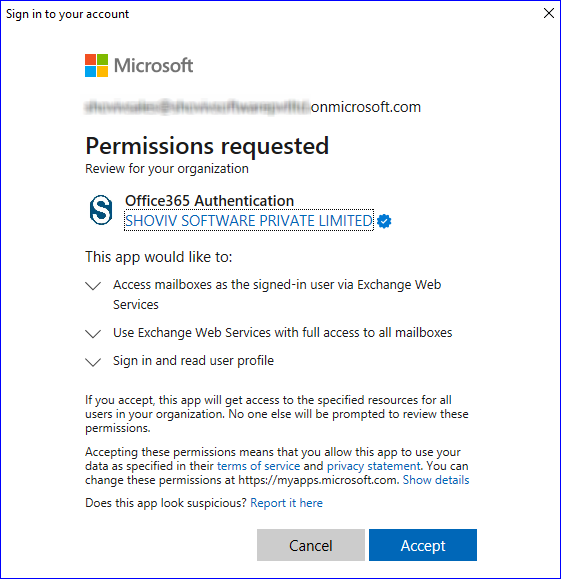
- Please verify your identity and permit it to connect to Office 365.
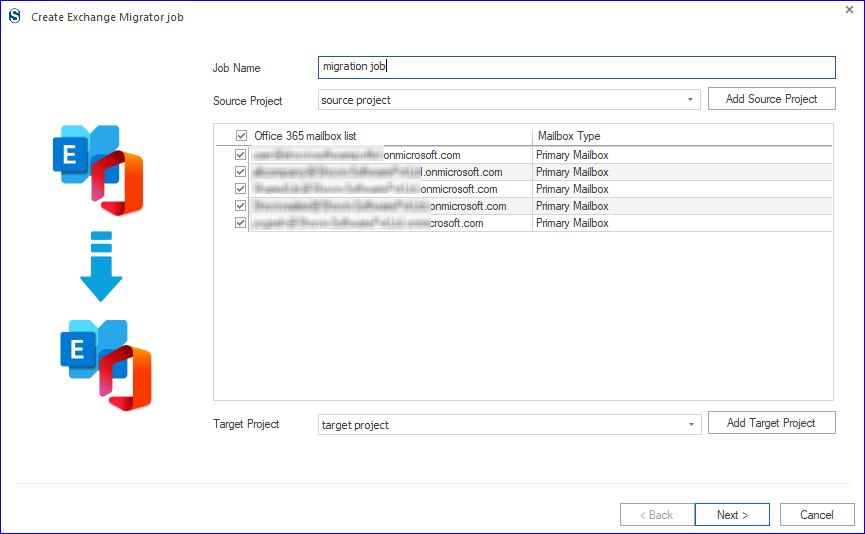
- Now, click on the Migration Job to create a job. Select the default mailbox type.

- Enter the Job Name and add the source and target project. Check the mailboxes and click on the Next.
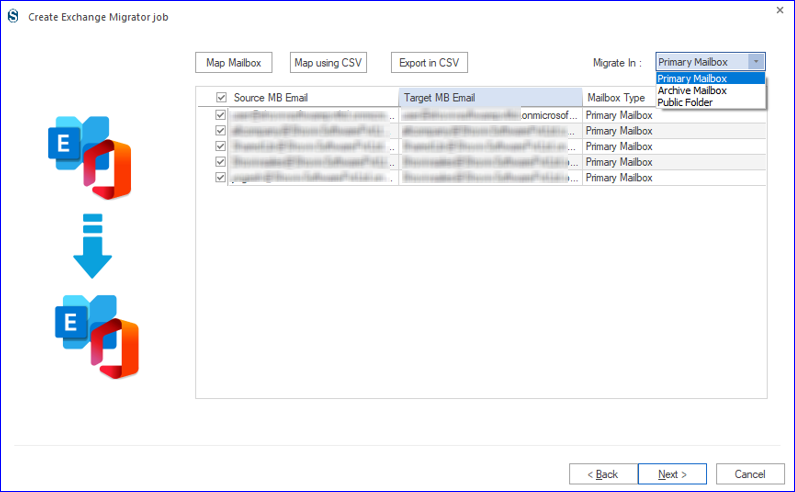
- Map the source mailbox with the target mailbox. Click on the Next.
- Apply the filter based on the need.

- Now, you are prompted to the settings page. Here, apply the settings as per the need of the task.
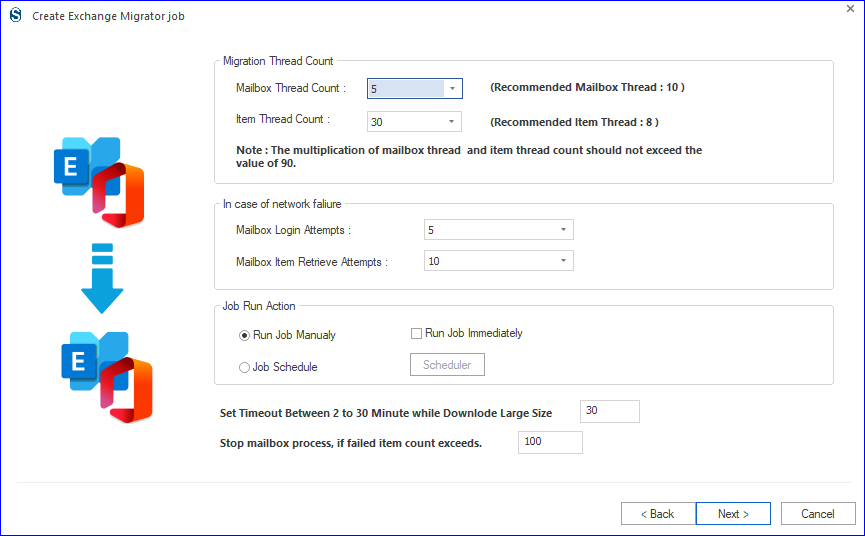
- You can also schedule the migration as per the requirement of the task.
- Finally, you will get a preview of the migration job settings. If all is Okay, then click on Finish. Run the migration by clicking the start button if the manual job running is selected.
Conclusion:
In this write-up, we learned different ways to migrate Exchange 2010 to Office 365. Firstly, we learned the manual methods, and then, we explored a professional utility. The blog explains the Shoviv Exchange Migration Tool with step-by-step processing, which will help users execute their tasks. A free demo version of the software is also available to download, install and try.


- How to Backup and Restore Emails in Webmail? - March 25, 2025
- How to Migrate Outlook to New Computer? - February 15, 2025
- Fix If Outlook Cannot Display the Specific Folder Location - February 1, 2025