In this given article, we will know about the methods by which we can import PST to OST in Outlook 2016 and 2013. The article will illustrate the methodology of importing OST files in Outlook 2016, 2013. Generally, it comes to see that users mostly search for the OST Converter, rarely how to convert PST to OST.
What are PST and OST?
PST (Personal Storage Table): PST files are the Personal Folder file in Microsoft Outlook.PST files store data in local hard drives. The single PST is created for POP3 accounts in all the versions of Outlook. The Storage limit for the single user in .pst file is 2 GB.
OST (Offline Storage Table): OST file can be described as the mirror of data that is stored in the server. OST file allows users to work even in the absence of server connection and users can read, compose, delete and even reply emails in Offline mode.
Why Import PST to OST?
- In case a user has two email accounts in Outlook, one is synchronised with Exchange server and other is not. In that case, Synchronised Profile will create an OST file and another one will create a PST file. I.e. Local Storage file. If the user wants all of its PST data in the account that is synchronised with the Exchange server, here need for import PST to OST created.
- If the user has an anonymous PST file and he/she wants its data in Outlook Exchange account. Here, the need for transferring PST to OST rises.
How to Export PST to OST in Outlook 2016, 2013.
Below we have provided the descriptive steps to Export PST to OST for different versions of Outlook. Users can go through them and proceed to export:
Steps to Import PST to OST in Outlook 2013 & 2016
- Launch Outlook application in your system.
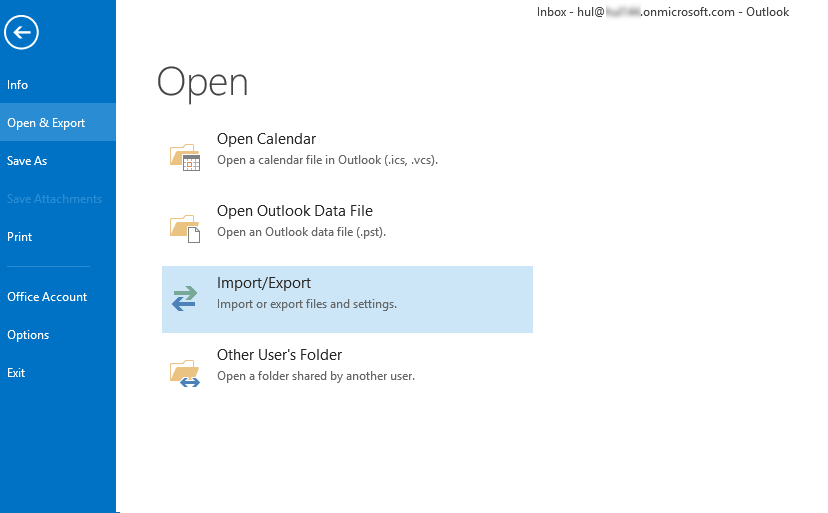
- Click on File>>Open & Export >> Import/Export.

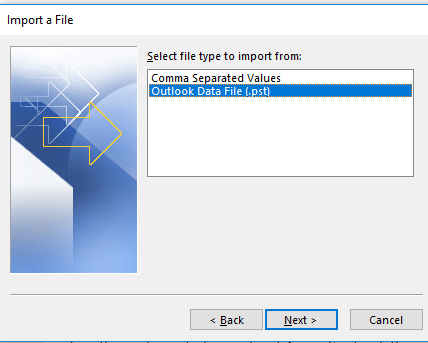
- Now, select the Import from another program or file from the wizard and click

- Select Outlook Data File (.pst) from the newly opened window and for further processing click on the Next.

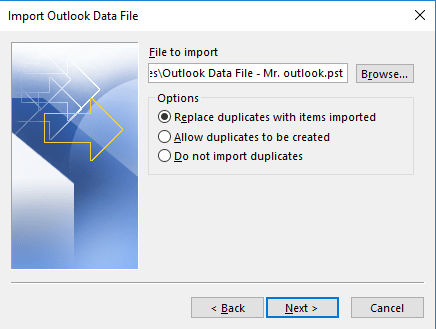
- Now, browse the personal Storage file from Import Outlook Data File window and Proceed by Clicking

- If PST file is secured, then enter the password and proceed by clicking OK.
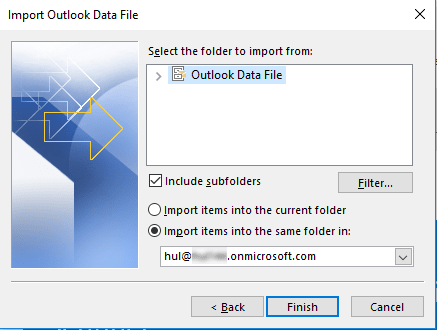
- Now, select the folder from where the user wants to transfer the local data file and click

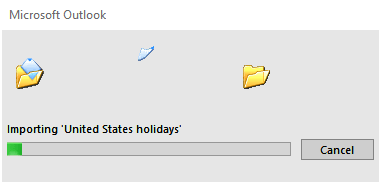
- By clicking Finish, the selected file will start importing.

- All data files that have been exported will be displayed on the left-side panel. Rightclick, where you want, make a new folder and then click on New Folder. Just drag and drop all the imported files into this folder.

Though the manual method can complete the task it has some drawbacks too:
- To Import OST manually, the user must have technical knowledge.
- The chances of human error are so high.
- The manual method doesn’t guarantee the safety of data, as it is not a secure way.
- It is a very time-consuming process with no guarantee of success.
As there are manual ways to Import PST to OST but they are not professional methods to import. To import OST files to PST, an accurate professional and easy to handle tool is required. Shoviv Outlook Suite is one of that method which can Import OST file to Personal Storage Table perfectly.
To Import PST to OST by Shoviv Outlook Suite, steps are given below:
- Firstly Add PST file into the source.
- Create an Outlook Profile, (if you do not have).
- Click on Export to Exchange Server
- Make folder selection and click the next
- From here, Choose Outlook Profile option and select the corresponded profile.
- Click on Next and apply filters (optional).
- Finally, click on finish, the process is complete.
So, we can conclude, for the easy to handle processing go with the professional and escape out from the risk of data loss.


