PST files are a common destination for mailboxes exported from Exchange database (EDB) files. To extract data from Offline EDB files and use it in MS Outlook is the most popular reason for doing so. However, exporting data has always been a time-consuming process that necessitated extreme caution. In this post, we’ll go through how to use the Exchange Management Shell (PowerShell Commands) and the Exchange Admin Center to export Exchange 2013 mailbox to PST. In this post, we’ll go through how to use the Exchange Management Shell (PowerShell Commands) and the Exchange Admin Center to export a 2013 Mailbox to PST.
Also, we will know an advanced effortless tool to export Exchange 2013 mailboxes to PST. Additionally, all the dimensions related to the export mailbox to PST Exchange 2013(version) will be elaborated. Read the blog till the end.
Export Exchange 2013 Mailboxes to PST: PowerShell Method
Exchange 2013 export mailbox to PST PowerShell method is a common query on the internet. If you are aware of the PowerShell method, you must be familiar with its complications. By the way, I am describing the process below; you can pursue it. But, it is suggested to have a backup as a single misstep, and all your data can play hide and seek, and you’ll never find your data again.

Pre-requisites for PowerShell command usage
- The account that will be used to export should be able to send a Mailbox Import/Export request.
- The user must be able to get to the network location where the PST file will be saved. The user needs to know the full UNC path. For example: PCNameHitesh$HiteshExchange.pst.
- Exchange 2013 mailbox must be in the Exchange database in order to export EDB files.
Export Exchange 2013 and 2016 mailbox to PST | Microsoft PowerShell
- Assign mailbox permissions to admin.
- Run the following command to assign import/export permission to the user
New-ManagementRoleAssignment –Role “Mailbox Import Export” –Hitesh
- Here, “Hitesh” is the mailbox that will have all the rights, or you can consider Hitesh as “Exchange administrator.”
- You can also assign import/export permission through the Exchange admin center.
- After that, create a UNC folder path for saving the .pst files that have been exported.
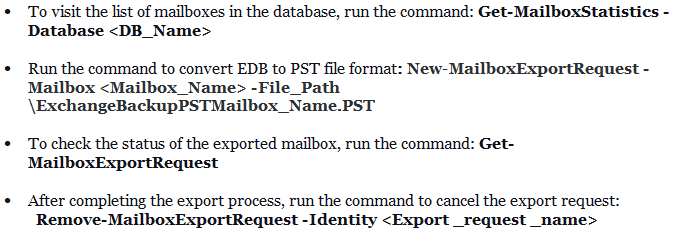
- Finally, export the Exchange 2013 mailbox to PST using the following command in the Exchange Management Shell. Have an idea by the following image.
If you have Exchange 2010 and you want to export those mailboxes to PST, then you can check out this given blog post:- Exchange 2010 mailbox to PST
Using Exchange Admin Centre Method:
To export Exchange 2013 mailboxes to PST, the Exchange Admin Centre method is also an option. Follow the below-given option to export the mailbox to pst Exchange 2013.
- As an administrator, log in to the Exchange Admin Centre. Then permissions tab >>Admin Roles.
- Select Recipients.
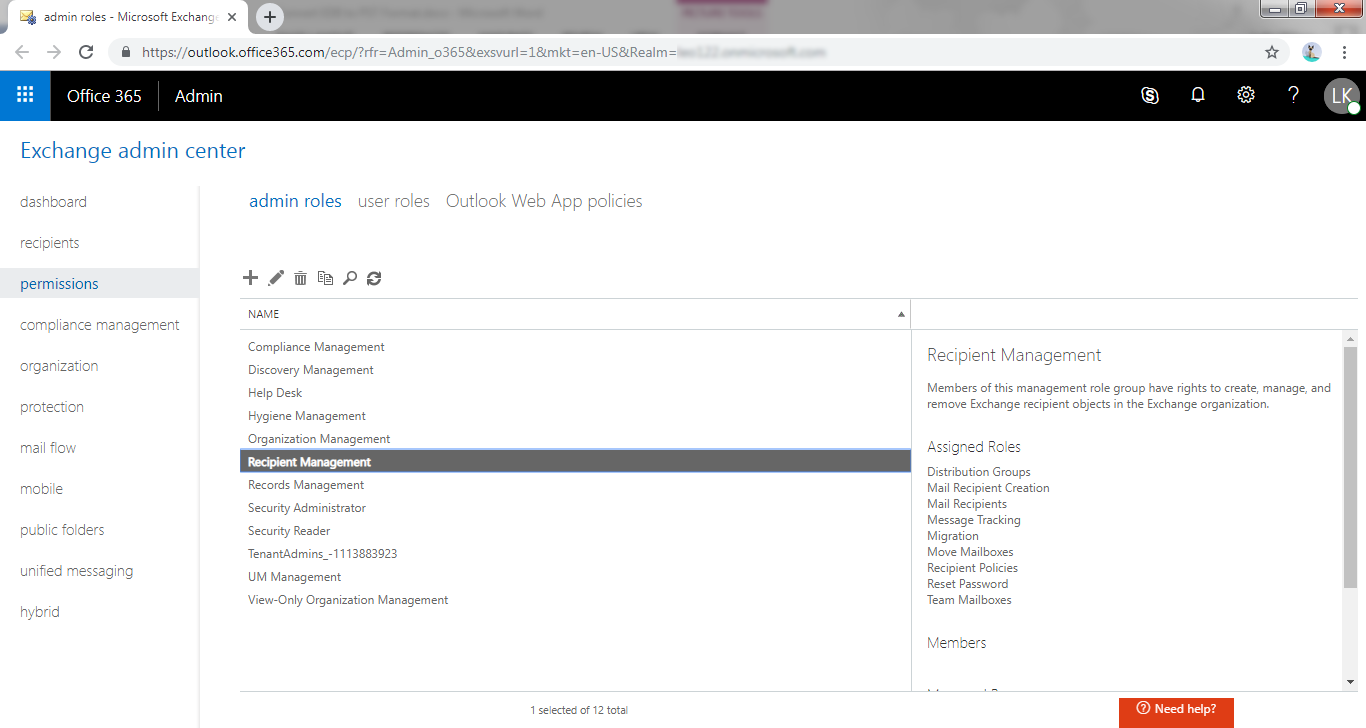
- Under the Role Group, click on the (+)Add option.
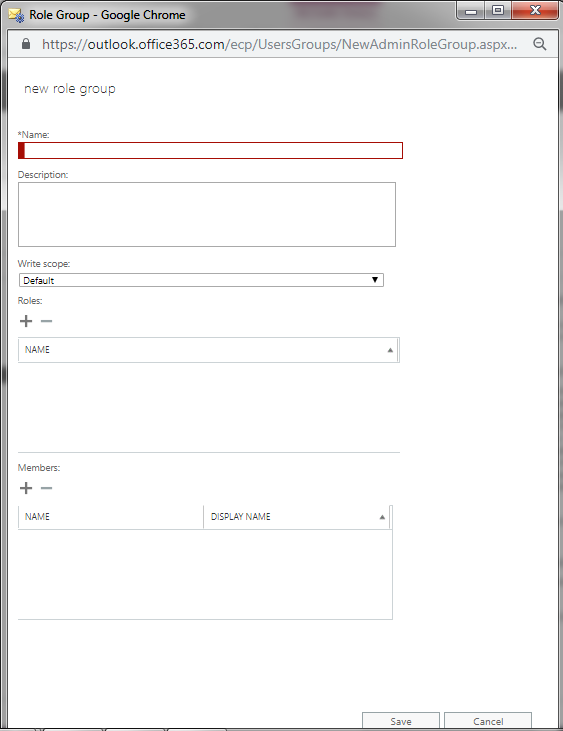
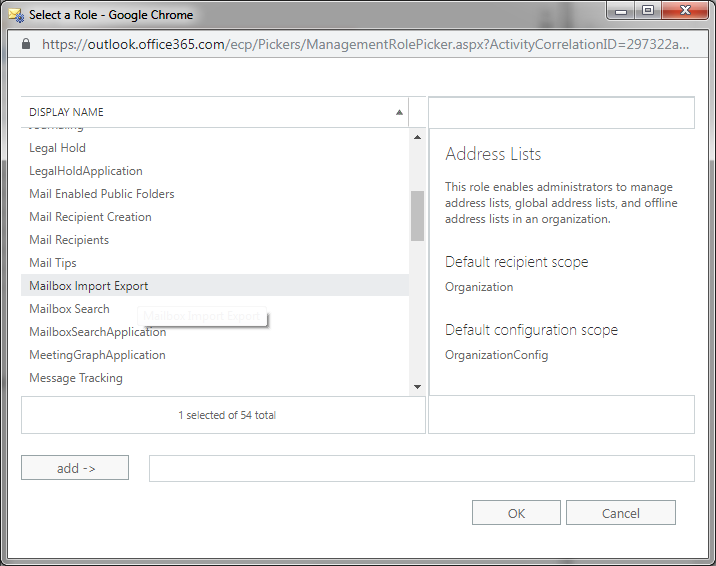
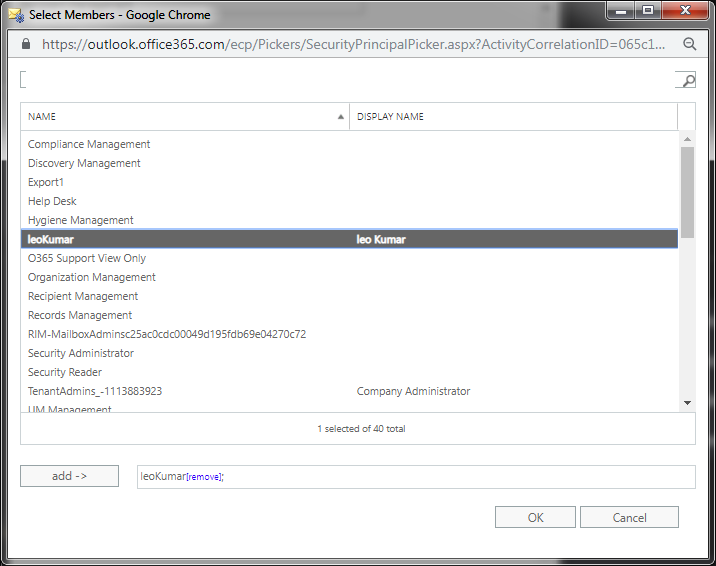
- Select a Role named window will open, Mailbox Import Export >> Add button >> Ok.
- Recipient Management >> Add Mailboxes>>
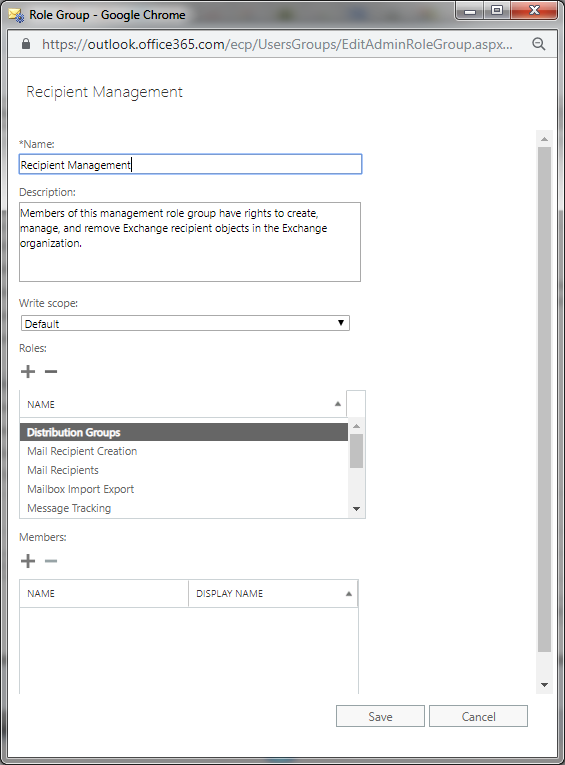
- Click Ok.
- Recipients>> …( more)>>Export to PST files.
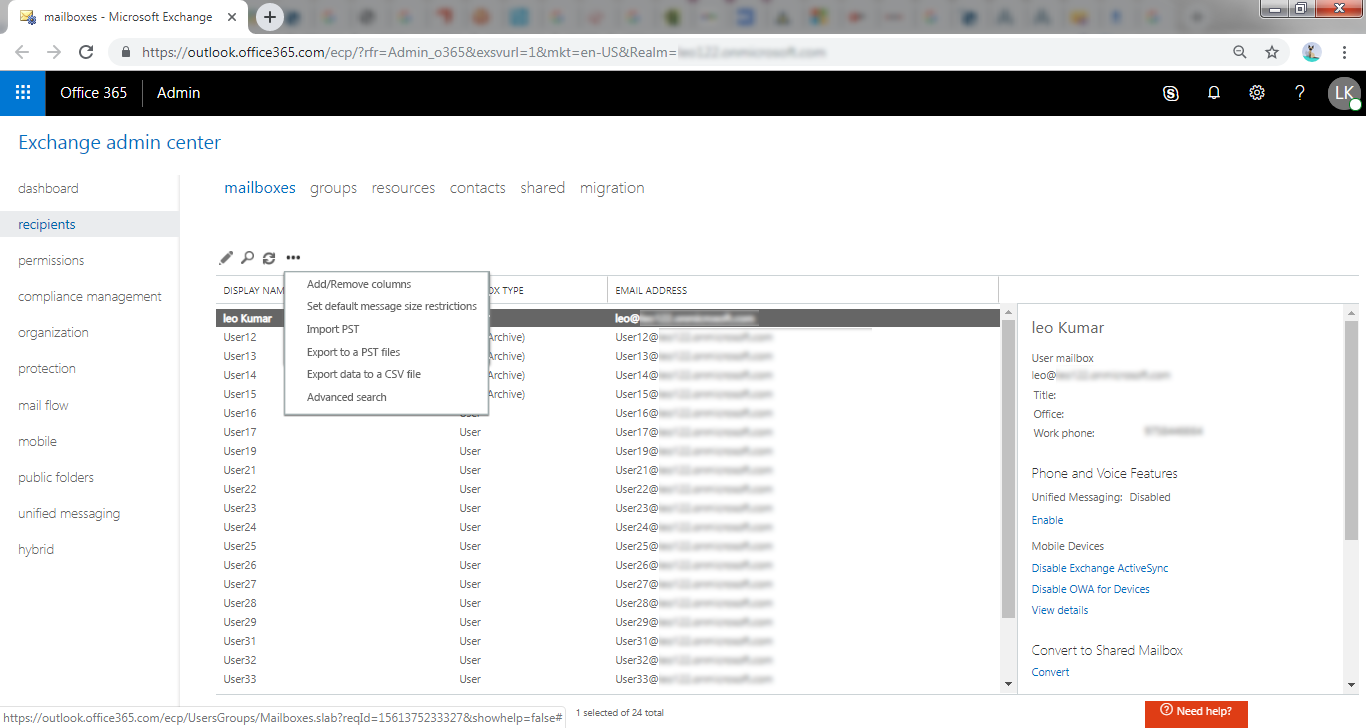
- Now browse the PST file’s path, and finally click on Next.
Are manual methods sufficient?
Manual methods come free in cost but are not free of demerits. Manual processes have a few disadvantages you should be aware of before executing the Exchange 2013 Mailbox Export to PST processing.
- Manual methods seek high technical expertise, an Everest-winning task for a novice. Understanding EMS cmdlets is a must.
- They are lengthy, tedious, and time-consuming.
- Users do not get the option to execute the process as per their desire; no advanced options. You have to compromise with the process to export Exchange 2013 Mailbox to PST.
- For the vast data, you do not get options to split .pst files to manage PST files.
- Users can not select multiple folders for the export.
Export Exchange Mailbox to PST in a Professional Way:
Using the Shoviv Exchange Recovery Manager Tool, you can professionally export Exchange 2013 mailbox to PST. The process is straightforward:
- Add Exchange Mailboxes and proceed.
- Select the Outlook PST option.
- Browse the location for resultant PSTs.
- Apply setting as per the need.
- The export will start, and the report will display.
First, let me clarify: you don’t need technical expertise to export Exchange 2013 mailboxes using Shoviv Exchange Recovery Manager. It has a user-friendly GUI. Some of its highlighted features are:
- Along with the export, it also expertly recovers the corrupted and inaccessible EDB files.
- In single processing, you can add any number and size of mailboxes from the source to export Exchange 2013 Mailbox to PST.
- You can also save in various file formats like HTML, RTF, EML, MSG, and vCard.
- This tool facilitates export from the source to Exchange Server and Office 365.
- The software also presents options like Email Translation, Folder Mapping, and Filter Options.
- Advanced features like Incremental Export are present; it resumes the process if the process interrupts for any reason.
- The tool is compatible with all versions of the Exchange Server(E.g. Exchange 2016) and Outlook.
The GUI of the tool is very user-friendly. Still, for a better understanding of the process, below, I am explaining the process to export Exchange 2013 mailboxes to the PST step by step.
Step by Step Export Exchange 2013 Mailboxes to PST:
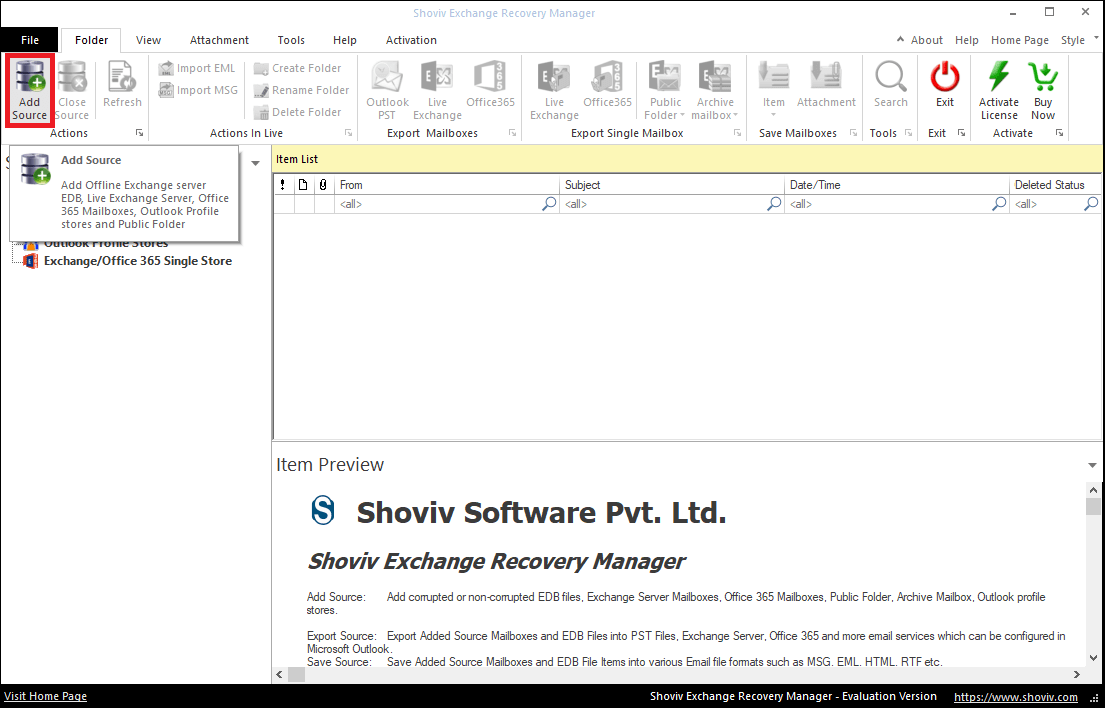
- Install and open the Shoviv Exchange Recovery Manager Tool.
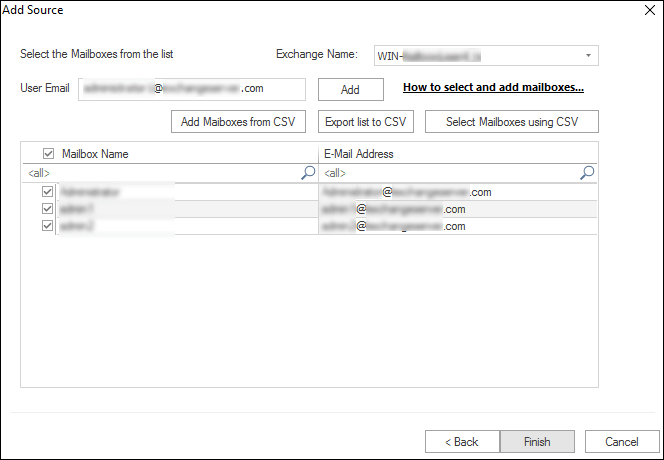
- Click the Add Source and choose the Exchange Server mailboxes.
- Provide Exchange admin credentials and click on the
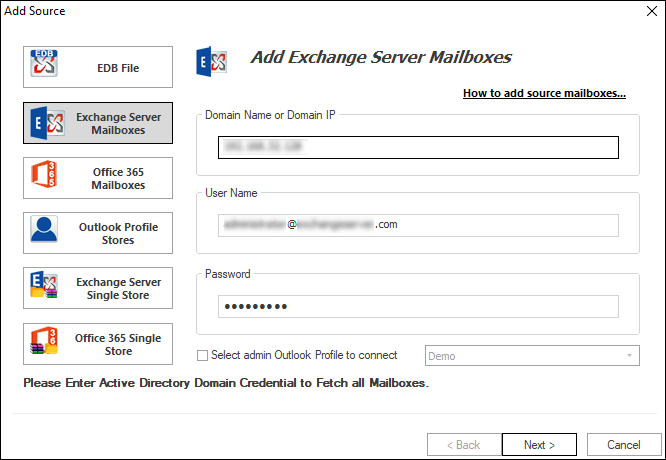
- Select mailboxes in the following prompt and click the Finish button from the bottom.
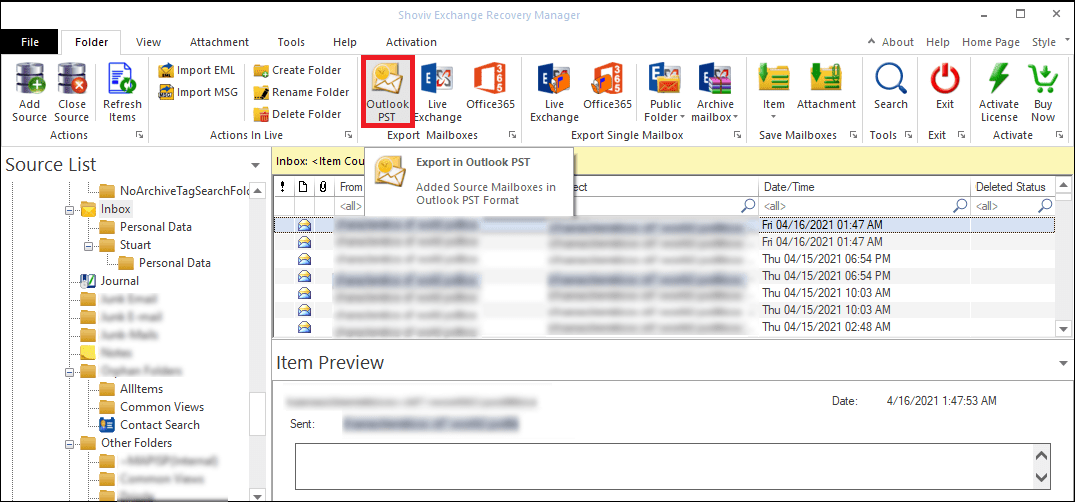
- Now click on the Outlook PST option from the ribbon bar.
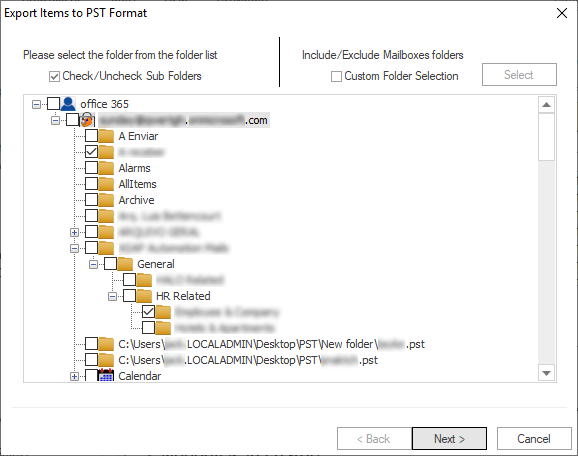
- Following, check/uncheck subfolders and move forward by clicking Next.
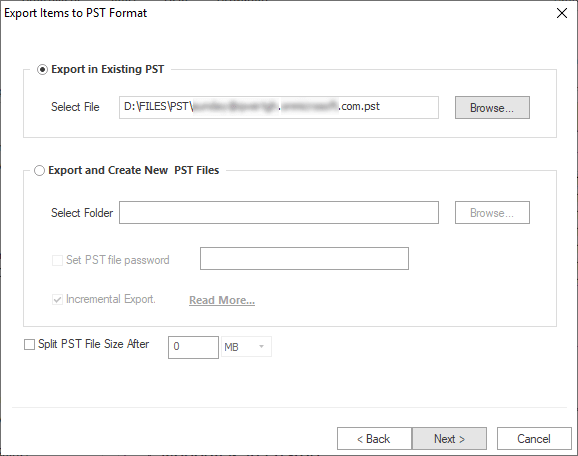
- Then, browse a location to save the resultant PST file and set the password and size for the PST file if needed.
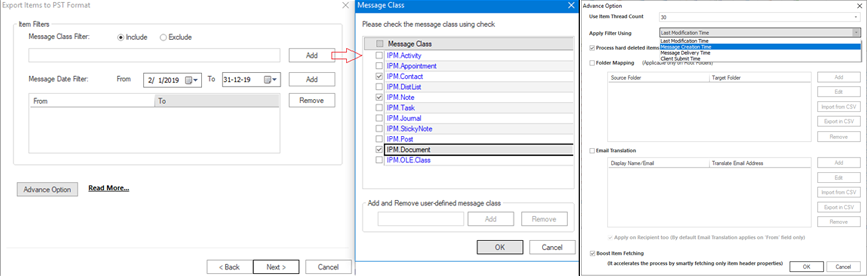
- Now, use the filter option based on the message class and message date criteria. You can use Advance options like email translation and folder mapping if required.
- .At last, the software will display a live log report with all the essential information. Once completed, click Finish.

So as you can see, the Export Exchange mailboxes to PST process is a cakewalk with the Shoviv Exchange Recovery Manager. If you’ve any doubt or want to evaluate the tool with your environment, download the free Exchange Recovery Manager.
Wrapping Up:
After reading this write-up, you will now be able to export Exchange 2013 mailboxes to PST. I have mentioned the manual methods in the starting, along with all dimensions. If you have expertise in the manual task and are aware of the drawbacks of the manual method, you can take the chance. But, if you don’t want to compromise the data and want to effortlessly export Exchange 2013 Mailbox to PST, go with the Shoviv Exchange Recovery Manager. Shoviv Exchange Recovery Manager is a renowned name for exchange-related tasks in all Exchange variants. For the errorless export, try Shoviv Exchange Recovery Manager. Download its free trial version and explore it’s working.