In the absence of data connectivity, OST helps the users to save the data in an offline mode. OST files get sync automatically when it reconnects with outlook client. It stands for an offline storage table. OST files cannot be affected easily by any outer circumstances like exchange server crashes, exchange mailbox deletion. Whereas on the other hand, the PST stands for personal storage table. PST stores the data on the hard disk of the client. The OST to PST converter not only enables the users to convert OST to PST files but also helps to convert corrupted and damaged OST files, repair them and then convert into PST files. Before we start discussing the solutions to convert OST to PST. Firstly, one should understand why there is a need to convert OST to PST. Here are some reasons mentioned below:-
- Sometimes the situation occurs, due to any system failure, unexpected crash and many more. Therefore by converting OST to PST files, one can easily get free from these troubles.
- After the conversion of OST to PST file, the users can easily migrate their data from one system to another.
- Even after the deletion of a mailbox on the exchange server, the database can easily be recovered.
But before using the OST to PST converter one must go through the manual method for conversion.
Steps to Convert OST to PST Using Manual Method:-
Note:- Before implementing this method, one must install the Outlook and should connect to the exchange server.
- Login to Microsoft Outlook.
- Open Microsoft Outlook.
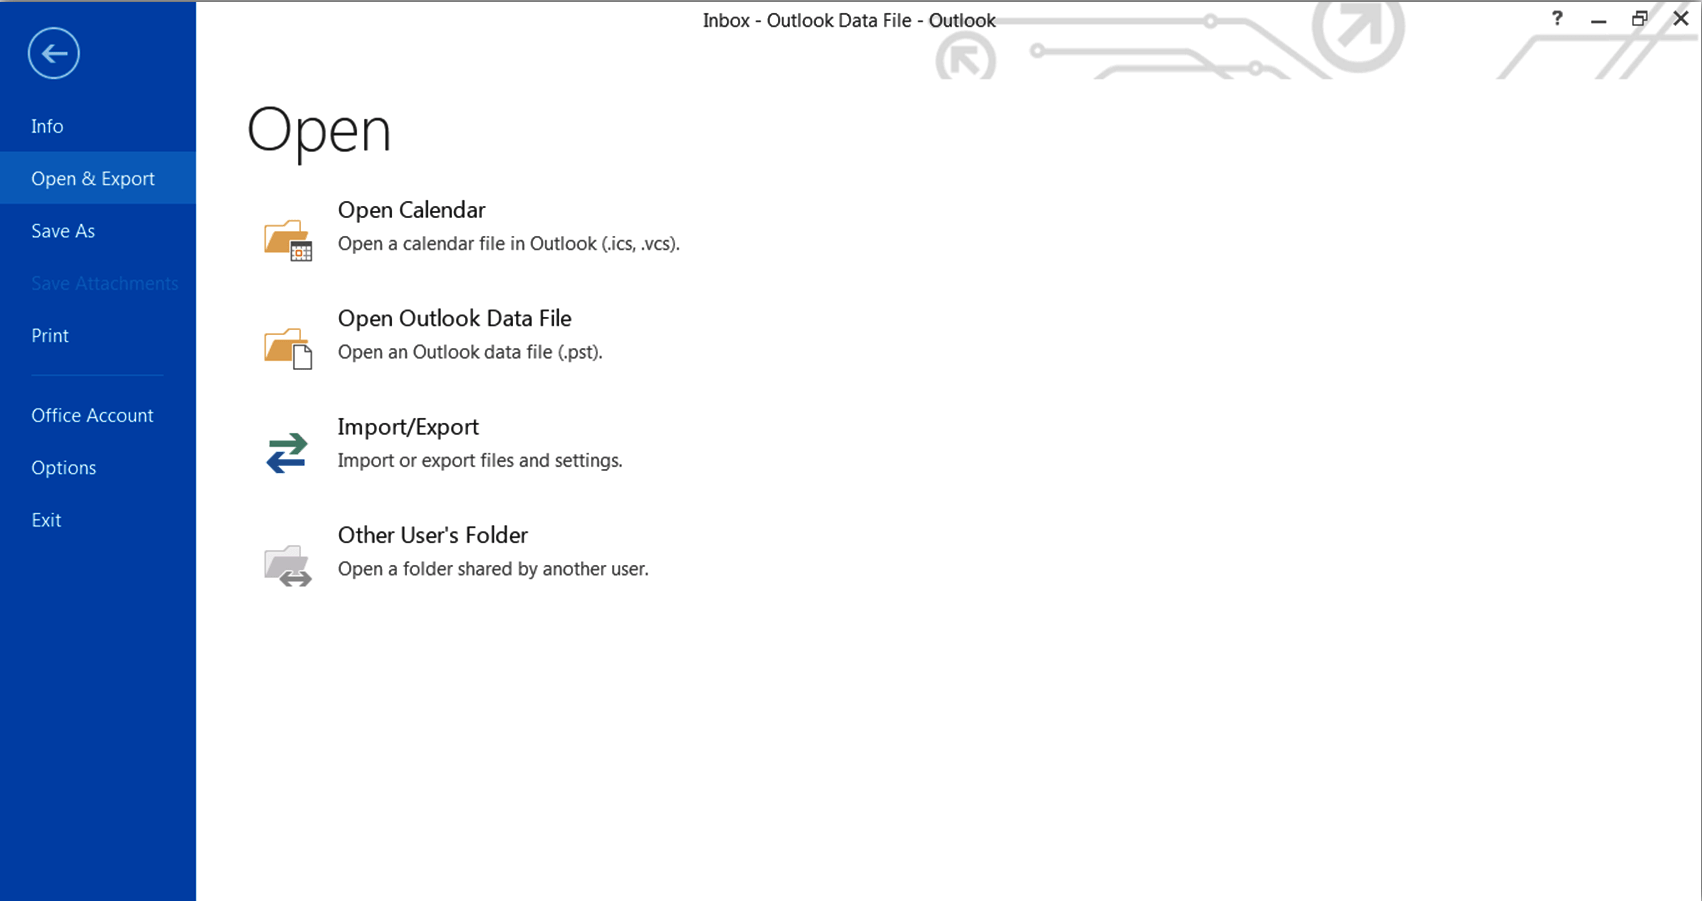
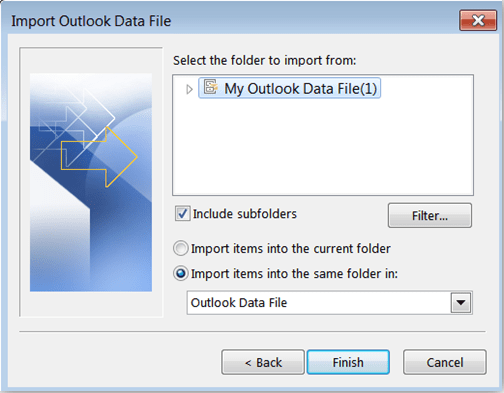
- Click on the File menu in the left corner and select open and exportoption>>Import/Export option.

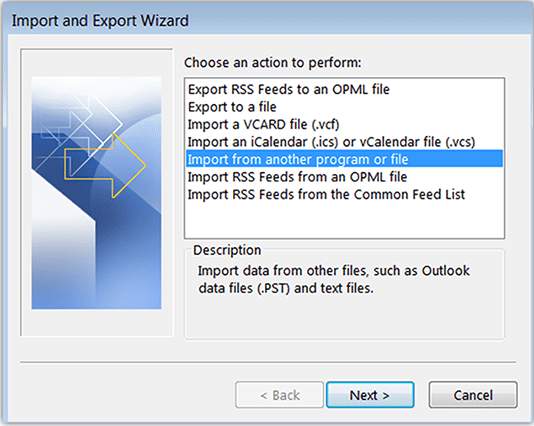
- From the import/export wizard dialog box. Select Import from another program or file. Click “Next”.

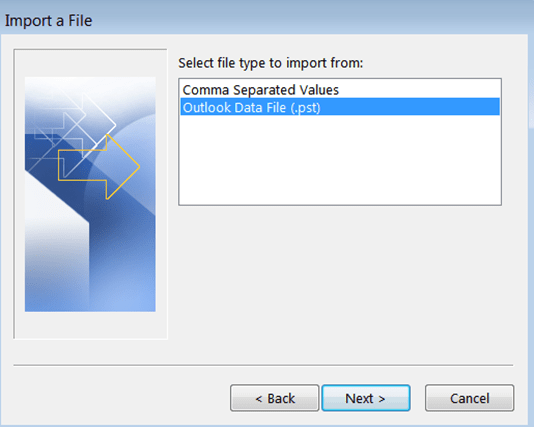
- Choose the file type – Outlook data file (.PST). Click “Next”.

- Select the file to import and choose the appropriate option.

- Then, select the destination location. Click “Next”.
- Now, import source file into the target folder. Click on the “finish” button.


Note: The process may take some time to export the files to PST.
Another method of converting OST to PST files is known as the “DRAG and DROP” method. Let’s start working with this method. Follow the below steps:-
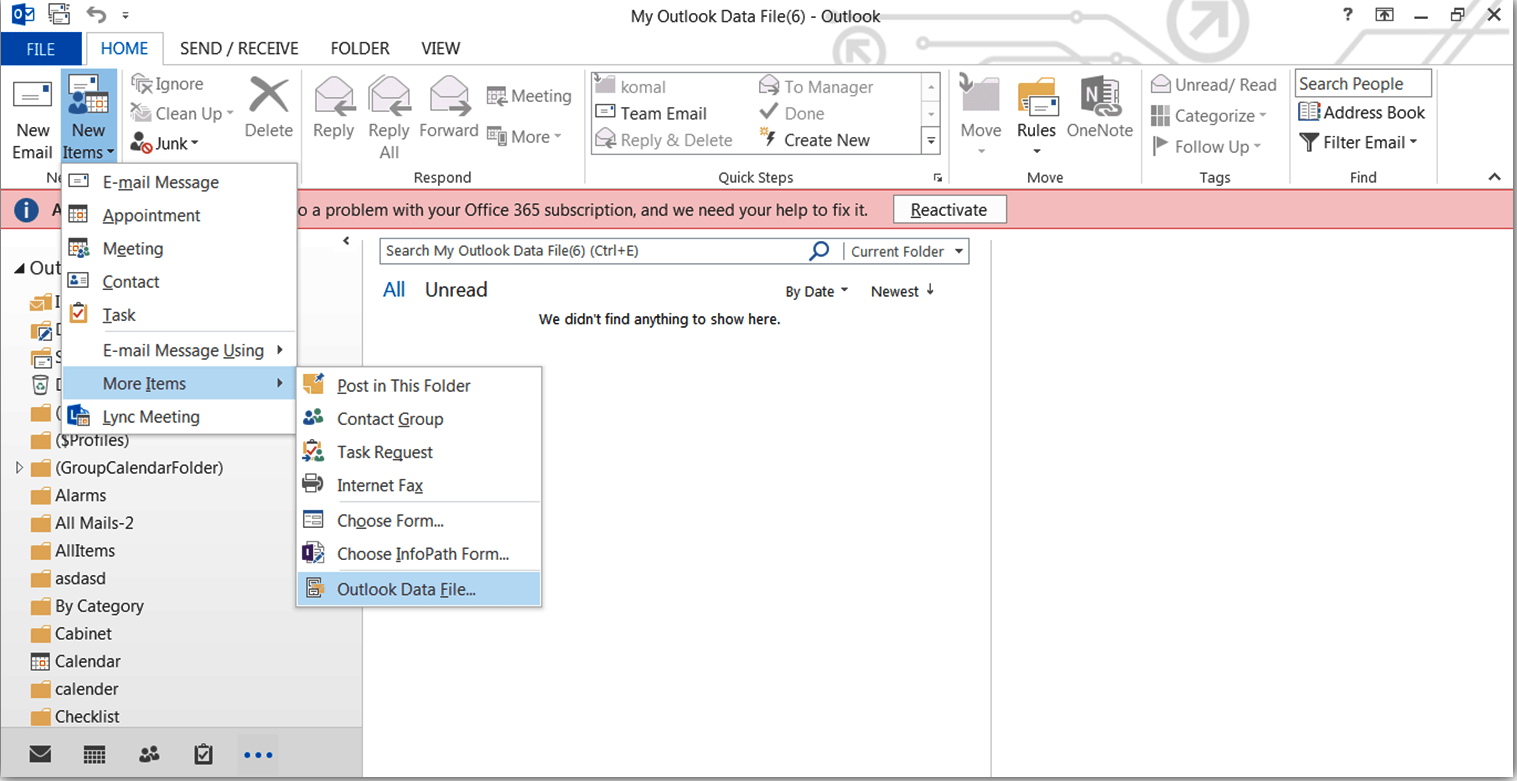
- Login to Microsoft Outlook.
- Click on new items. Select “more items”. Now, choose the Outlook data file(.PST).

- Create a new PST file and save it in the desired location.
Note:-one can also set a password by selecting the password box.
- Click “OK”. Hence, the new PST file is created.
Now, start dragging the mailbox folder which you want to export and drop them into the new created PST file.
Hence the OST files can be converted to PST. During, the process the users cannot fully trust the manual method. Also, it provides various limitations to the users.
Limitations of manual methods are:-
- The manual method is unable to move offline data.
- It does not permit the users to transfer the calendar entries.
- Sometimes the operation might omit to move entire content present inside the folders.
- The manual method fails to repair the corrupted and damaged OST file and convert them into PST.
- The manual method restricts to use batch conversion.
Therefore, a professional tool named Shoviv OST to PST Converter successfully convert the OST to PST. This tool also guarantees to recover all the corrupt OST files along with its data items such as emails, contacts, calendars, etc. in a hassle-free manner.
This software provides a set of powerful features to the users. It not only converts OST to PST but also into office 365 and live exchange. The software holds an outstanding advantage to users to select the multiple files and convert them, altogether. Along with it can enable the users to recover or repair the corrupted and deleted files. Now, follow the steps to convert OST to PST.
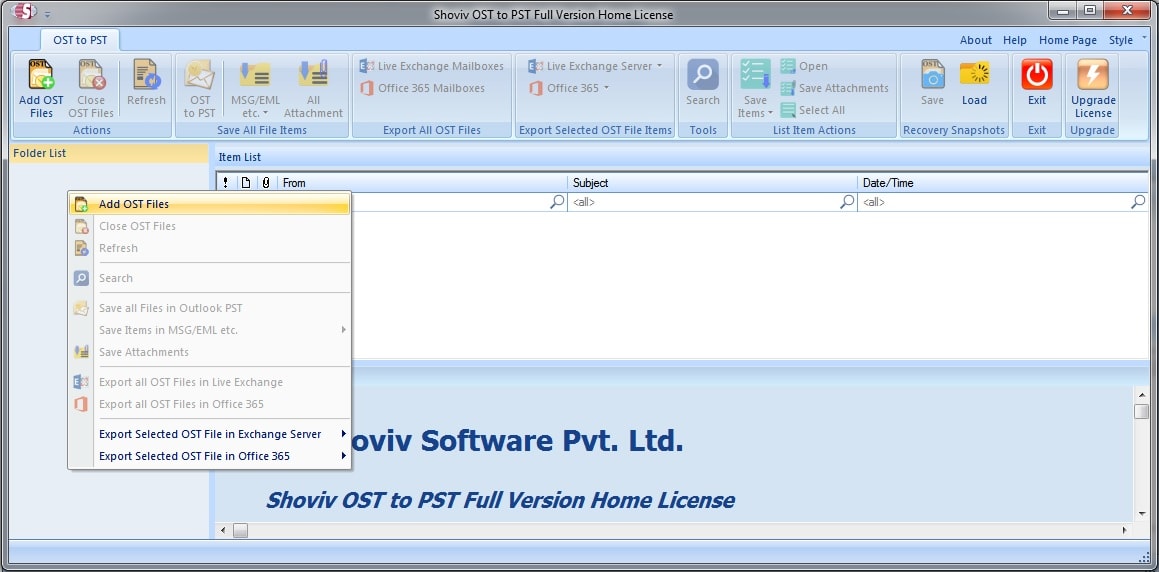
- Install the SHOVIV OST to PST Converter.
- Click on add OST files at the ribbon bar.

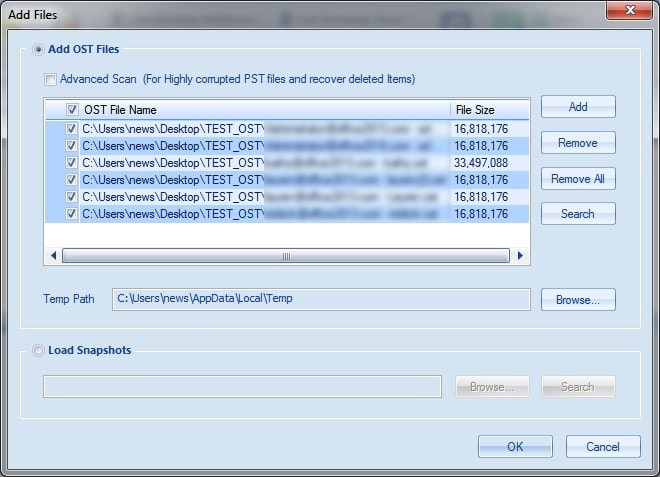
- Now, add or search for required OST files and then, click “OK”.

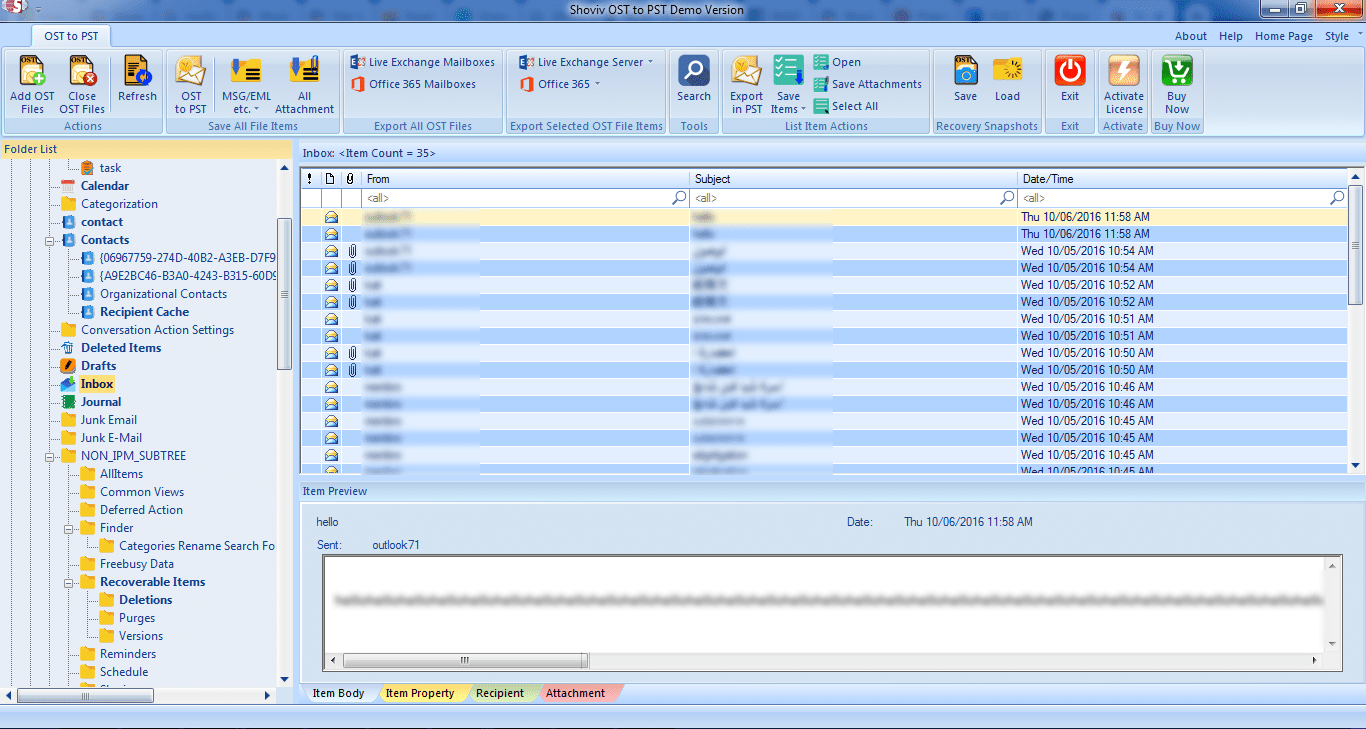
- Now, the user will able to see the content of OST file.

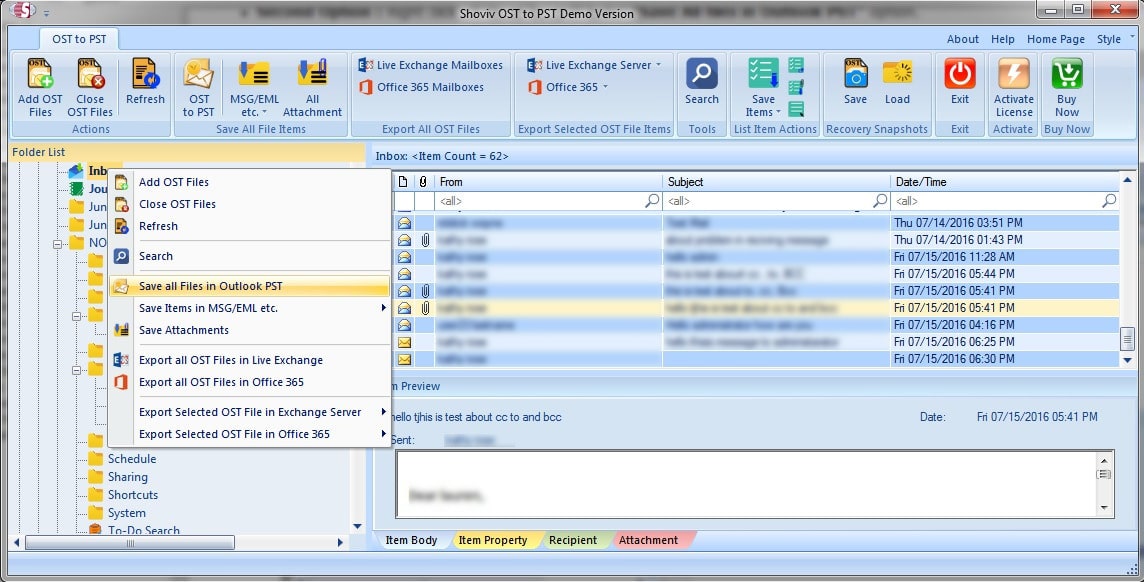
- Select the required OST file and choose to save all files in Outlook PST option.

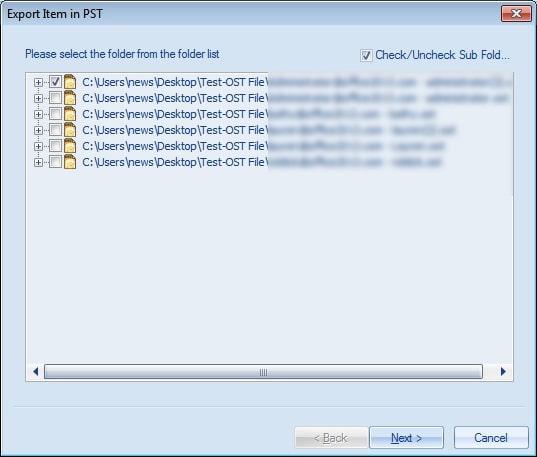
- Now, one can also check/uncheck for the subfolders as per the requirement and then, click on “Next”.

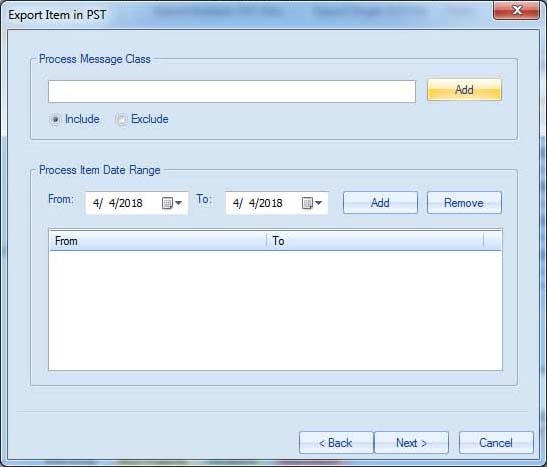
- Then, set the filter option either by choosing process message class or process item date Click on the Next.

- Choose the desired option to export the item in the existing PST or by creating new PST. Click “Next”.
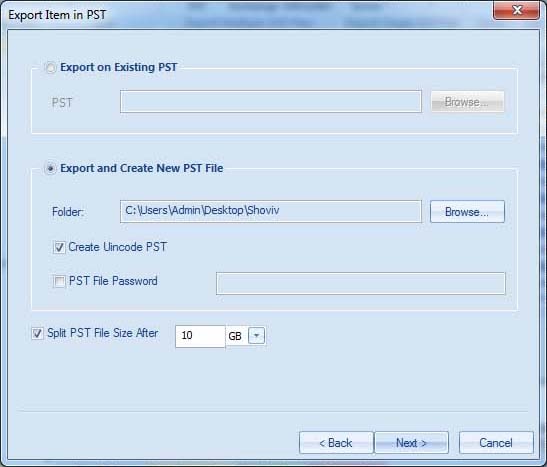
Note:-One can also set a password in the new PST file and furthermore, can set the size limit of resultant PST to convert it into small batches.
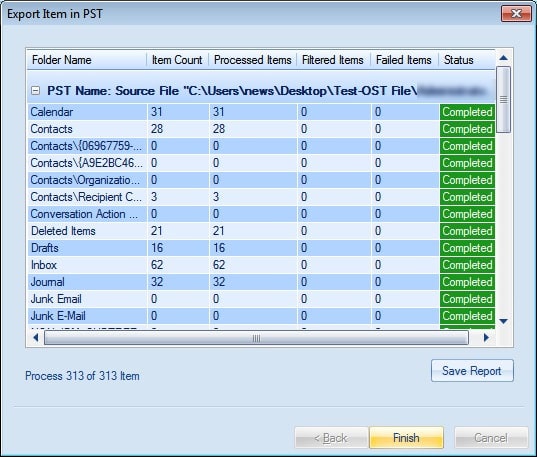
- Here, the process gets completed successfully.
From the above discussion, it is clear that risky, unreliable and lengthy manual method is not fit for converting OST to PST. Therefore, the article provides an automated, professional best solution to convert OST to PST.