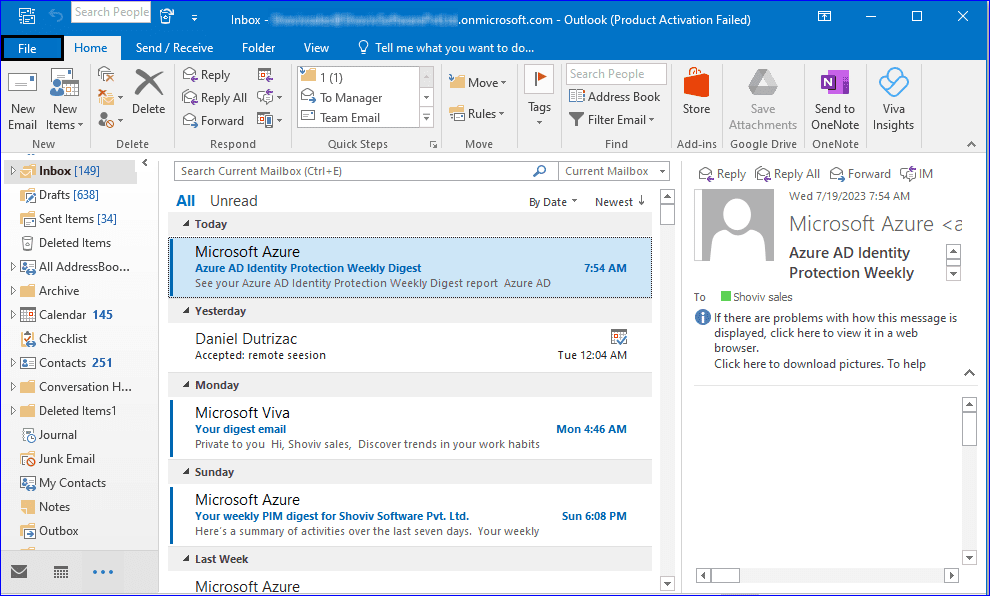
There are times when you need to get a list of emails either stored in your mailbox or some other subscribed account. In case you are an online marketing professional or a salesman, you might have a long list of client emails that you need to export emails from Outlook 365 to hard drive.
This blog is meant to help users who handle Outlook 365 and want to save emails from Outlook 365. Whether you want to export all emails or a particular folder like inbox or sent items, we’ll walk through the steps and provide useful insights along the way. This blog is written easy to follow, with screenshots of each step. Firstly, let me briefly explain what Outlook 365 is because many users are still confused between Outlook and Outlook 365.
Outlook 365: An Introduction
We all have used Outlook, a simple but effective email client that offers several features and uses OST&PST file format to store data. But when we talk about Outlook 365, it gets a bit different; Outlook 365 is an Outlook version that comes with Office 365 and stores data on the cloud.
The thing is, we cannot access multiple accounts in Outlook 365 as it, by default, gets login when we access our Office 365 account. Also, there is no inbuilt import/export utility to export Outlook 365 into the hard disk.
Instant Solution to Backup/Export Emails from Microsoft Outlook 365 mailbox to Local storage.
Downlaod a free trial version of Shoviv Office 365 backup tool and start your Outlook 365
export process.
Time Tested Ways to Download Emails from Outlook 365
We all are aware, Office 365 doesn’t have any inbuilt utility to save emails from Outlook 365 to hard drive. However, we can create an Outlook profile of the Office 365 mailbox on a desktop variant of Outlook and then utilize the import/export wizard to export data into PST format. Apart from this, users can export emails from Outlook 365 to hard drive in HTML format by using save as an option. Below is the step-by-step process to export Outlook 365 emails into the hard drive for free.
Outlook’s Utility to Export Outlook 365 emails in bulk
- Open Outlook and make sure that the Office 365 account is configured. If not, then configure.
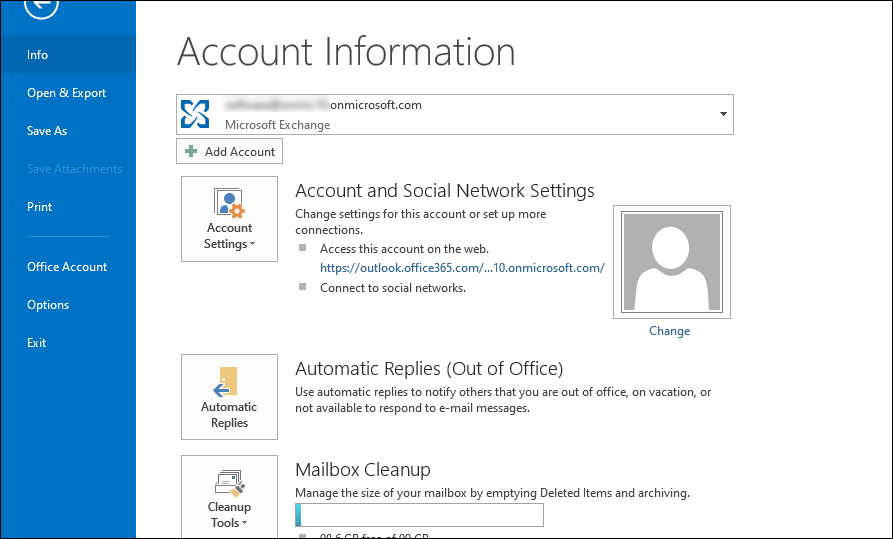
- Now click on the File tab present on the left of the ribbon bar.
- Click on Open and Export >>Import/Export.
- Then go to the File option and click Open & Export.
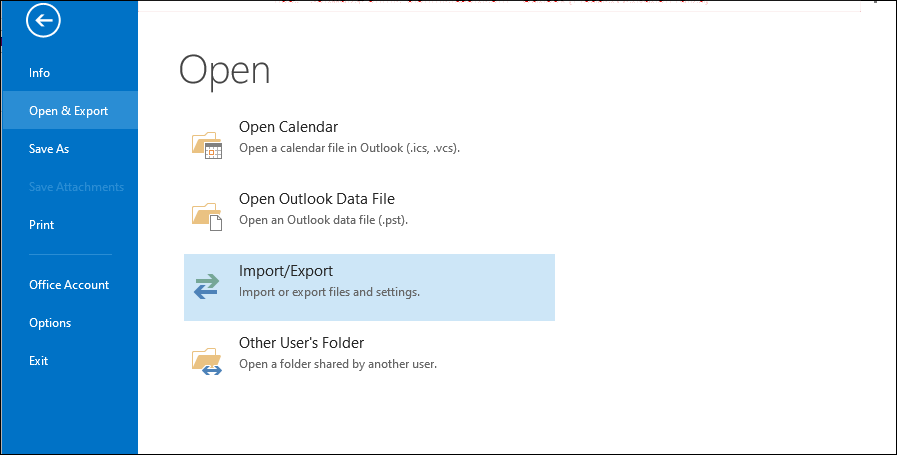
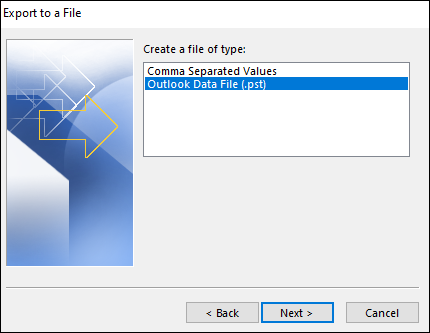
- Here, select Export to a file and click on Next.
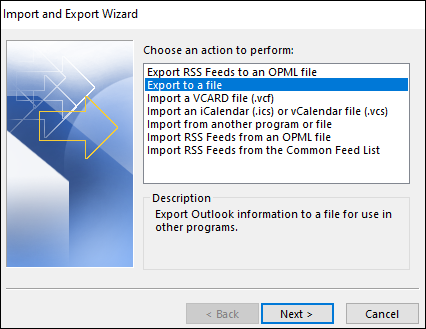
- Go to the Outlook data file (.pst) option and click Next.
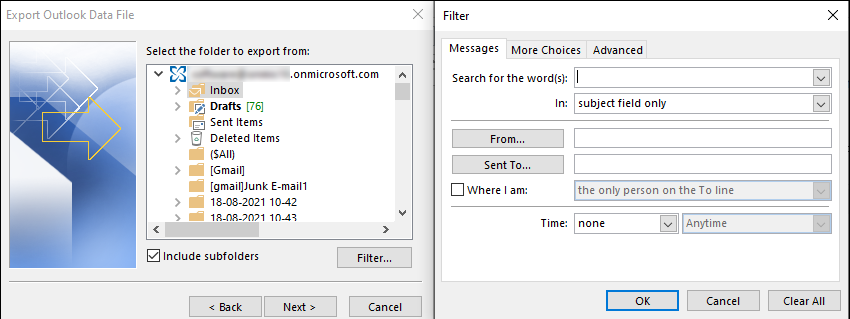
- Choose the folder/mailbox to export and use filter options if needed.
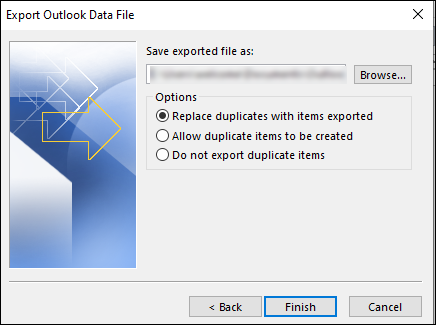
- At last, browse a folder to save emails from Outlook 365 to local storage and click Finish.
It is the process; you might have used this one before and might be aware of the limitations, like repeating the task repeatedly, tediousness, and technically complex steps.
Let’s move to the second option, which will download your Outlook 365 single email into HTML/MSG/TXT/OFT file format.
Export Outlook 365 single email into HTML/MSG file
-
- Open Outlook 365 profile and select the email to export.

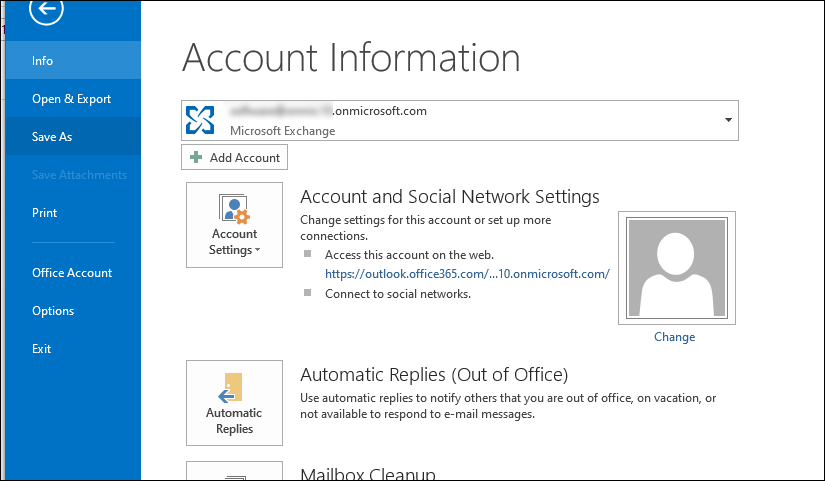
- Now Go to the File option and click Save As.

- Browse the location and pick a file format to save the O365 email.
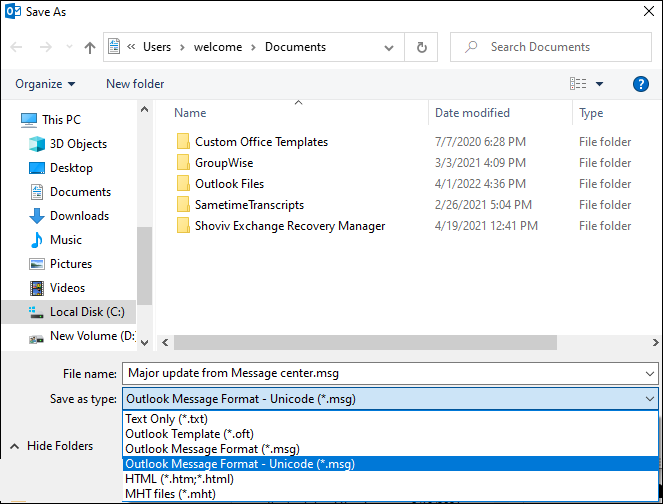
It is quite a simple process, but as you can see, it exports a single Outlook email at a time, which makes it a lengthy and repeated process. But if you only want to export a single email to share it with someone, then it is the ideal way for you.
Apart from these two methods, one can use a third-party tool named Shoviv Office 365 backup and restore tool. It is an automated tool that offers several advanced features and allows users to schedule their Outlook 365 export/backup for a specific period. Before diving into its features, let’s look at its process.
Steps to Export Emails from Office 365 on Outlook:
- Run the Shoviv Office 365 Backup and Restore tool.
- Connect to Office 365 and Add O365 mailbox.
- Click the backup directory to choose Target Location.
- Create a backup job & select Outlook 365 mailbox.
- Run Backup job to finish Exporting emails from Outlook 365.
Here the process will start, and the software will display a live log report to you where you can monitor the process.
Persuasive reasons to pick the automated solution for Outlook 365 export
- Schedule Outlook 365 export: As mentioned above, the software allows users to schedule their export process on a daily, weekly, and monthly basis. It will provide you with rid of remembering the export process, and the software will automatically save emails from Outlook 365 to hard drive.
- One-time connection: No one wants to repeat the same process repeatedly, and Shoviv knows that. Our software needs only a one-time connection, and you can start and stop the process anytime from the dashboard.
- Safest technology for confidential data: The Shoviv Office 365 backup and restore tool is an automated tool that doesn’t require additional software installation. Also, you don’t even need to share your credentials with anyone, which makes it a secure approach for confidential data.
- Default Incremental: Process interruption can be the worst scenario during the export, and several instances can make it happen. Shoviv has embedded a by default incremental export option in the tool that allows users to resume the interrupted process without any hassle and without repeating the already processed items.
- No risk of data loss and human error: The software is an automated tool, and after scheduling the process, you don’t even need to open the tool. It will automatically export emails from Outlook 365 to a hard disk and completely eliminates the risk of data loss and human error.
Conclusion
Exporting Outlook 365 emails is the hottest trend in the market, and several users are seeking a way for the same. Here I’ve described all the possible solutions, and now it is up to you what you prefer. For a better and more reliable process, it is suggested to go with the Shoviv Office 365 backup and restore tool.