Need to move your Microsoft 365 data offline? This guide breaks down the most reliable methods to export an Exchange Online mailbox to PST. Whether you are managing offboarding, preparing for legal eDiscovery, or simply creating a local archive, moving cloud data to a PST format can be tricky.
This guide breaks down the most effective methods for backing up your data, ensuring you have a clear path forward regardless of your technical setup.
In this article, you will learn:
- The “Why”: Common scenarios and compliance reasons for backing up M365 mailboxes.
- Native Methods: How to use the Microsoft Purview (eDiscovery) portal to generate PSTs.
- Advanced Solutions: A look at more efficient, automated tools for when the manual process becomes too time-consuming.
Why this matters
Microsoft 365 is powerful, but it doesn’t offer a simple “Export to PST” button like the legacy Outlook clients of the past. We evaluate the standard native approaches alongside automated solutions that can save you hours of manual configuration.
Whether you’re an IT admin or a power user, this write-up provides the clarity you need to keep your data accessible and secure.
Common Reasons to Export PST from Exchange Online Mailboxes:
Multiple reasons initiate users to export their exchange online data to PST format. Understand the cause before you learn how to back up mailboxes to PST in Microsoft 365. Let’s start:
- If any organization wants to keep a backup of their data to avoid future mishaps, they export PST from exchange online (Microsoft 365) Mailboxes.
- The backup keeps a copy of the exchange online mailboxes that are helpful in accidental data loss situations, virus attacks, etc.
- PST files are easily portable, so to make data movable to another system, users export exchange online mailbox to PST format.
- If you do Exchange export mailbox to PST, it will also help to reduce the size of the mailbox.
Users could have more reasons; they want to back up the exchange online mailbox to PST file format. Now, we will learn the techniques to quickly complete this process.
Effortlessly Export Your Mailboxes from Exchange Online to PST file. Use the Shoviv Office 365 backup and restore Tool. This software is highly recommended by MVPs and tech experts.
Ways to Export PST from Exchange Online in Microsoft 365
Here, we will learn about the available possible ways to export entire exchange online mailboxes. We simplify the manual methods like eDiscovery Content Search, Outlook Native Import Export Wizard, PowerShell Commands and using a Professional third-party software.
Let’s know the working of each methods to export exchange Online mailboxes to PST one by one.
Method 1: Export Mailbox to PST from Exchange Online Using eDiscovery:
Here, we will share the steps to export the mailbox to PST format in Microsoft 365 using the eDiscovery export method. In this method, we will create a Content search that will include the entire mail of the user. After that, we will move the result into PST format using the eDiscovery.
- Open the Office 365 login page and log in with your account and password.
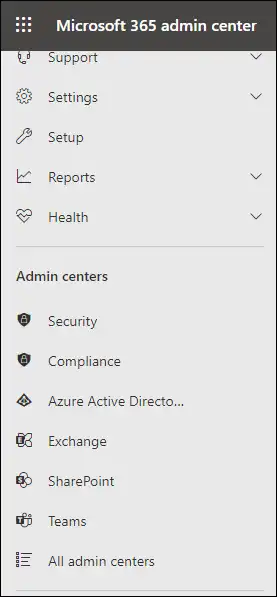
- Now, open the Microsoft 365 Admin Centre and hit the Security option.
In the menu click on Compliance to open the Compliance Admin Center.
- Navigate to the Permissions tab and select the eDiscovery Manager from the options.
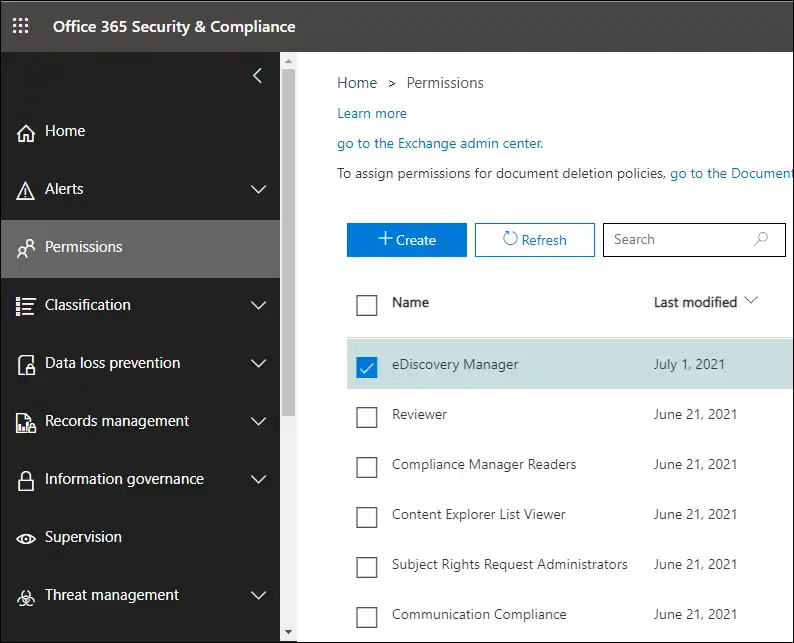
- Then tap on the edit button.
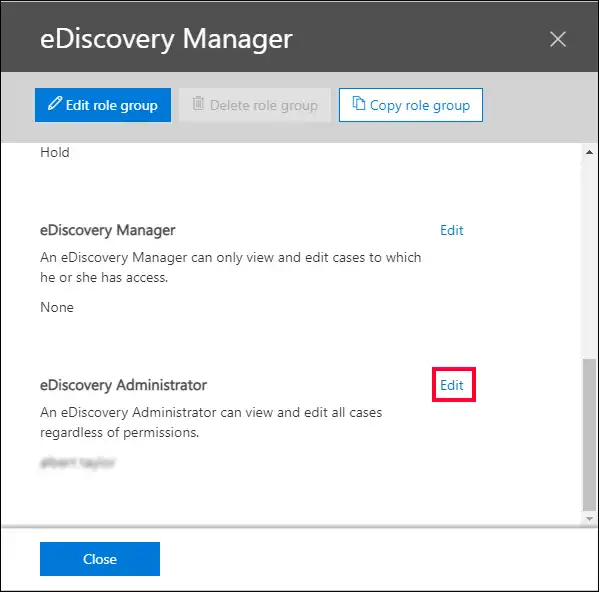
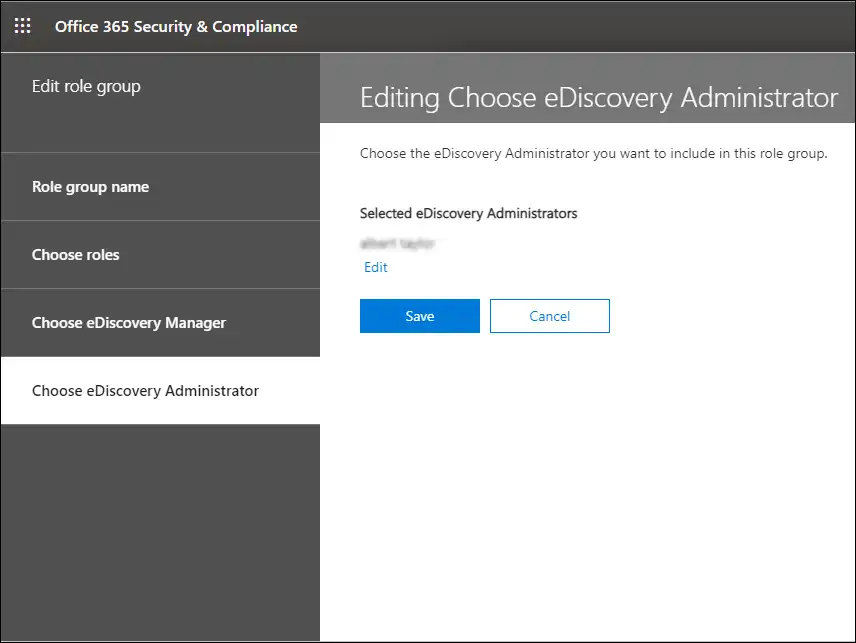
- Go with the Choose eDiscovery Administrator and press the Save button.
Create Content search to export PST from Exchange Online Mailbox:
In the next steps, we will create a content search to collect all the user’s emails. To do this first open the Microsoft 365 Compliance Center.
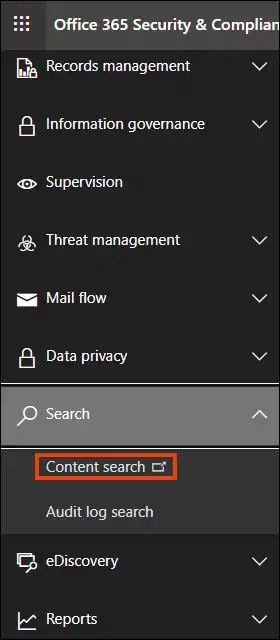
- Navigate to the Search option and click on the Content search.
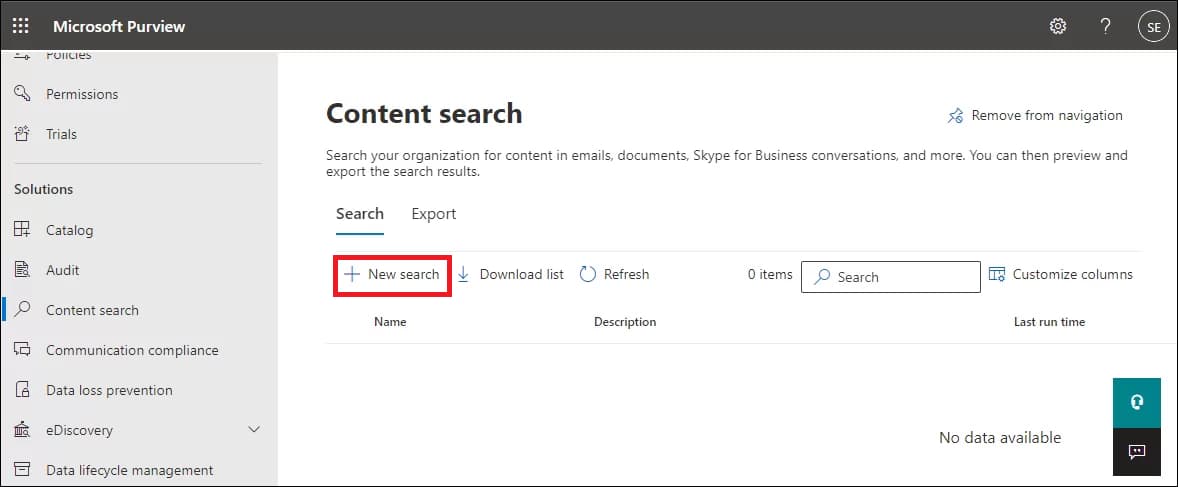
- Now, tap the New Search button to create a new search.
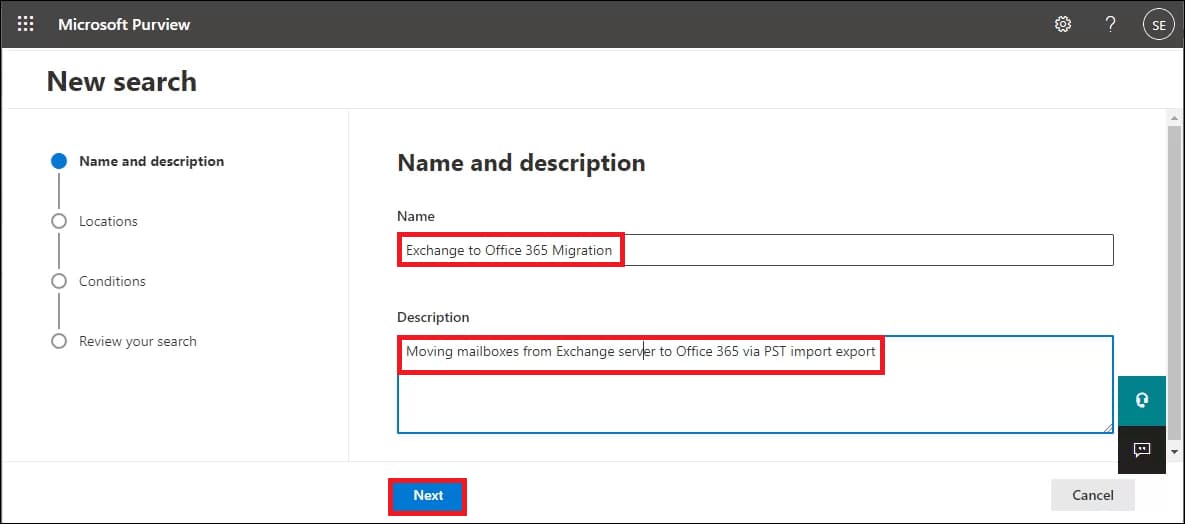
- Provide the name and description for your new search and press the Next button.
- Make the selection for the mailbox you want to export into the PST file format.
- After that, add the conditions as per the requirements.
- Review your search settings and press the Submit button.
- Go to the search list and opt for your search. Then, click on the Action.
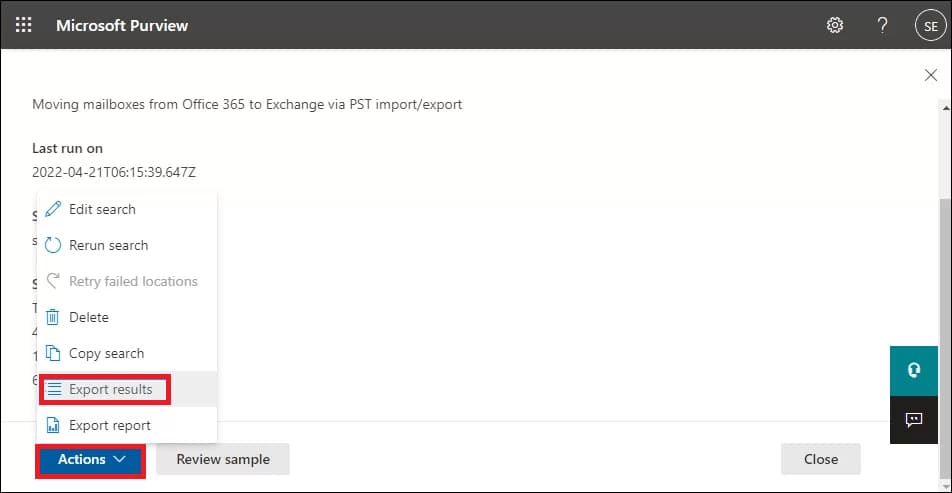
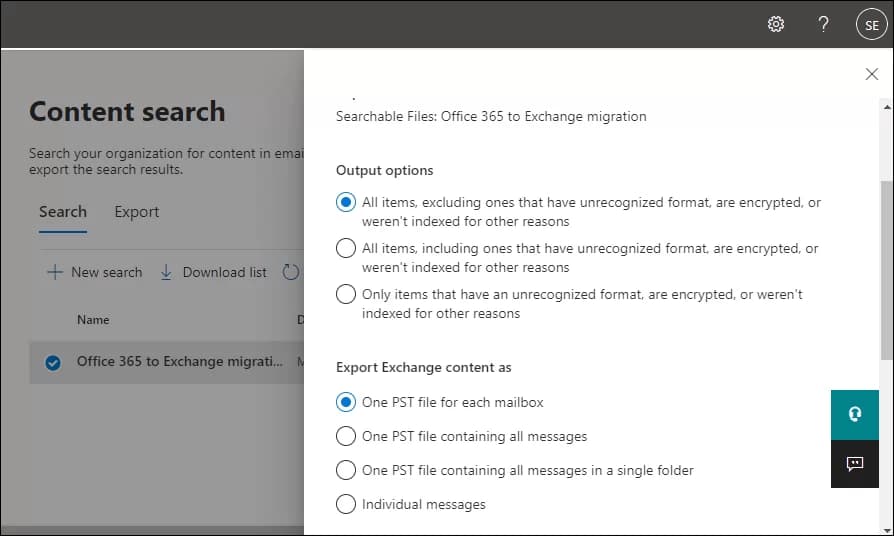
- Navigate to the Export result option, select your Output, and then hit the Export button.
- From the Export tab, choose your last export and tap on the Download results.
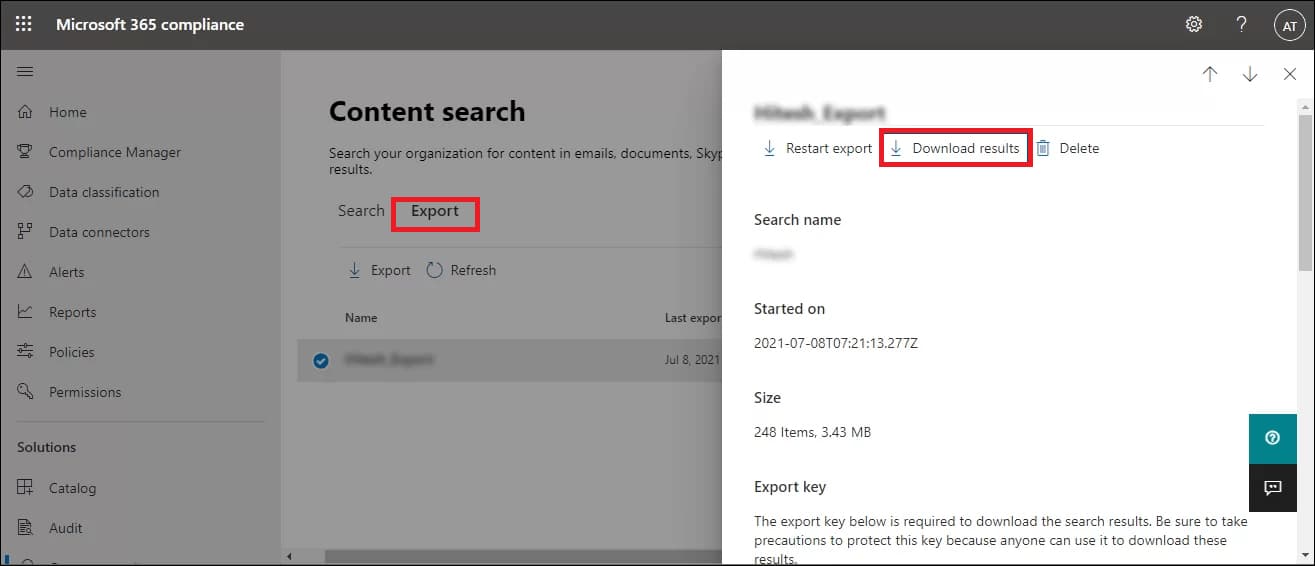
- Scroll through the page and copy the Export key.
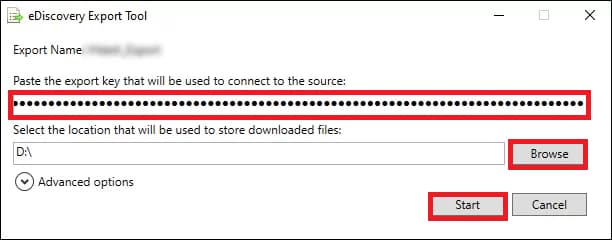
- The eDiscovery Tool will be opened. Then, paste the copied key and hit browse to select the location to save the PST file.
- Finally, click the Start button to export Office 365 mailbox to PST format.
Method 2: Export Exchange Online Mailbox via Outlook Application
Exporting an Exchange Online (Microsoft 365) mailbox to PST using the Outlook Desktop application is a built-in feature of Outlook. The process involves adding the Exchange account to Outlook and then using the Import/Export wizard to create a PST file.
Below is the complete step-by-step process.
1. Add Exchange Online Mailbox to Outlook Desktop
Before exporting, make sure the mailbox is configured in Outlook.
Follow the below Steps:
- Open Microsoft Outlook Desktop.
- Go to File → Add Account.
- Enter the Exchange Online email address.
- Click Connect.
- Enter the Microsoft 365 password and complete authentication.
- After setup, Outlook will start synchronizing the mailbox.
Important Note: Wait until the mailbox fully syncs with Outlook; otherwise, some emails may not export.
2. Open the Import/Export Wizard
Now start the PST export process.
Follow these Steps:
- Open Outlook.
- Click File in the top menu.
- Select Open & Export.
- Click Import/Export.
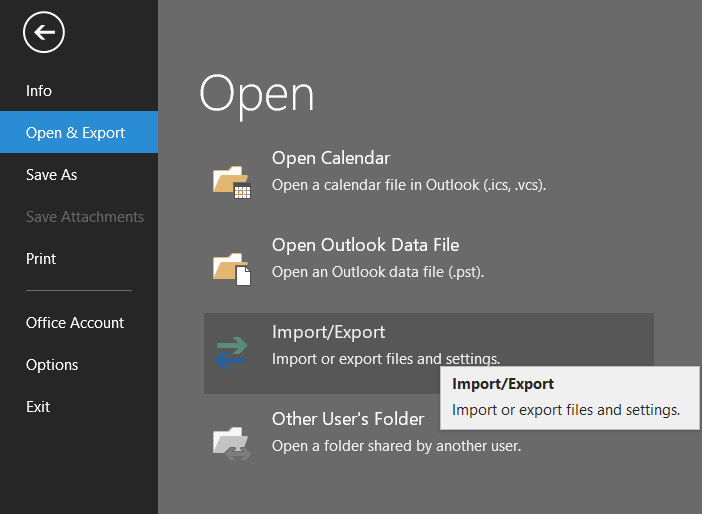
This will open the Import and Export Wizard.
3. Select Export to a File
- In the wizard, choose Export to a file.
- Click Next.

4. Choose PST Format
- Select Outlook Data File (.pst).
- Click Next.
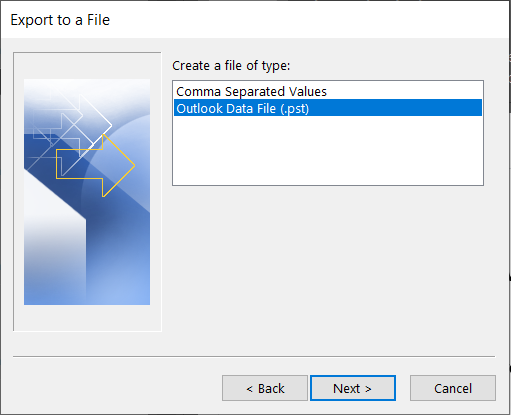
PST is the file format used by Outlook for exporting mailbox data.
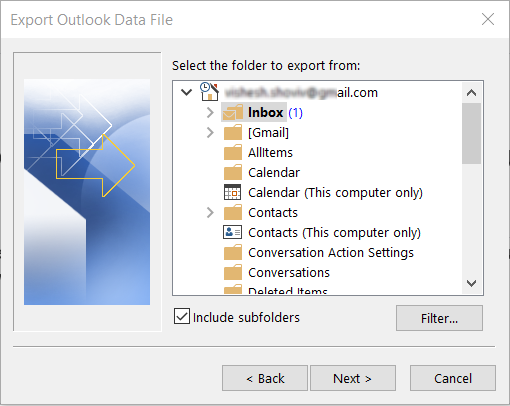
5. Select Mailbox Folder to Export
- Select the mailbox or specific folder you want to export.
- If exporting the entire mailbox, select the email address at the top.
- Check Include subfolders.
- Click Next.
6. Choose PST File Location
Options available:
- Click Browse.
- Select the location where the PST file will be saved.
- Enter a file name.
- Choose how Outlook should handle duplicates:

- Replace duplicates with items exported
- Allow duplicates to be created
- Do not export duplicate items
- Click Finish.
7. (Optional) Add PST Password
Outlook may prompt you to:
- Add a password to the PST file
You can either:
- Set a password, or
- Leave it blank and click OK
8. Export Process Starts
Outlook will begin exporting the mailbox.
The time required depends on:
- Mailbox size
- Internet speed
- System performance
Once completed, the PST file will be saved to the selected location.
Method 3: Using PowerShell to Export Entire Exchange Mailbox into PST
If you’ve been looking for a simple Export-Mailbox command for Exchange Online, I have some news: Microsoft doesn’t make it quite that easy. Unlike on-premises Exchange, you can’t just export a mailbox to a local drive with a single PowerShell command.
In the Microsoft 365 environment, exporting to PST is handled through Microsoft Purview eDiscovery. You’ll use PowerShell to do the “heavy lifting” (creating the search and the export request), but you’ll still need the eDiscovery Export Tool to actually download the file.
Here is the straightforward way to get it done using a mix of PowerShell and Purview.
Phase 1: The PowerShell Setup
First, you need to create the search and generate the export package.
- Connect to Security & Compliance PowerShell:
Connect-IPPSSession- Create the Content Search:
Replace the placeholders with your specific details.
New-ComplianceSearch -Name "MailboxExport_UserA" -ExchangeLocation "user@domain.com" -ContentMatchQuery "(kind=email)" Start-ComplianceSearch -Identity "MailboxExport_UserA"- Create the Export Action:
Once the search finishes, trigger the export.
New-ComplianceSearchAction -SearchName "MailboxExport_UserA" -ExportPhase 2: Grabbing the Download Key
To get the PST onto your machine, you need the unique “Export Token” generated by Microsoft.
- Run this to find your status and the container URL:
Get-ComplianceSearchAction -Identity "MailboxExport_UserA_Export" | Format-ListPhase 3: The “Human” Part (Downloading)
Since PowerShell can’t physically stream the PST to your hard drive in Exchange Online, you’ll need to:
- Open the Microsoft Purview compliance portal.
- Navigate to eDiscovery > Standard.
- Find your search, click Exports, and select your job.
- Copy the Export Key and click Download Results. This will launch the eDiscovery Export Tool where you’ll paste the key and choose your save location.
Why do Professionals Not Prefer the Manaul Methods?
Users must be aware of the difficulties they face while exporting mailboxes using the manual method. Read the bullet points below to understand the manual method’s limitations in backing up Exchange Online to PST file format.
- Users can’t move forward with exporting selective data, such as emails, contacts, and calendars.
- The eDiscovery method takes a long time to Exchange Online export mailbox to PST.
- It always has a high chance of data loss and human error.
- The folder hierarchy and metadata may change while processing this task with the help of the manual method.
- Users must be technical savvy if they want to export Microsoft 365 mailbox to PST format using this manual method.
- Manual process is not ideal for multiple mailboxes if you choose export via Outlook native Import/Export.
Method 4: Using Shoviv Office 365 Backup & Restore Tool
Shoviv Office 365 Backup and Restore software is helpful for users who use Microsoft 365. It allows users to easily create backups of their Office 365 data in file formats like PST, MBOX, EML, MSG, and MHT. They can also restore data from these file formats to Office 365. Exporting mailboxes to PST in Exchange Online becomes effortless for users with this software.
Apart from Exchange online export mailbox to PST i.e., Microsoft 365 Mailbox, this software also does the import of PST files into the Office 365 mailbox.
This software is a user-friendly and reliable solution for users who must perform an Exchange Online export to PST format. The next section will list the steps to complete this exporting procedure. So, carefully review all the steps and understand how this software works.
Quick Steps to Export Exchange Online Mailbox to PST
- Run the Shoviv Office 365 Backup and Restore tool.
- Create a Connection to your Microsoft 365 Account.
- Select a Backup path to create the backup directory.
- Pick your desired mailboxes to create a backup job.
- Start Exporting M365 to PST by running the backup job.
Also Read: How to Back up Office 365 Emails?
Wrapping Up:
We have discussed the reasons and solutions to safely execute the export from Microsoft 365 Exchange Online Mailboxes to PST file format. The above-mentioned write-up has provided four methods to back up exchange online to PST file format: manual and professional. In sum, we suggest users use the Shoviv Office 365 Backup and Restore Tool for an easy and secure process. Users can also check all features of this software by downloading its free trial version. This demo version enables users to back up the first 50 items per folder of the Microsoft 365 mailboxes.
Frequently Asked Questions:
A: Follow these Steps:
– Preview the mailbox items after adding them to the software.
– Use the filter option to remove unwanted items from the mailboxes.
– You can control the failed items count to save your maximum time.
– One can also set the thread count to speed up the process.
A. You can export the specific folders from exchange online mailboxes to PST using Shoviv Software. It provides a filter option that will enable you to select a specific folder to export in PST format.
A. No, you don’t need to start from scratch. This professional utility is boosted with the incremental export facility that resumes the process, prevents duplicity, and saves time.
A. You should contact Shoviv’s technical support team, which is 24*7 available to assist you. You can contact us through live chat/ by emailing support@shoviv.com or by calling the phone number on the Contact Us page.