Summary: “Public Folders and Shared mailboxes are essential parts of email management within an organization for data sharing, collaboration, and accessibility to the team. If you are willing to migrate Public Folders to Office 365 mailboxes, whether shared or general, here is the solution“
But before discussing the migration methodology, let’s talk about Office 365 and why it is so popular among users. Office 365 is a cloud-based service that Microsoft offers to users. It provides a wide variety of products. Users can easily access it from anywhere and anytime.
Moreover, it also includes desktop applications for users to make their work easier. Regarding the pricing of Office 365, it has various subscription plans for individuals and enterprises. In this write-up, we will introduce you to the methods to export Exchange public folders to Office 365 environment. We will introduce the manual and professional approaches to complete the migration job.
Manual Solution to Migrate Exchange Public Folders to Shared Mailbox
Users need proper planning before processing this migration task. If you make any mistake, you may lose your data permanently. If we talk about the manual method, there are two ways to migrate public folders to M365. Moreover, the manual process is free of cost for the users. Let’s elaborate on both ways to perform it.
Way 1: By using the script of the Microsoft Public folder migration
Step 1: First, you have to download the public folder migration script, which you can download from Microsoft’s official website.
Simple steps to download the Microsoft public folder migration script
- Go to the official website of Microsoft.
- Open the Download center tab on your screen.
- After that, you can directly download it.
Step 2: Save the script to the local storage where you want to run the power shell.
Step 3: You must download the Mail-enabled Public Folders – directory sync script.
Step 4: At last, download the Sourcesidevalidationps1. And save it where you saved all earlier scripts.
Step 5: Run the Sourcesidevalidationps1 script into the Power shell. It helps to scan the Exchange and detect the issues if any.
Step 6: Fix the issue if any issue is detected during the scan of Exchange.
Step 7: Check it for the duplicate public folder and corrupted ones.
Step 8: Check your SMTP email address before processing the public folders to Office 365 migration task.
It’s time to follow Microsoft suggested reference library guide, which is available on the official website of Microsoft.
Way 2: Through Microsoft Outlook
In this way, you have to use the Outlook import export wizard, which helps to export exchange public folders to Outlook PST file format.
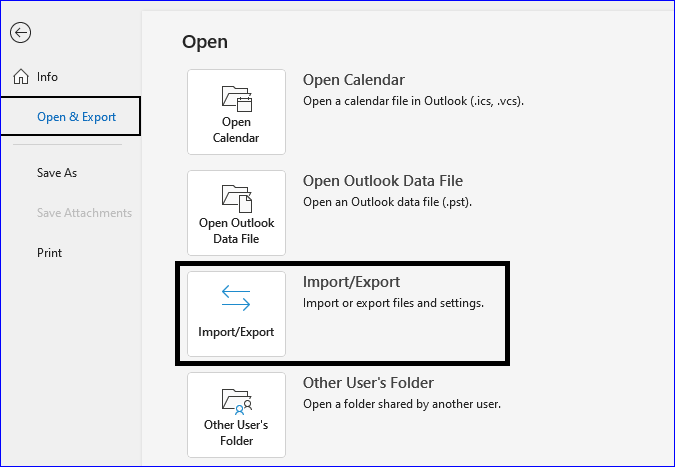
Step 1: Open Outlook on your system and click on the open tab.
Step 2: Now, select the import/export option.
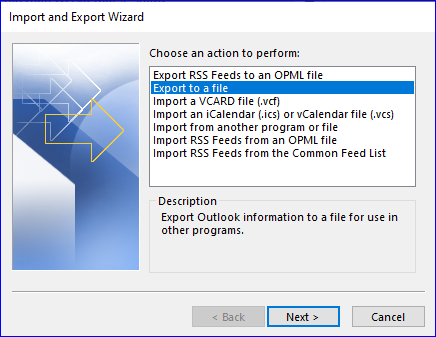
Step 3: Tap on the export to a file option and then click on the next.
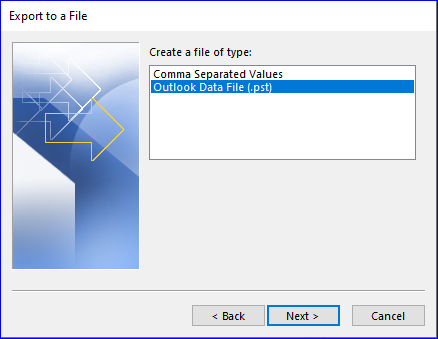
Step 4: In the next step, select the Outlook data file (.pst) and click on the next.
Step 5: Select the public folder from the list and if you want to select the subfolders, then click the checkbox.
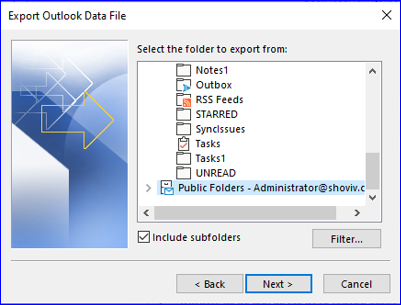
Step 6: You must browse the location where you want to export Exchange public folders to PST file format.
Time to import the exported PST file into Office 365. For this, you have to follow the below steps.
- Firstly, you have to download the public folder migration script.
- Now run that script to generate a CSV file.
- Select the map source public folders to Office 365.
- Now you need to create a public folder in Office 365 based on the mapping file.
- Create a public folder in every public folder mailbox with the help of the New-PublicFolder cmdlet.
- Open the Outlook import/export wizard to import the PST files into Office 365.
- You have to use Exchange Administration Center to allow the public folder permissions.
Limitation of the Manual Method to Export Exchange Public folders to Office 365
The manual method does not charge users any fee but has some drawbacks. It has limitations on adding multiple and large public folders. Moreover, it has a high chance of risks, and you know every user wants to migrate public folder to Office 365 without an error. Due to its technical interface, users need excellent technical knowledge to perform migration. In addition, the manual method is very time-consuming and lengthy for the users. Even technical users also face problems when they migrate public folders to Office 365 cloud service.
Most importantly, it doesn’t maintain the folder hierarchy and metaproperties of the data. In addition, users can lose their data permanently if any error happens. If you have time and excellent technical knowledge, use the manual method to migrate public folders to the Office 365 cloud-based service.
Need help with which way to go for the public folders to Office 365 migration? Don’t worry, as better alternatives are available to make your work easier.
Skip the troublesome manual method; Use Shoviv Exchange Server Tool
I’ll not suggest manual methods for non-technocrats, as a single wrong script may corrupt your public folder. One can use Shoviv Exchange Server Suite to migrate public folders to Office 365 cloud service. This software is the same as a mobile application; you can monitor everything in a single dashboard. Along with this, the software eliminates the risk of data loss and provides advanced features to enhance users’ experience.
Let’s talk about some advanced features of this software:
- This software has an incremental export option to resume the process where it was stopped. Also, it prohibits the chances of data duplicity.
- Moreover, it perfectly maintains the folder structure and integrity of the data, even after completing the public folders to Office 365 migration task.
- It has a search option to find the desired items in no time by adding specific field names.
- If we talk about its GUI, it is straightforward and easily understandable to every user. Even novice users can export a Public Folder to a Shared Mailbox without hassle.
- The preview option of this tool allows users to cross-check the added items before initiating the migration.
- This tool allows users to recover the EDB, PST, and OST files.
- A splitter option is also available to split the resulting PST file.
- Users can include or exclude the items before processing the public folders to Office 365 migration task.
- Moreover, users can export the public folders directly into the Live Exchange Server.
- There are no limitations on adding the numerous Exchange mailboxes.
A free trial version of this software is available, which users can download to check its functionality.
Migrate Public Folders to Shared Mailboxes without any risk of data loss:
- Firstly, install and open the software.
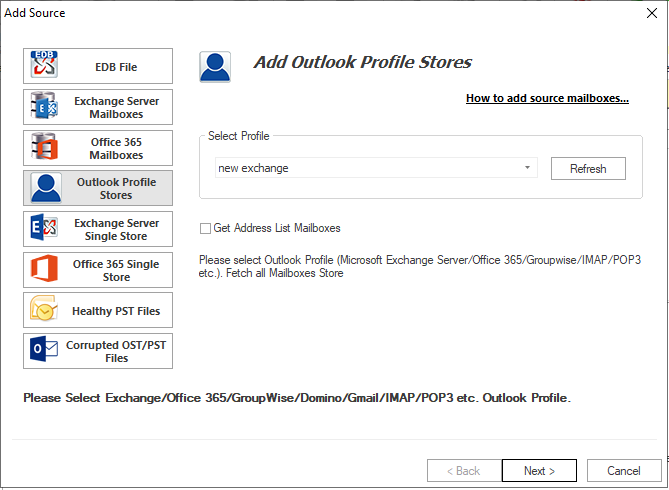
- To add the Exchange public folder, you need to click on Outlook Profile Stores. After that select the profile from the drop-down list. Once done then click on Next.
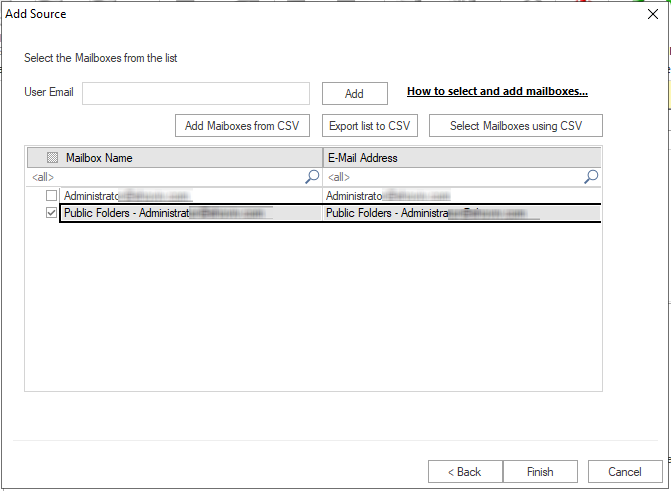
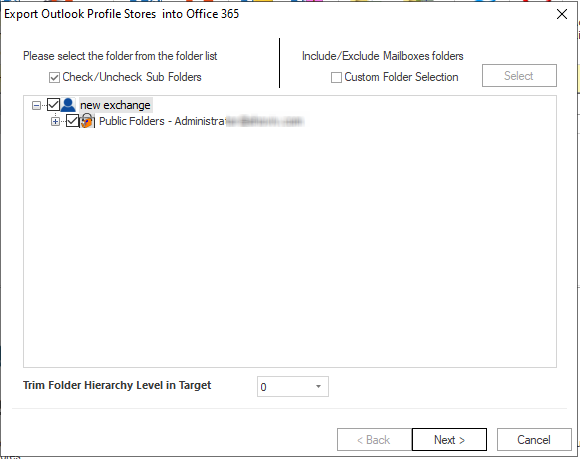
- Now the software displays the mailboxes where you need to select the public folder. Hit the Finish button to move ahead.
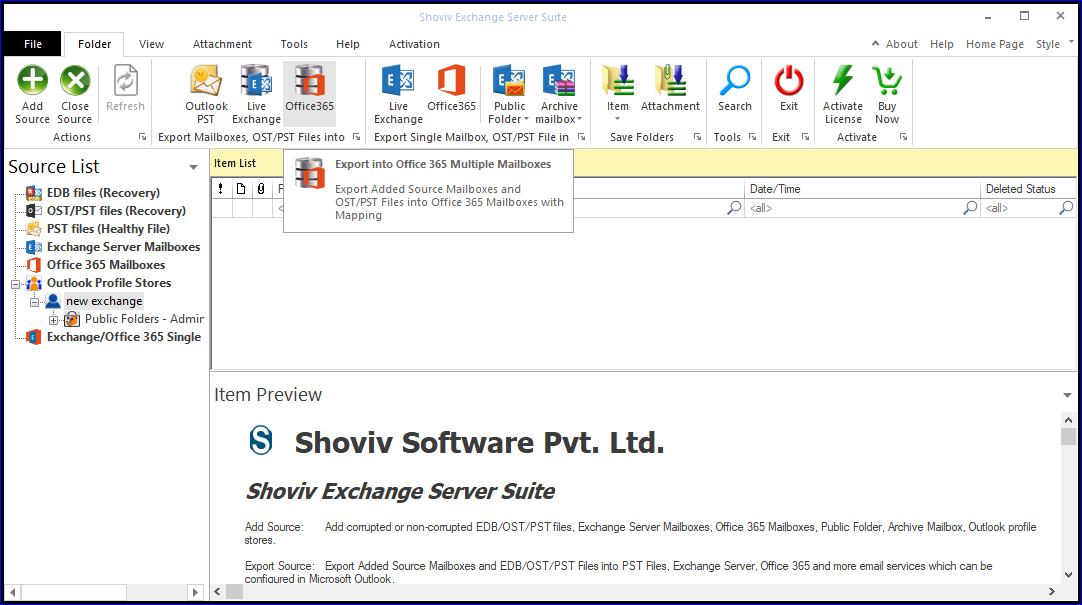
- After that, go to the ribbon bar and select Office 365 as target.
- Now check the subfolder checkbox to add the subfolders and click on next.
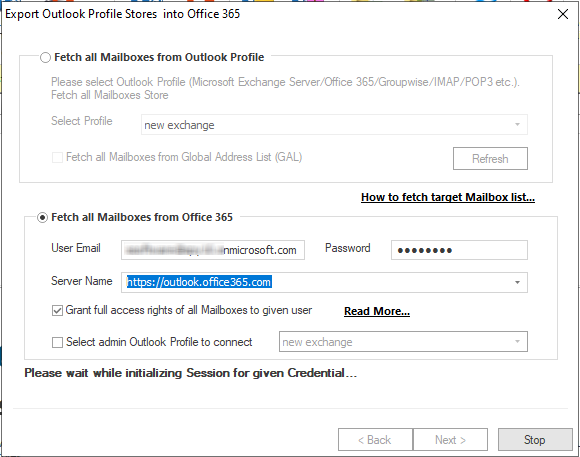
- You must mention your Office 365 account credentials, such as email id, server name, and password. Also, check the grant full access rights of all mailboxes option and then click on next.
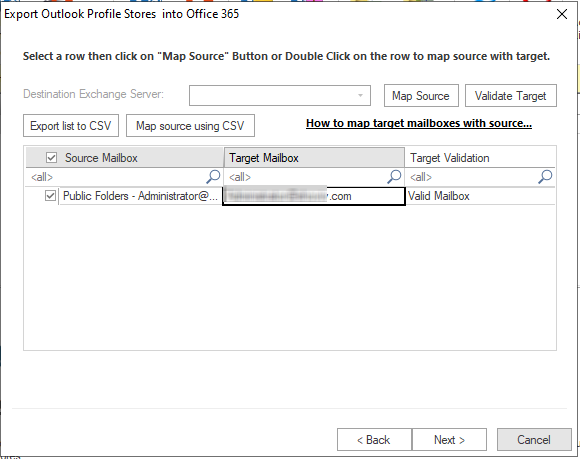
- From here, you can also map the source folder with the target. After that, you need to validate the target mailbox. Now press the Next button.
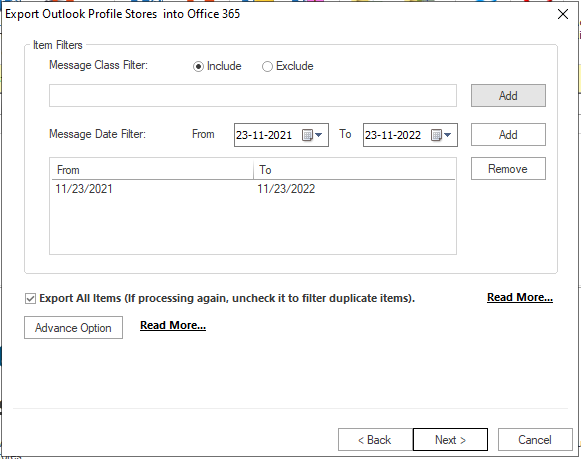
- Now use the filter option to include or exclude the desired items and click next.
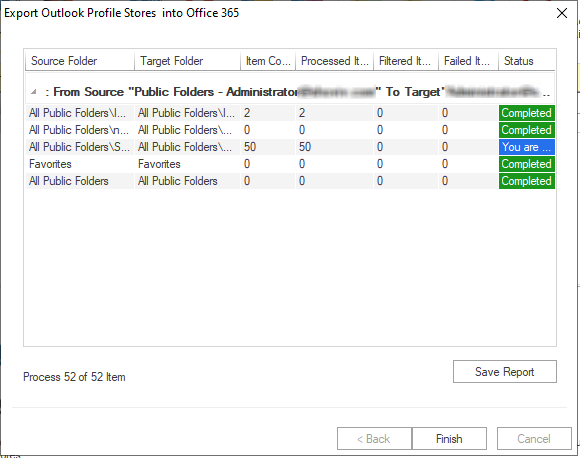
- This tool will start migrating the public folder, and a status report of the whole process will be displayed on your screen. Also, if you want to save this report, tap on the save report option and click on the finish button.
Conclusion
Manual Solution requires few permissions before launching the migration, whereas users do not need to take any permission to migrate public folders to Office 365 environment. Thus, third-party software eliminates the process, which takes a lot of time and provides quick results. Migrating public folders through a manual method is only some people’s cup of tea. Now it depends on the user’s mind which way they want to use to achieve this migration task. But with the Shoviv Exchange Server Suite, anyone can accomplish it.


Frequently Asked Questions:
You can simply migrate the Public Folder to the Office 365 shared mailbox using Shoviv Software. Along with this, you get multiple sources and targets to migrate.
Yes, you can have a demo of the Shoviv Exchange Server Suite. Simply install the tool and execute your migration task. The demo version is just a restricted version of the licensed one. The demo version only migrates the first fifty items per folder. In working, both are the same.
You can migrate corrupt PST data to Office 365 with the Shoviv Exchange Server Suite. Simply use the Corrupted OST/PST Files option on the Add Source wizard.
Shoviv Exchange Server Suite offers multiple targets, and Outlook PST file is one of them. You can easily back up your Office 365 mailboxes in the PST file format.