Office 365 to Exchange migration is not everyone’s cup of tea, especially if you don’t have any technical expertise or tech geek in your team. Some users get confused when they know users want to migrate office 365 to Exchange Server because Office 365 is a technology where most organizations head today for better productivity. Still, some users want to stay with the on-premises; don’t know why.
But unfortunately, there is no direct manual solution available for the Office migration into Exchange Server. Here I’ll tell you an approach to migrate your data into Exchange Server from Office 365.
Migrate Office 365 to Exchange via PST import/export
As I have stated above, there is no direct way for Office 365 to exchange migration, but I recently tried an indirect approach that works in my case. Below I’ve written the steps I took to shift my mailbox from Office 365.
I’ve divided the process into two phases, so it’ll be easy for everyone to understand the jargon. Let’s start:
Phase1: E-discovery to export Office 365 mailbox to PST
You might be aware of the e-discover or might have used that to backup Office 365 mailboxes to the local drive. Here we’ll do the same.
Step1: Add administrator and create a Search
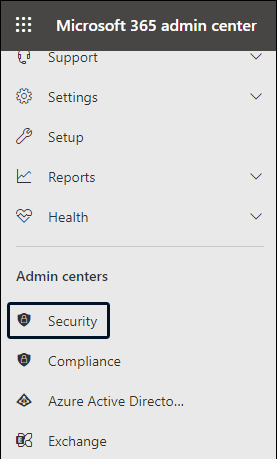
- Log in to your Office 365 account and navigate the Office 365 Admin center.
- Now, expand Office 35 admin center and click on the Security option from the left pane.
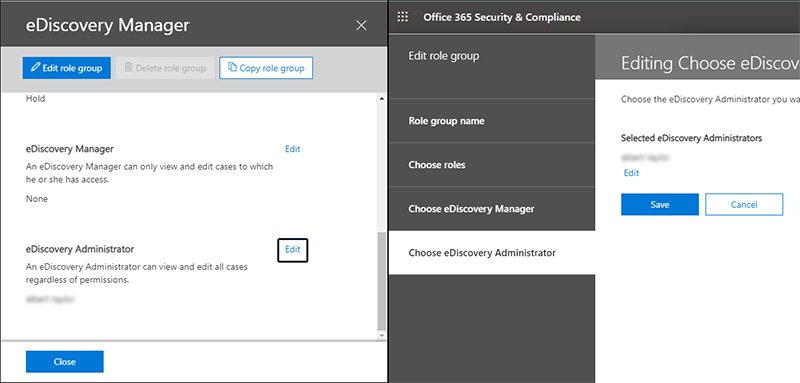
- Following, select Permission from the left pane and check the box adjacent to the e-Discovery Manager.
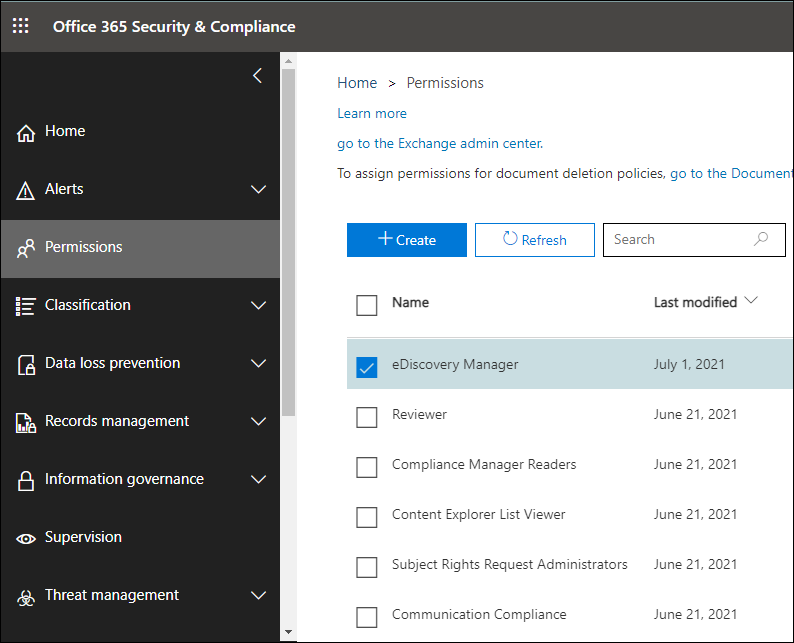
- In the eDiscovery wizard, click the Edit button adjacent to the eDiscovery Administrator and add your account to the Administrator list.
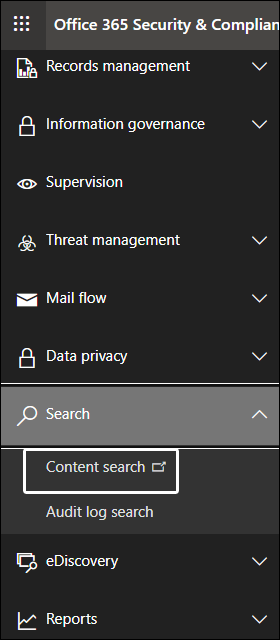
- Then, click Search from the left pane and chooseContent Search from the dropdown list.
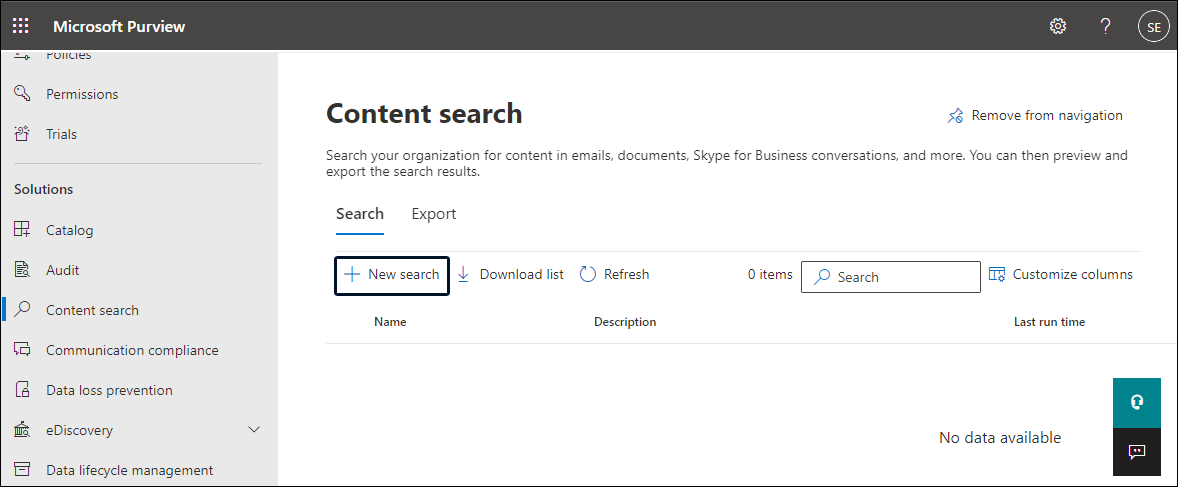
- In the content search window, click on the New Search
- Following provides the Name and Description, and choose the mailboxes you want to export into PST files. Also, if required, you can also apply conditions.
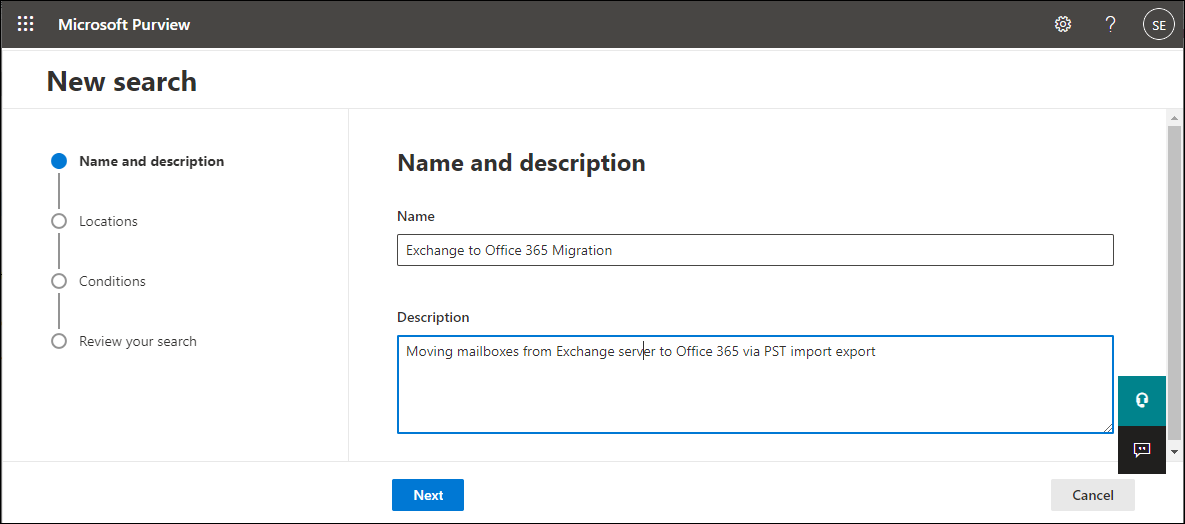
- At last, review your Search and click on the Next Here, you’ve successfully created the content search.
Step2: Export Mailboxes to PST
- Go back to the Search window and choose the last created Search from the Window.
- Then, click on the Actions and click Export result from the dropdown list.
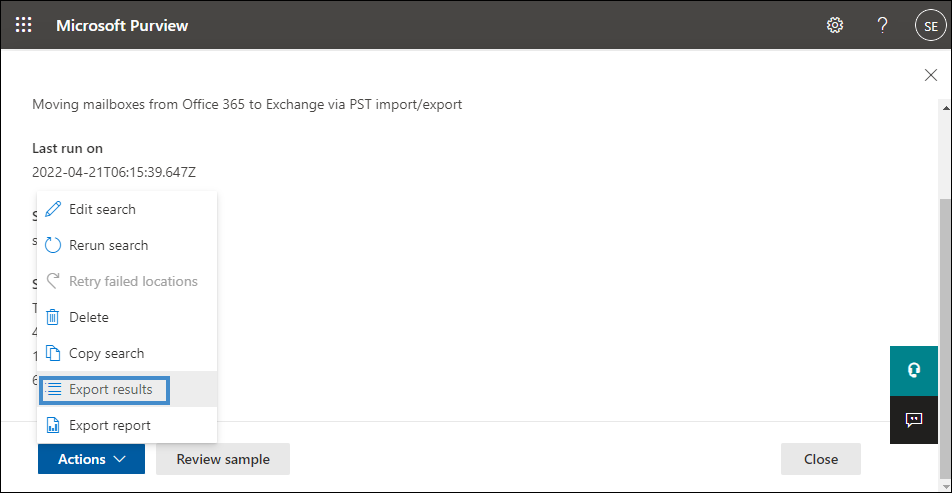
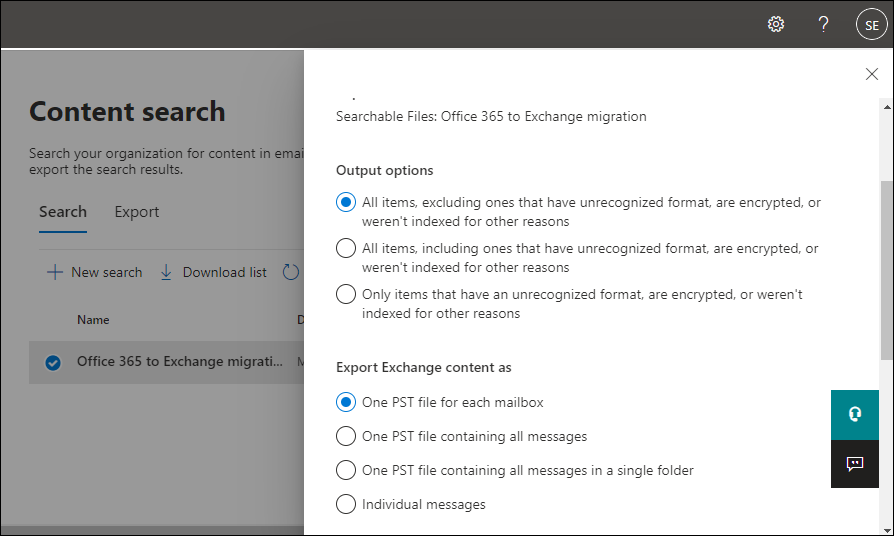
- In the following pop-up, you can choose Output options and other settings. Once done, click the Export.
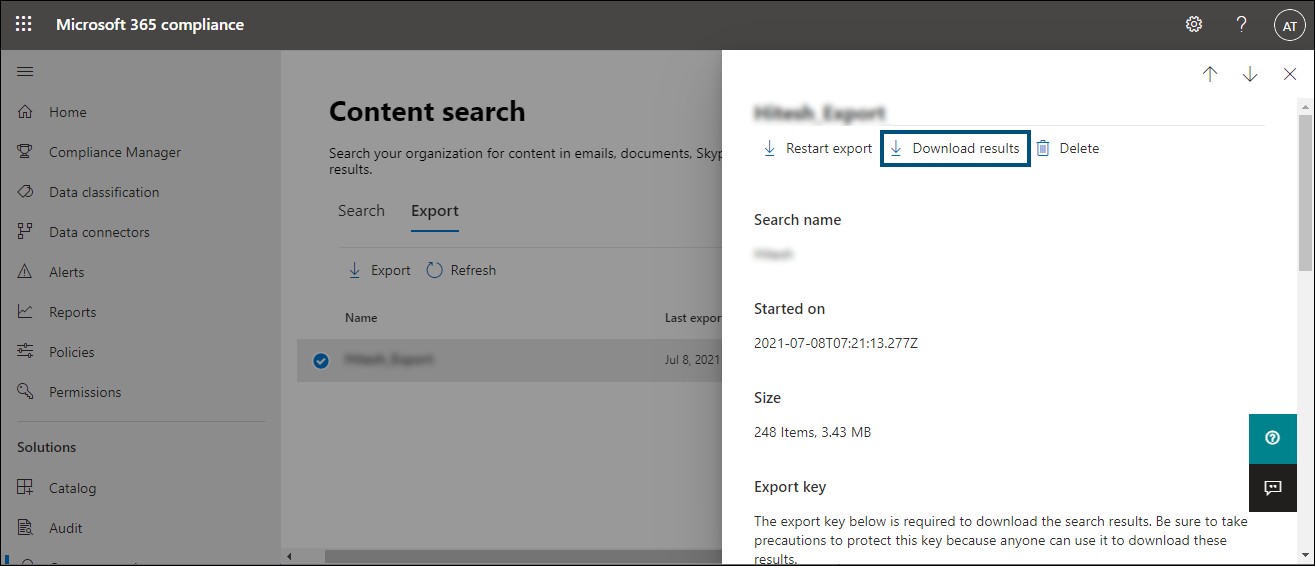
- Now, click the export option from the Search window, and choose your Search. In the following window, copy the export key and click the Download Results.
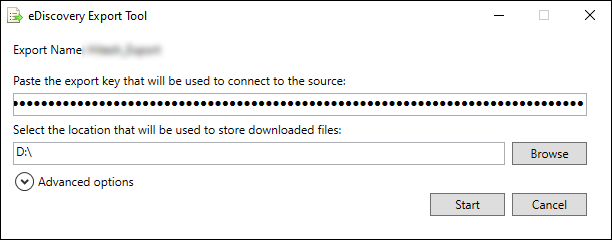
- Open the PST export tool downloaded in the previous step. Then, provide an export key and choose a location to save PST files.
This will import your Office 365 mailboxes into PST format. Now we’ve to export these PST files into Exchange mailboxes to migrate Office 365 to Exchange.
Phase2: Import PST to Exchange mailboxes
- Open Exchange admin center and go to the Recipients option from the left pane.
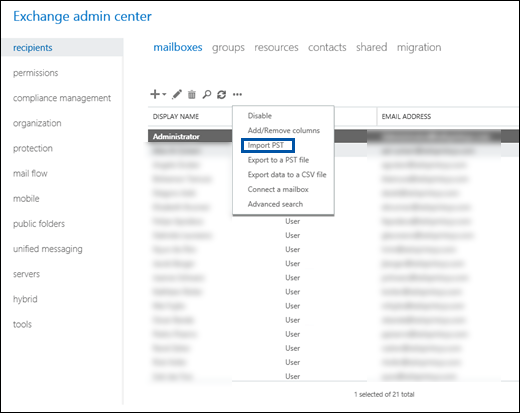
- Now click on the More(…) and select the import PST
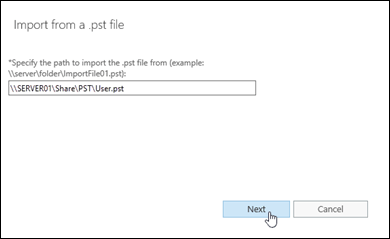
- Following, browse Office 365 PST files and click Next.
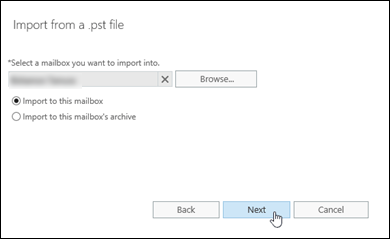
- In the next Window, select the Exchange mailbox where you want to import PST files and choose the appropriate option.
- At last, choose a mailbox where you will receive an email once the PST files get exported into Exchange mailboxes. Then click Finish.

After completing all the steps, you will complete the Office 365 to Exchange migration. I know it’s a complicated and time-consuming process, but it is the only way to migrate Office 365 to exchange manually.
Now the question is would you prefer to use a manual method to migrate mailboxes from office 365 to Exchange, or would you prefer an expert solution? If your choice is the latter one, we have a perfect tool for that. We at Shoviv present you the Exchange Migration Tool
Office 365 Migration tool | Recommended by Experts
The Shoviv Exchange Migration Tool lets you migrate Office 365 to Exchange directly and offers several handy features to enhance the process.
Below are the few features that hold this tool in high regard for Office 365 migration to Exchange Server and vice versa.
Why Shoviv for Office 365 to Exchange migration
- Direct Office 35 migration to Exchange: With the Shoviv Exchange Migration Tool, you can migrate your mailboxes directly into Exchange Server. Also, the tool supports all versions of Exchange, so you don’t have to worry about the Exchange version you’re using.
- Preview every bit of Office 365 mailbox: Having a preview of data before the migration is a blessing as users can decide which item to migrate or exclude. Users can preview every bit of Office 365 mailboxes, including Item body, Item property, Recipient, and attachments.
- Filter out unwanted items: We all can have emails there is no longer needed and deleting them one by one is an Everest winning task. But with Shoviv Exchange Migration Tool, you can check folders/subfolders or use filter options to exclude unwanted items from the Office 365 to Exchange migration.
- Resume interrupted process: If anyone asks me what’s the worst scenario you don’t want to face when you migrate Office 365 to Exchange, my simple answer is process interruption; especially at the last moment. I have faced this situation a few times, and it hits very hard as you have to do the entire process again. But Shoviv offers an incremental export option that resumes the process from the last processed email and saves you crucial time.
- Export Office 365/Exchange mailboxes into PST for backup: If you’re familiar with Office 365 and Exchange, you might know that both don’t allow accessing their data in the local system. The only way to access both server data is to export them into PST format. By keeping this thing in mind, our software allows exporting both Exchange Server and Office 365 to PST without any extra cost and hassle.
What Next?
So, as you would by now have already understood, you cannot find elsewhere the services that this Office 365 to Exchange migration tool provides to you. Try this tool out and let us know your experiences too.
We suggest you download the free version of this tool and evaluate its skills by yourself. Below is the link for the free version and also the steps to migrate Office 365 to Exchange, so you can evaluate the tool.
Shift Office 365 mailboxes to Exchange in simple steps
- Open the free Office 365 to Exchange migration tool.
- Click on the Add source and Add Office 365 mailboxes.
- Then, click the Live Exchange option from the ribbon bar.
- Check/uncheck Office 365 folders/subfolders to migrate.
- Provide Exchange cred and map mailboxes with the Source.
- Use filter and other options; folder mapping, email translation.
- Voila, the software will start to migrate Office 365 to Exchange.
See, this is a cakewalk that will move your Office 365 mailboxes into Exchange Server; icing on the cake, the software has no restriction on adding large and multiple mailboxes to migrate simultaneously.
Wrapping Up:
Several instances initiate users to migrate Office 365 to Exchange. However, manually it is like a walk on eggshells; that’s why Shoviv Exchange Migration Tool is a must for effortless migration. At last, it depends on you whether you choose manual hassle or cakewalk with Shoviv.