SharePoint is one of the most popular services used by end users in cloud services. It is a web-based collaboration service used for hosting websites, team communication, file sharing, and access to files from anywhere and at any time.
Most of the users type the same doubt: How to move subsites to another site, move a subsite to a top-level site, etc.
Overview of Site and Subsites
A site is the main location or the platform where information, services, or other features are available. On the other hand, a subsite is a smaller part of the site, which is a dedicated section, with a focus on the design of the specific content, functions, or the targeted audience while remaining connected to the overall structure of the site.
Manual Methods to Move a Subsite to Another Site in SharePoint
- To begin the process of the subsite into another site, you need to log in to SharePoint using your administrative credentials. And then click on the admin icon to move forward.
- Next, go to the Admin Centre and then select SharePoint.
- In the Admin centre, go to the Active site. It will list all the active sites present in your account. You can click the URL of any site that you need to move to another site.
- After that, go to the settings area and then open the site. Click on the Site contents.
- The site contents include the current site and its subsites. Go to the subsite section.
- At the subsite option, click on the Show Actions and then select the content of the site by clicking on the Site Content.
- You need to double-click on the site content to pick the required site.
- Select any folder or items and then click on the Move to option.
- Select any site from the present list displayed on the screen for the respective content.
- Done with the content, moving to the site. Finally, the status of the process changes to done successfully, putting the data at the site.
Note:- With the manual method, you can easily migrate the subsite to another site, but it can be time-consuming and less efficient for bulk and complex subsite migration.
Move Subsite to Another Site in SharePoint with the help of PowerShell
- Install PnP PowerShell Module
- Install-Module PnP.PowerShell -Scope CurrentUser
- https://tenant.sharepoint.com/sites/ParentSite/Subsite1
- Installs the PnP PowerShell module for SharePoint.
- Define Source Site URL
$SourceSiteUrl = “https://tenant.sharepoint.com/sites/ParentSite/Subsite1”
- Connect to SharePoint Online
Connect-PnPOnline -Url $SourceSiteUrl -Interactive
- Define the template path
$templatePath = “C:\SharePointMigration\SubsiteTemplate.xml”
- Export the site template
Get-PnPSiteTemplate `
- -Out $templatePath `
- -Handlers, Lists, Pages, Navigation, ContentTypes, Fields.
- -PersistBrandingFiles `
- -IncludeAllTermGroups
- Key Parameters
- Invoke-PnPSiteTemplate -Path $templatePath
- # Verify lists
- Get-PnPList
- # Verify document libraries
- Get-PnPList | Where-Object {$_.BaseType -eq “DocumentLibrary”}
- # Verify pages
- Get-PnPPage
Note:- You need to ensure the access of the admin, PowerShell 7, update PnP module, MFA- ready login, term store alignment, preparation for the site, and understand the limitations of this method.
Although the manual method is straightforward to execute, it remains prone to human errors and becomes increasingly time-intensive when managing the bulk subsite migrations. Consequently, to adhere to the best practice for migrating the subsites within SharePoint, which provides automated solutions such as Shoviv SharePoint Migration tool, provides a more efficient and reliable approach, supported by an advanced algorithm and a user-friendly interface.
Shoviv SharePoint Migration Tool
Shoviv SharePoint Migration Tool is a picture-perfect tool for migration from SharePoint to SharePoint Online and On- Premises. Moreover, Google Drive, Google Shared Drive, OneDrive (Personal or Business), etc. The tool has numerous advanced settings and features for the migration result. It can easily migrate the Sites to another site, and subsite vice versa. Users can try the free demo version, which allows them to process 500 MB per site and process files up to 20KB in each folder.
Step- by-Step Process to Move SharePoint Site:
- Install and run Shoviv SharePoint Migration Tool.
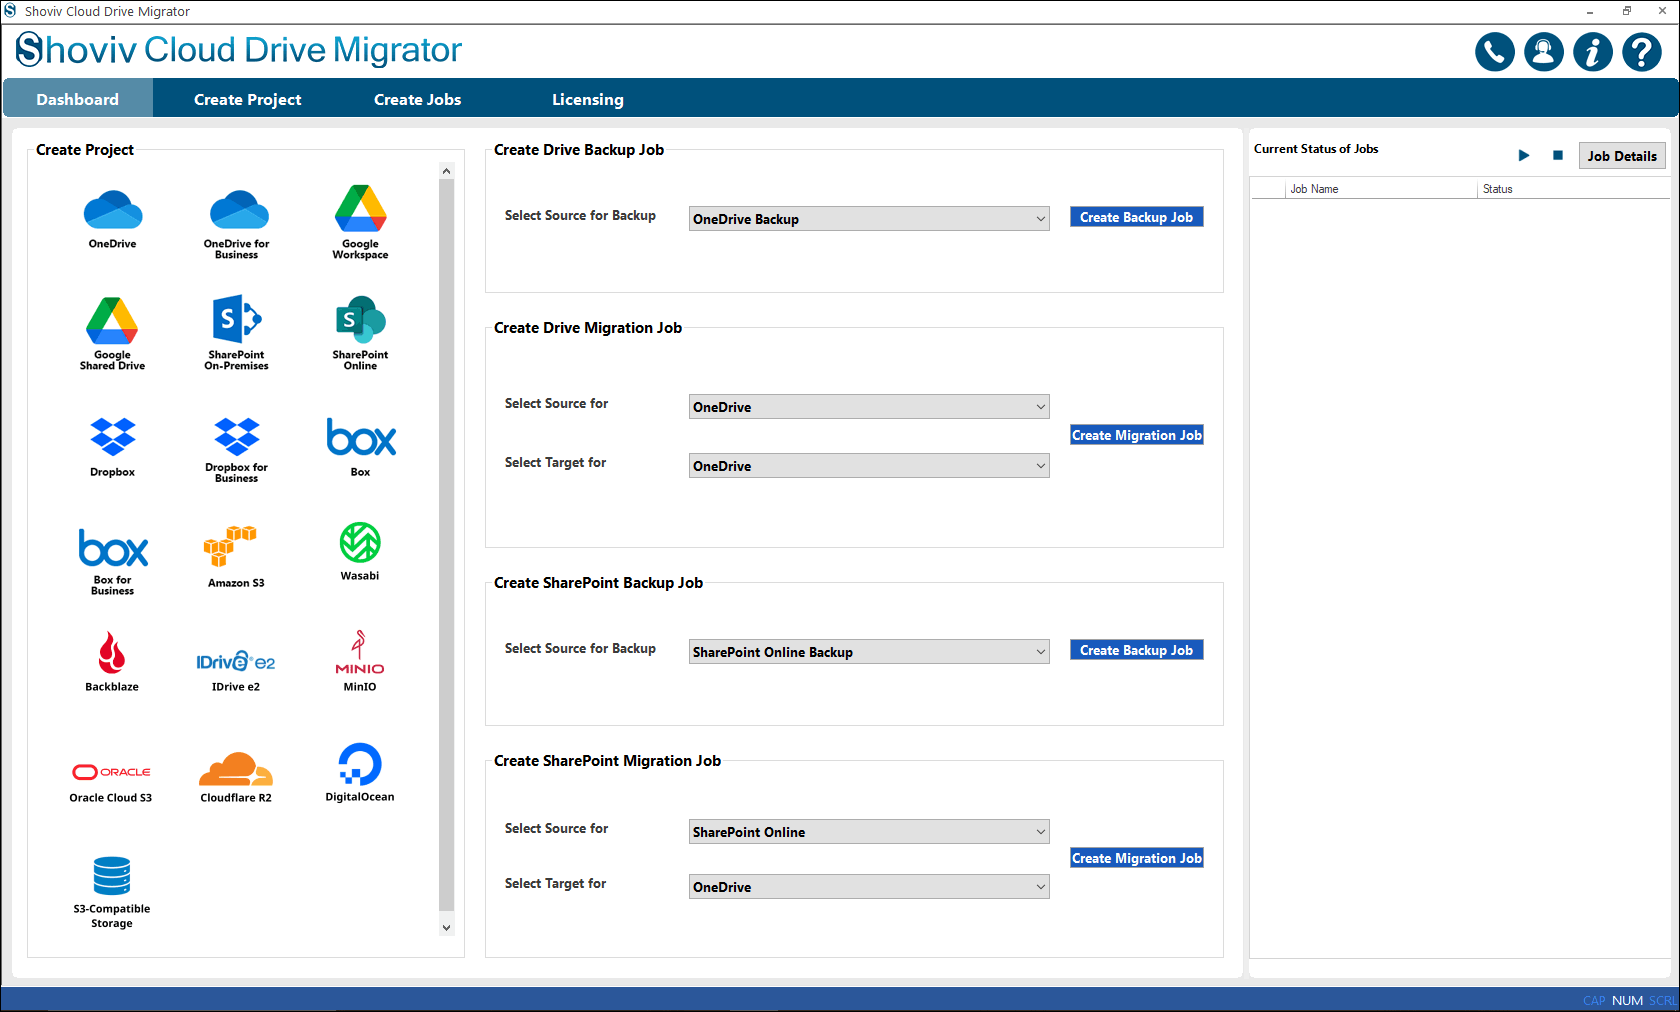
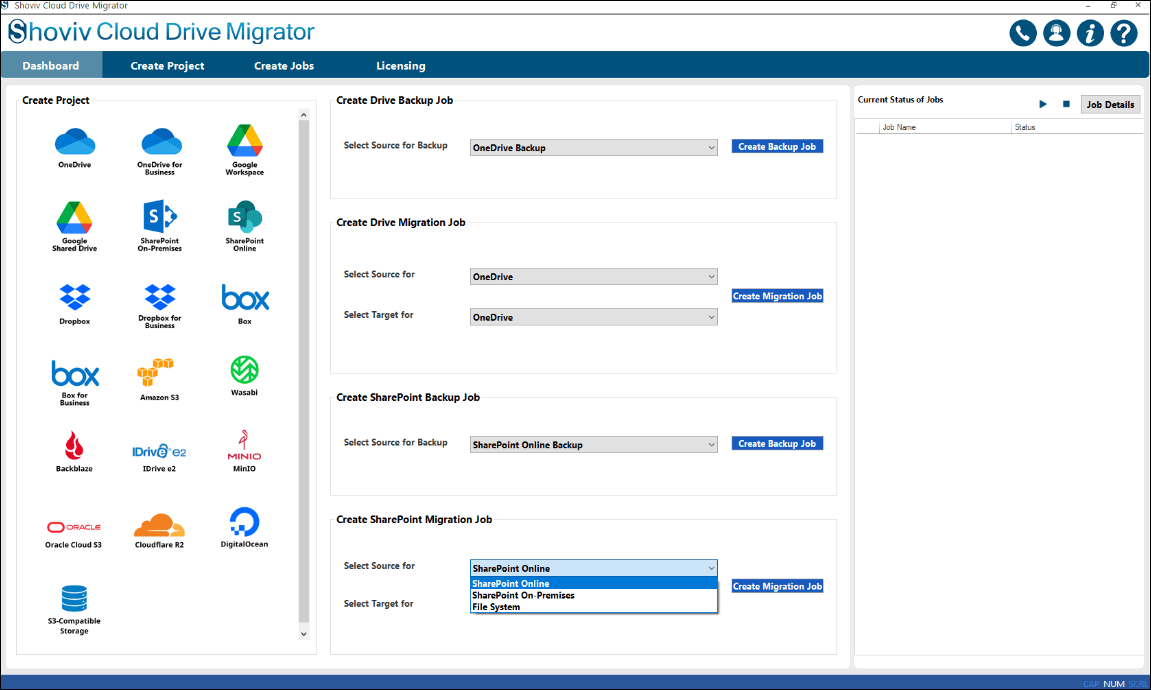
- Select SharePoint Online as the Source.
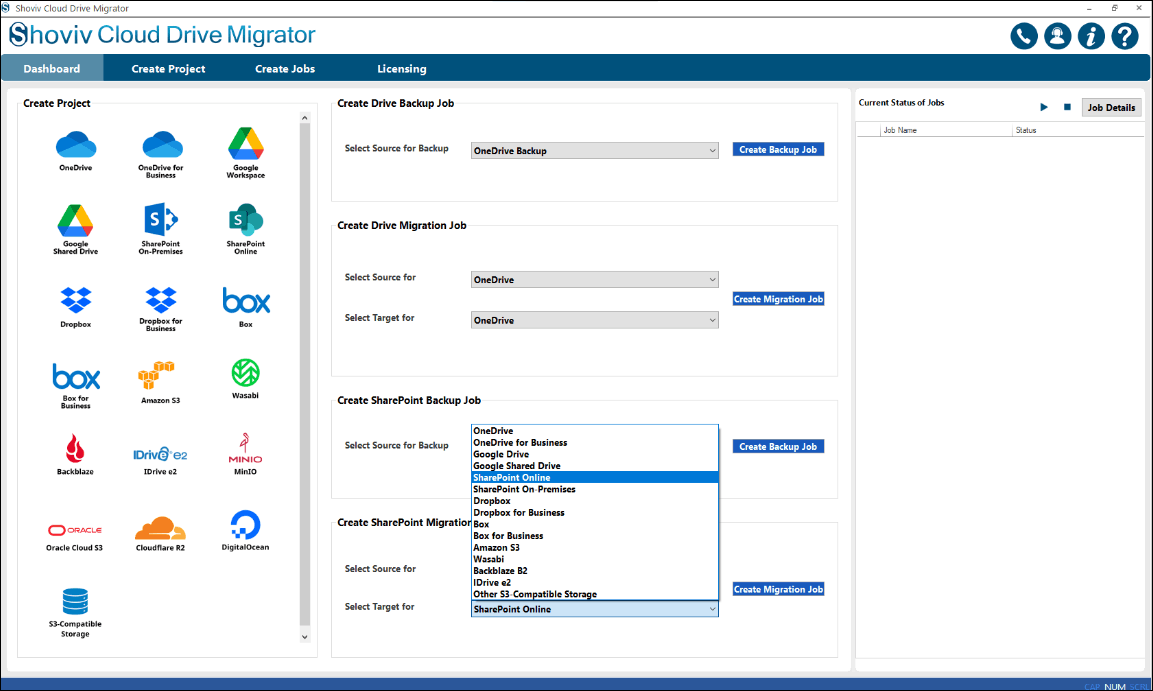
- Again, select SharePoint Online as the Target destination.
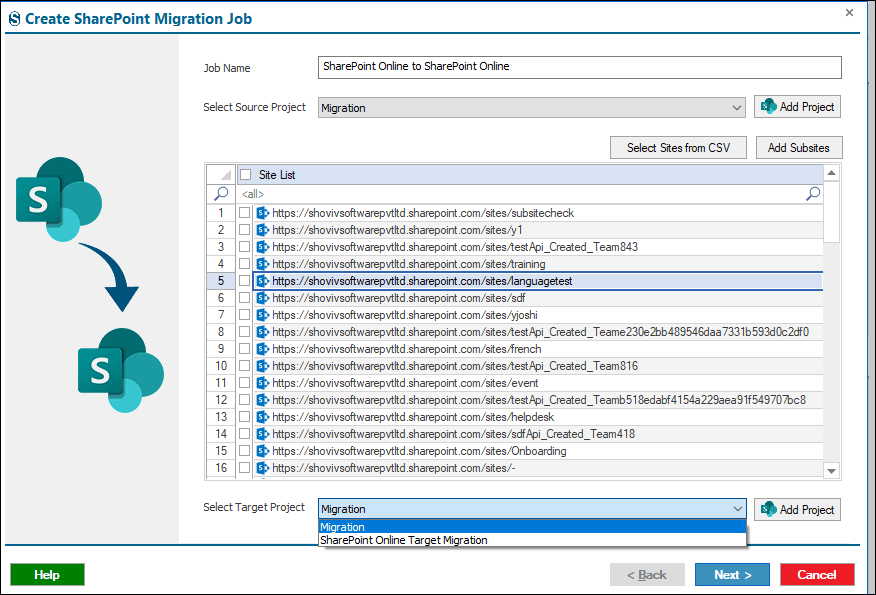
- Click on the Create Migration Job.
- Give the name to the job.
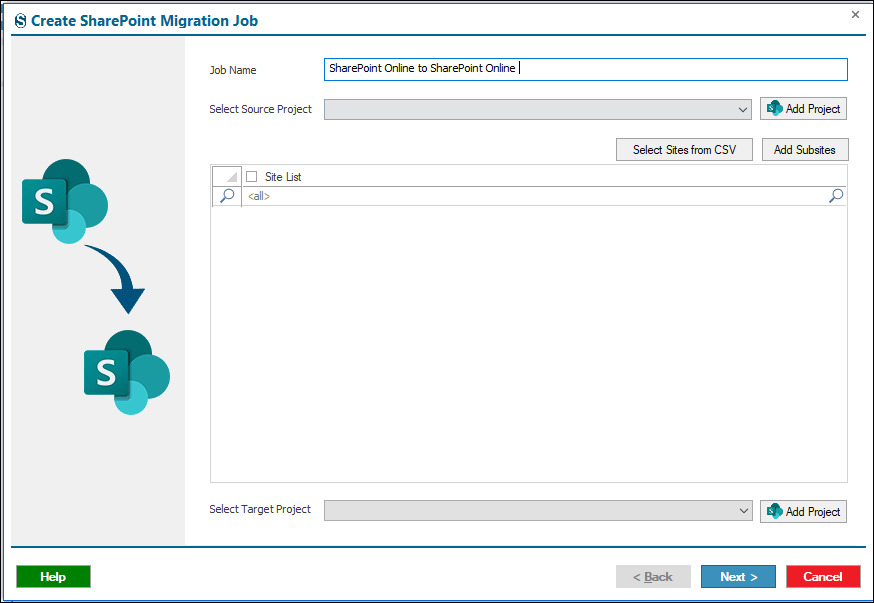
- Connect with the Source and Target Project.
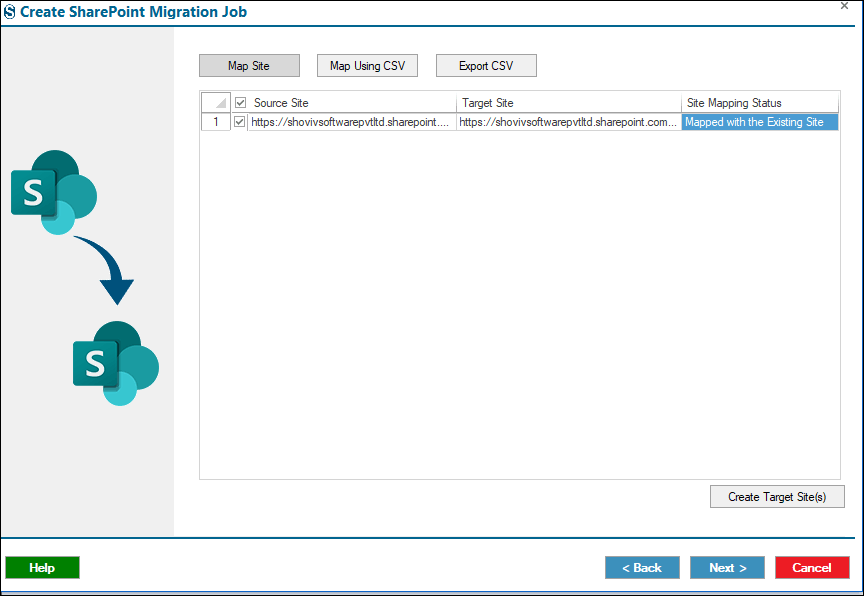
- Map the source and target sites or subsites.
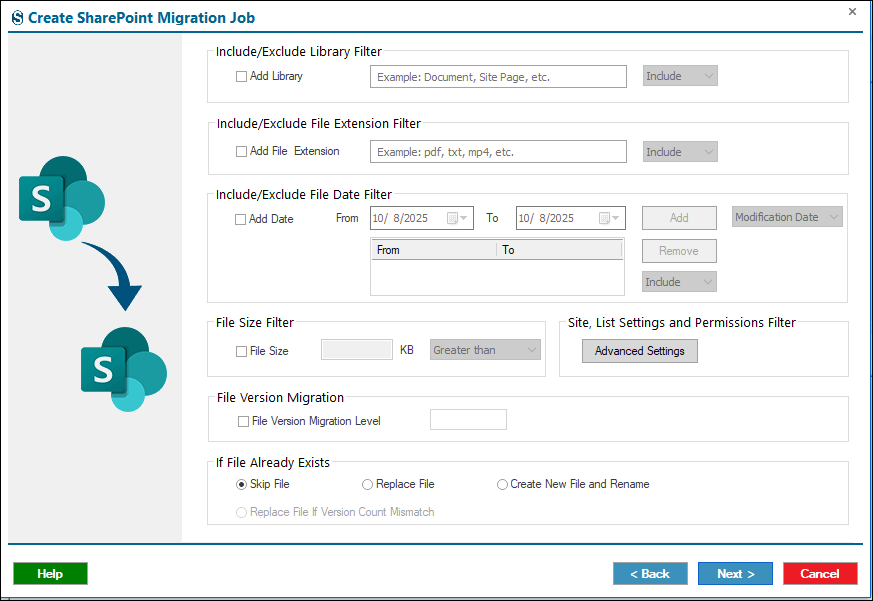
- Apply the filters that you want from the various options.
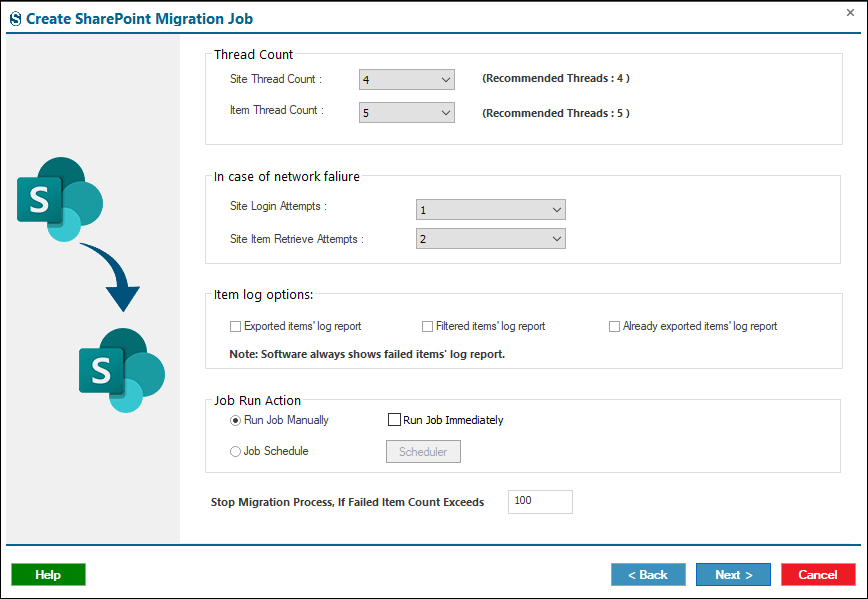
- You can do it in the settings page.
- Review the job details.
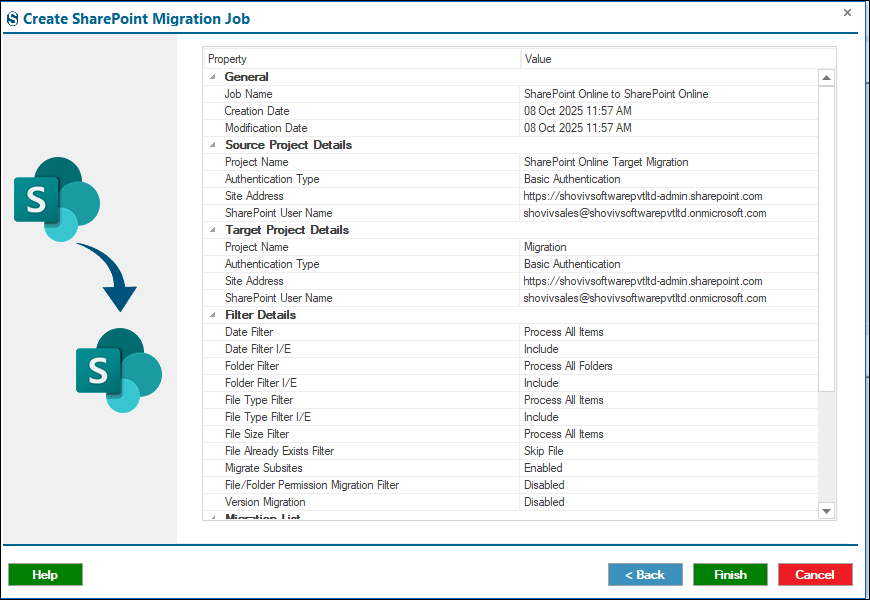
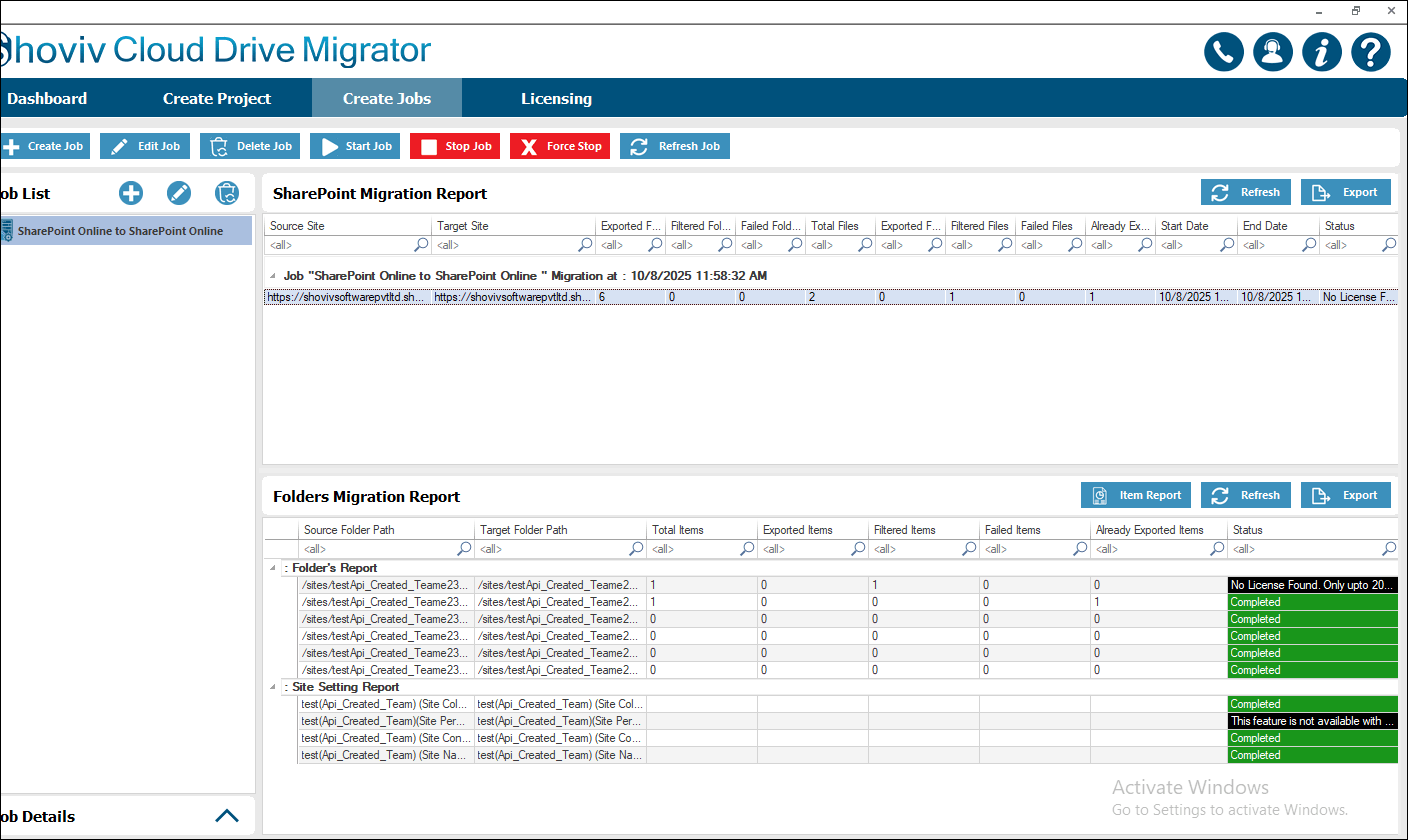
- The job runs as per your instructions according to the option you have chosen.
Conclusion:
Moving a subsite to another site in SharePoint can be performed using manual methods such as PowerShell, depending on the complexity and the area of the operation. While the manual approaches are suitable for the smaller tasks, they are prone to errors and inefficiencies in the bulk operations. PowerShell offers great control but requires technical expatriates. For large-scale, business-critical migrations, automated solutions like the Shoviv SharePoint Migration Tool provide a more efficient, reliable, and scalable approach, ensuring accuracy and streamlined execution.