To manage the storage and for other requirements, users often need to change the location of the OneDrive folder.
In this blog, we will answer all the common questions which end users ask about changing the OneDrive folder location.
Why Do We Need to Change the OneDrive Location In Windows?
- The default location of all drives is the C drive, and then the C drive can easily fill the storage area, especially on laptops with a small Solid State Drive, such as 128GB/ 256GB.
- Moving a large file off your primary drive into the drive that has ample space can improve the overall performance of the device.
- To stop the specific folders like (desktop, documents, pictures) from the automatic baking up and taking up unnecessary space.
- To store files on a secondary drive, such as the D: drive with more room or a fast external device.
- For the organised file system, where you can easily identify your desired files, or to have OneDrive act as a cloud copy rather than a replacement in your local folder in a smooth way.
Step- By- Step Guidance
1. Window Registry
To easily change the OneDrive location folder path, for example, to D:/ Data, you need to make a change in a few settings in your default settings with the help of the Windows registry and in the application data.
Open the registry editor and change the path in the following location (note:- if the key already exists in your system)
HKEY_CURRENT_USER\Software\Microsoft\OneDrive\UserFolder
HKEY_CURRENT_USER\Software\Microsoft\OneDrive\Accounts\Personal\UserFolder
HKEY_CURRENT_USER\Software\Microsoft\OneDrive\Accounts\Business1\UserFolder
2. Update the INI File
You need to go to the Explorer and type the following path of the local drive in the line for the path:
%localappdata%\Microsoft\OneDrive\settings\
Now, change the location of the folder as per your needs in the system.
3. OneDrive Application
- Begin with this process, click on the OneDrive icon, which is present at the bottommost in the taskbar, which displays on your desktop screen. Find that, now click on the arrow to expand the toolbar if the OneDrive icon is not found anywhere.
- At this point, click on the Help and Settings and then pick the settings from the list that appears on the screen.
- Under the Account tab, click on the Unlink this PC option.
- A confirmation message will appear for this action; click on the Unlink account option.
- Please move to the OneDrive folder on your system and open it. Select the desired or all folders and then click the Move to option as shown. Select the destination location for these files, and they will be moved to the selected location immediately. You should move your OneDrive folder to another drive where you need it.
- Click on the Get Started button on the earlier opened OneDrive screen where it is set up.
- You need to sign in to OneDrive again. This sign-in process will appear on the screen where the current default folder for the OneDrive files is. Click the Change option to select a new folder location, and then click OK.
- OneDrive location has changed.
Key Points to Remember Before Changing OneDrive Folder Location
- Backup Your Data First
- Sign out and properly unlink your account.
- Registry changes require more focus.
- Ensure the destination is stable
- Do not delete the original file
- Check the permissions of the folders
- The internet connection is not working
- Business vs Personal Account
- Ignore multiple file accesses at the same time.
- Restart after the completion of the process.
Changing the OneDrive folder location helps when your C drive lacks space and improves storage management efficiency. However, registry edits, unlinking accounts, or large data transfers can cause data loss, sync failures, or file corruption.
That is the reason why it is highly recommended to take a complete backup of your OneDrive data before changing the location of the file.
OneDrive mainly works as a sync service, not a complete backup solution, so deletions or corruption can quickly sync to the cloud without recovery. You can prevent this by using the Shoviv OneDrive Backup tool.
Steps for the Backup of OneDrive with the help of the Shoviv OneDrive Backup Tool
- Install and run Shoviv OneDrive Backup Tool.
- Enter the name of the Job.
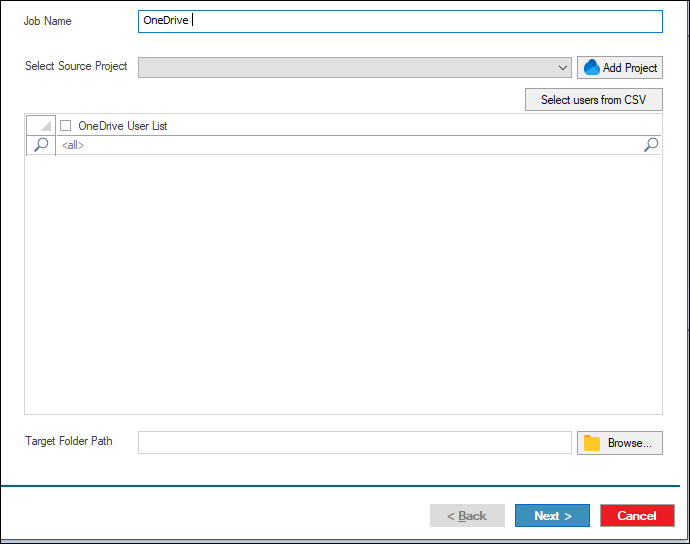
- Connect with the Source Project.
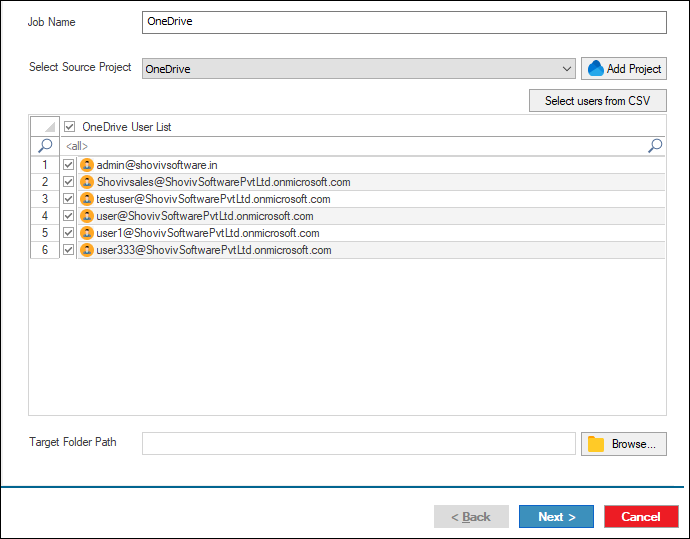
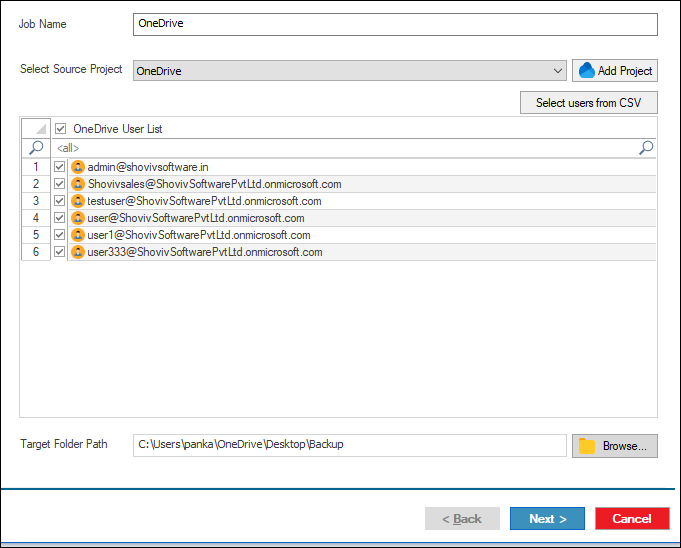
- After connecting with the source project, confirm the location with the help of the browser.
- Select the filter option that you want.
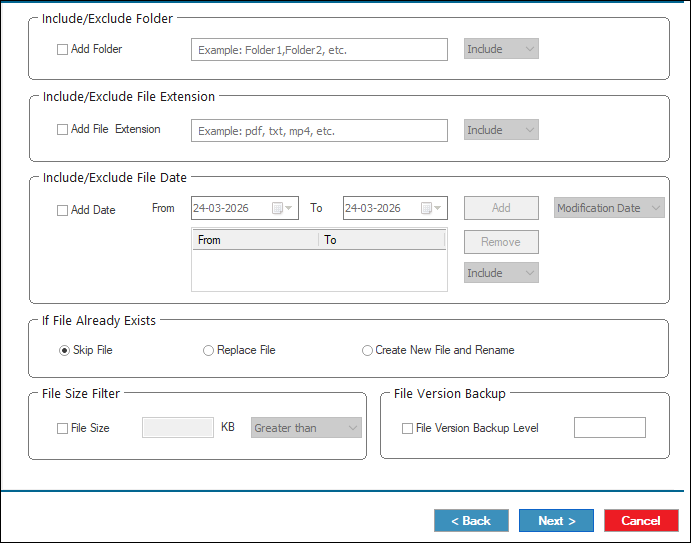
- After that, set the settings of the backup and then click on the Next button.
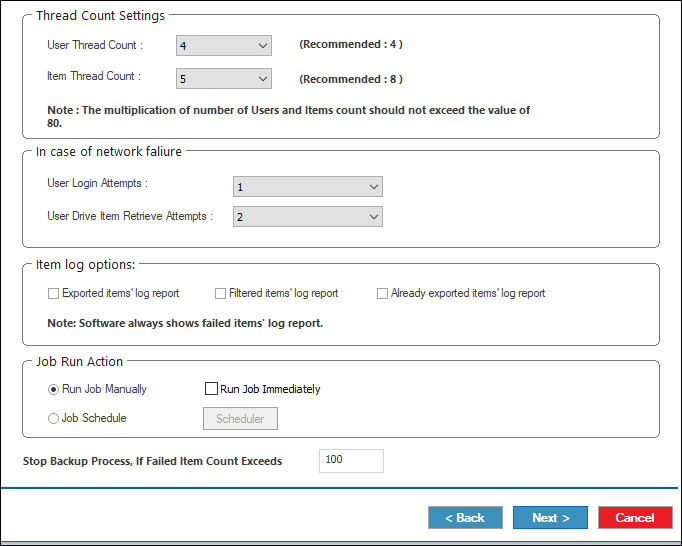
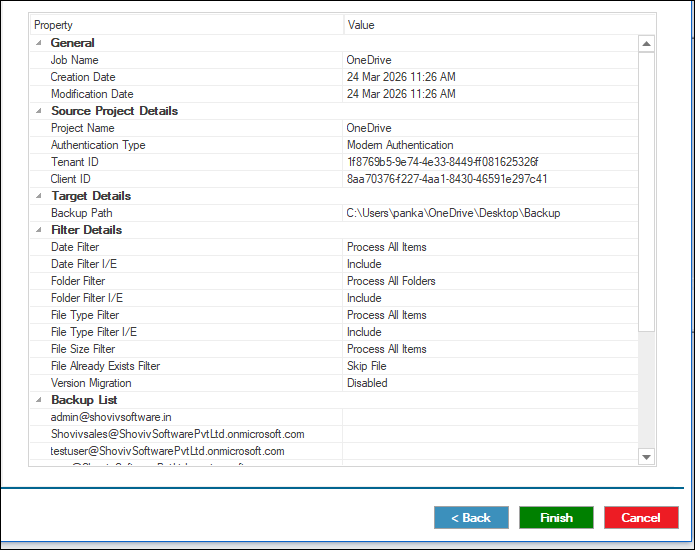
- Review the job, and if you want to change the edits, then click on the Back button; if not, then click on the Finish button.
- The job runs according to the options you have chosen in the above section.
Conclusion:
Changing the OneDrive folder location helps manage storage space and improves system performance, especially when the C drive is full. However, the process involves risks such as data loss or sync issues. Therefore, taking a complete backup beforehand is essential. Using the Shoviv OneDrive Backup Tool ensures data safety, quick recovery, and a smooth OneDrive folder relocation process.