Excluding a SharePoint Online site from a Retention Policy can be done manually in the Microsoft 365 Admin Centre by editing the policy settings and excluding the site.
In this blog, we will answer the most frequently asked questions from users online about how to exclude a SharePoint Online site from the retention policy.
What Is a SharePoint Retention Policy?
SharePoint Retention Policy is described as the automatic management of the content life cycle, such as retain, delete, or retain then delete for the entries, Sites, libraries, or Groups.
Exclude A SharePoint Online Site From Retention Policy- Manual Method!
- Firstly, you need to log in to the Microsoft Admin Centre. Then click on show all, and after that select companies.
- Under the left panel. Choose the Policies and then click on the Retention option.
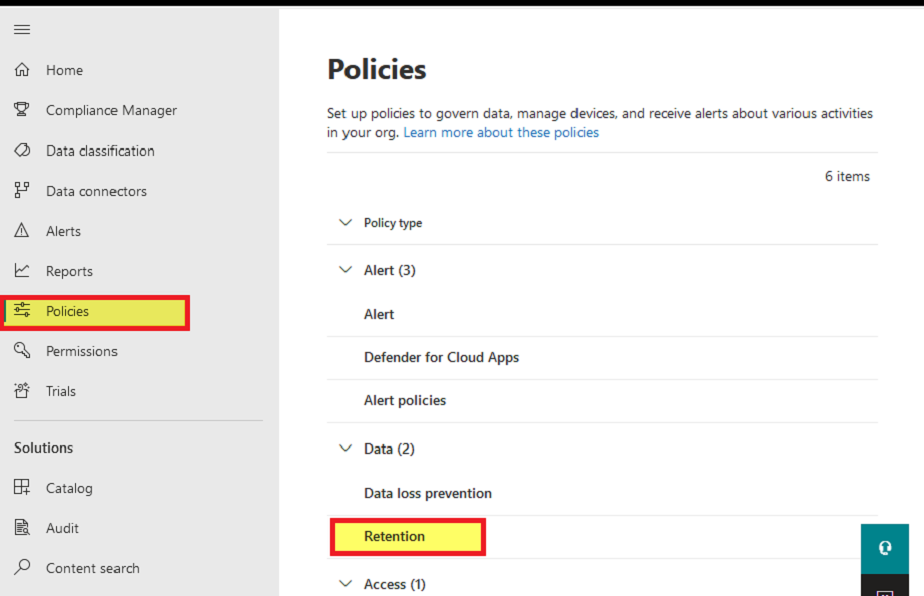
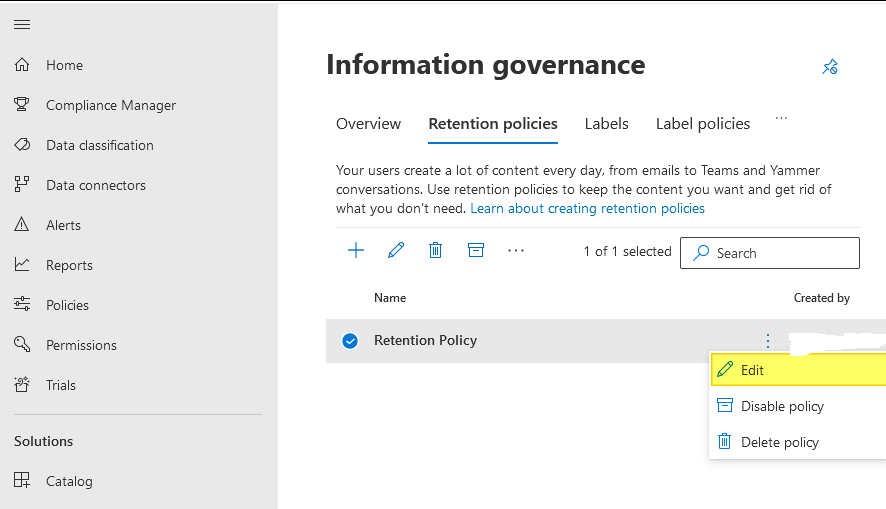
- You need to locate the policy of retention that is required for you and then double-click on it.
- Click on the Edit option beside Applies to content in these locations.
- Under SharePoint Sites. You need to click on the Exclude sites.
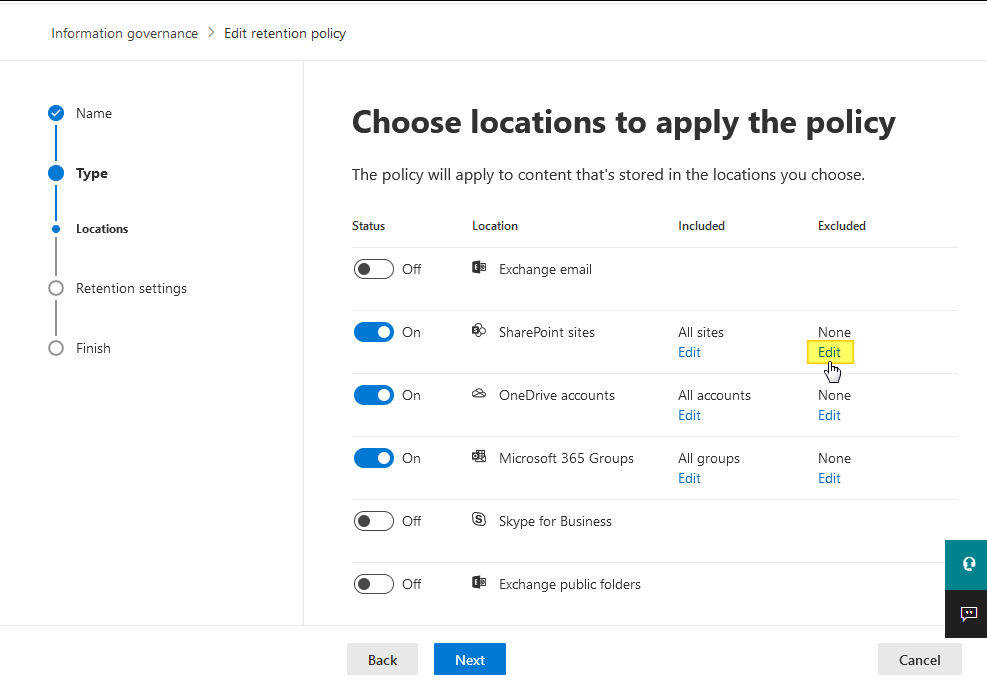
- After that, give the details within the site URL, then select the + option, and click on the Checkbox.
- Exclude the option for the confirmation of the removal of the required site.
With the exclusion of a SharePoint Online Site from the Retention Policy, there were several issues that can be faced by the end-users, such as server error, internet connection weakness and manual errors.
To ignore this issue, most users are using the third-party tool, the SharePoint Backup Tool developed by Shoviv, for the convenience of the users.
Shoviv SharePoint Backup Tool
The Shoviv SharePoint Backup tool is a complete solution that helps the end-users to take the backup in an effortless manner. It allows you to create backup jobs and automate the backups as per the requirements. With this tool, you can back up all required components such as Documents, libraries, Site Pages, Templates, and the assets of the sites, etc. It includes all the essential features that are needed to ensure a smooth and efficient backup process. The free trial version lets you take the backup up to 500 MB of data per site and supports files up to 20 MB in size.
Fundamental Features of Shoviv SharePoint Backup Tool:
- The tool supports all versions of SharePoint and allows backup of Forms, Sites, Pages, Style Libraries, and more.
- It provides multiple filtering options, such as including library filters, file extension, and sub-site filters.
- There is no limit to adding multiple backup jobs at the same time.
- It includes the incremental export feature to prevent data duplication.
- The tool runs smoothly on the Windows Operating systems without any issues.
- It offers the schedule feature, allowing users to take automatic backups on a daily, weekly, and monthly basis.
- A trial version is available so users can test all the features before the purchasing process.
Conclusion
In conclusion, excluding a SharePoint Online Retention Policy can be completed through the Microsoft 365 Admin Centre with careful operations. If the different approach is effective, it may require time, precision and a certain level of technical skills to avoid errors. For the organisation looking for a more streamlined and reliable experience, using a dedicated solution for backup can be beneficial. Such tools help simplify the management, reduce the chances of data loss, and ensure the important data in SharePoint remains secure and accessible.