Summary: SharePoint Online provides multiple ways to upload and manage files, making it suitable for everything from simple everyday tasks to large enterprise-level migrations. Users can quickly add files through drag-and-drop uploads or the built-in Upload feature in the browser. For a smoother day-to-day workflow, the OneDrive Sync client creates a seamless connection between desktop folders and the cloud. When it comes to large-scale migrations, specialized solutions like the Shoviv SharePoint Migration Tool help transfer data more efficiently while preserving important elements such as metadata and folder structures. Following best practices — including consistent naming conventions and using metadata instead of overly complex folder systems — also plays an important role in keeping files organized, searchable, compliant, and easy to manage within the Microsoft 365 environment.
Understanding the SharePoint Environment
Before uploading or moving files into SharePoint Online, it helps to understand how the platform is structured. SharePoint stores files inside Document Libraries, which work as organized digital storage spaces for teams and businesses.
These libraries do more than simply hold files. They also allow users to manage permissions, track version history, apply metadata, and keep documents organized in a more controlled and collaborative environment.
Methods For Uploading Files to SharePoint
- Manual Methods
- Third-Party Migration Tool
Manual methods need the physical attention of the users in the form of selecting, dragging, or saving files into a SharePoint document library.
Method 1: The “Drag and Drop” Technique
One of the easiest and fastest ways to move files into SharePoint is by using the classic drag-and-drop method. This approach works especially well for quick uploads of files or folders.
How to Use It
- Open your SharePoint Site and go to the target Document Library.
- Open File Explorer on Windows or Finder on Mac.
- Select the files or folders you want to upload.
- Drag them directly into the browser window where the Document Library is open.
- A progress indicator will appear in the top-right corner, showing the upload status until the process is complete.
This method is simple, fast, and perfect for everyday file transfers.
Method 2: Using the “Upload” Command
If you prefer a more guided approach, SharePoint’s built-in Upload feature offers a cleaner and more structured way to add files.
Steps to Upload Files
- Open the Document Library where you want your files to be stored.
- Click the Upload button from the top menu bar.
- You will see two upload options:
- Files — Upload individual files or multiple documents.
- Folder — Upload an entire folder along with its structure.
- Browse your computer, select the files or folders, and click Open.
This method is especially useful when you want more control during the upload process.
Method 3: Syncing with OneDrive for Business
For users who prefer working directly from their computer instead of constantly opening SharePoint in a browser, the Sync feature is often the most convenient long-term solution.
How Sync Works
- Open the SharePoint Document Library.
- Click the Sync button from the top menu.
- This connects the library to your OneDrive for Business client.
- Once connected, the SharePoint library appears as a normal folder inside File Explorer or Finder.
Uploading Files Through Sync
After syncing, you can simply copy, move, or save files into that local folder on your computer. The OneDrive client will automatically sync and upload those files to SharePoint Online in the background.
This approach creates a much smoother workflow, especially for users who regularly work with large numbers of documents.
Method 4: Uploading Files Through Microsoft Teams
Because every Microsoft Team is connected to a SharePoint site behind the scenes, files can also be uploaded directly through the Microsoft Teams interface.
Steps to Upload via Teams
- Open Microsoft Teams and select a Channel.
- Click the Files tab at the top.
- Choose Upload or simply drag files into the window.
Once uploaded, those files are automatically stored inside the Shared Documents library connected to the related SharePoint site.
This method is particularly useful for teams that already collaborate heavily inside Microsoft Teams and want quick access to shared documents without switching platforms.
Method 5: Use Third-Party Migration Tool to Upload Files to SharePoint Online
Shoviv SharePoint Migrator is the picture-perfect tool to ignore these limitations that occur in the above steps. It is highly recommended by the MVPs. There are no data limitations, and it works for all SharePoint versions.
Here is the step-by-step process for the File System (PC) to SharePoint migration.
- Install and run Shoviv SharePoint Migrator.
- From the dashboard, you need to go to the Create SharePoint Migration Job.
- Select File System as the source and SharePoint as the target destination.
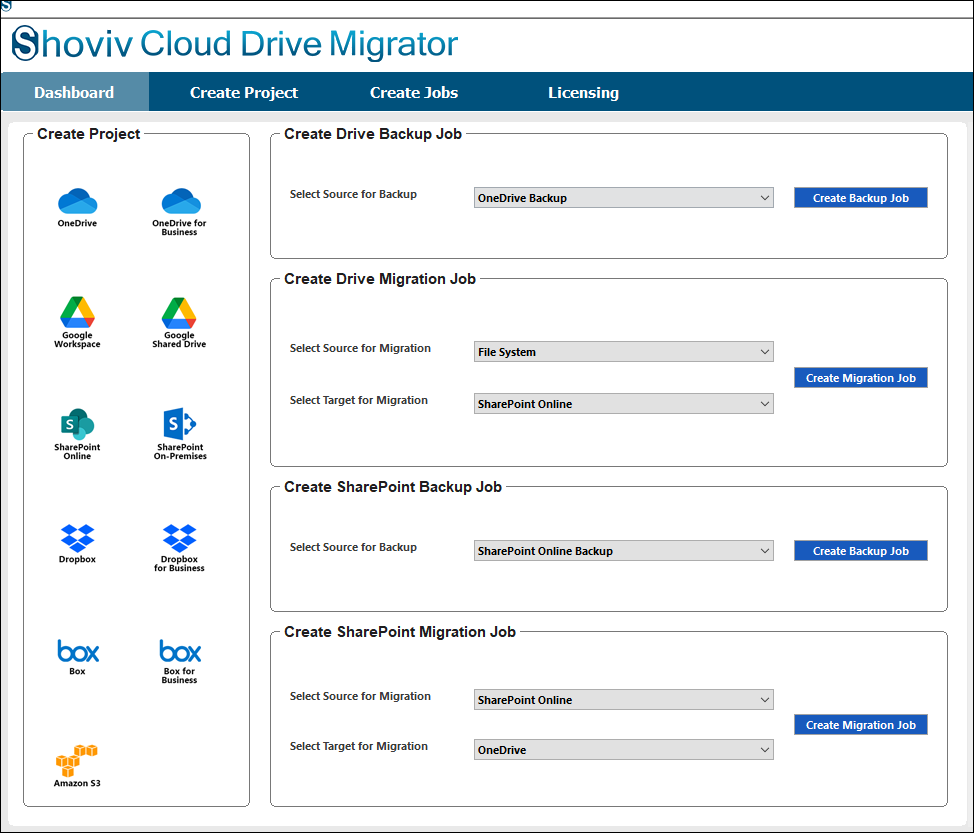
- Give the name of the job under the Job Name section
- Select the folder with the help of the Add Folder for the Source.

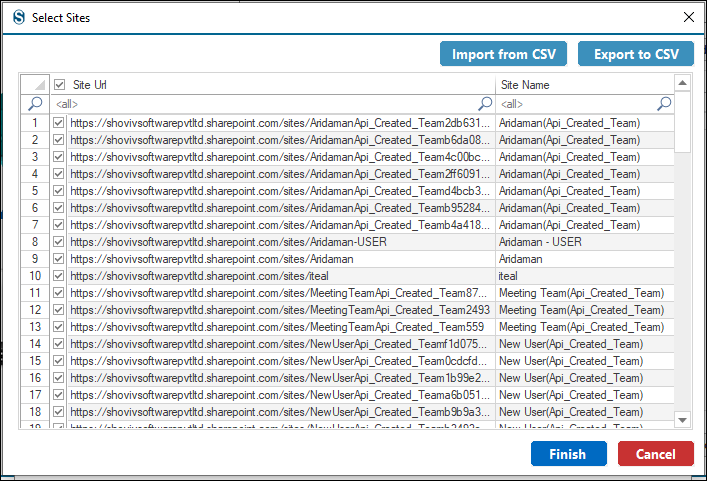
- Now you need to connect with the Target Project.

- Select the target users from the list and then click on Finish.
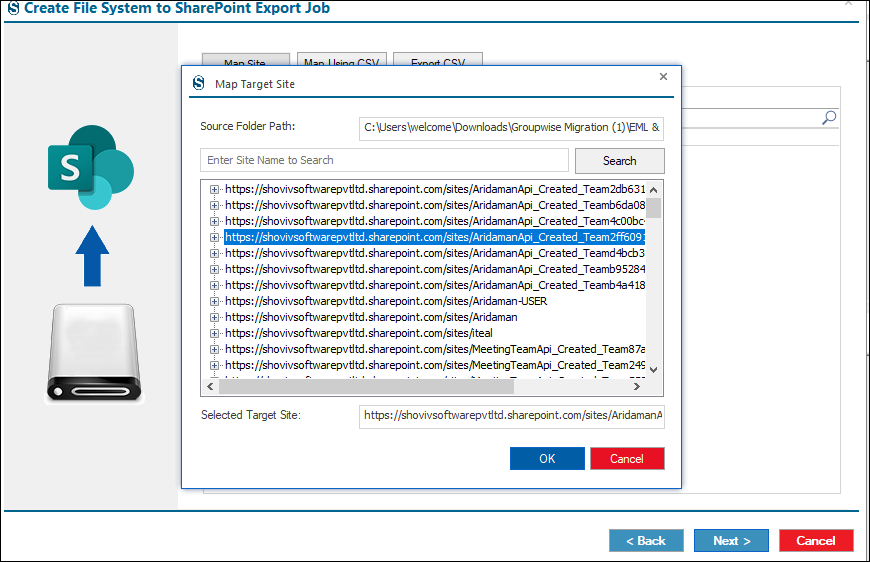
- Match the target user with the Source Folder with the help of the mapping, and then click on the OK button.
- With the help of the filter options, you can refine your migration process, and if not, then ignore it with the help of the Next button.

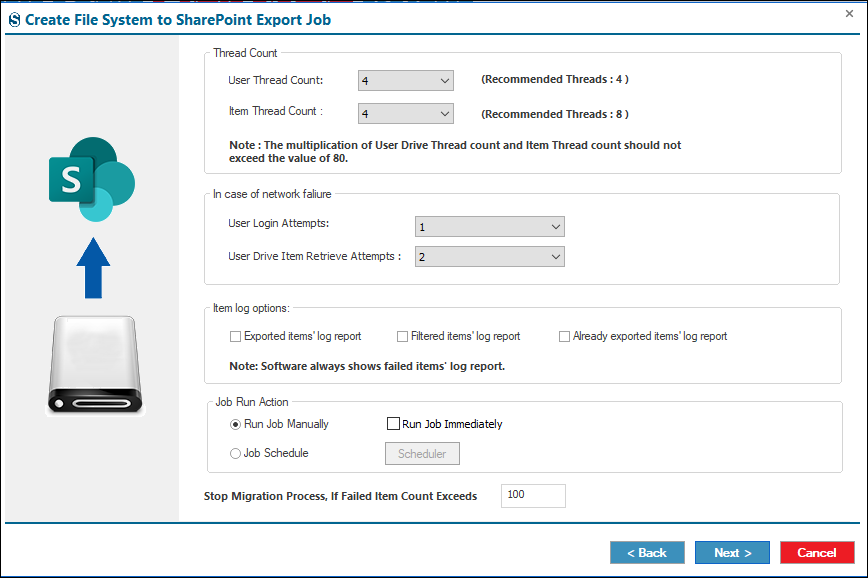
- Under the settings page, you can set the advanced settings, and if not, then ignore it with the help of Next.
- Review the job details, and if you want changes, then click on the Back button; if not, then click on the Finish.

- The job runs according to the options you have chosen under the Job Run Action.
Final Words:
Understanding the different ways to upload files to SharePoint Online can make managing and sharing data much simpler. Whether you prefer quick drag-and-drop uploads or seamless syncing through OneDrive, SharePoint offers flexible options that fit a wide range of workflows and team needs. However, users sometimes face limitations with large files, metadata, and sync methods. The Shoviv SharePoint Migration Tool overcomes these challenges by ensuring secure, structured, and error-free transfers. A free trial is available for users to explore its features. After all, choosing the right upload method is essential for data integrity, compliance, and seamless collaboration across your workspace.


