Are you willing for Office 365 to Office365 migration but do not know an efficient and reliable method? If yes, then you are on the correct article. Here, we will discuss all Office 365 migration. Office 365 to Office 365 migrations look like a different tasks from other migration tasks. Many users are even getting confused about where to begin the migration of Office 365? Luckily, it is not as complicated as it seems.
You might think why one should migrate between Office 365? So, here it is, reasons like merging companies, migration from the tenant, shifting data storing location, domain change, et cetera initiate Office 365 tenant to tenant migration.
Ways to Migrate Office 365 to Office 365
Sometimes Office 365 users want to migrate their mailboxes from one Office 365 account to another Office 365 account. But due to the lack of knowledge and tools, they get failed. Mainly, users can use manual ways and professional software to migrate mailboxes between Office 365.
Manual method to migrate Office 365 to Office 365
Users can perform Office 365 to Office 365 migration using the PowerShell commands. But before using the PowerShell Scripts user has to do some Pre &Post migration steps:
Words of warning: if you are a non-technical user, skip the manual method. And check the recommended and effortless way for Office 365 tenant-to-tenant migration.
Migrate single user
Domain Preparation:
- Firstly, make sure that you have enough licenses for target Office 365.
- Secondly, create admin accounts in both source and target Office 365.
- Now, create a user mailbox, resource mailbox, and distribution groups in the target tenant.
- Perform ADDS (Active Directory Domain Service) consolidation using the ADDS tool.
- Now synchronize both the source and target domains.
Verify Domain:
- Start the process of verifying the target domain in Office 365.
- Now add the source domain to the target domain to create the TXT record in DNS.
(Note: Make sure the domain is using only one tenant. And it will take 72 hours to show the changes).
Schedule Office 365 to Office 365 migration:
- Firstly, generate a list of user mailboxes that you want to migrate.
- Secondly, create a CSV for mapping.
- Note down the lowest TTL value (Time to Live) on the MX (Mail Exchange) record.
- At last, disable the synchronization of the source domain. (Disable from Admin center).
Migrate Office 365 to Office:
- Stop the mail flow of the source tenant by changing the MX value to an unreachable value. (Enter the lowest value of TTL on the MX record) (Noted in the previous step).
Prepare Source Office 365:
- Before transferring the mailbox to another Office 365, erase all the objects from the primary domain on the source Office 365.
- In the window PowerShell, run the below command to remove all the objects from the primary email address.

Prepare Target Office 365:
The last step for Office 365 to Office 365 migration. Initiate this step after one hour of performing the last action.
- Configure auto-discover CNAME.
- If you use Active Directory Federation Services (ADFS), configure a new domain in the target Office 365 for ADFS.
- Now activate the new users in the target Office 365 and assign new licenses.
- Then, set the new primary email address using PowerShell Scripts given below.

- Now decide the communicate password for the end-users.
- Once the user mailboxes get activated, change the mail routing and point the MX record to the new primary email address.
- At last, check the mail flow of the target Office 365.
It is the end of the pre-migration task. Now use the PowerShell Command to migrate Office 365 to Office 365.
If you have corrupted items in the mailbox, you can move it with PowerShell but specify how many things you will allow failing before it will cancel the move request.
Open PowerShell, then make Right Click and Run as administrator.
![]()
First thing first: Make sure you’re using PowerShell, not the Exchange Management Shell.
- Use the Global Admin account for Office 365.


- Use On-Premise account

Move bulk users
In my opinion, moving mailboxes in bulk (in a hybrid deployment) is most accessible by using the Exchange Admin Center 2013 or Exchange Management Console 2010. However, with some additional preparation, we can use a list of commands for the same task.
In a hybrid server, install Microsoft Online Services and Sign-In Assistant for IT Professionals RTW first. After that, install Azure Active Directory Module for Windows PowerShell (64-bit version) and reboot the hybrid server to complete the installation process.
Next, create a list of mailbox aliases for the users you want to move in bulk. The file must be a CSV file (userlist.csv) containing a header named ‘Alias.’
Connect to Office 365
- From the hybrid server, using the ‘Windows Azure Active Directory Module for Windows PowerShell’ console, use the below commands to connect with Office 365.

- For the variable ($ONPREMCREDS), use your on-premise credentials (i.e., DOMAINNAME\Administrator).


Run the Bulk Office 365 Migration
Now, we’ll use the CSV file we created earlier to perform the bulk migration. Make sure the path on the CSV is local. Use this command to set the variable.
![]()
Use this command to initiate and run the bulk moves. 
Monitor Move Requests
- To monitor the mailbox moves, use the following command.

- To remove mailbox move requests, use the following command.

It is the manual method (PowerShell) for free Office 365 migration. Before you use the manual method, let me mentioned some of its drawbacks.
Drawbacks of the PowerShell
- Firstly, it is complex and hard to operate for non-technocrats.
- Secondly, it is lengthy and time-consuming. And users have to repeat the same process again and again.
- It has a risk of data loss and chances of human error. Manually, a misstep and your Office 365 data can become inaccessible, or you’ll lose it.
- Manually, there is no guarantee of a successful migration.
- It doesn’t assure Folder hierarchy and Data integrity.
To eliminate the risk of data loss & drawbacks of the manual method, users prefer professional Office 365 migration tools.
Professional Third-Party Software
Shoviv Exchange Server Suite is a professional third-party tool. The software is one of those few utilities that are master in their field. There is no need for any technical knowledge and assistance to use this tool. Using Shoviv software, you can effortlessly migrate entire mailboxes from one Office 365 to different Office 365 mailboxes.
Shoviv Exchange Server Suite
This O365 migration tool is one of the best O365 migration tools in the market. It is used and recommended by many organizations and individuals. It keeps a user-friendly and convenient GUI that makes it easy and hassle-free to use. Even non-technical and beginners can also use this migration tool without any hassle. It will migrate calendars, tasks, emails, contacts, and shared mailboxes. Shoviv Exchange Server Suite comes with many user-centric features.
Migrate multiple mailboxes:
This O365 migration tool allows users to export multiple Office 365 mailboxes into Office 365, Outlook PST, and Live Exchange Server mailbox. It has a user-friendly and convenient GUI that makes this software easy to access for everyone. Even non-technical and beginners get high-quality results without any technical knowledge and setup.
Displays preview
This Office 365 email migration tool has a preview facility. It fetches the Office 365 mailboxes and displays a preview of them. By previewing the data before the migration, users can get assured about the added mailbox’s data.
Search option
This software has a search option based on the attachment availability, date criteria, subject name, and sender name. Using the search option, users can search a specific folder/email. This option saves users from unwanted scrolling to find a specific email and also saves time.
Incremental export
With this O365 migration tool, users got an advanced Incremental export option. By using this, users can resume the interrupted process and prevent duplicity in the target location. This feature makes this software stand above in the competition.
Filter option
This O365 migration tool has a filter option to exclude/include desired items in the process. It allows users to filter the items on the message class filter and message date filter (From-To) basis.
Advanced options
The software has advanced Folder mapping and email translation features. With the email translation feature, users can replace the incorrect email address with the correct one. And the folder mapping feature comes in handy to export data from one folder to another.
Free Trial
Nowadays, every person wants to get assured about the software before investing in it. For this, the software offers a free demo version to examine the software skills before purchasing it. The free version allows migrating the first 50 items per folder.
A Gist of Office 365 to Office 365 Migration with Professional Tool:
- Add Office 365 mailboxes using the credential.
- Check mailboxes; select the Office 365 mailboxes option as the target.
- Provide details after clicking Fetch all mailboxes from Office 365.
- Map, validate mailboxes and apply filter (if needed).
- Migration will start, and the process report will generate.
Steps to use Shoviv Exchange Server Suite:
- Firstly, install and open Shoviv Exchange Server Suite.
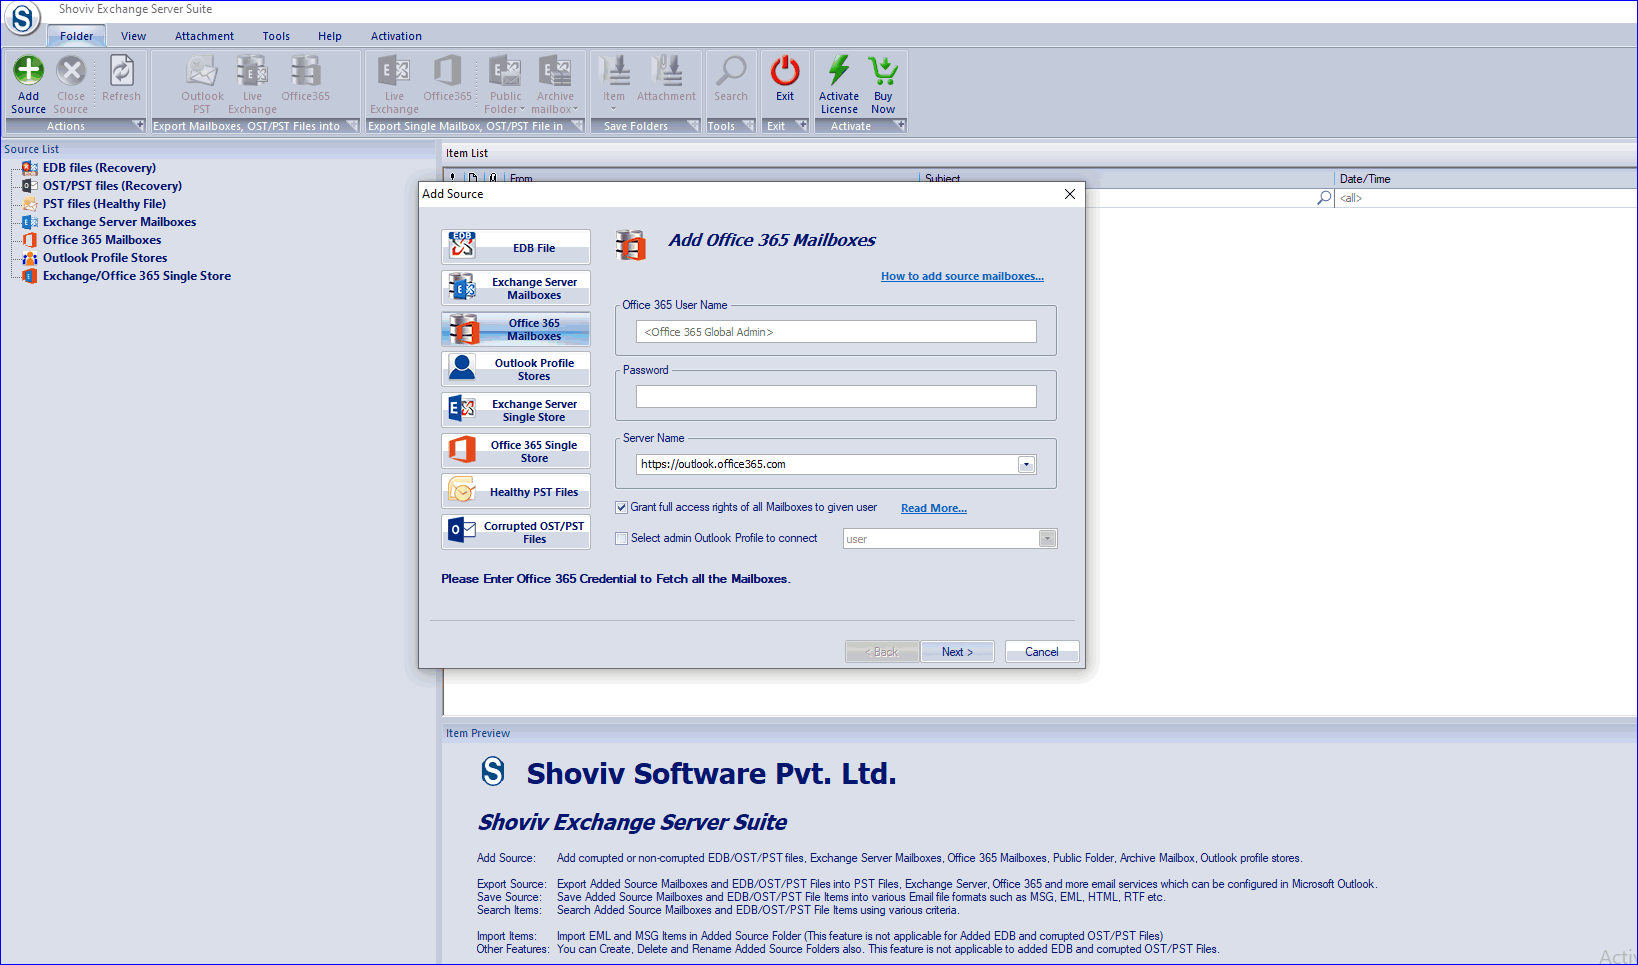
- Secondly, click on the Add Source button.
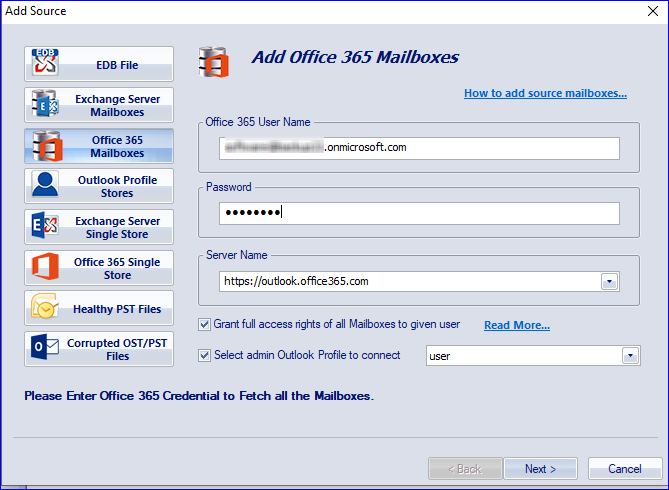
- Select Office 365 mailboxes option, enter Office 365 credentials, and click Next.
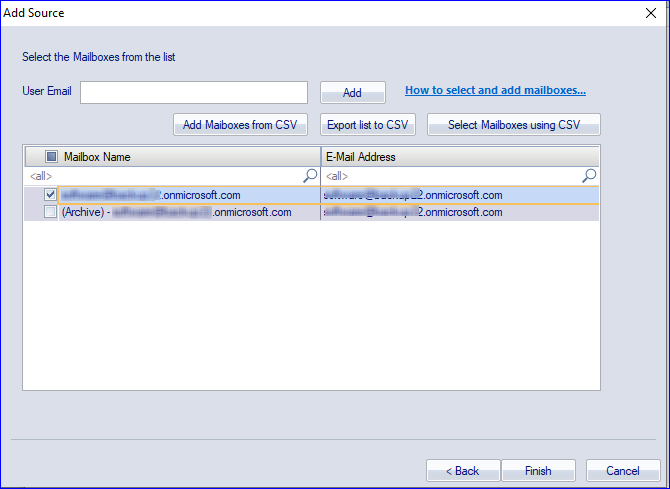
- Then, the software displays the mailboxes list. Choose mailboxes and click Finish.
- After that, click the Office 365 mailboxes option from the ribbon bar.
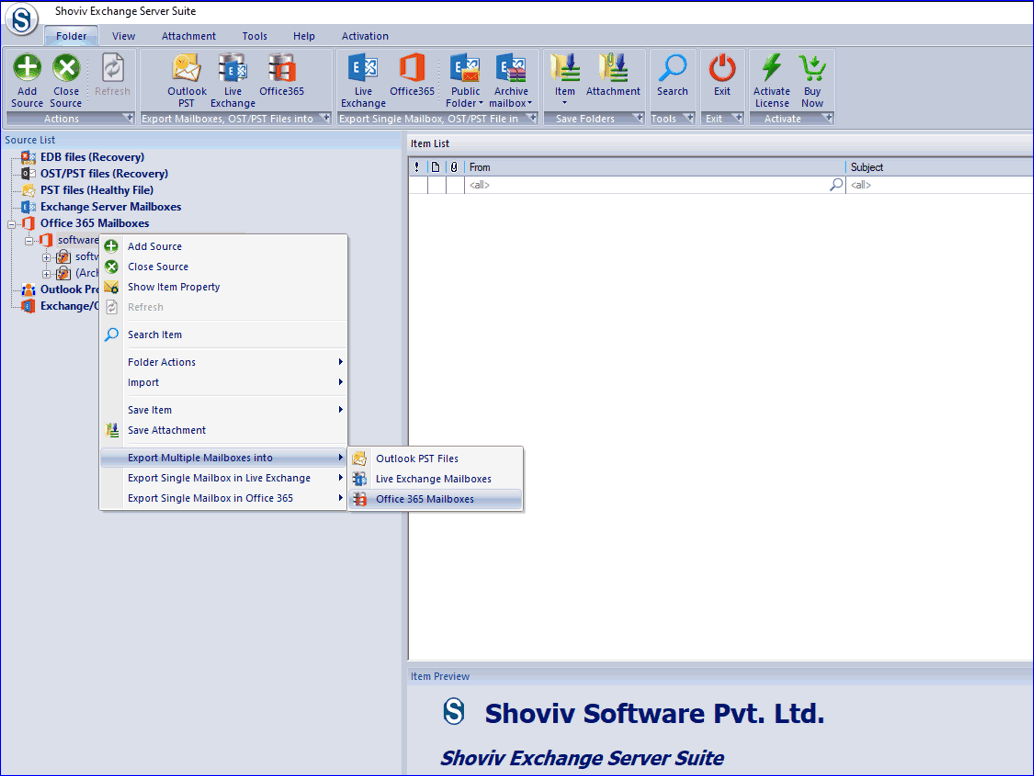
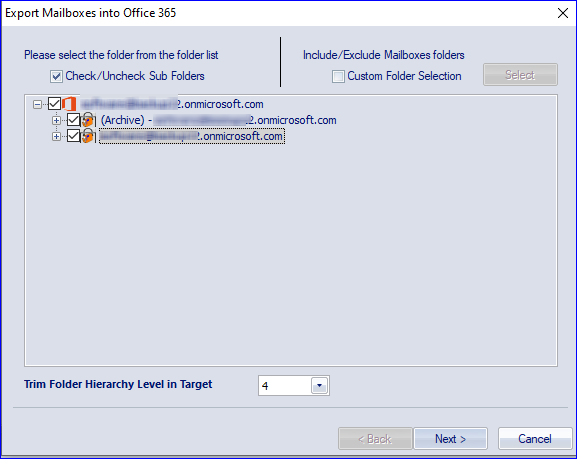
- Now, check/ uncheck subfolders and click Next. Users can also add or remove folders using the checkbox.
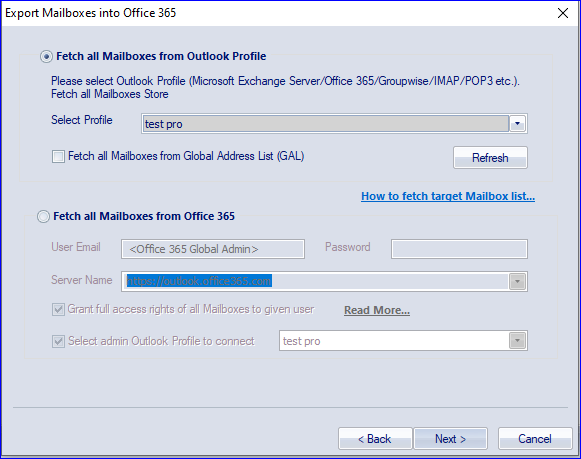
- Here, click on the Retrieve all mailboxes from Office 365 option. Enter User’s email and password and click Next.
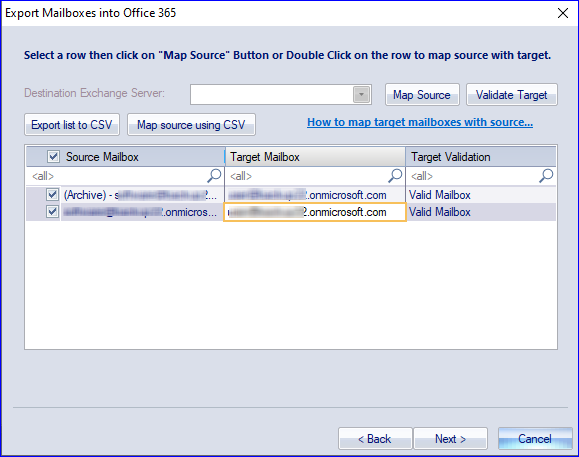
- In the following wizard, Map and Validate mailboxes and then make click on the Next button.
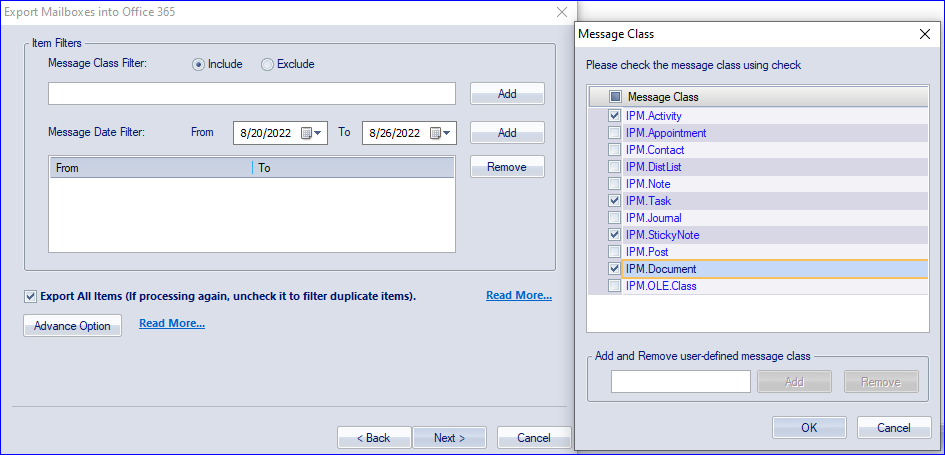
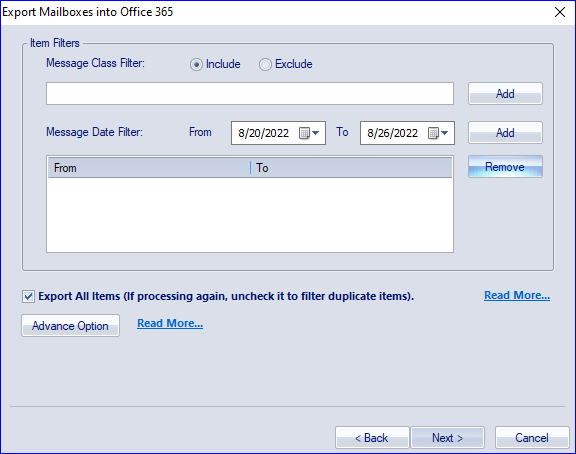
- Now Filter dialog box will appear. Use the filter option based on message class and item date range. There is also an advance option provided, users can use advance options as per need. After that, click on the Next button.
- Now the software will start the mailbox migration and displays a live log report. Once the process gets completed, users can save the log report for later use.
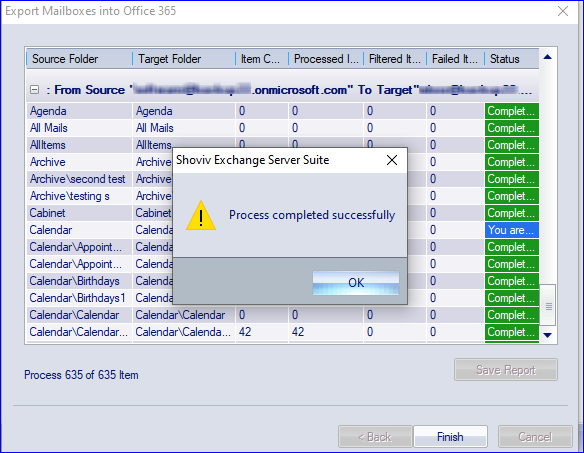
- At last, click on the Finish button.
Wrapping Up:
Here you get to know about Office 365 to Office 365 migration. There are also some manual methods available for this task. But, the manual way is not a recommended and efficient way. Using a manual approach is like a walk on eggshells. Hence one misstep, and you will lose your Office 365’s data. Those who want safe and hassle-free migration should use Shoviv Exchange Server Suite. It is the easiest way to migrate Office 365 mailboxes to Office 365.


[WPSM_AC id=8354]